Running and Imaging with FTK Imager from a flash device
Oct 21, 2021 by Georgi Nikolov | 30373 views
https://cylab.be/blog/180/running-and-imaging-with-ftk-imager-from-a-flash-device
In the process of analyzing a suspicious machine, the first thing we need to do is to actually image the machine we want to investigate. There are different tools available to do this, but the one I most often use is FTK Imager by AccessData. The FTK Imager tool is easy to use and more importantly, there is a free version.
Setting up your FTK Imager flash drive
First of all we need a flash drive on which we can set up the FTK Imager tool and a Windows machine where we can initially install the imagining tool. Once we have all the devices we need, we can follow the set-up procedure:
- On a machine other than the system we want to image, we need to install FTK Imager.
- After the installation of the tool is complete, connect the flash drive we want to use into the system.
- Copy the entire “FTK Imager” installation folder (default installation folder is in
C:Program FilesAccessDataFTK ImagerorC:Program Files (x86)AccessDataFTK Imager) to the usb device. - For the 64-bit versions of FTK Imager (version 3.4.3 and higher), we need to copy extra files to run, more precisely any Microsoft Foundation Class (MFC) files.
- The MFC files needed are all
mfc100*,mfc110*,mfc120*andmfc140*files found in theC:WindowsSystem32folder. - Copy these files to the folder on the flash device where the FTK Imager executable is located, oor to the root of the removable device.
Running FTK Imager from a flash drive
After we have set up our flash device with FTK Imager, we can insert it into the system we would want to image. An important thing we need to keep in mind is that anything we do on a machine, brings changes to the system we want to image. In the case of a Windows OS, any programs we install or run, multiple places will be updated with information about our actions on the machine. Examples of places where the OS will save information about our actions are:
- the windows registry is updated with information about any programs installed or ran
- the windows registry and the setupapi.dev will be updated with information on the USB device connected
- LNK files will be created the first time we run an application, or updated for consecutive executions
- entries in the memory for new processes
This means that we need to be very careful about how we image a suspicious machine, so we don’t bring too many changes to it and maybe pollute or change the available evidences. It is of vital importance to document extensively everything with do, starting with at what time we insert the flash drive, what exactly we run from the flash drive and when we remove the external device.
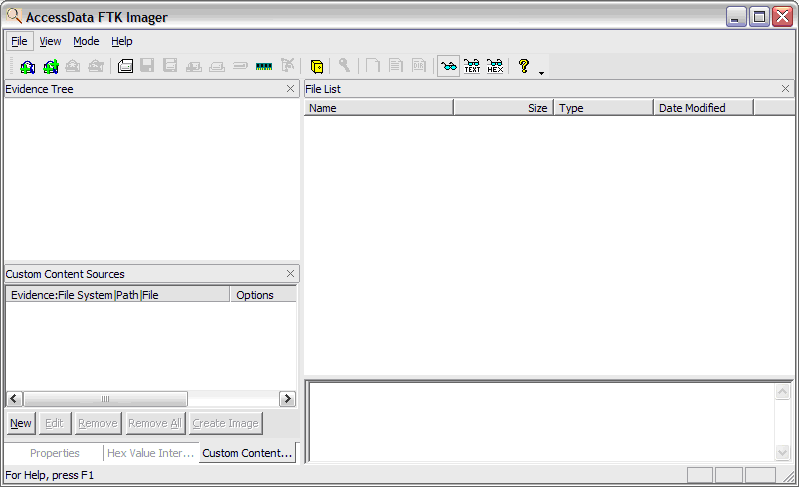
Inserting our newly configured flash drive in the machine to be imagined, we can navigate to the folder where we copied the tool and run it. We are welcomed by the FTK Imager window and we can start our imaging.
From here we have multiple options to what we can capture. In most cases, we should follow the order of volatility, first and foremost target the data that will be removed on system shutdown. FTK Imager gives us the option to capture the memory of a running system and choose where to store it.
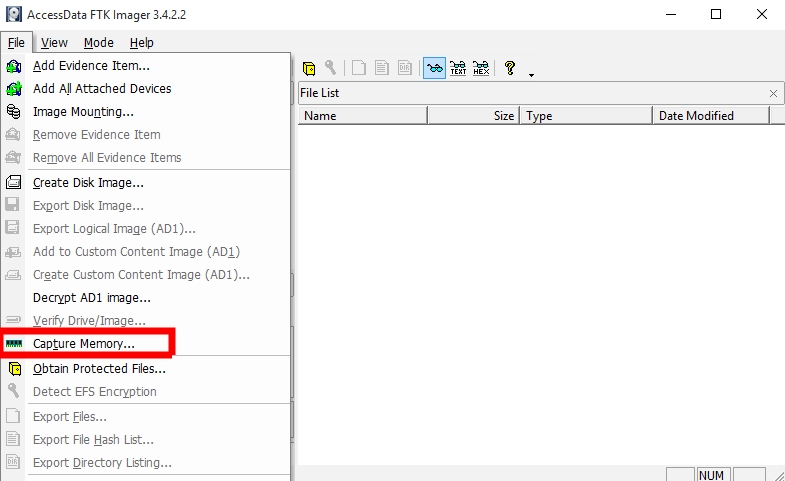
Once we have finished capturing the memory, we can focus on imaging the hard disk of the machine.
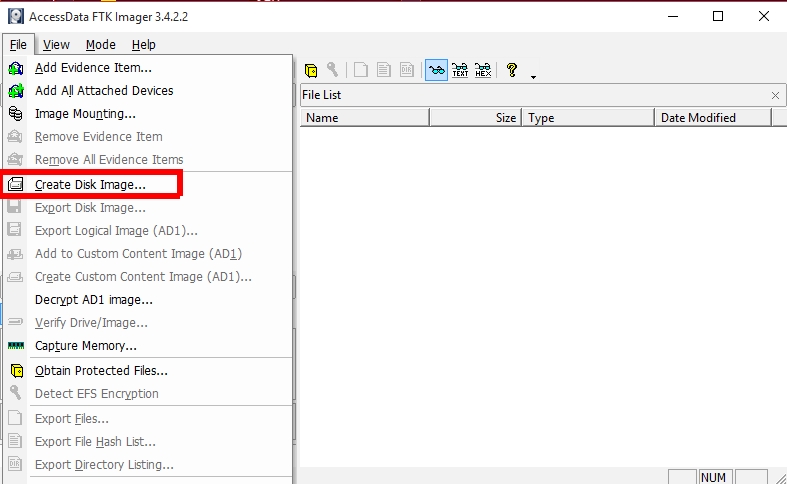
When imaging the hard disk, we have different options present on exactly what we want to image:
- image Physical Drive: bit-wise copy of the hard disk, images the Allocated and Unallocated space
- image Logical Drive: only copy the Allocated space and the accessible folders and files
- Image File: copy a specific file or files
- Contents of a Folder: image a specific folder and all its contents, no deleted or unallocated data
- Fernico Device: image multiple CDs or DVDs
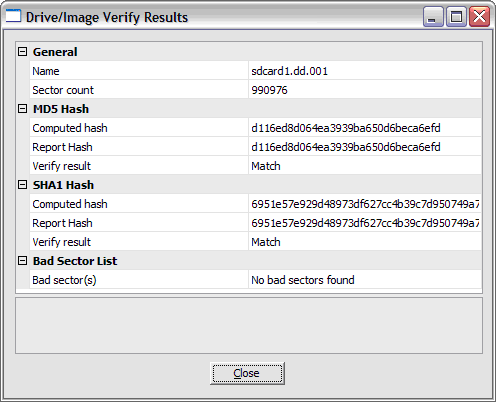
After the imaging is finished, the FTK Imager tool will present you with the verification results, used in checking that the image was made without any errors.
Rounding up
Now we have a flash drive, which we can use to image any machine we need to analyze. We also need a device to save the image itself, so it is recommended to use a flash drive with enough space not only for copying the FTK Imager folder, but also to store the Memory dump and the Hard Disk image of the machine we have imaged.
This blog post is licensed under
CC BY-SA 4.0


