Tutorial: Building Isolated Network Topologies in Proxmox
Mar 12, 2026 by Ioanna Gianni | 4000 views
https://cylab.be/blog/490/tutorial-building-isolated-network-topologies-in-proxmox
This guide outlines how to leverage Proxmox Software Defined Networking (SDN) and an OPNsense virtual router to create isolated, multi-subnet environments.
1. Prerequisites
Before beginning, ensure you have:
- A running Proxmox VE installation
- An OPNsense VM already deployed on that Proxmox server, with at least one interface connected to your upstream internet/WAN
- A management workstation (a VM or physical machine) with browser access to the OPNsense Web GUI
In cylab’s case the above are provided, just have an active account on the Cylab Proxmox server
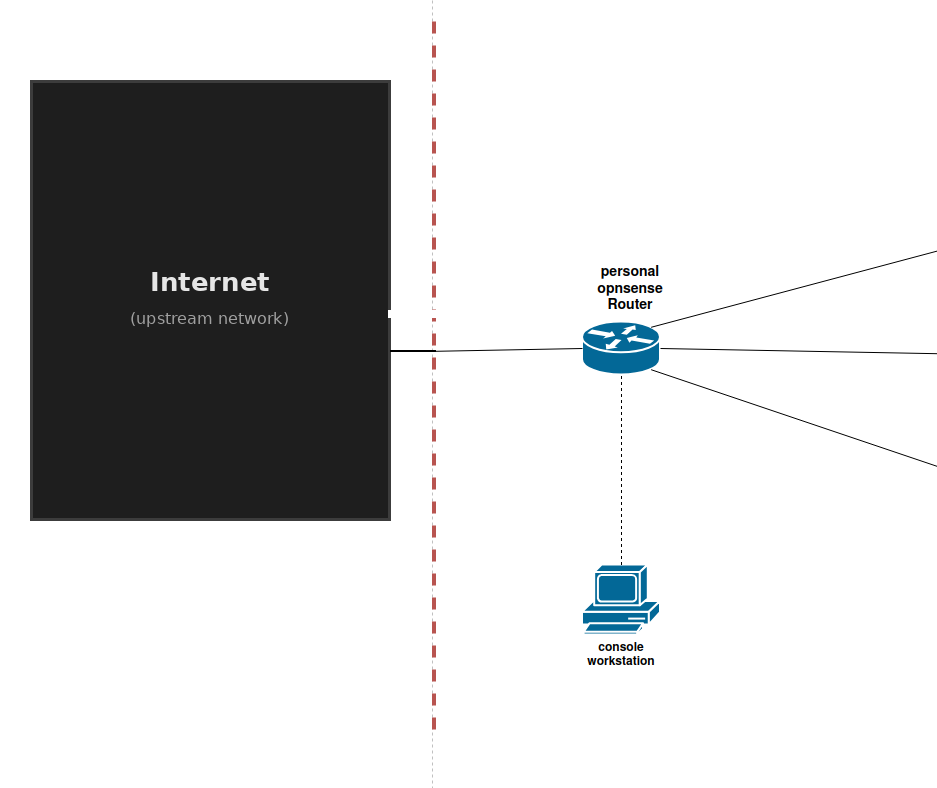
Initial Infrastructure State
At this point, your OPNsense router is bridged to the internet, but your private virtual networks have not yet been defined. VMs you create are isolated — they have no gateway, no DHCP, and no internet access until we configure the SDN and router together.
2. Planning the Topology
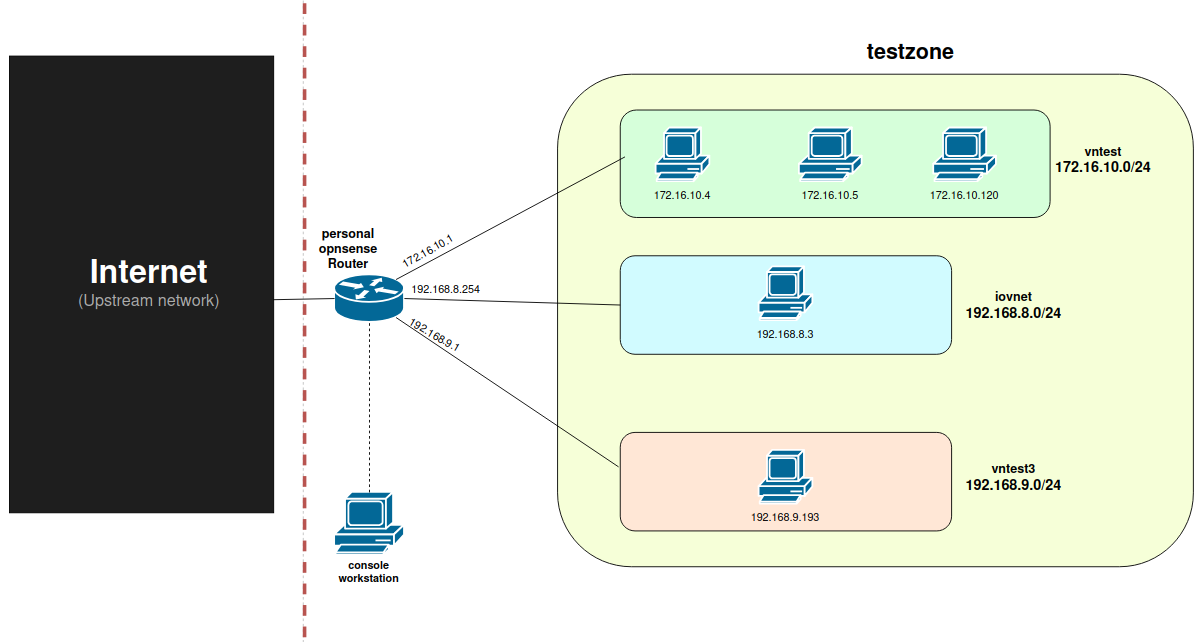
The goal of this tutorial is to create a topology with three distinct subnets. VMs within these subnets will be able to communicate with each other and access the internet through the central router.
Target Architecture:
- Subnet A: vntest, Subnet B: iovnet, Subnet C: vntest3
- Routing: OPNsense handling inter-VNet traffic and DHCP assignment.
3. Defining the Network Blueprint (Proxmox SDN)
First, we must define the virtual “wires” (VNets) in the Proxmox datacenter.
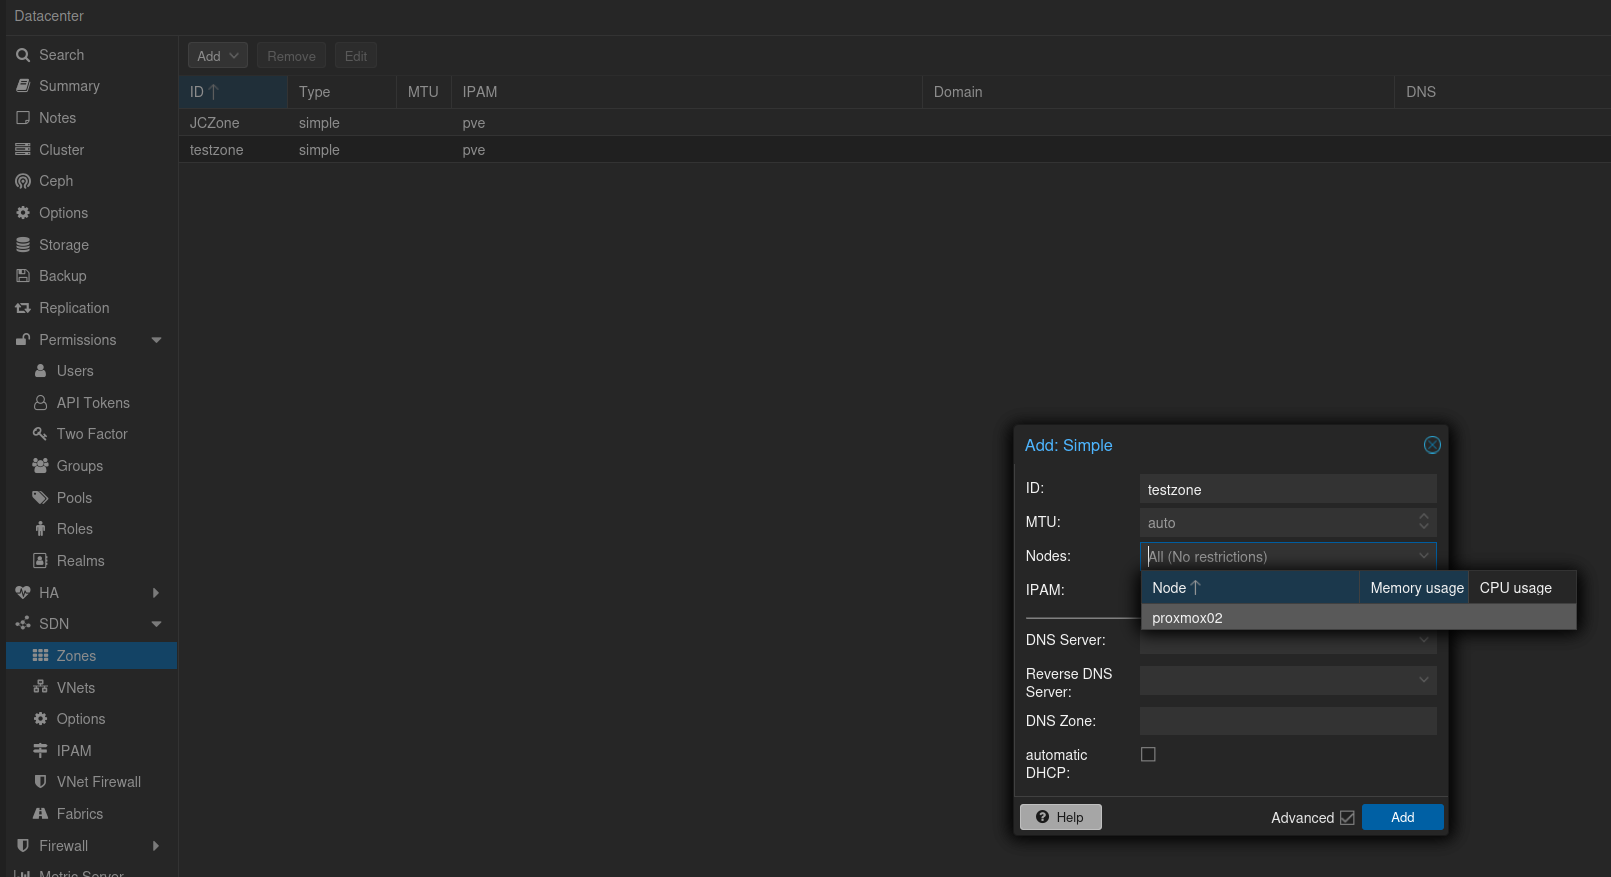
- Create a Zone: Navigate to Datacenter -> SDN -> Zones. Create a new Simple zone (e.g.,
testzone). This acts as the logical container for your virtual networks.
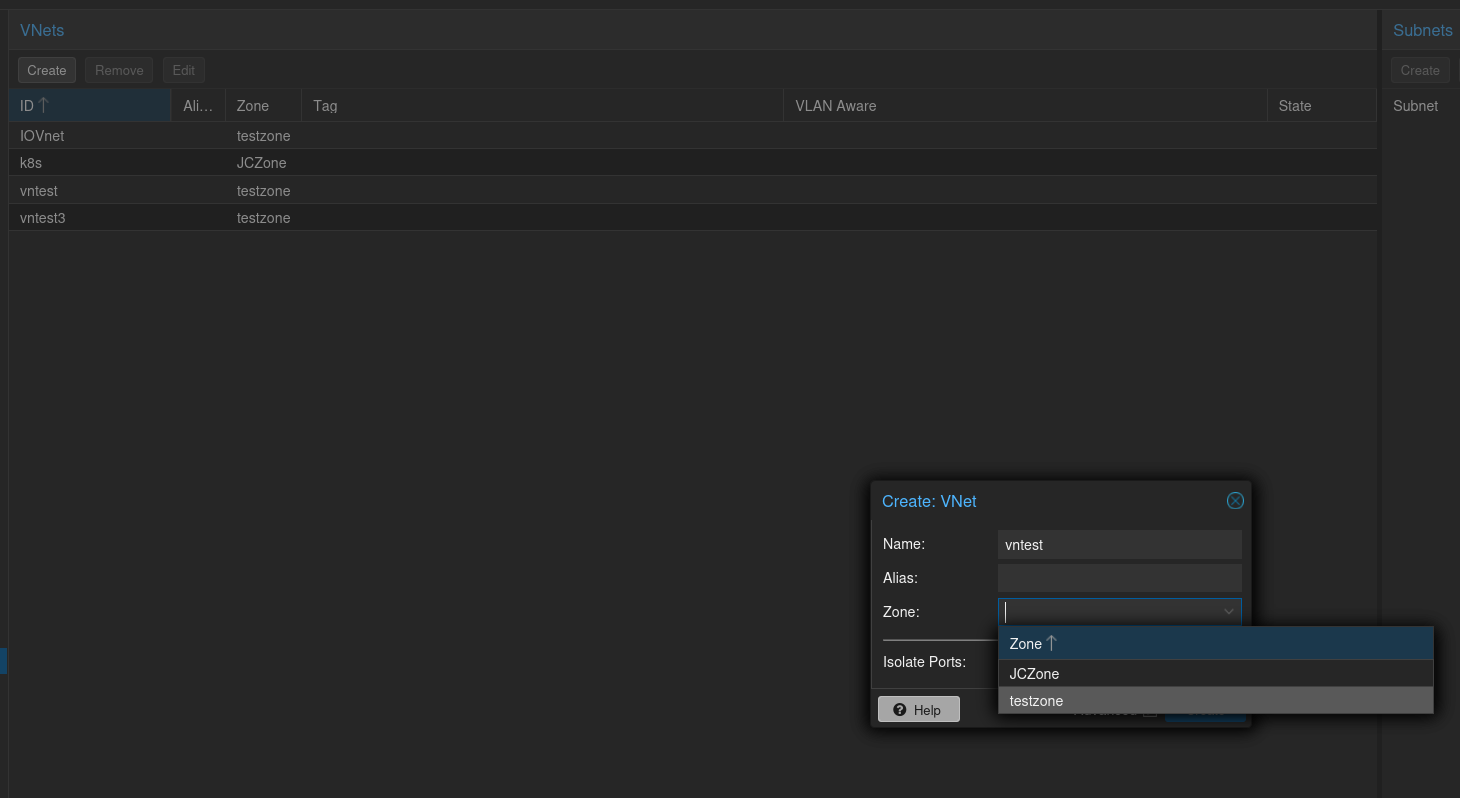
- Create VNets: Navigate to the VNets tab. Create your required networks (e.g.,
vntest,Iovnet) and associate them with the Zone created in the previous step.
- Define Subnets: Within each VNet, assign the IP ranges for your subnets (e.g.,
192.168.9.0/24).
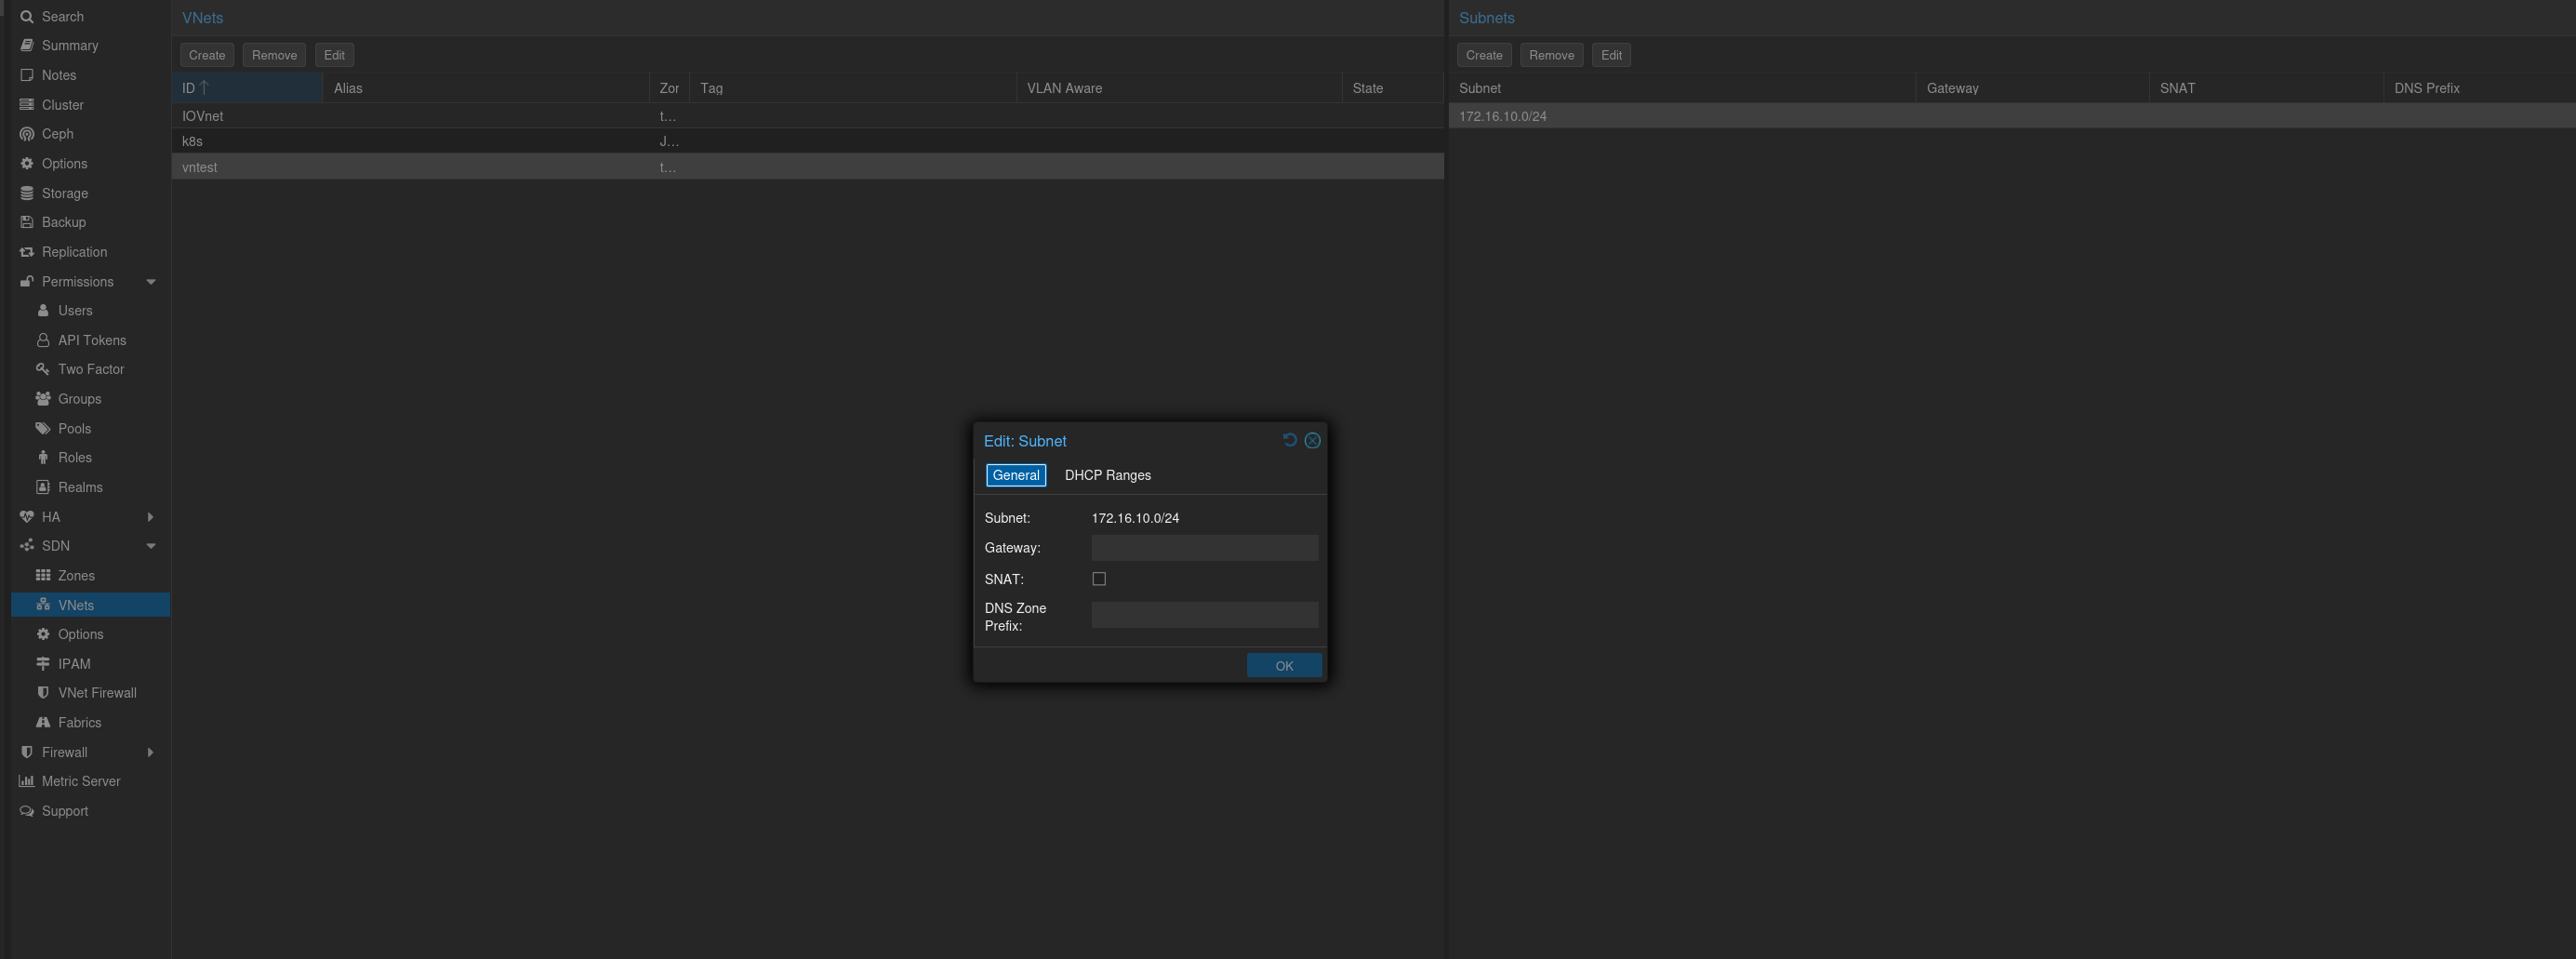
Note: At this stage, the network paths exist, but there is no gateway or DHCP server attached. VMs created now will require manual IP configuration and will not have internet access until the router is configured.
4. Configuring the Router (OPNsense)
To enable internet access and automatic IP assignment, we must bridge the Proxmox VNets to the OPNsense virtual appliance.
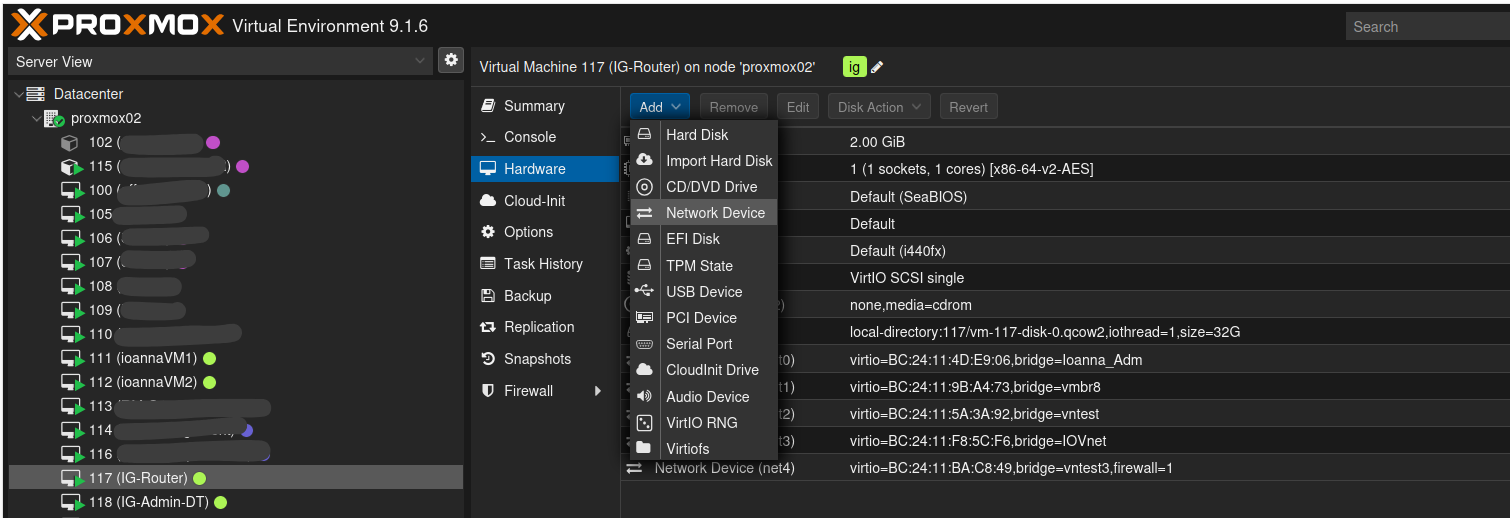
A. Hardware Level Mapping
- In the Proxmox interface, select your OPNsense VM.
- Navigate to the Hardware tab.
- Add a new Network Device for every VNet you created. Ensure they are linked to the correct VNet bridge.
B. Software Interface Assignment
- Access your Management Workstation and log into the OPNsense Web GUI.
- Navigate to Interfaces -> Assignments.
- Add the new network ports and provide descriptive names (e.g.,
LAN_General,LAN_IoT).
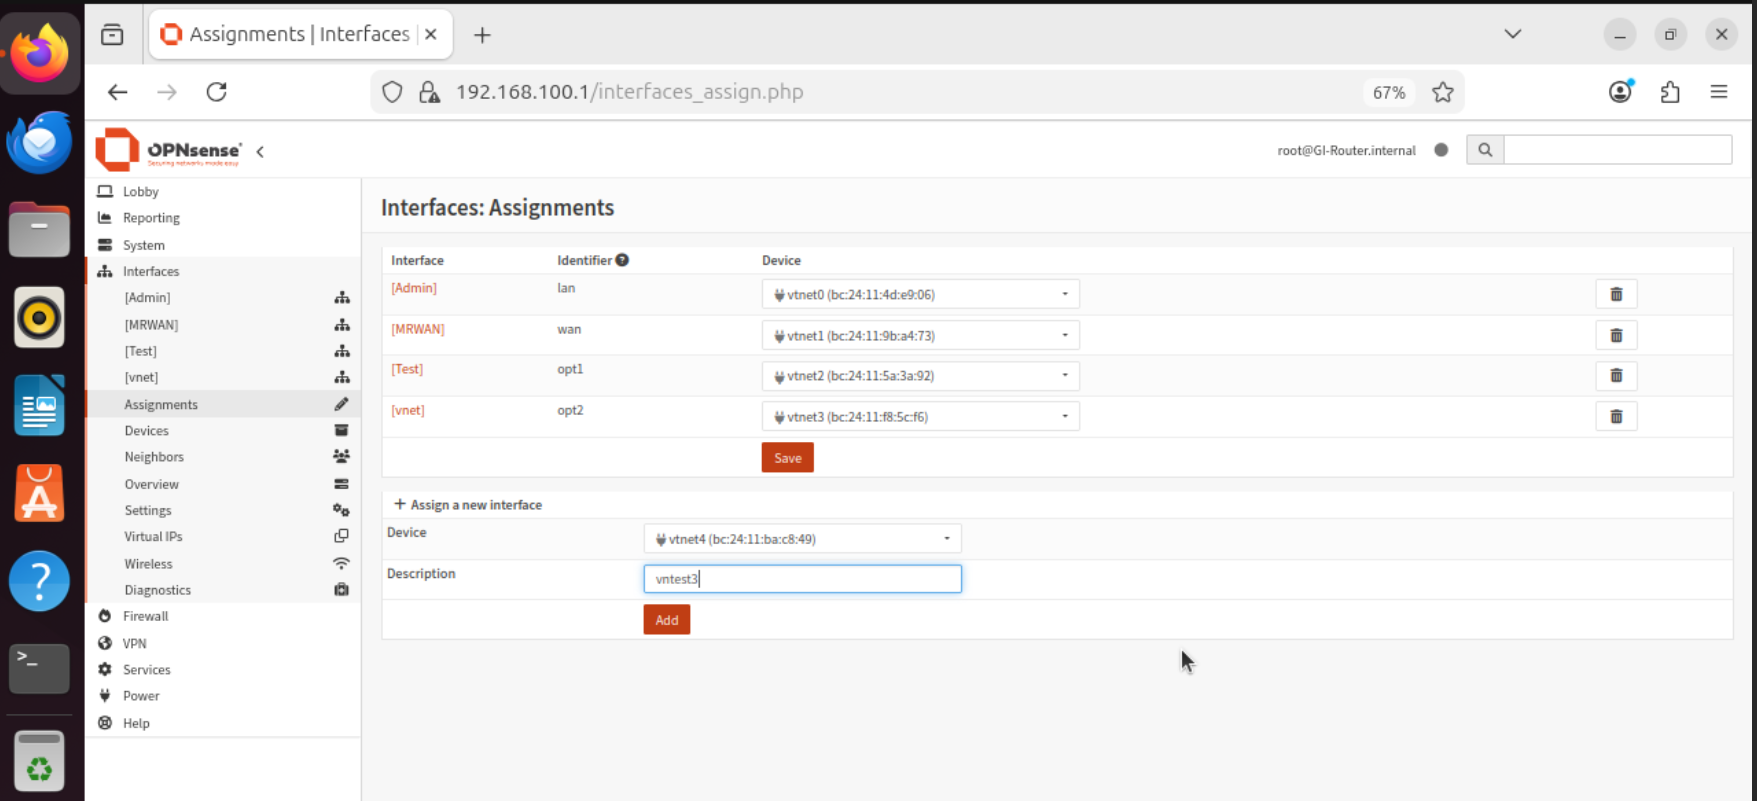
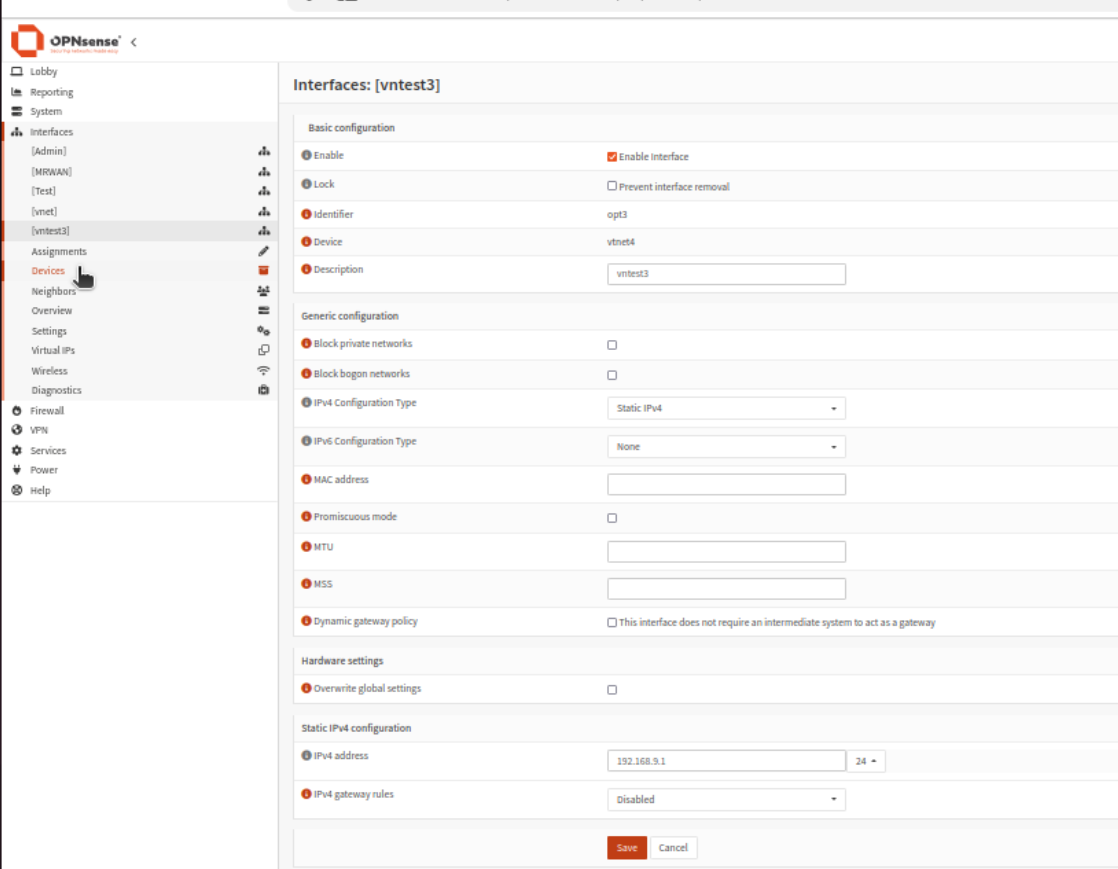
- Click on each interface to Enable it.
- Set the IPv4 Configuration Type to “Static IPv4” and assign the gateway IP for that specific subnet (e.g.,
192.168.9.1).
C. DHCP Server & DNS Configuration
To automate IP distribution for your VMs:
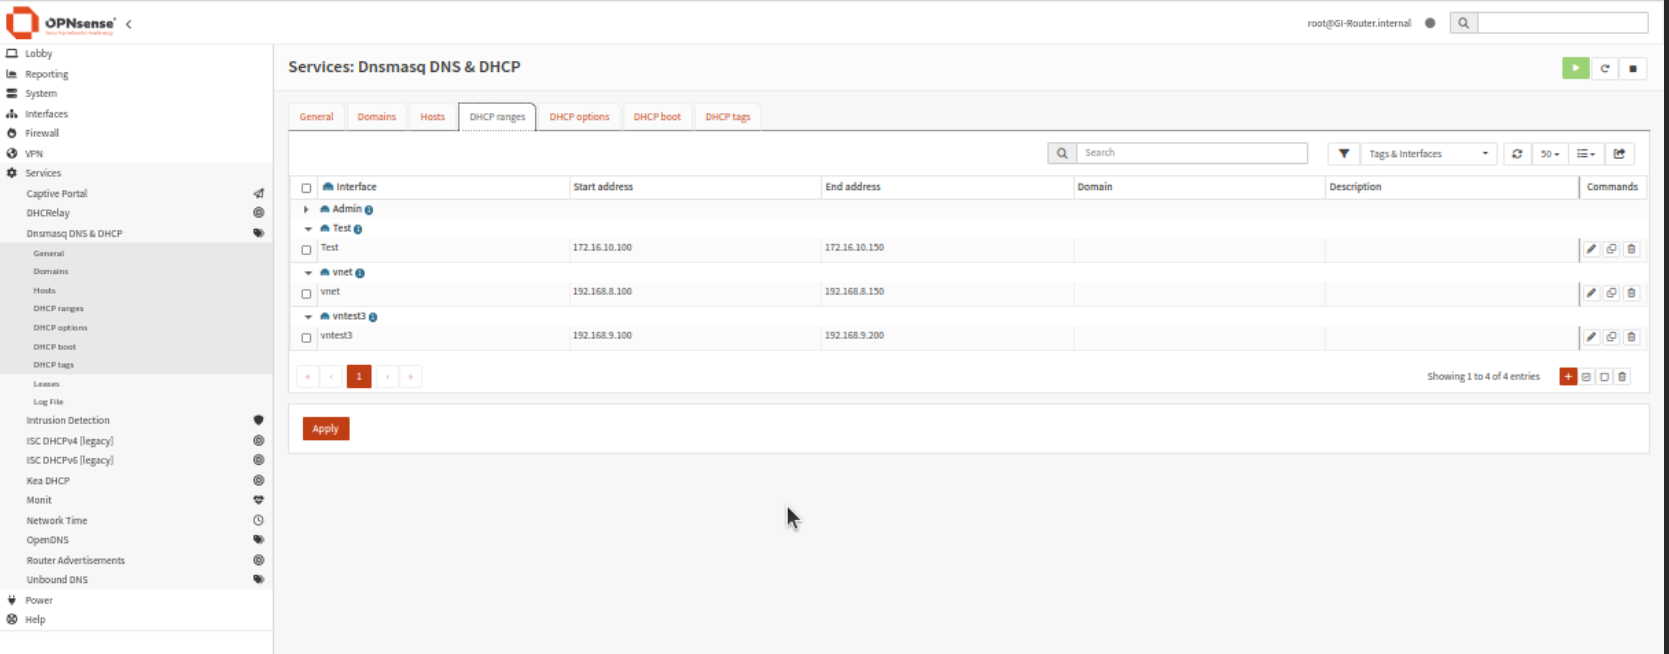
- Navigate to Services -> Dnsmasq DNS & DHCP.
- Select the tab for your new interfaces
- Define the Range of IPs to be distributed to clients.
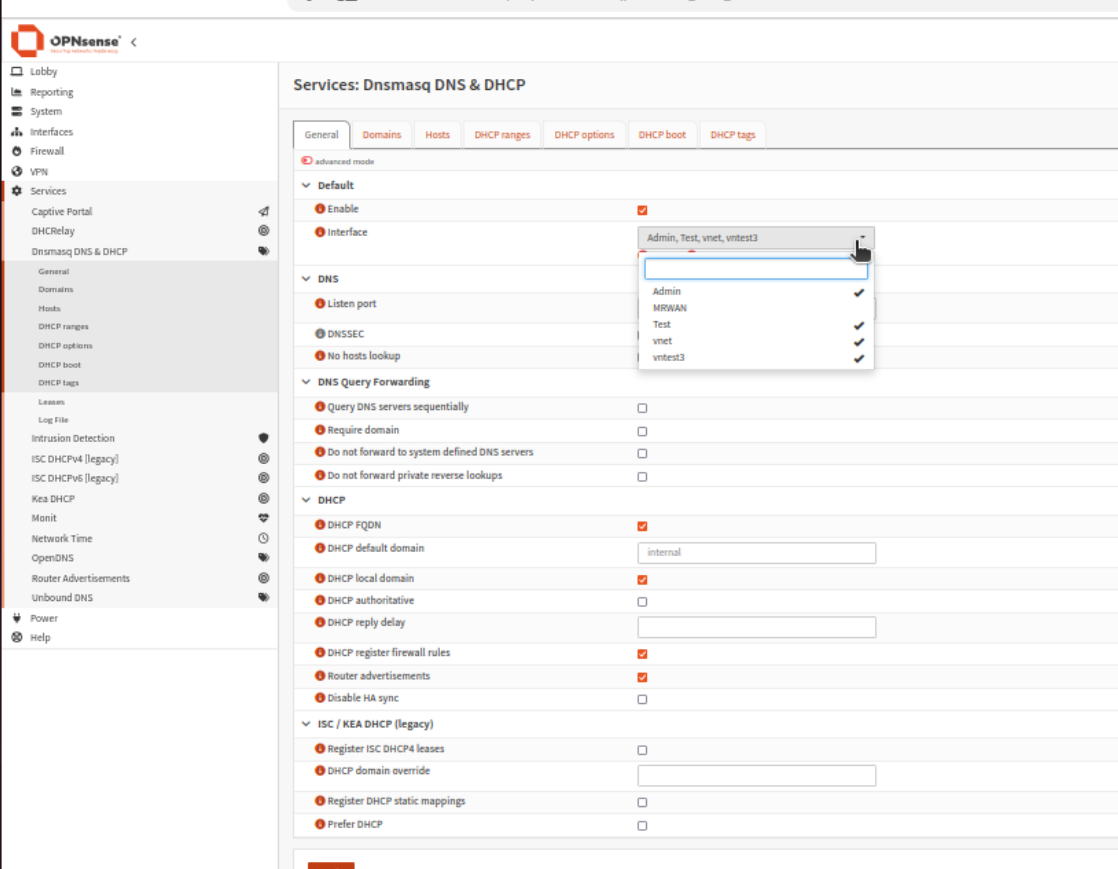
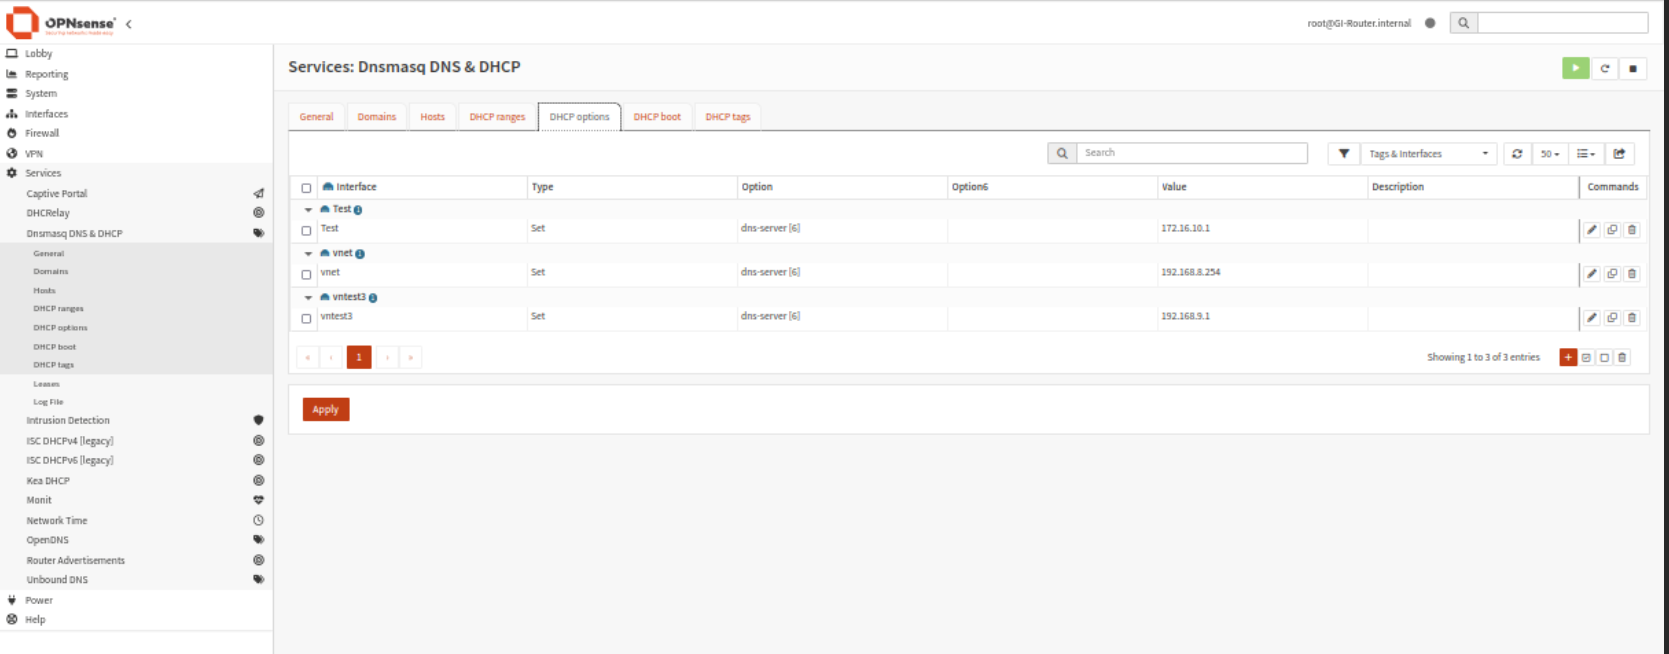
- Under DHCP Options, ensure you provide a DNS Server so VMs can resolve web addresses.
5. Firewall Rules
By default, OPNsense may block traffic on new interfaces. You must ensure rules are in place to allow traffic to flow.
- Navigate to Firewall -> Rules.
- Select your interface tab and add a rule to allow traffic from the subnet to your desired destinations (or “Any” for full internet access).

6. Deployment
Your environment is now fully configured. When creating new Virtual Machines:
- Go to the Network tab during VM creation.
- Select the appropriate VNet bridge.
- The VM will automatically receive an IP via DHCP and have connectivity based on your router settings.
This blog post is licensed under
CC BY-SA 4.0


