Integrate Portainer and Keycloak Identity and Access Management (IAM)
Sep 19, 2026 by Thibault Debatty | 55 views
https://cylab.be/blog/525/integrate-portainer-and-keycloak-identity-and-access-management-iam
Managing users individually within Portainer works fine for small labs, but as your infrastructure grows, manual user management becomes a security risk and an administrative headache. To achieve true scalability and centralized control, you need a robust Identity and Access Management (IAM) strategy. In this guide, we will walk through the process of integrating Portainer with Keycloak using OpenID Connect (OIDC). Beyond just setting up Single Sign-On (SSO), you will learn how to automate user provisioning and use Keycloak group mapping to automatically assign Portainer teams and permissions.
Prerequisites
Before we begin, ensure you have a running instance of Portainer Business edition and a Keycloak realm already configured. If needed, you can get a free Business edition licence for up to 3 nodes at https://www.portainer.io/take-3
Keycloak
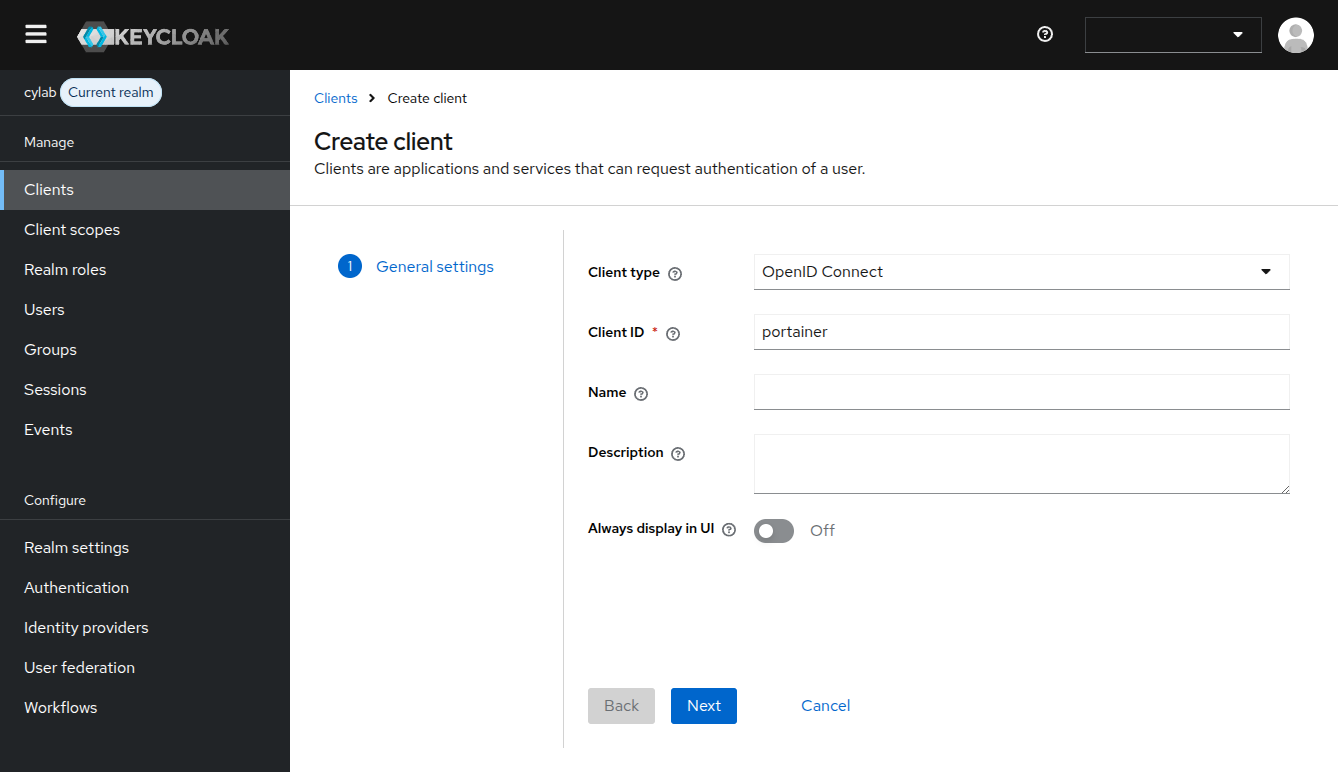
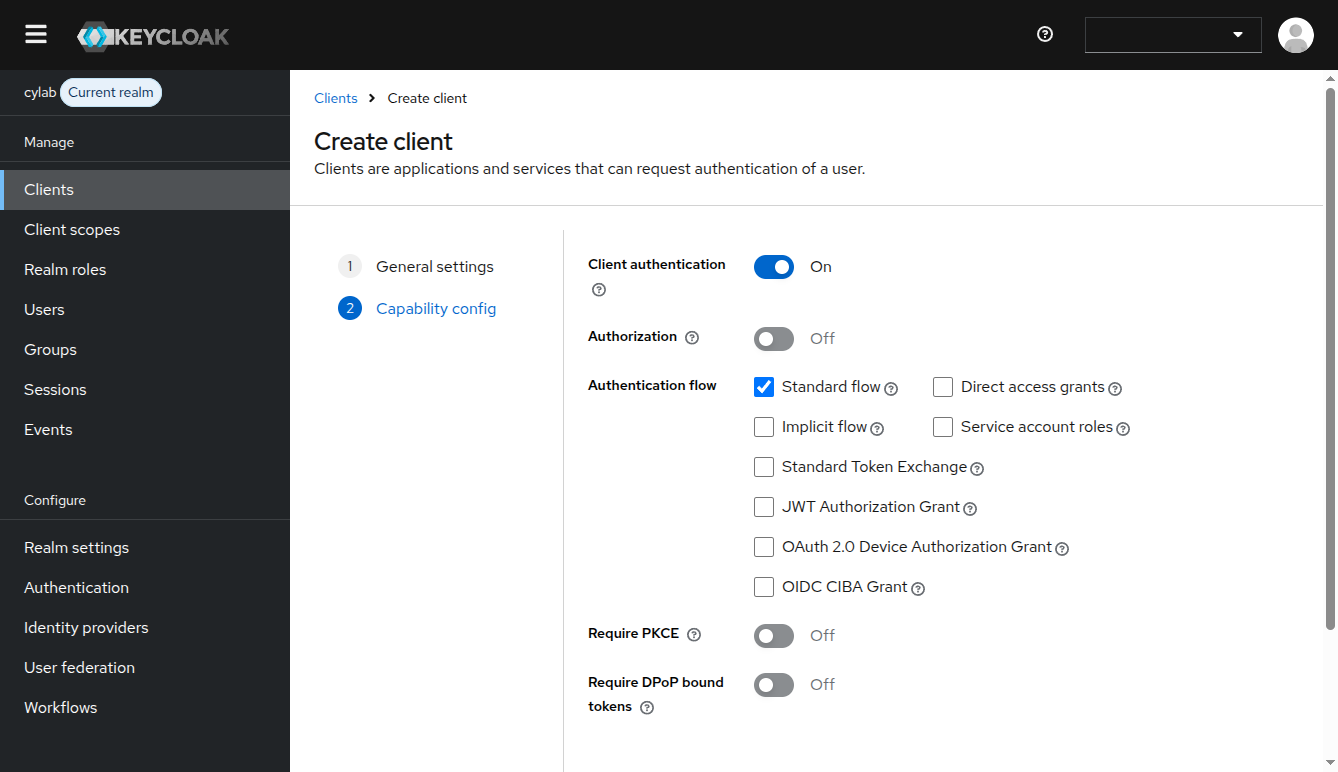
In Keycloak, create a new client with the type OpenID Connect. On the second screen (Capability config), make sure Client authentication and Standard flow are selected.
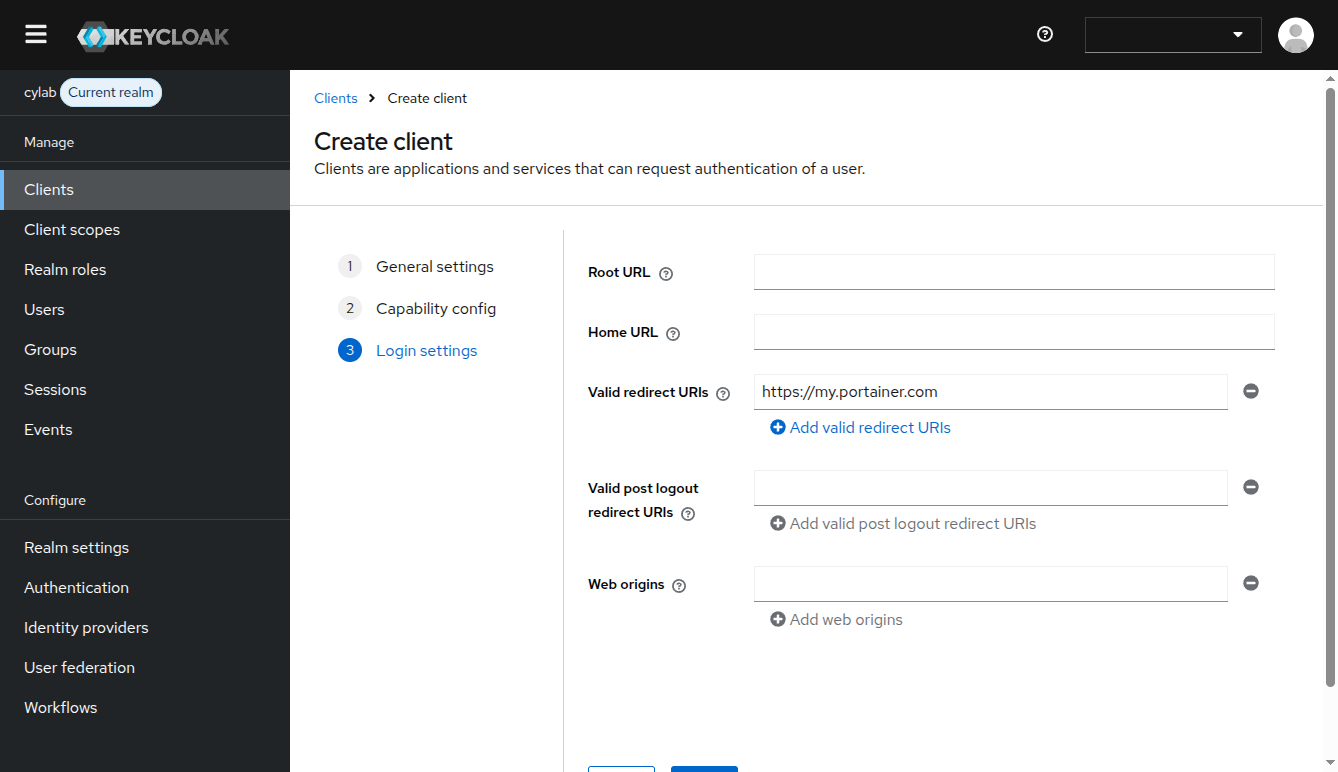
On the third screen (Login settings), indicate the URL of your portainer instance (WITH the trailing /) in the Valid redirect URIs field.
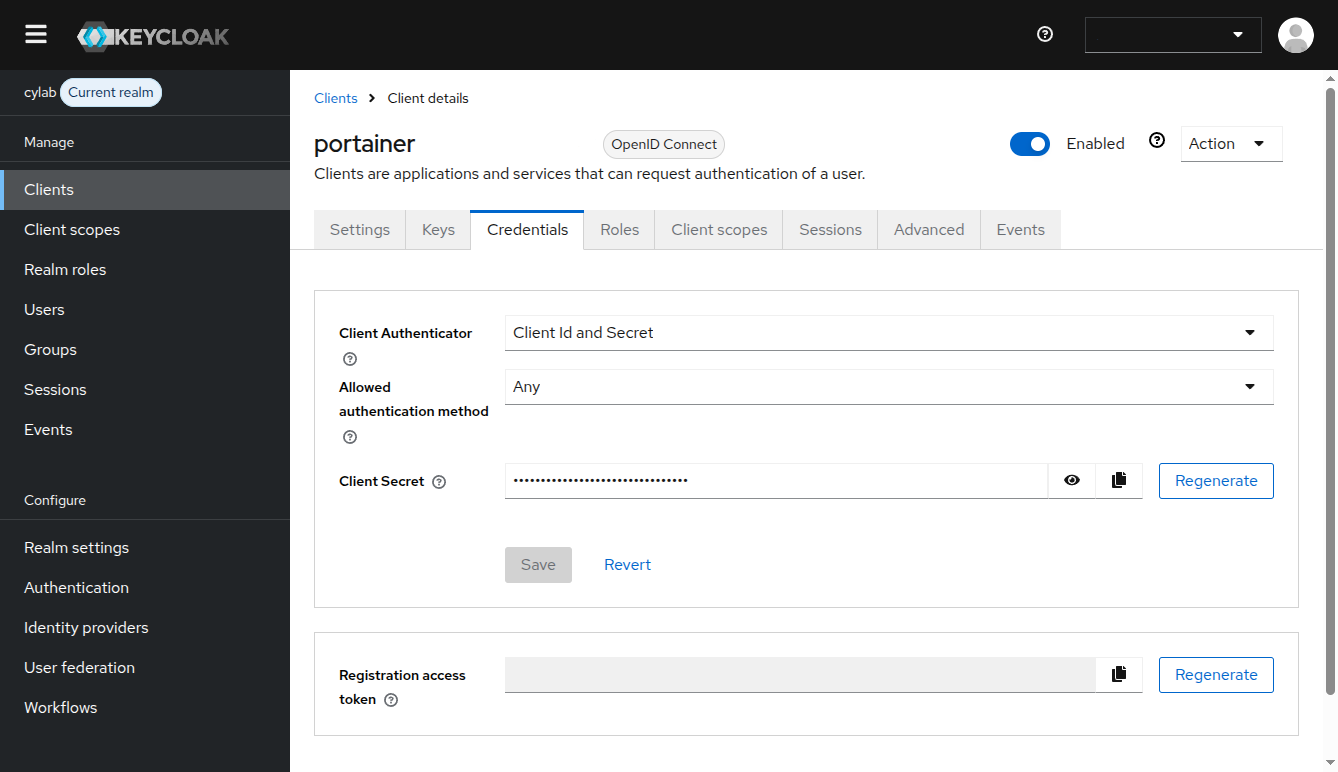
Once the client is created, open the Credentials tab and copy the Client Secret
Configuring Portainer for OAuth
Now, open your portainer instance and in the menu open Settings => Authentication.
- For Authentication method, select OAuth
- You can enable Use SSO to speed-up the login process
- Disable Hide internal authentication
⚠️ Keep Hide internal authentication DISABLED and make sure you have an emergency admin account configured on Portainer. If your Keycloak instance becomes unreachable, you will need the local admin account to recover the system.
- You can enable Automatic user provisioning as it means you don’t need to manually create users in Portainer, but keep in mind that with this configuration anyone with a Keycloak account will have access to your Portainer instance.
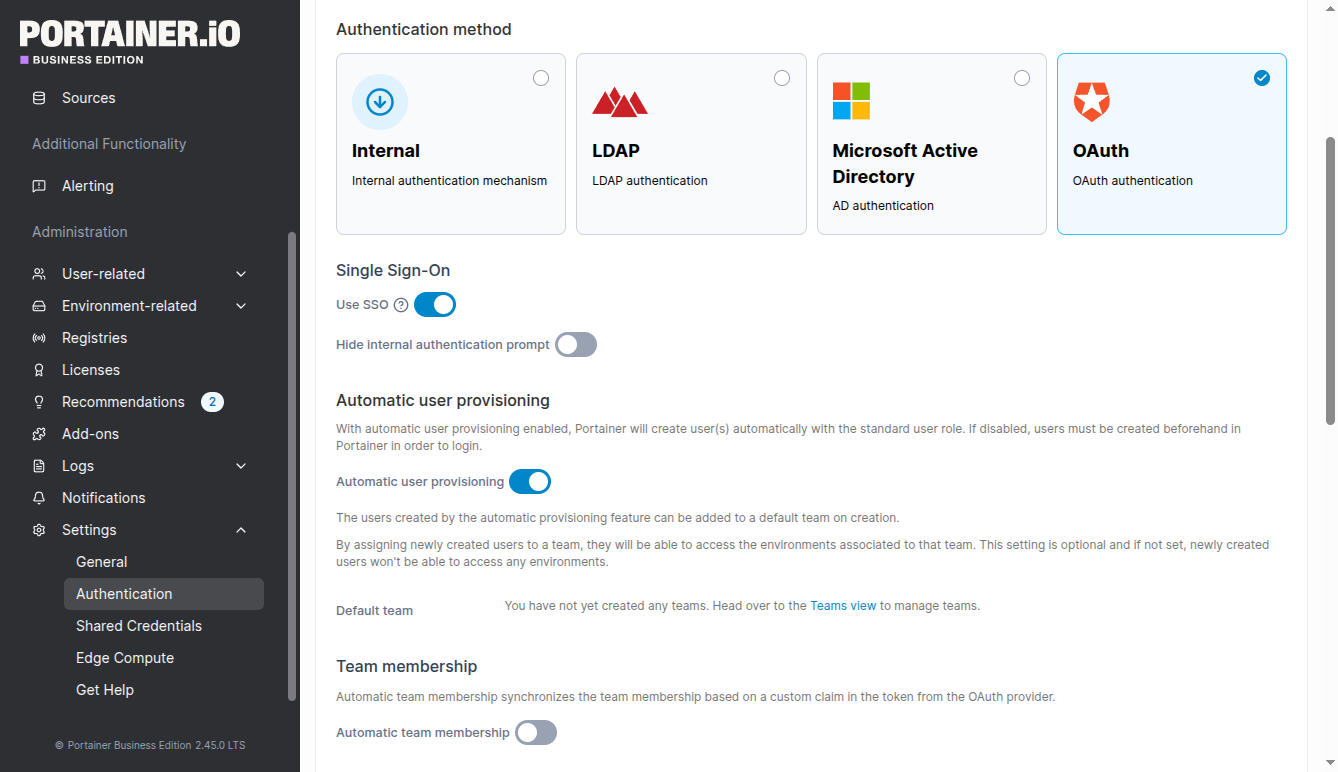
Now in the Provider section select Custom then fill the following OIDC endpoints.
Note: Replace {your.keycloak.address} with your domain and {realm} with your specific Keycloak realm name.
| Field | Value |
|---|---|
| Client ID & Secret | Copy from Keycloak Credentials tab |
| Authorization URL | https://{addr}/realms/{realm}/protocol/openid-connect/auth |
| Access Token URL | https://{addr}/realms/{realm}/protocol/openid-connect/token |
| Resource URL | https://{addr}/realms/{realm}/protocol/openid-connect/userinfo |
| User Identifier | preferred_username (or email) |
| Scopes | openid email profile |
Testing the integration
You can now test you OAuth authentication. Authentication will succeed, but the user will not have access to any resource.
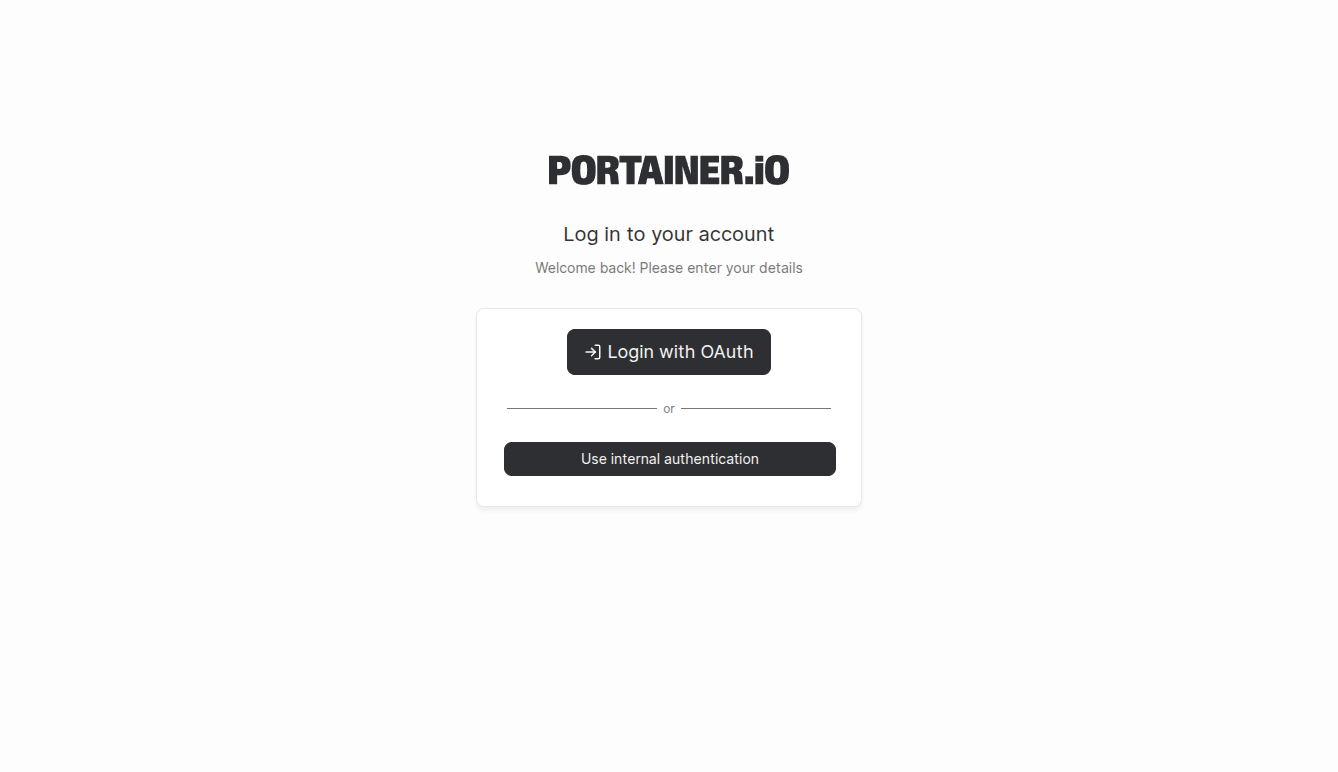
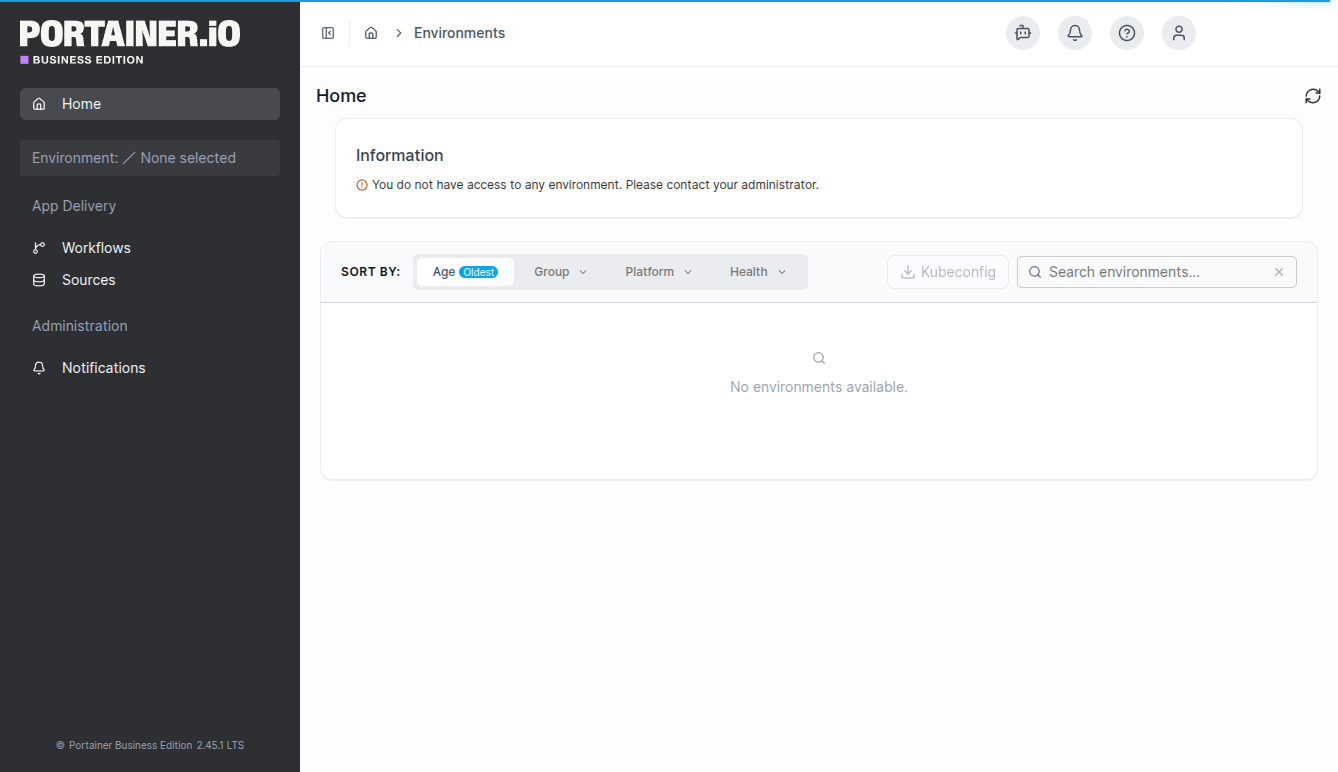
To give the user access to resources, you must either manually assign roles or teams to the user, or configure groups mapping as explained below.
Roles and teams management
The primary mechanism for managing Portainer roles and teams from Keycloak relies on mapping Keycloak groups to Portainer teams. This means that the name of the teams you create in Portainer must exactly match the name of the realm groups in Keycloak.
Keycloak group mapping
In Keycloak, open the client, then the tab Client scopes then the Dedicated scope for this client.
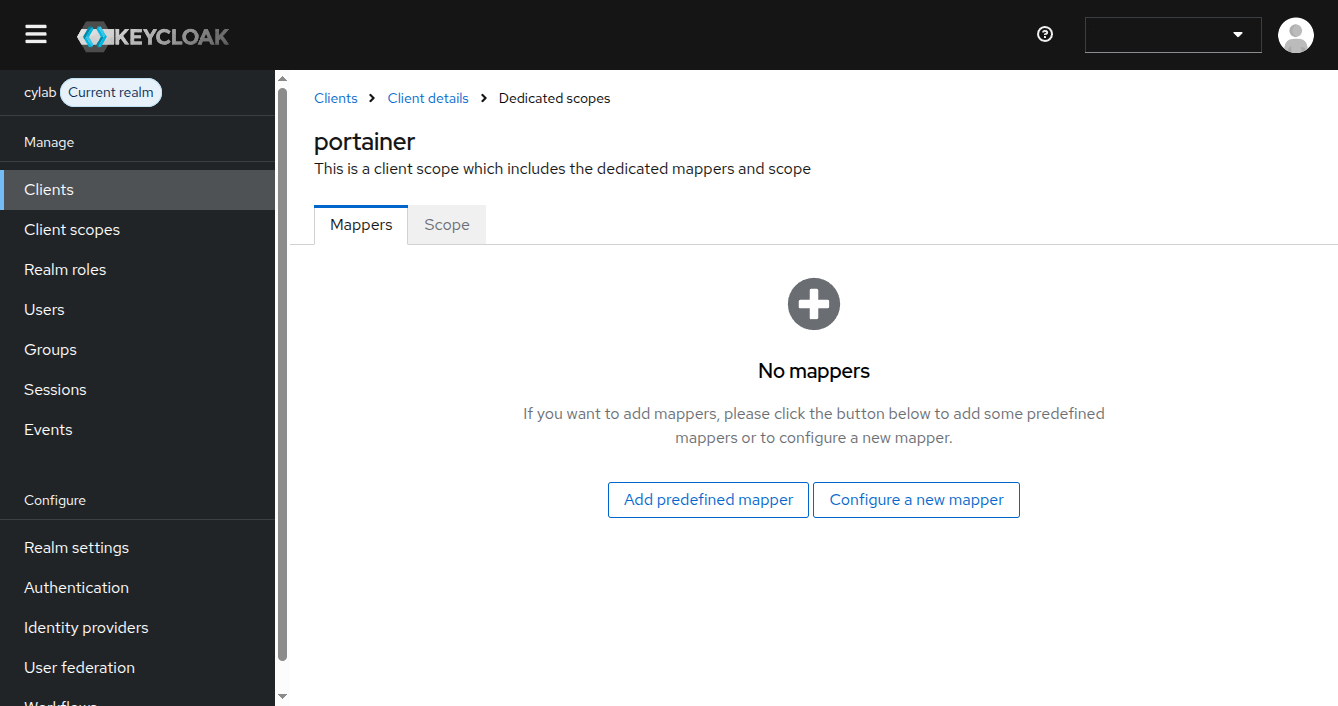
Click on Configure a new mapper then in the list select Group membership.
- Name: groups
- Token Claim Name: groups
- Full group path: Off
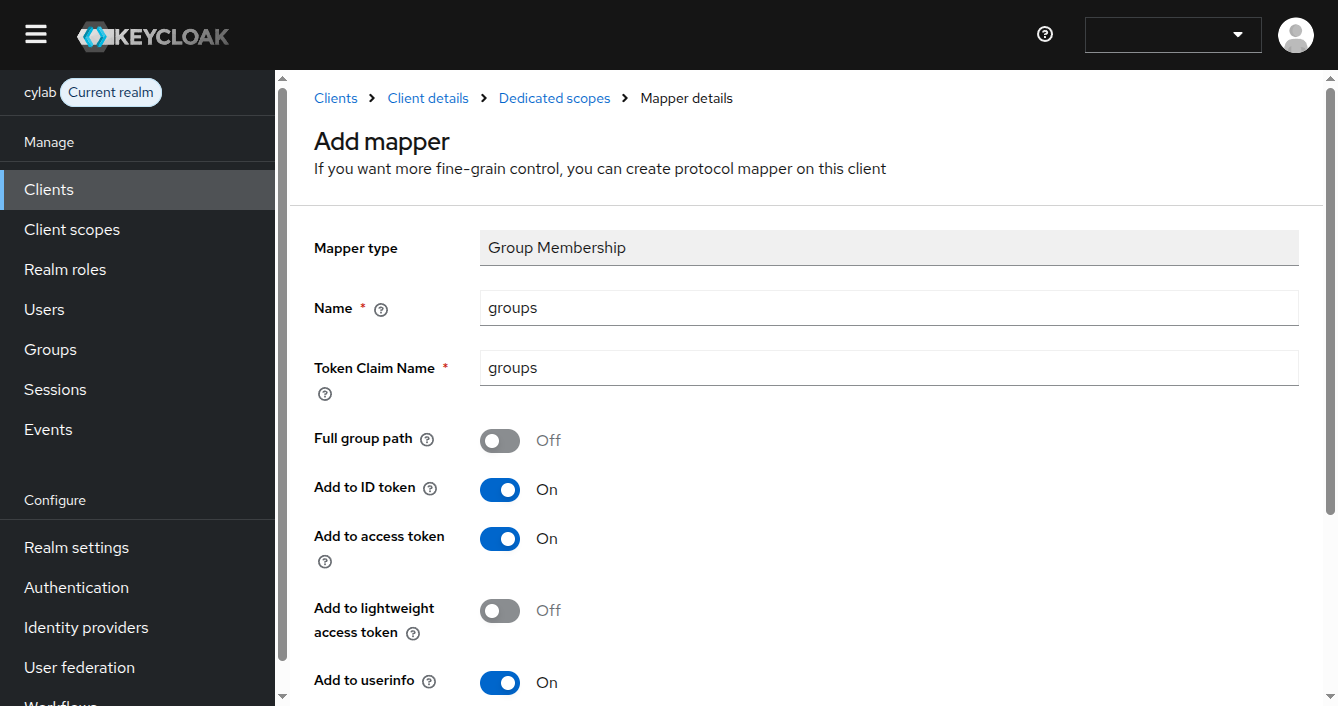
Now the list of groups a user belongs to will be added to the token Keycloak handles to Portainer.
Portainer team
Back to Portainer, in the user-related menu, select Teams and create a team. The name must exactly match the name of the corresponding group in Keycloak.
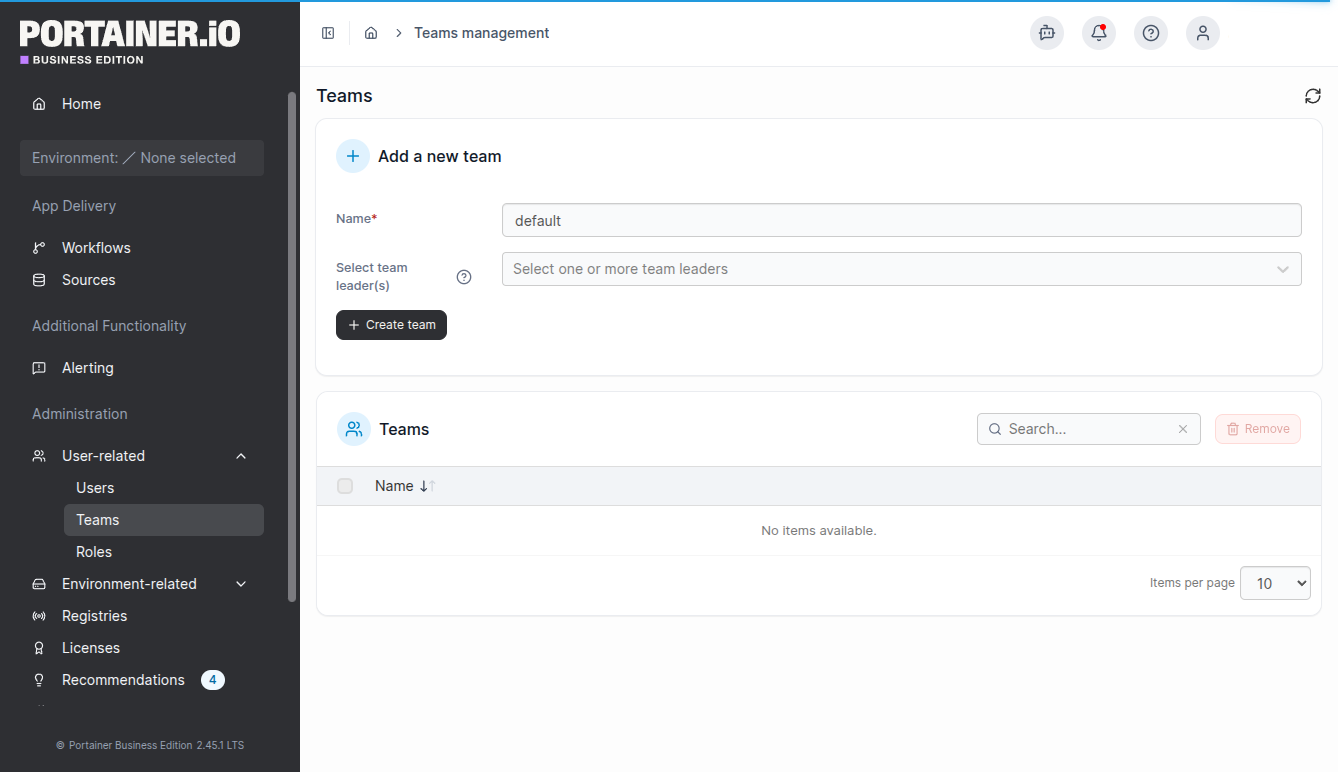
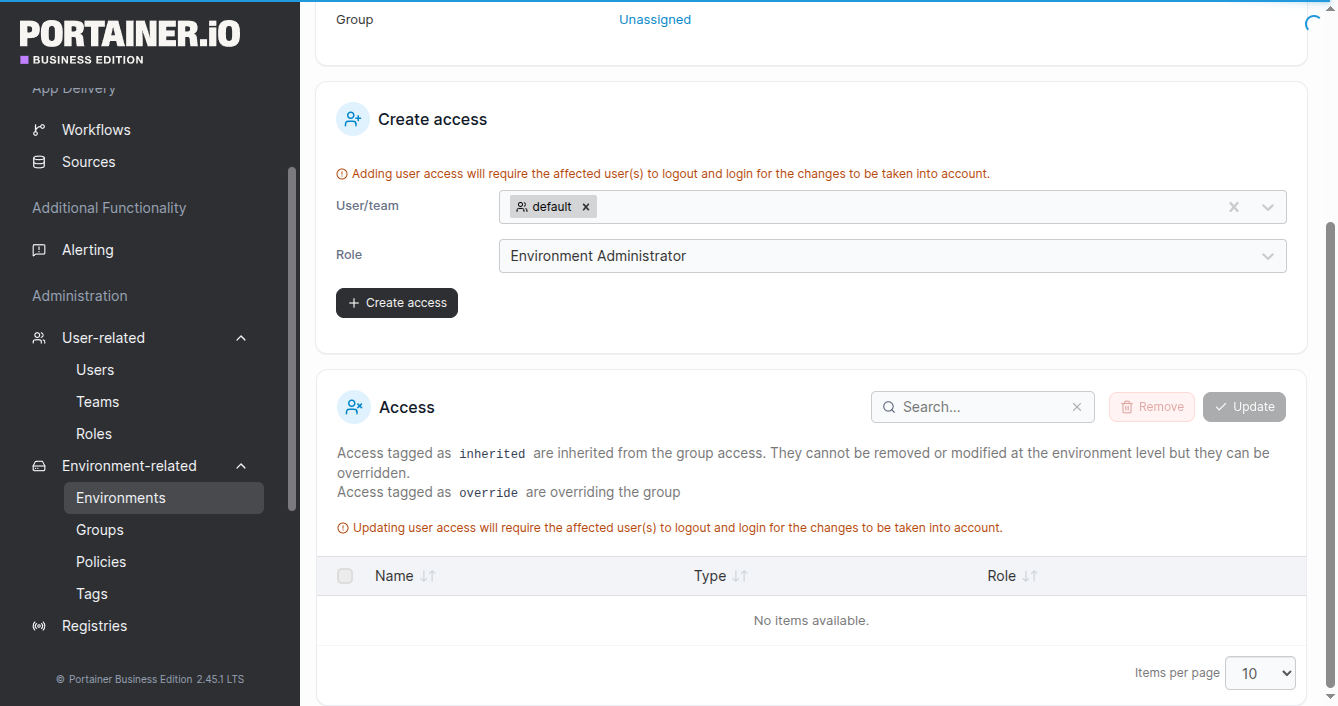
Then in Environment-related, select one (or more) environments and create an access to this environment for the team you created.
Portainer authentication
Now in the Authentication menu, you can enable Automatic team membership and set claim name to groups.
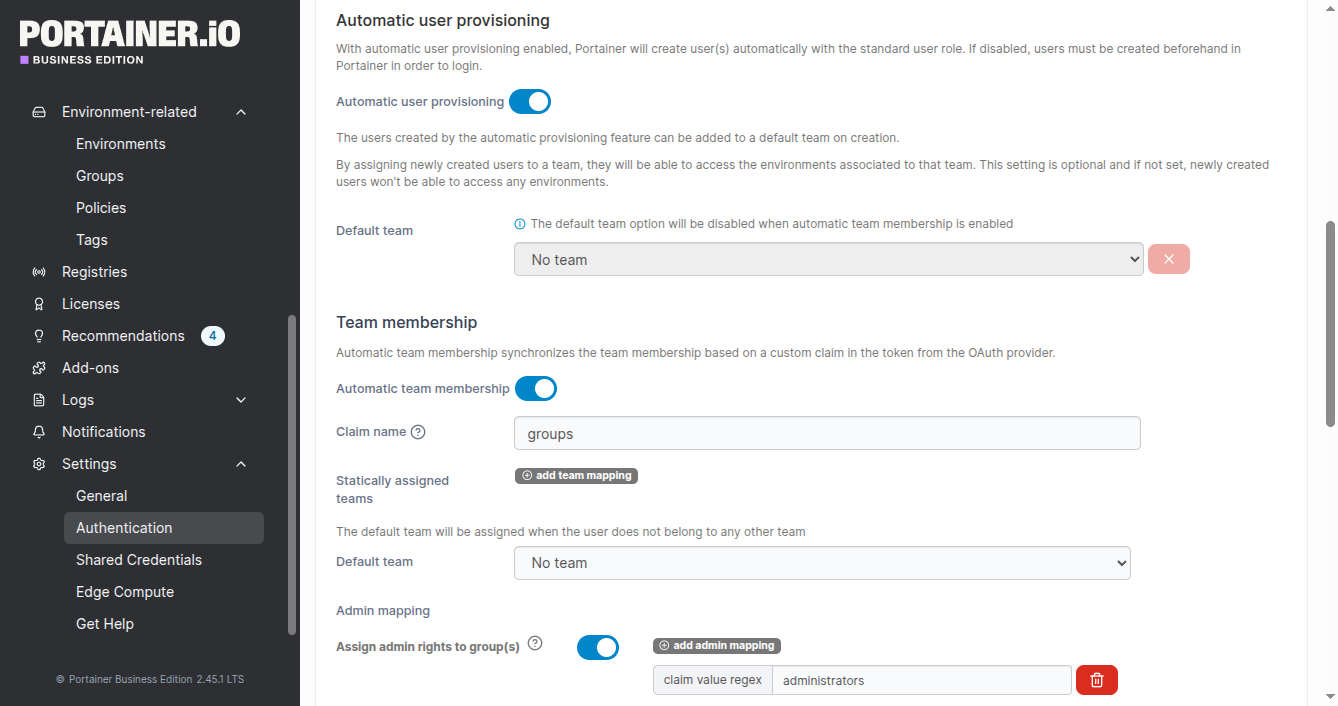
If needed you can also Assign admin rights to group(s) and define a mapping (regex) that matches groups(s) that should be Portainer administrators.
This blog post is licensed under
CC BY-SA 4.0


