Cloning a disk with CloneZilla
Jan 26, 2022 by Zacharia Mansouri | 8227 views
Cloning the old disk or installing the new one from zero? That question crossed many minds and this post might help you finding the answer by explaining how to clone your old disk to a new one using CloneZilla and some disk management tools.
What you need
Here is what you’ll need:
- two storage disks (source and target) to clone the source disk’s content to the target disk;
- two USB keys, one to boot from CloneZilla and one to boot from an external Ubuntu system;
Partitions structure
Let’s first consider we own a 512GB dual boot (Ubuntu/Windows) disk that shares its memory between the following partitions:

The 512GB source disk is divided into 5 partitions:
- /dev/sda1p1: partition containing the boot code that the computer runs at boot;
- /dev/sda1p2: Microsoft reserved partition that helps with partition management;
- /dev/sda1p3: Windows partition containing the user system and data;
- /dev/sda1p4: Ubuntu partition containing the user system and data;
- /dev/sda1p5: Windows partition that is used when trying to recover the system (e.g. when Windows crashes at startup).
There are 5 partitions because dual boot is used. However, this post can be applied to any number of partitions, it does not matter how many operating systems your computer runs.
The partitions can be viewed:
- on Ubuntu, by using the Disks application or by (installing and) using gparted that provides more disk management tools;
- on Windows, by using the Windows Disk Management built-in tools.
Side note: partition sizes are showed in MiB/GiB on gparted, see here how those units differs from MB/GB.
Create a CloneZilla bootable USB key
This page explains how to do it using a Windows, Ubuntu or MacOS operating system. I personally used the GNU/Linux Method A.
Run CloneZilla
Insert the CloneZilla USB key and boot on it by changing the boot device to that key using the BIOS/UEFI functions of your computer.
Clone the disk
This step requires a source disk and a target disk. Your source disk is typically the internal disk of your computer and your target disk can, for example, be a USB-connected disk. In this configuration, you have an internal disk that you want to copy to an external (USB) disk using CloneZilla that booted from a USB key.
Now let’s clone! The CloneZilla website already contains all the necessary information but let’s summarize the steps here:
- choose the other modes of Clonezilla live;
- boot on the option that proposes you the ToRAM option;
- select your language (you can keep EN since this post is in English…);
- select your keyboard layout (usually keep the default one);
- choose Start CloneZilla;
- choose the device-device option since you want to clone a whole disk to another whole disk;
- choose the Beginner option;
- choose disk to local disk;
- select your source disk (here it is your internal disk), this is the disk that will be cloned;
- select your target disk (here it is your external USB disk). Be careful, that disk will be overwritten!;
- choose the -sfsck option unless your source file system needs to be repaired;
- choose the mode you want after the disk cloning is done (let’s keep it simple and select -p choose);
- press Enter to continue and answer yes (y) to confirm the information you previously submitted (ensure that the source and target disks have been choosed as intended!).
You’ll observe that the partitions are cloned one by one.
Replace the old disk (optional)
Replace the old internal disk of your computer by the (external) clone and boot on it. Be careful, if you try to boot on the clone disk from another computer, you’ll get error messages (e.g. a Windows blue screen) since the OS that is installed on it is based on your actual computer drivers.
This step is optional since you can also boot from your external USB-connected disk and, for example, check if each OS boots and runs as expected.
Manage the partitions of the new disk
Let’s assume your old disk was a 512GB disk (with dual boot Ubuntu/Windows) and the new one is a 2TB disk. Here is what you’ll see on your disks manager (e.g. gparted):

This last step only depends on the partitions you have on your disk, their order and which one(s) you want to increase. In this post, I’ll increase the size of the Ubuntu (/dev/sda1p4) partition. Before doing anything, you should ideally have a USB key burned with the latest version of Ubuntu. In that case it is not necessary since we can work using gparted on the Ubuntu (/dev/sda1p4) partition because we’ll only move the Windows recovery (/dev/sda1p5) partition to the right in order to increase the size of that Ubuntu partition, which can be achieved without unmounting that Ubuntu partition.
If you however prefer to do it using gparted from the Ubuntu (20.04) system installed on a USB key, which is what we’ll do, then the Ubuntu desktop ISO lies here. Burn it on a USB key, using balenaEtcher for example. When you boot on that key, instead of choosing Install Ubuntu, you can choose Try Ubuntu and directly access gparted so that you can edit your disks.
Before moving the Windows recovery partition, you’ll have to disable it. Here is how to do it:
- boot on Windows;
- run PowerShell (or cmd) as an administrator;
- run the
reagentc /disablecommand in order to disable any active Windows recovery boot image; - stop Windows;
- boot on Ubuntu (from your USB key).
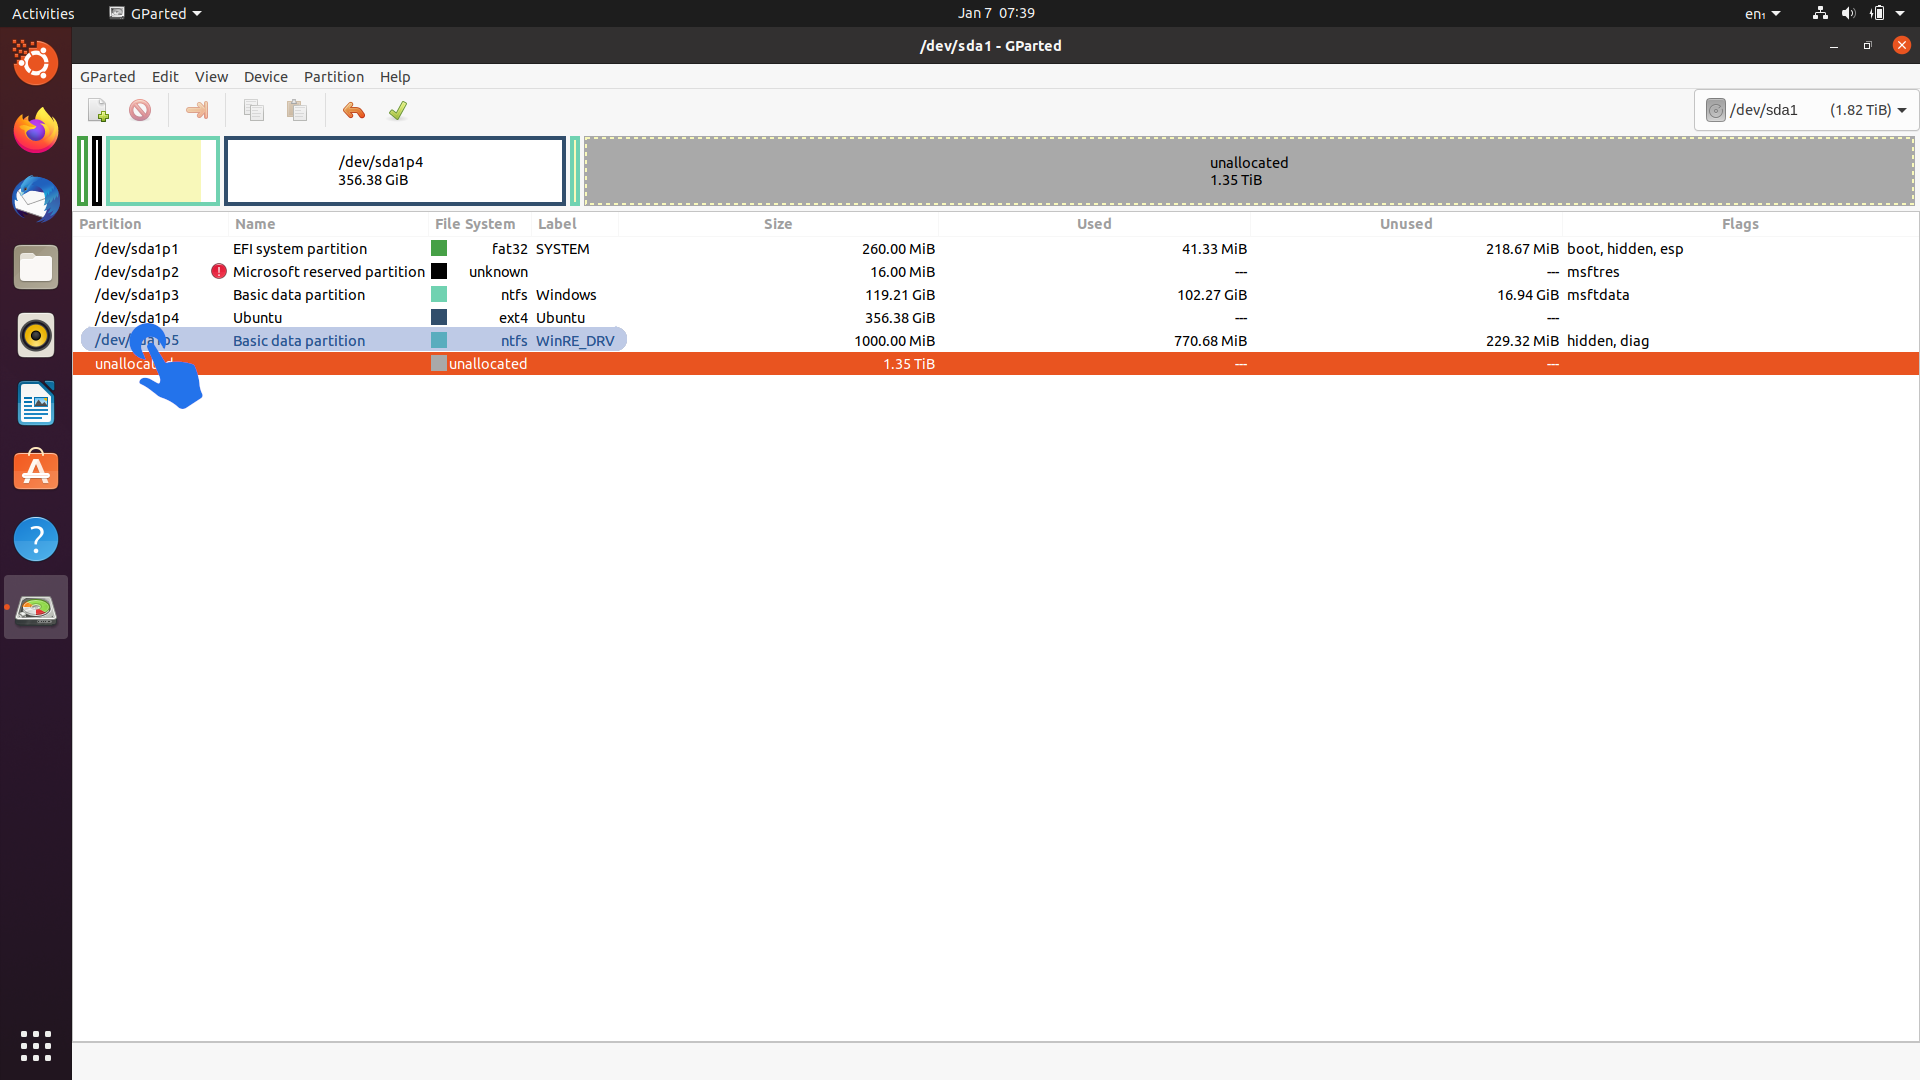
Now you can open the gparted tool, ensure you’re working on the target disk (you can select it in the top right corner), right-click on the Windows recovery partition and select the Resize/Move option:
Then drag the partition and slide it all the way to the right:
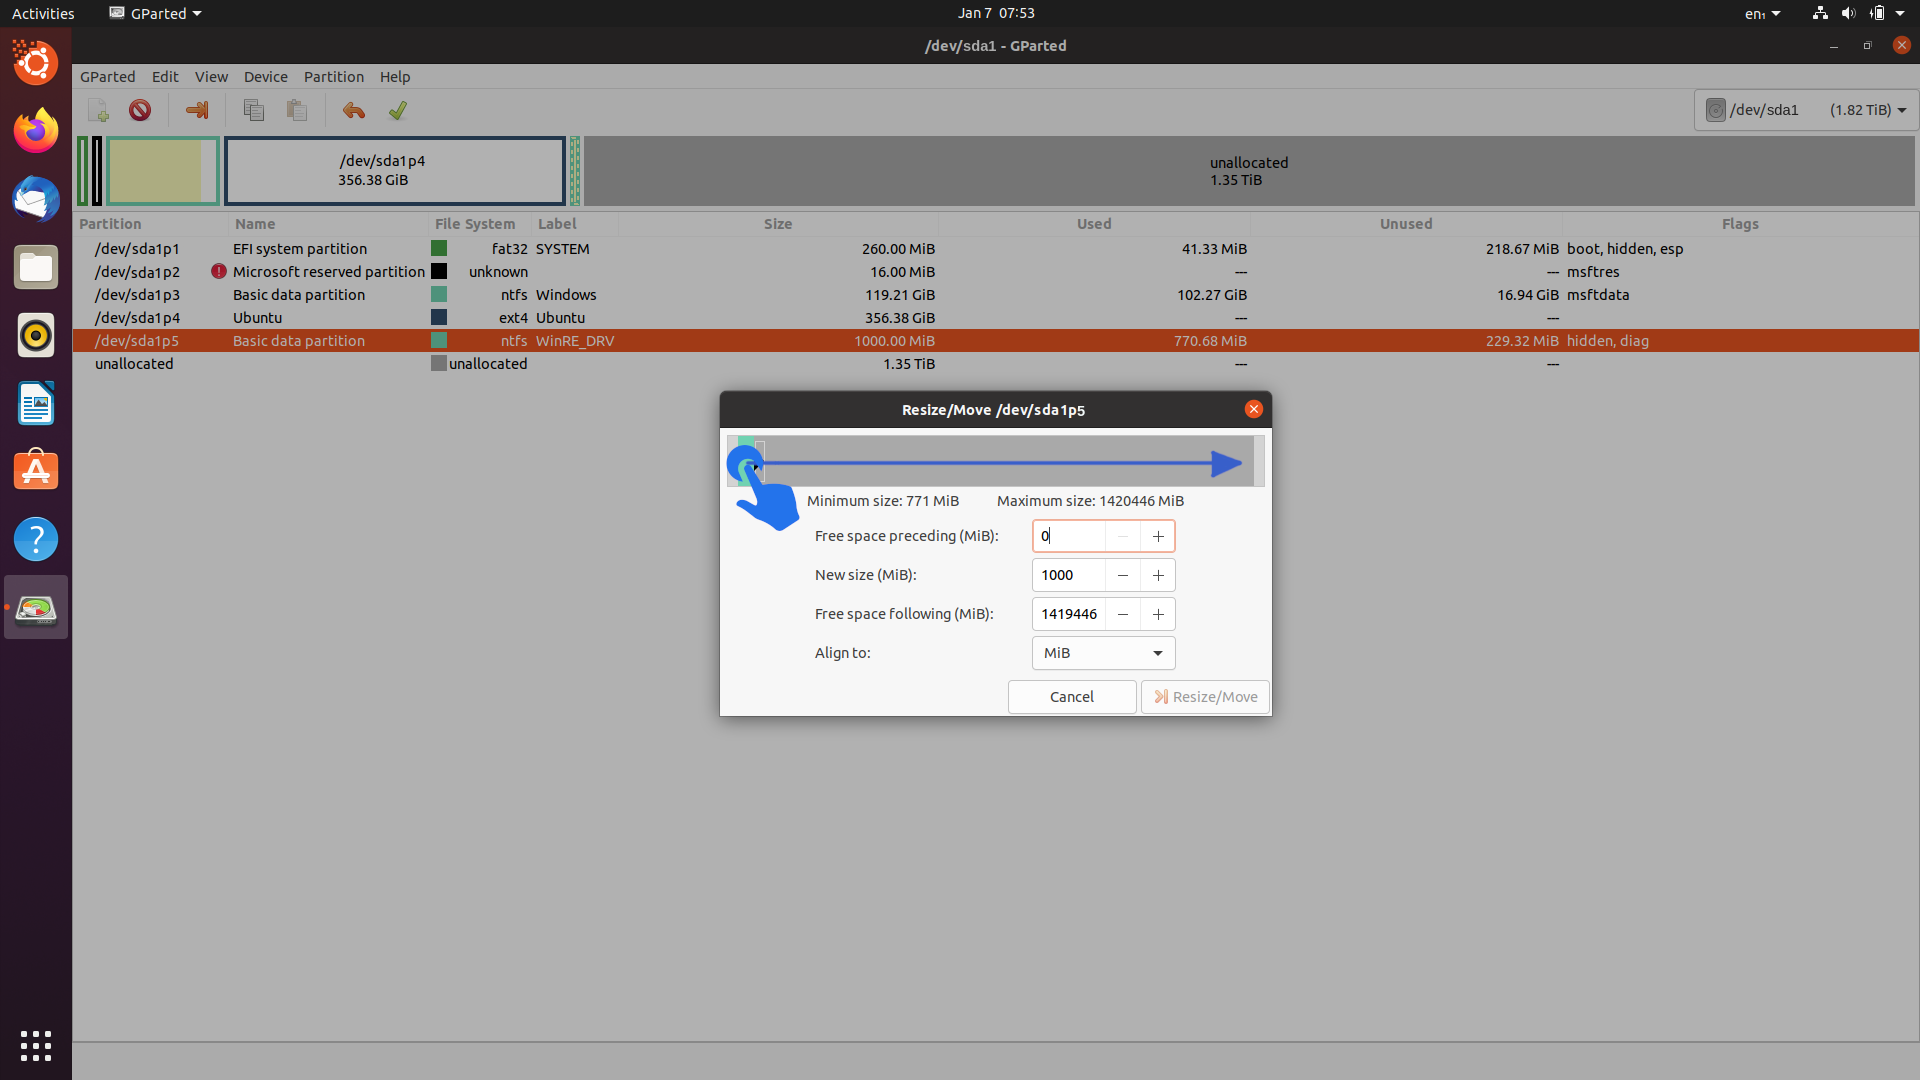
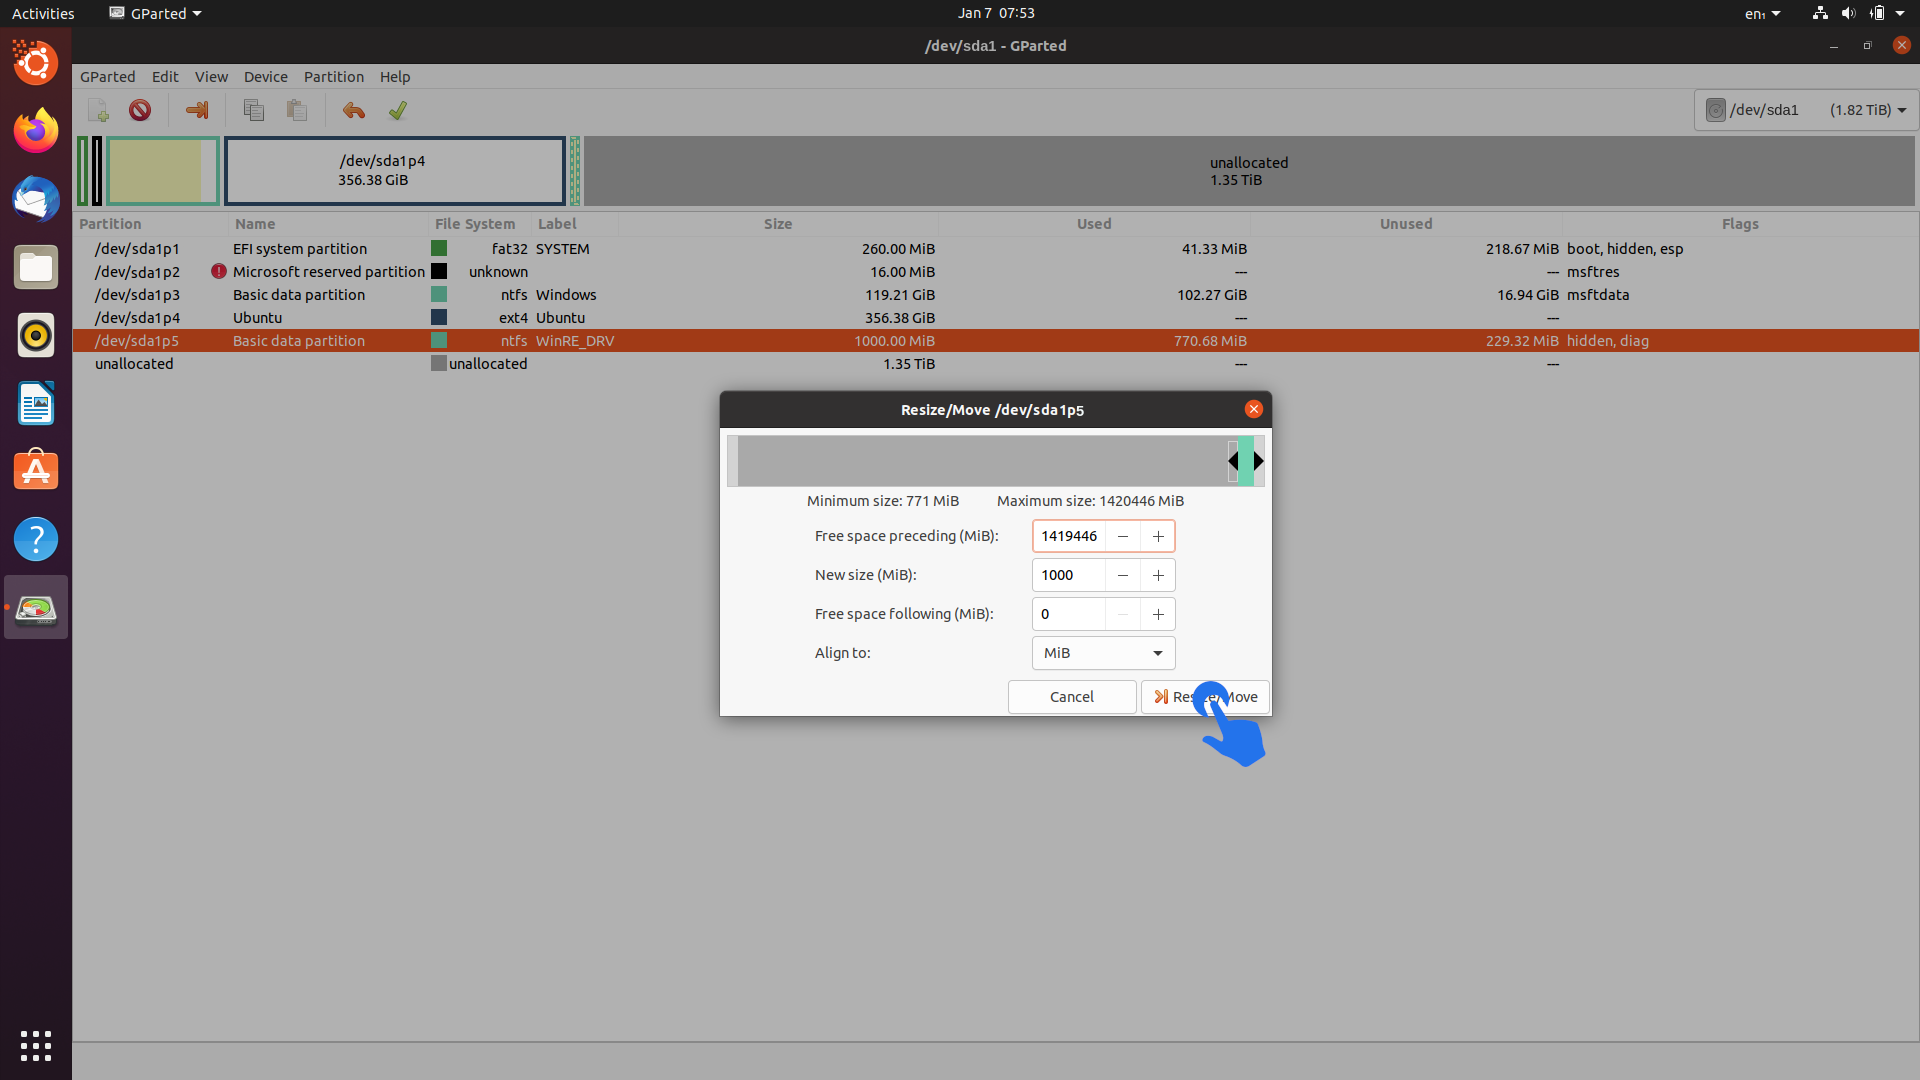
Confirm the moving action by clicking on the Resize/Move button:
Since we used the reagentc /disable command on Windows we can safely click on the OK button:
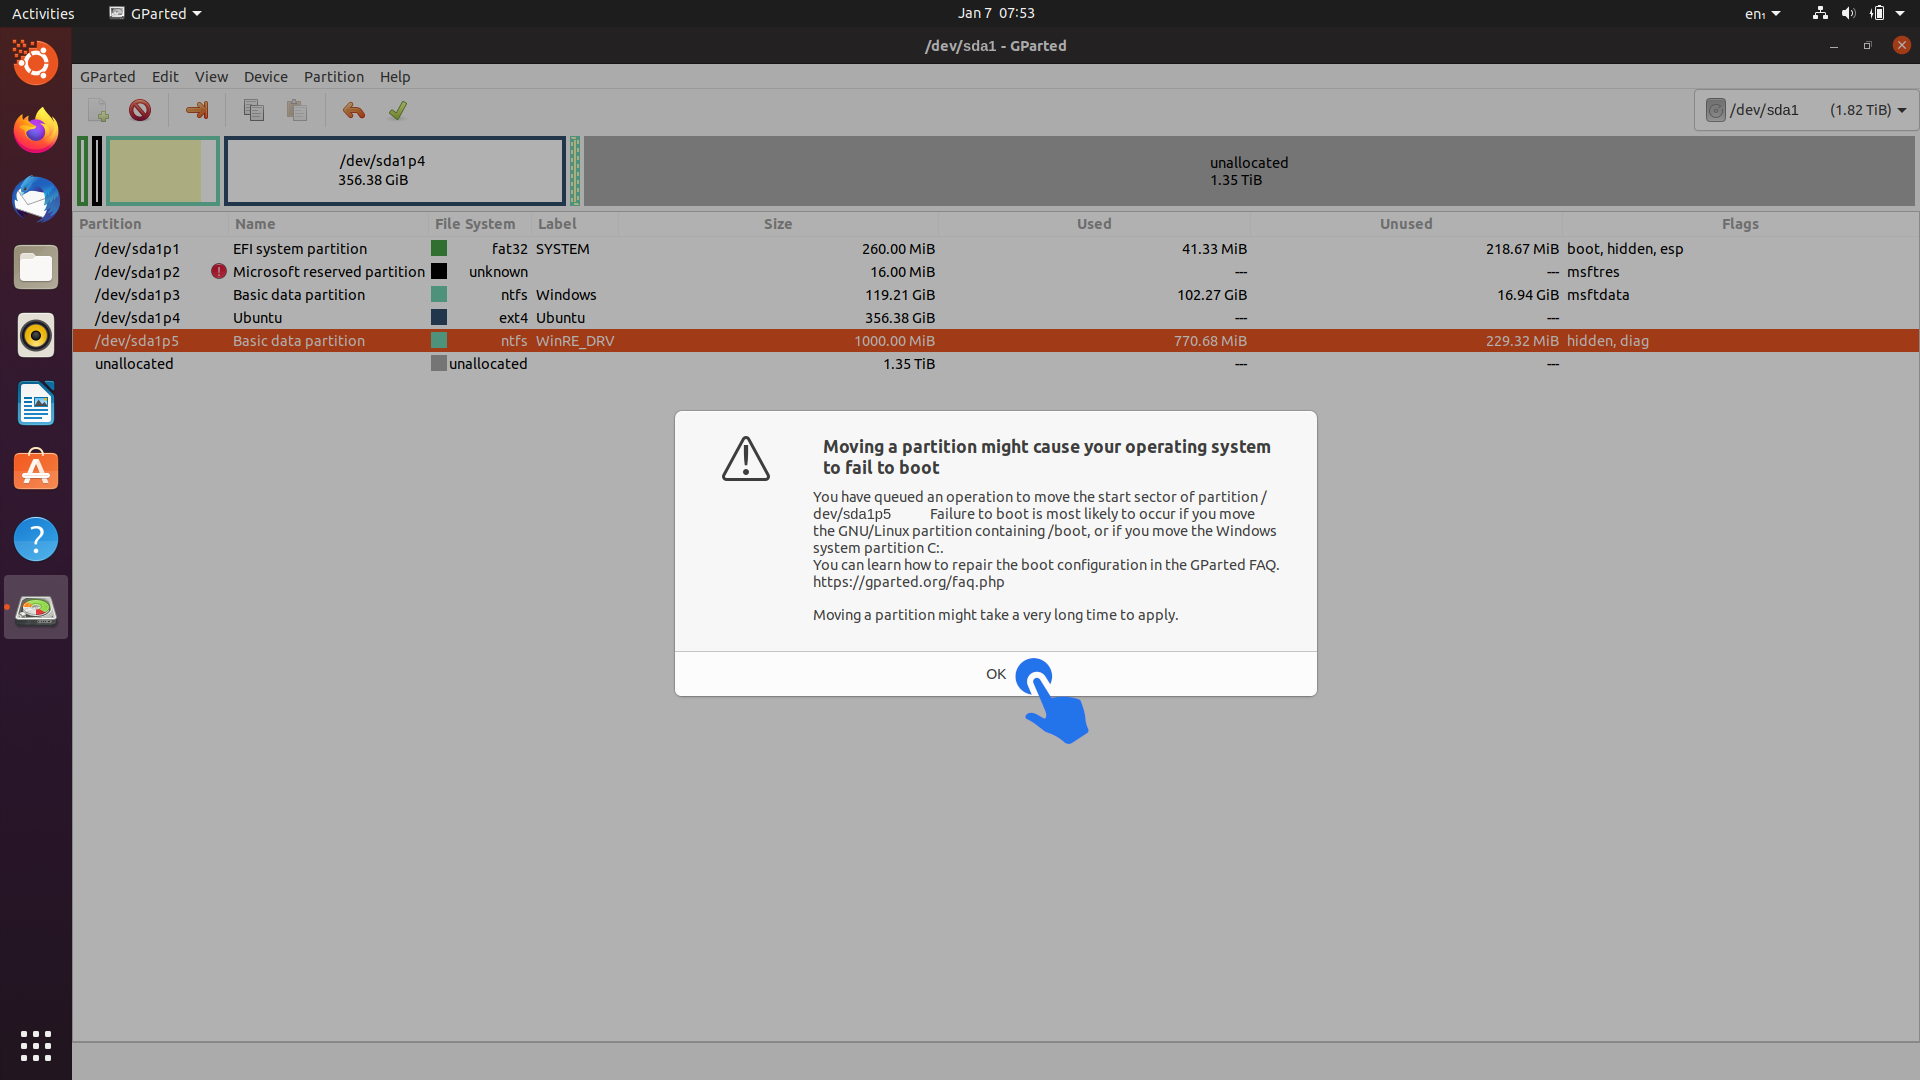
Now you can resize your Ubuntu partition by right-clicking on it and selecting the Resize/Move option:

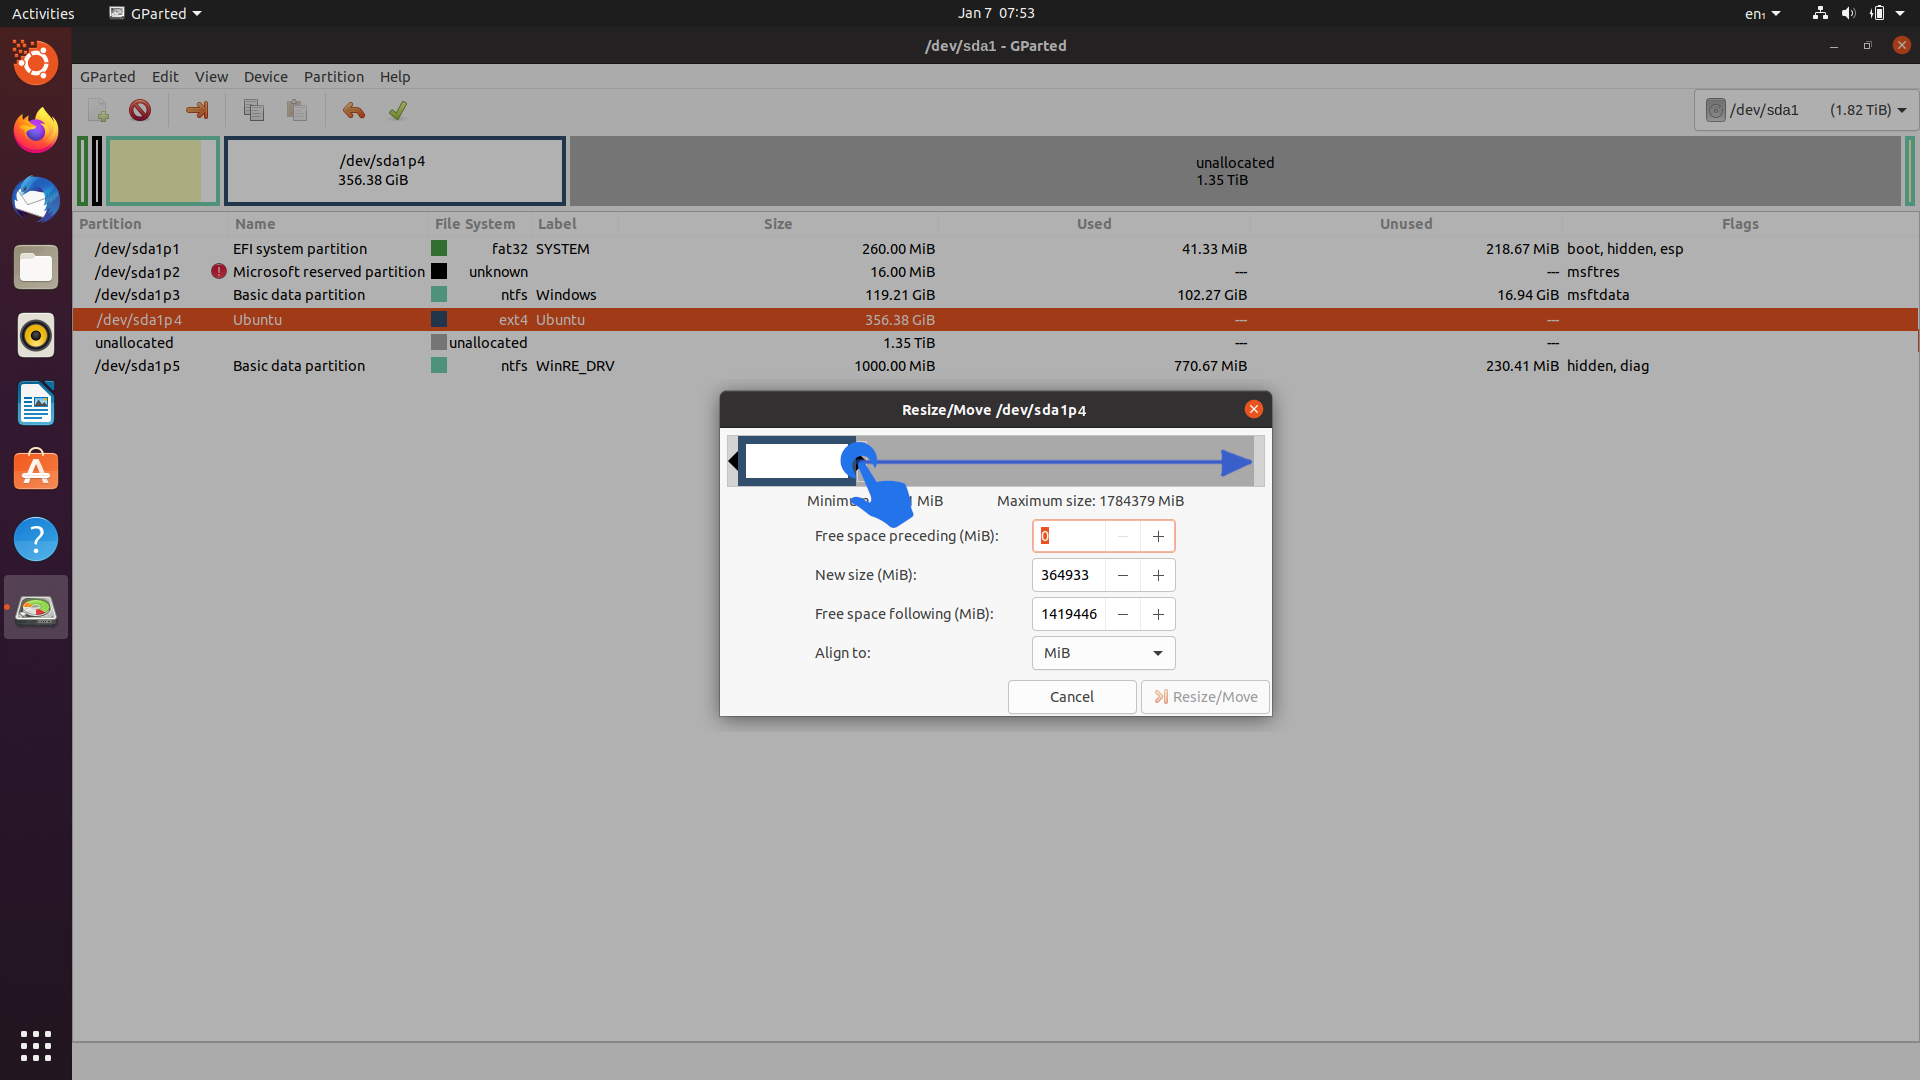
Resize it by dragging the right border of the partition and sliding it as much as you want to make it grow (here we’ll make it as large as possible):
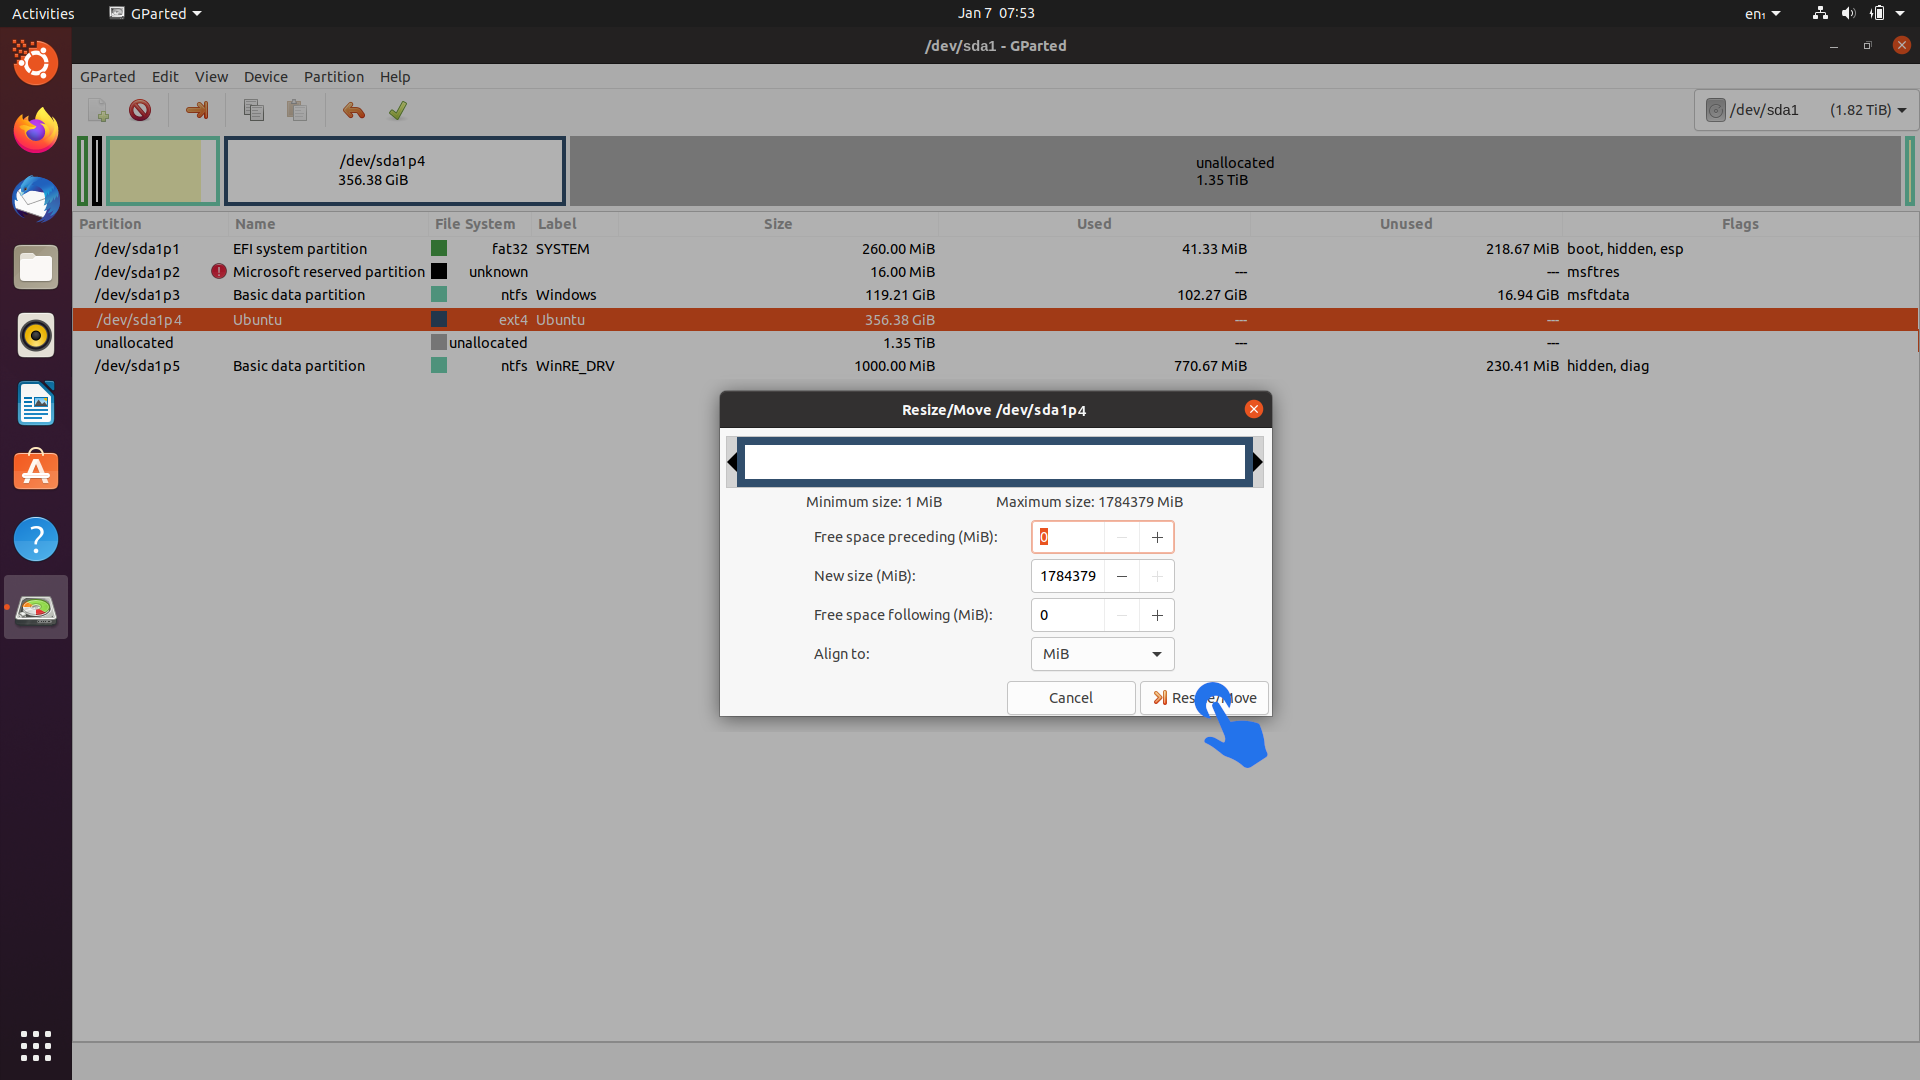
Confirm the resizing action by clicking on the Resize/Move button:
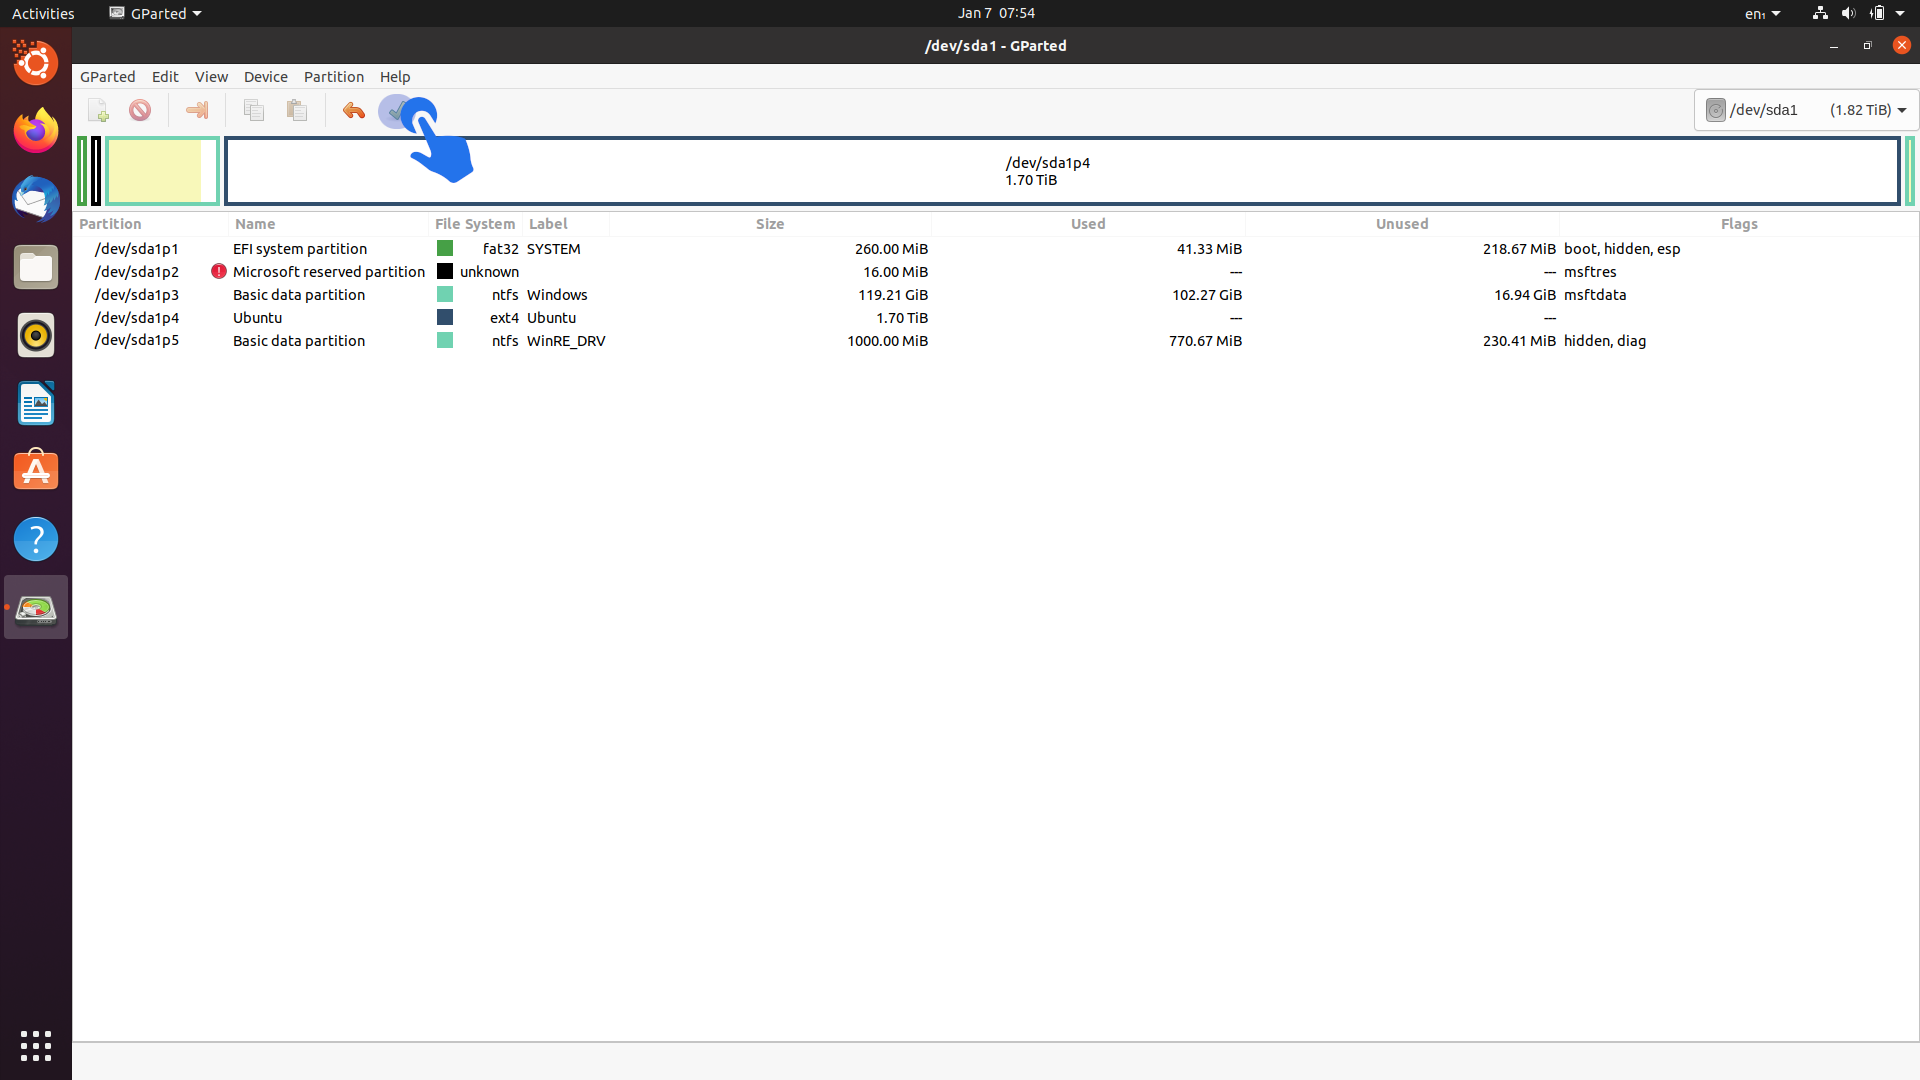
And now execute all your modifications by clicking on the confirmation button (the execution might take a few minutes):
If you had to move the Windows recovery partition, you must now quit Ubuntu and:
- boot on Windows;
- run PowerShell (or cmd) as an administrator;
- run the
reagentc /enablecommand in order to enable a custom Windows recovery boot image. The image should be found by the reagentc tool.
And you’re done. You now know how to clone a whole disk to another using CloneZilla and resize the partitions on that new disk using gparted.
This blog post is licensed under
CC BY-SA 4.0


