Understand and implement PXE network boot
Jan 17, 2024 by Thibault Debatty | 13262 views
https://cylab.be/blog/319/understand-and-implement-pxe-network-boot
PXE is a powerful system that allows to boot a system from the network. The applications are numerous : install a system from the network, create diskless or kiosk systems. But the system is pretty complex! In this blog post we will explain how network booting works, and show an example to allow interactive installation of Ubuntu 22.04 server from the network…
In a nutshell
This is how PXE network booting usually works:
- The PXE stack (integrated in the network card) searches for a DHCP server and looks for boot server information in the DHCPACK message.
- PXE connects to the server using TFTP protocol, downloads and try to execute the (binary) file. This file is usually an ‘intermediate’ bootloader, with more functionalities than PXE.
- The intermediate bootloader downloads a configuration file from the TFTP server, to show a menu to the user with different options.
- The intermediate bootloader downloads the appropriate kernel image and root filesystem, and starts executing the kernel.
In the rest of this blog post:
- We will use PXELINUX as intermediate bootloader. PXELINUX is a bootloader which is derived from Syslinux, specifically to handle network booting.
- PXELINUX will download the kernel and root filesystem from the same TFTP server.
- We will use the installation image of Ubuntu 22.04 server (the
.isofile, which will be downloaded usinghttps), so we can install Ubuntu 22.04 server directly from the network.
Why is network boot so complex?
First because there are 3 stages involved:
- the PXE booloader from the motherboard)
- the intermediate bootloader (pxelinux)
- the actual kernel that must be executed
Second, because a lot of variations are possible:
- At step 1, we will use DHCP options 66
Boot Server Host Name, and 67,Bootfile Name, but there are other possibilities, like DHCP option 43Vendor Specific Configuration. When used with PXE, this option allows to list multiple boot servers and define different menu entries. - At step 2, we will show how to use pxelinux as intermediate bootloader, but other options exist, like iPXE or the Windows PE bootloader
- At step 4, we will show how to download an installation image (iso) to install Linux from the network, but a lot of other possibilities also exist, like:
- download a compressed root directory structure, decompress it in memory and run a system completely from memory (ramdisk)
- use a network drive as root directory (NFS, iSCSI or other)
- or do a combination of both : use a root directory in memory, and mount
/homefrom the network
Third, because of the differences between BIOS and UEFI.
UEFI is an improvement of the BIOS [6]. Unlike BIOS, UEFI supports boot media larger than 2TB thanks to the GPT partitioning scheme. Also, UEFI is more flexible than BIOS regarding boot options: bootstrap code is no longer required at fixed locations (the MBR of the partition), but can be any file. However, the bootstrap file must be formatted according to the Portable Executable / Common Object File Format (PE/COFF), which means the DHCP server must lead the PXE to a different intermediate bootloader depending on the client boot mode (BIOS or UEFI).
In the example below, we will assume that the client computers are configured in BIOS boot mode. We will cover UEFI network booting in another blog post…
Finally, because of incorrect implementations of PXE. Some network devices have buggy PXE implementations, that do not entirely respect the PXE standard. Some of these issues can be circumvented by adding appropriate DHCP configuration [7, 8].
And why do we need the intermediate bootloader (pxelinux)?
Because PXE is pretty limited and only supports TFTP, and TFTP in turn is also pretty limited:
- it only supports UDP, which means there is no error detection at all, and no possibility to retransmit a corrupted packet
- it is known to be extremely slow!
So although TFTP (and PXE) could theoretically be used to directly load a full-blown OS, it is not feasible in real-life, which means they are only used to load a more evolved and robust bootloader…
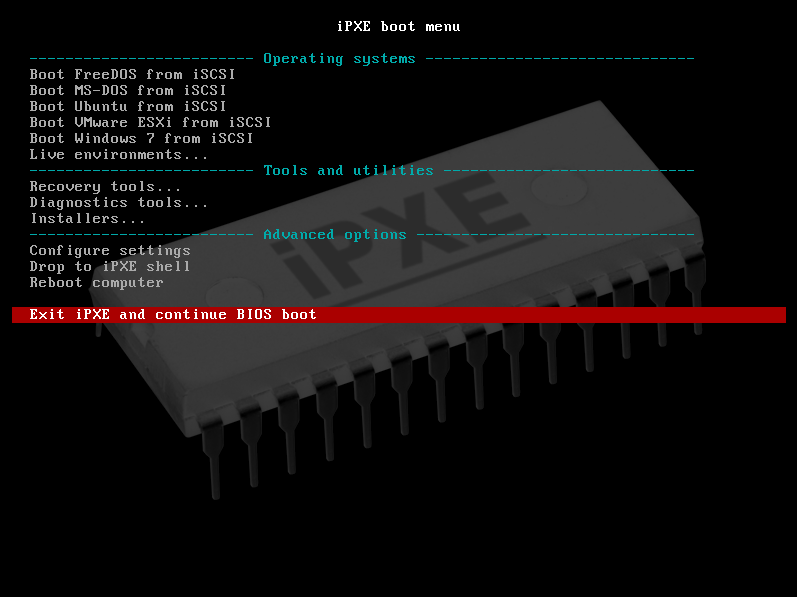
There is a project called iPXE [2] that aims to implement an improvement version of PXE directly on the network card. However, at the time of writing iPXE is not integrated in existing network cards, which means you have to flash the PXE ROM on your network card yourself. Once done, you typically don’t need an intermediate bootloader anymore.
You can also chainload into iPXE to obtain the features of iPXE without the hassle of reflashing, but this means you are simply using iPXE as intermediate bootloader…
1. DHCP configuration
So, the first step is to configure options 66 and 67 on your DHCP server. We show this below for OPNsense and for ISC DHCP server (the default DHCP server on a Ubuntu server)
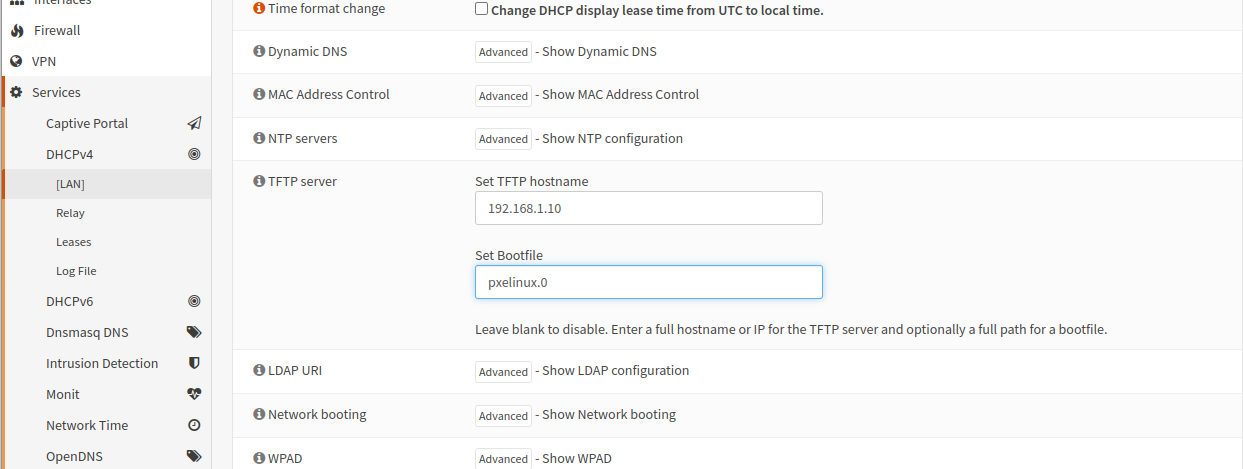
OPNsense
On an OPNsense router, head to Services > DHCPv4 > LAN > TFTP Server and fill the fields TFTP Hostname and Bootfile. In this example, 192.168.1.10 is the address of the TFTP server:
ISC DHCP server
If not done yet, install the DHCP server:
sudo apt install isc-dhcp-server
Then modify the configuration file /etc/dhcp/dhcpd/conf and configure your subnet according to your needs:
subnet 192.168.1.0 netmask 255.255.255.0 {
 range 192.168.1.100 192.168.1.199
  option routers 192.168.1.1;
  option domain-name-server 9.9.9.9;

  # option 66
  option tftp-server-name "192.168.1.10";
  # option 67
  option bootfile-name "pxelinux.0";
}
In this example, 192.168.1.10 is the address of the TFTP server. Don’t forget to restart the server:
sudo service isc-dhcp-server restart
2. TFTP server
We can now install the tftp server:
sudo apt install tftpd-hpa
You should also increase the verbosity by modifying the config file /etc/default/tftpd-hpa and and the option --verbose:
TFTP_OPTIONS="--secure --verbose"
And don’t forget to restart the server:
sudo service tftpd-hpa restart
As you could also see from the file, the root directory for serving files is /srv/tftp.
3. PXELINUX
PXELINUX [1] is a Syslinux derivative for booting from a network server using a network ROM conforming to the Intel PXE (Pre-Execution Environment) specification.
Installation
We will need files from Syslinux and PXELINUX, so we install both:
sudo apt install syslinux pxelinux
Boot files
If you remember from the TFTP section, the root directory is /srv/tftp. And if you remember from the DHCP section, PXE will try to download and execute pxelinux.0, so we have to copy this file in that folder. We will also present a menu to the user, which means pxelinux itself will try to download additional code files, which we must also copy in the tftp directory:
sudo cp /usr/lib/PXELINUX/pxelinux.0 /srv/tftp
sudo cp /usr/lib/syslinux/modules/bios/ldlinux.c32 /srv/tftp

# to display the menu:
sudo cp /usr/lib/syslinux/modules/bios/menu.c32 /srv/tftp
sudo cp /usr/lib/syslinux/modules/bios/libutil.c32 /srv/tftp
Menu configuration
The default location for the menu file that PXELINUX will present to the user is pxelinux.cfg/default (on the same TFTP server) [3], so we can create the file and directory:
sudo mkdir /srv/tftp/pxelinux.cfg
nano /srv/tftp/pxelinux.cfg/default
with the following content:
UI menu.c32
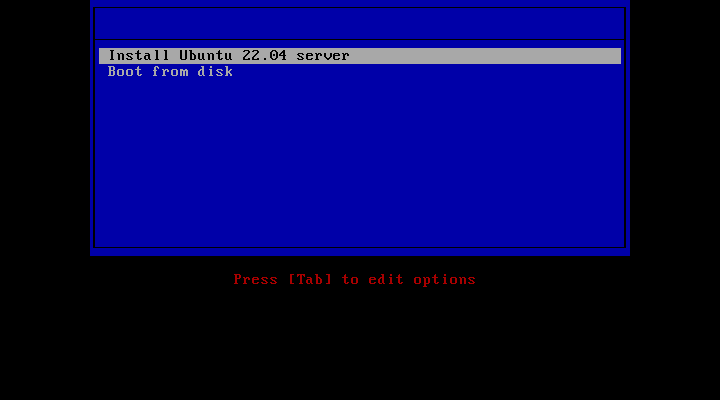
LABEL Install Ubuntu 22.04 server
KERNEL ubuntu2204/vmlinuz
INITRD ubuntu2204/initrd
APPEND root=/dev/ram0 ip=dhcp cloud-init=disabled url=https://releases.ubuntu.com/jammy/ubuntu-22.04.3-live-server-amd64.iso
LABEL Boot from disk
LOCALBOOT 0
Most lines are self-explanatory. The syntax and other possibilities can be found on the wiki of Syslinux [4].
As you can see from the kernel command line (APPEND), I disabled cloud-init. You should of course tune these parameters according to your needs…
Kernel and root filesystem
As we can read from the menu entry, PXELINUX will try to download vmlinuz (the kernel) and initrd (the root filesystem) [5] from directory ubuntu2204 (on the same TFTP server). So we have to create the corresponding directory:
sudo mkdir /srv/tftp/ubuntu2204
And we will extract vmlinuz and initrd from the installation iso:
curl -O https://releases.ubuntu.com/jammy/ubuntu-22.04.3-live-server-amd64.iso
sudo mount -o ro,loop ubuntu-22.04.3-live-server-amd64.iso /mnt
sudo cp /mnt/casper/vmlinuz /srv/tftp/ubuntu2204
sudo cp /mnt/casper/initrd /srv/tftp/ubuntu2204
Test
We can now test our setup. On the server, /var/log/syslog is a good source information, and help debut eventual problems:
tail -f /var/log/syslog
If another computer is connected on the network, and configured to boot from the network (check the BIOS) for this, the PXELINUX should be displayed, allowing to install Ubuntu…
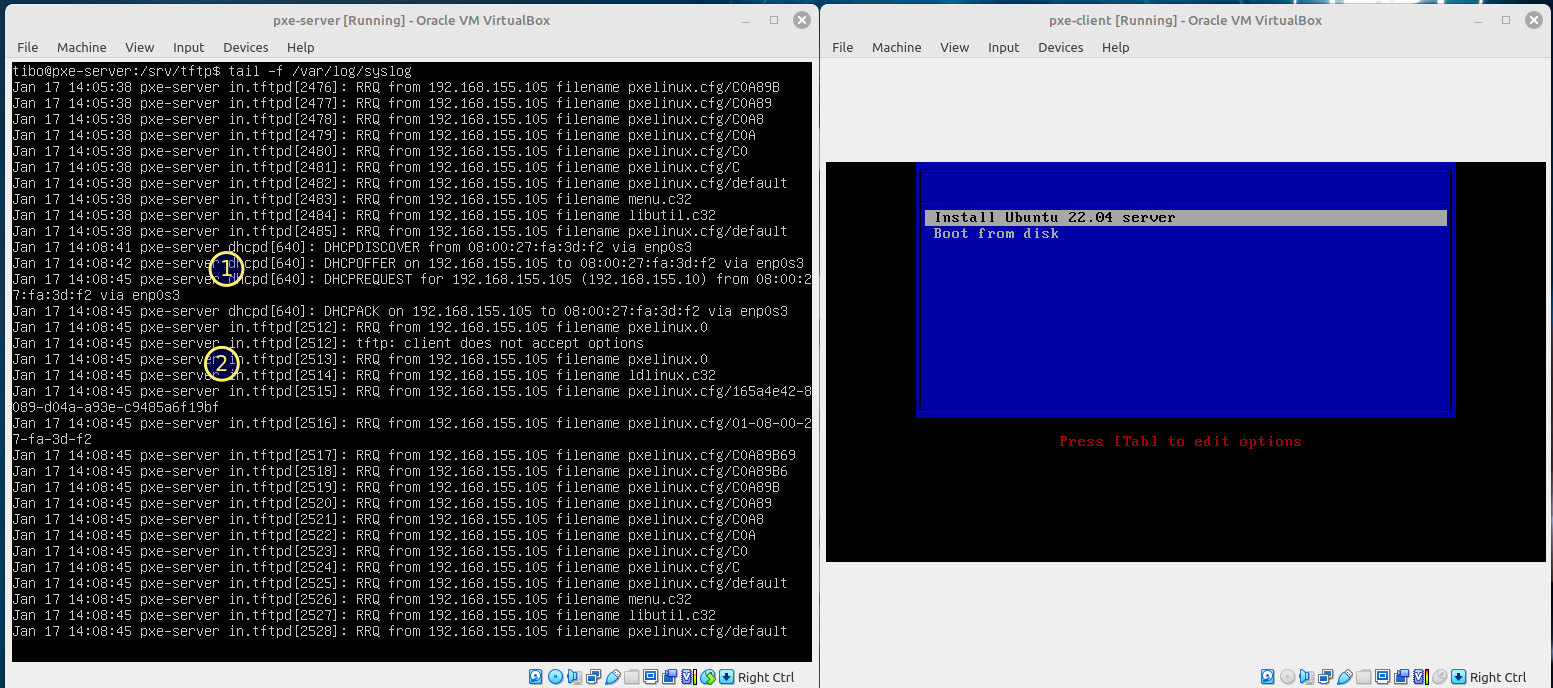
In the screenshot above, we can see on the server (left):
- PXE requesting an IP from the DHCP server
- the different files that get downloaded from the TFTP server…
We can also monitor the process by recording packets with something like tcpdump or wireshark. On the screenshot below we can see the options 66 and 67 transmitted by the DHCP server.
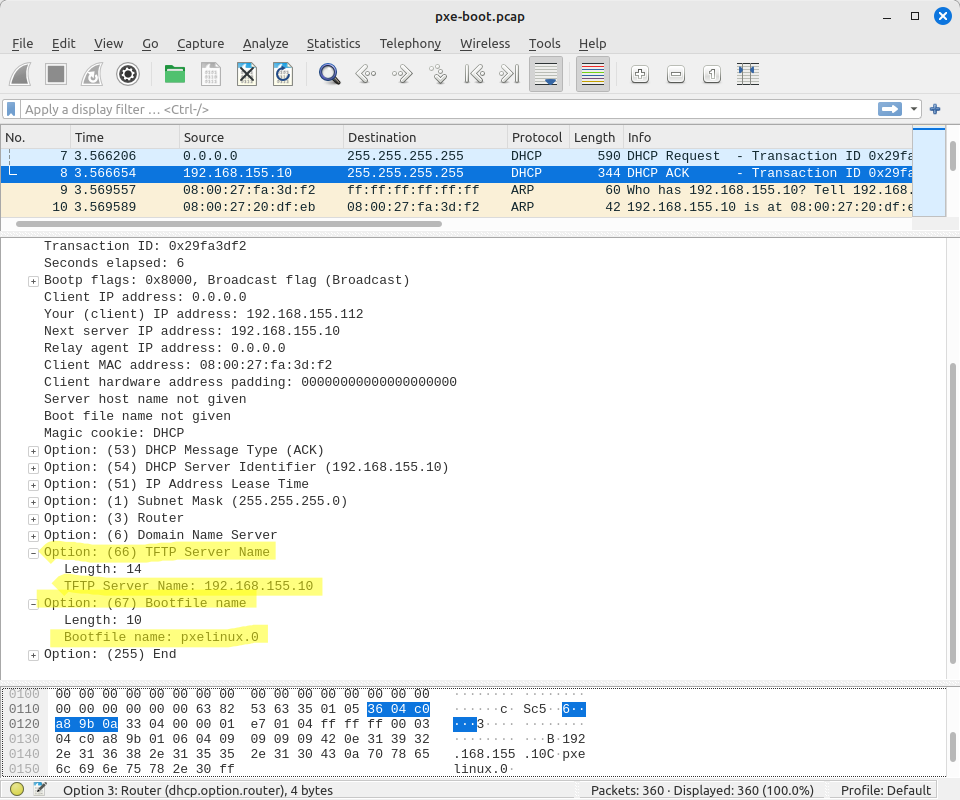
You can also download the complete pcap: pxe-boot.pcap
References
- https://wiki.syslinux.org/wiki/index.php?title=PXELINUX
- https://ipxe.org/
- https://wiki.syslinux.org/wiki/index.php?title=PXELINUX#Configuration
- https://wiki.syslinux.org/wiki/index.php?title=Config
- https://en.wikipedia.org/wiki/Initial_ramdisk
- https://dl.dell.com/manuals/common/dellemc-boot-mode-bios-uefi.pdf
- https://wiki.syslinux.org/wiki/index.php?title=Hardware_Compatibility
- https://wiki.syslinux.org/wiki/index.php?title=PXELINUX#Examples
This blog post is licensed under
CC BY-SA 4.0


