Install and use Dell perccli on Ubuntu
Jun 13, 2025 by Thibault Debatty | 10858 views
https://cylab.be/blog/422/install-and-use-dell-perccli-on-ubuntu
When working with Dell servers, managing storage can be a complex task, especially when dealing with multiple RAID controllers, enclosures, and drives. The perccli utility is a powerful tool that allows you to monitor, configure, and troubleshoot your server’s storage system. In this post, we’ll guide you through the process of downloading and installing perccli, as well as provide a comprehensive overview of its general syntax and various commands.
Download and installation
You can download the perccli utility directly from Dell support website https://www.dell.com/support
You will have to indicate the model of your server and search in the list for perccli.
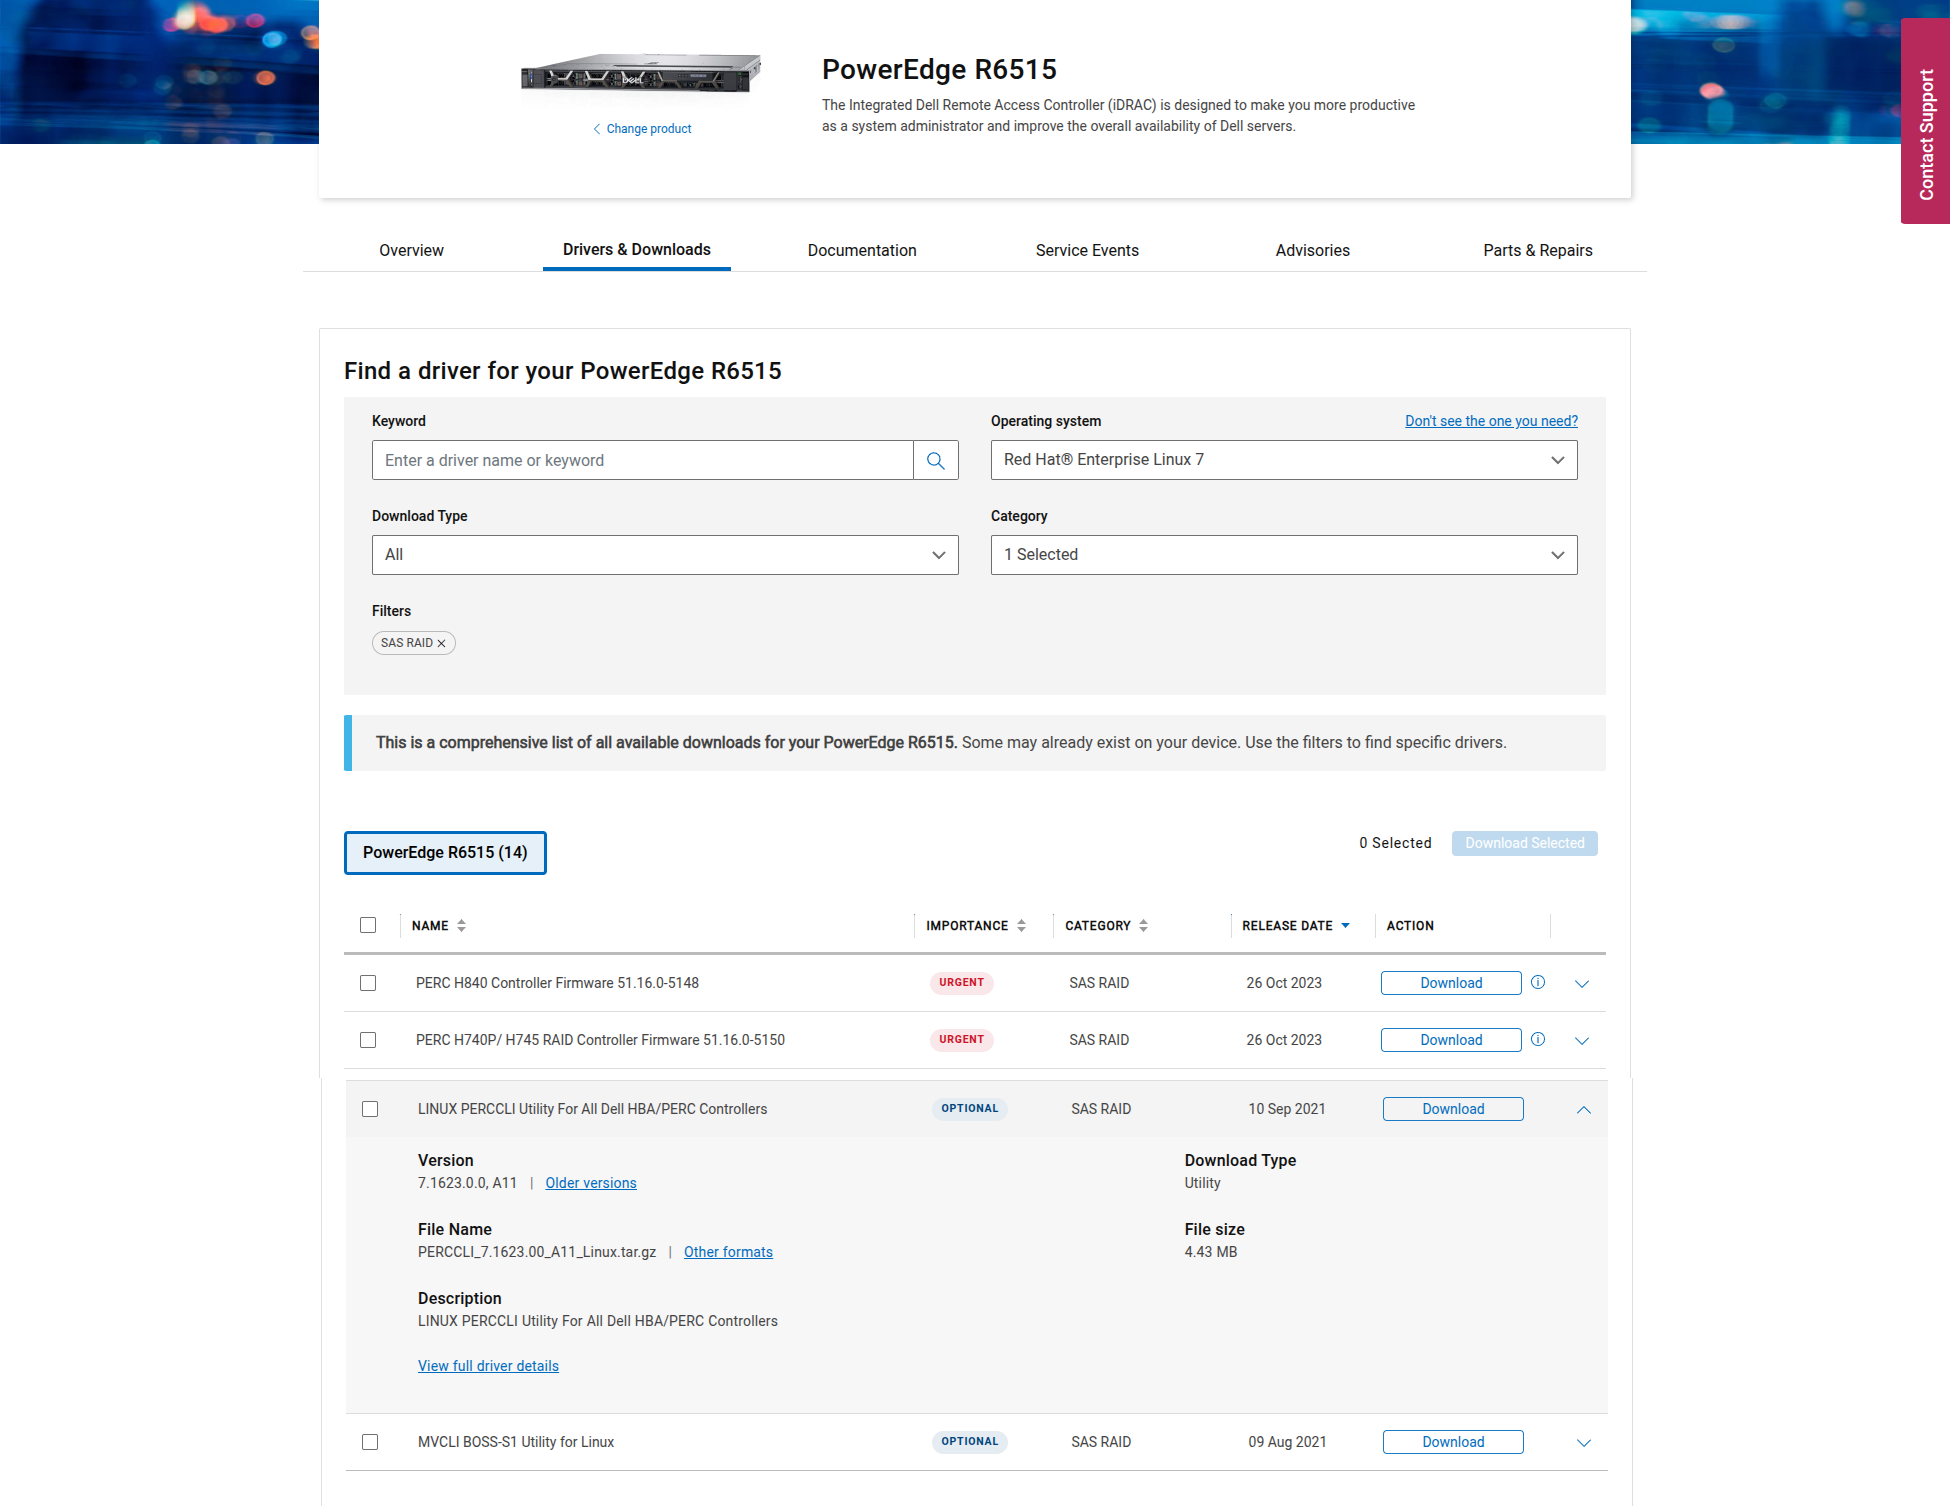
💡 Hint: You may have to indicate a different Operating System to get the utility. In the example above, I had to indicate “Red Hat Enterprise Linux 7”, while the archive actually contains both a .rpm and .deb.
In some cases, you will only find a .rpm, but you can convert it to a deb package with:
sudo apt-get install alien
sudo alien -k perccli-007.1623.0000.0000-1.noarch.rpm
In both cases, you can install the deb with
sudo dpkg -i perccli_007.1623.0000.0000_all.deb
The perccli utility will generally get installed in /opt/MegaRAID/perccli so you’ll have to indicate the full path at each command, or you can create a symbolic link:
sudo ln -s /opt/MegaRAID/perccli/perccli64 /usr/sbin/perccli64
General syntax
A server may contain multiple RAID controllers, each of which can be connected to multiple enclosures, which in turn have multiple slots… So generally the syntax of perccli commands will be
sudo perccli64 /c<x> /e<y> /s<z> <command>
where
<x>is the controller ID<y>is the enclosure ID and<z>is the slot ID
And the command can be show, show all, set or add as we will see below…
List controllers
First, to list connected controllers:
sudo perccli64 show
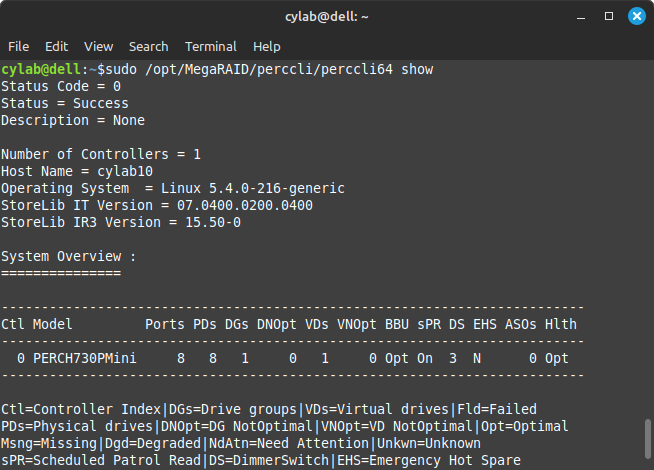
Controller and drives info
To get detailed information about a single controller, including connected drives:
sudo perccli64 /c0 show
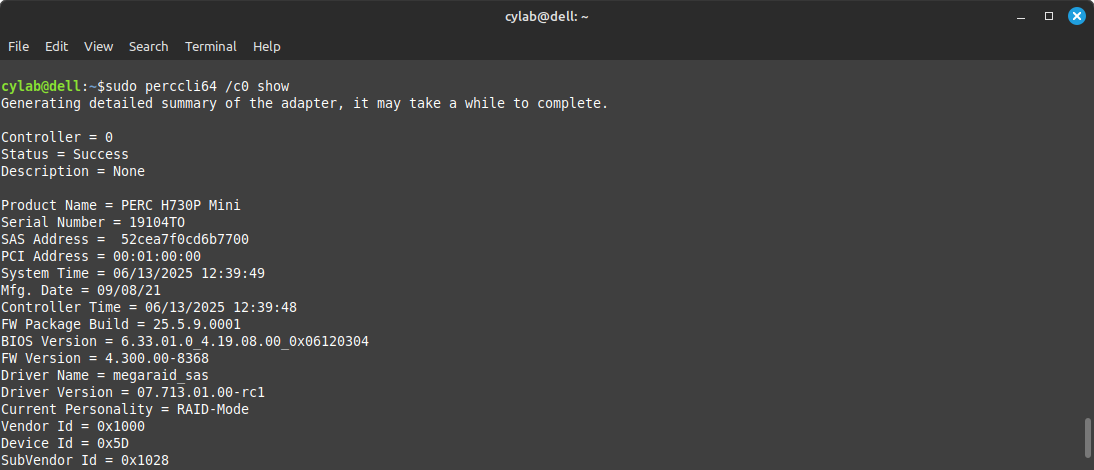
The bottom of the command also shows that the controller is connected to a single enclosure, with ID 32, which contains 8 slots, all filled with drives:
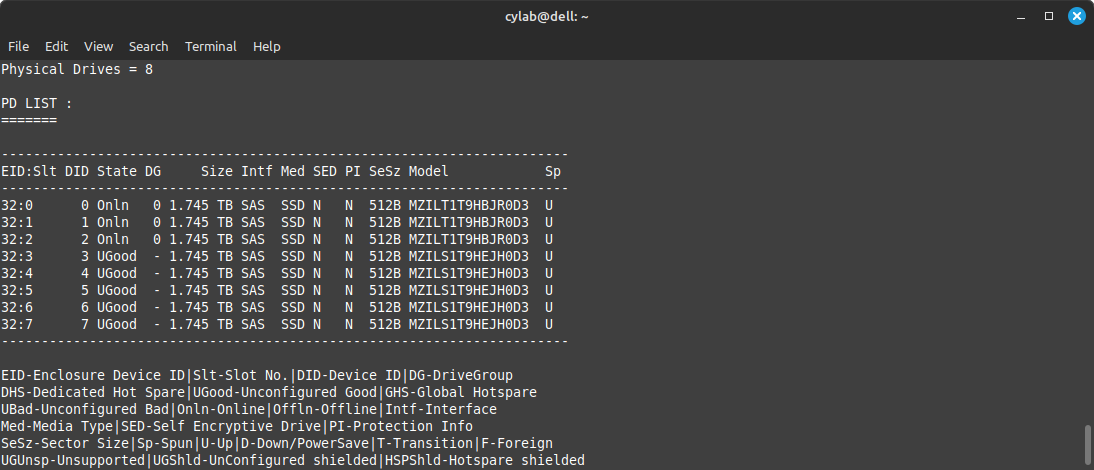
The screenshot also shows that 3 drives (32:0-2) are currently used (Onln) while the 5 other drives (32:3-7) are available (UGood).
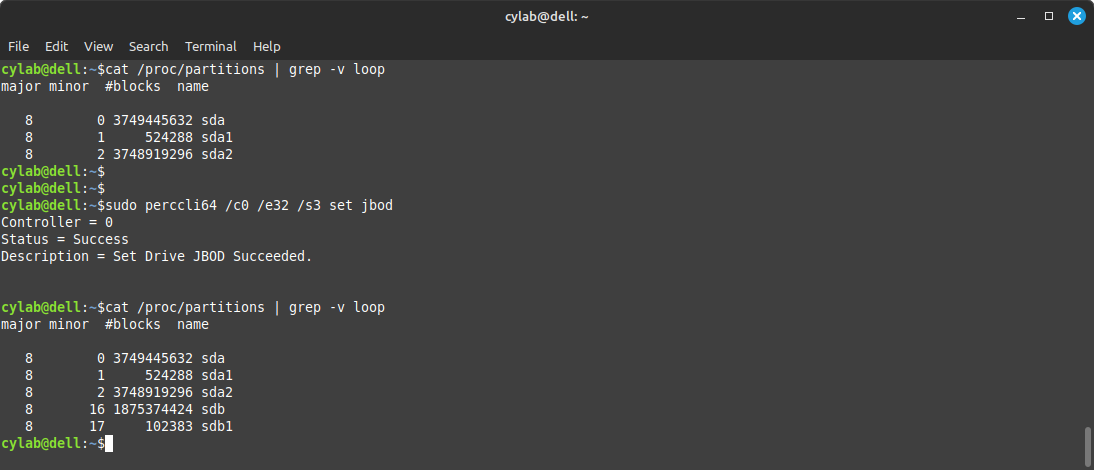
JBOD
You can directly expose a drive to the OS using the following command:
sudo perccli64 /c<x> /e<y> /s<z> set jbod
For example
sudo perccli64 /c0 /e32 /s3 set jbod
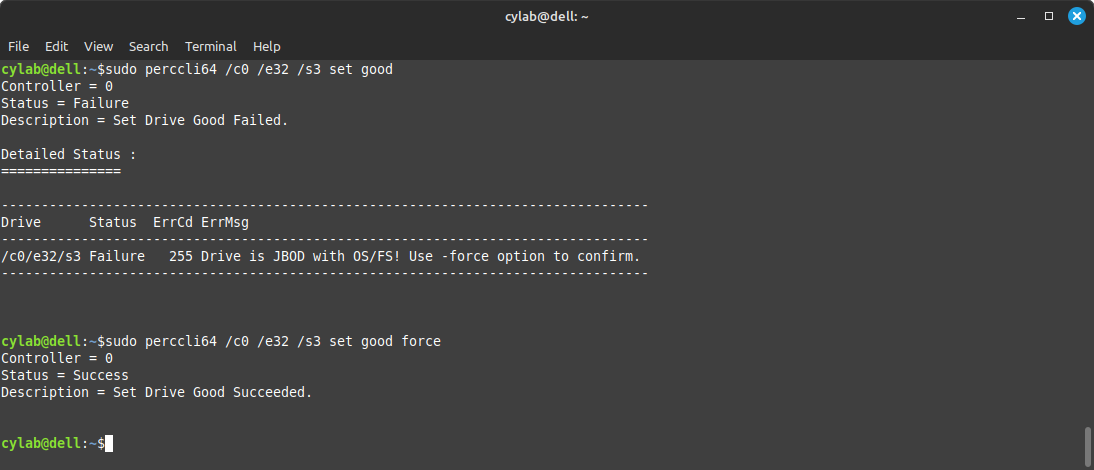
Contrary, you can detach the drive with
sudo perccli64 /c<x> /e<y> /s<z> set good [force]
The force option is required if the drive contains a filesystem.
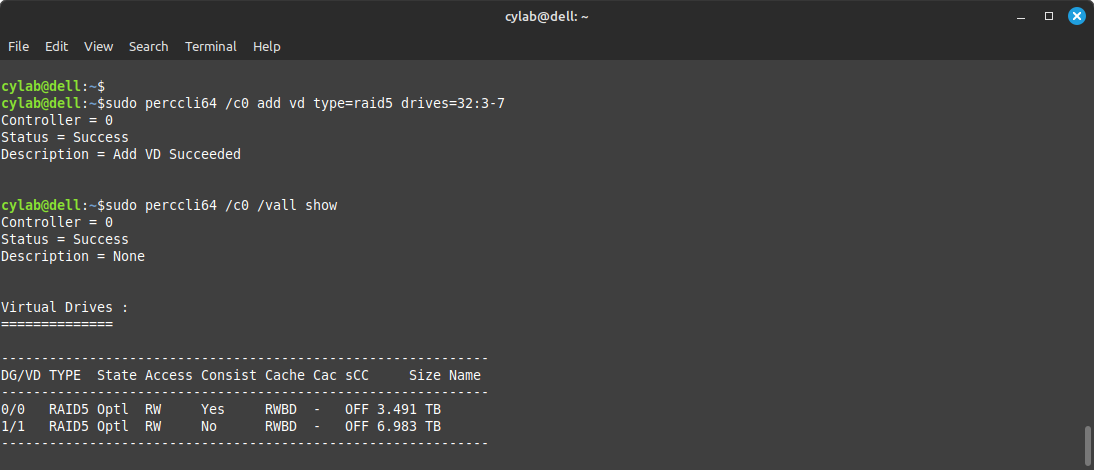
RAID volume
The syntax to create a RAID volume is actually to add a virtual drive:
sudo perccli64 /c<x> add vd type=<type> drives=<drives>
where
<type>can beraid0,raid1,raid5,raid6,raid10,raid50orraid60<drives>is the list of drives to use (enclosure and slot), using-for ranges and,as separator
For example:
sudo perccli64 /c0 add vd type=raid5 drives=32:3-7
Hot spare drives can also be added to the RAID volume with:
sudo perccli64 /c<x> add vd type=<type> drives=<drives> spares=<spares>
Replace and rebuild
If you need to replace a drive (for example because it failed), the procedure is to:
- set the drive as offline
sudo perccli64 /c<x> /e<y> /s<z> set offline
-
replace the drive
-
the rebuild process will start automatically, you can check with:
sudo perccli64 /c<x> /e<y> /sall show rebuild
Reference
dell-sas-hba-12gbps_reference-guide_en-us.pdf
This blog post is licensed under
CC BY-SA 4.0


