Ceph distributed storage (part 1) : installation
Mar 21, 2025 by Thibault Debatty | 10113 views
https://cylab.be/blog/399/ceph-distributed-storage-part-1-installation
In a previous blog post I evaluated the performance penalty of virtual storage. This time I’m focusing on distributed storage, and more precisely on Ceph. This will be a series of 2 blog posts. In this first part, I will show the installation process. In the second part I will present the performance comparison…
Lab environment
For this demo I used a small cluster of 3 nodes. Each node is actually a micro computer with 8GB of RAM, a 2.5G ethernet network interface and 2 SSDs: one 128GB SSD for the OS and one 480GB SSD reserved for Ceph data. So this is actually cheap domestic equipment, but enough to run a micro-cluster.
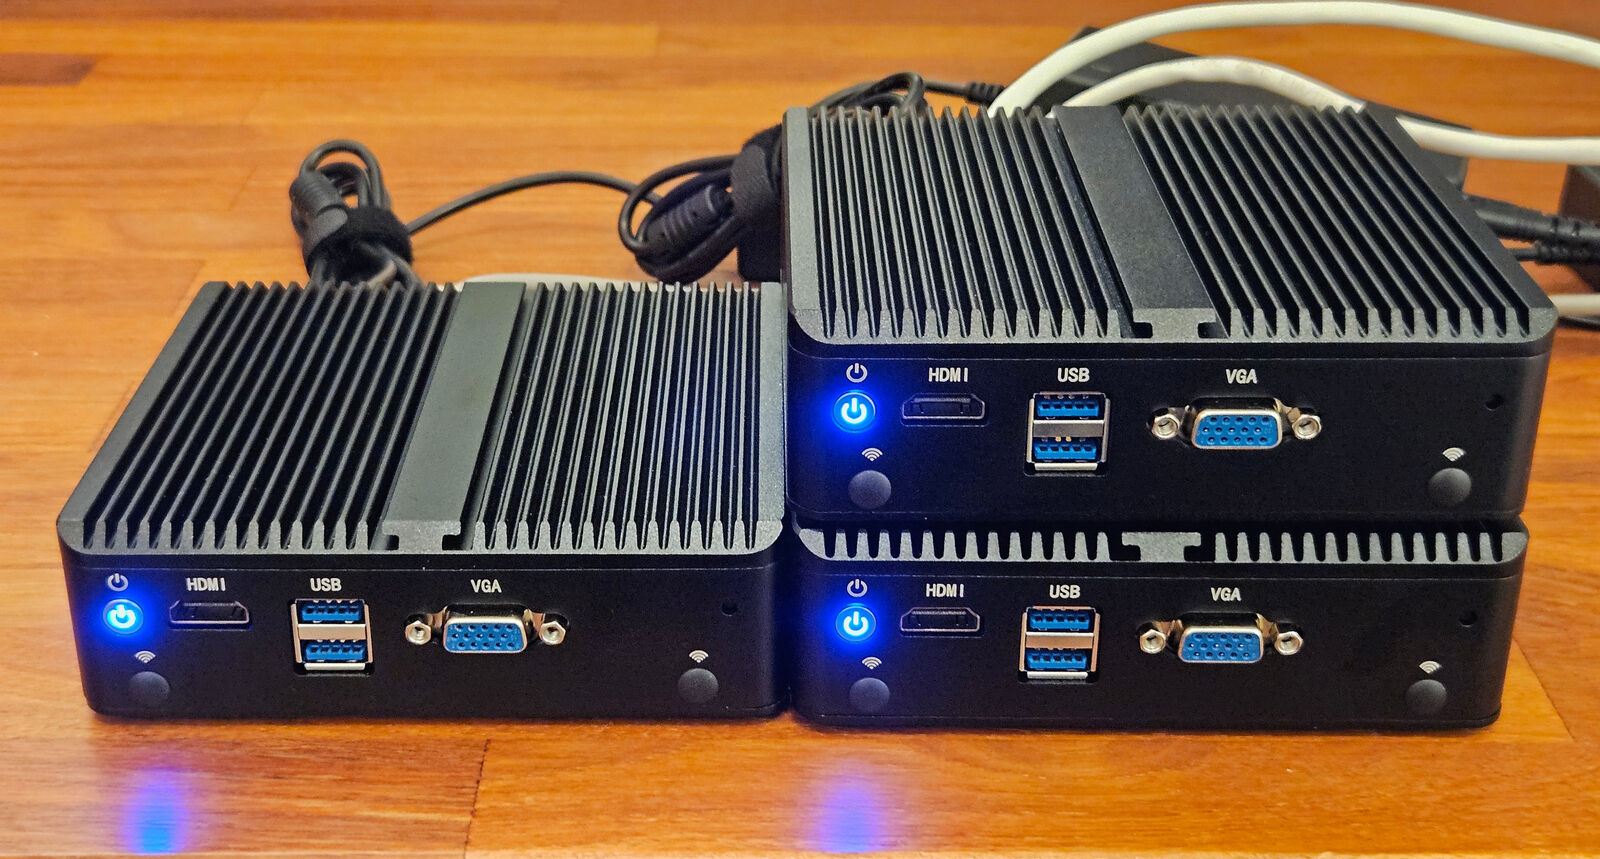
For the base OS I used Debian Bookworm server (so without a graphical environment).
⚠ I tried to install Ceph on Ubuntu 24.04 but could not update cephadmin (see below) because of repository incompatibilities…
Ceph architecture
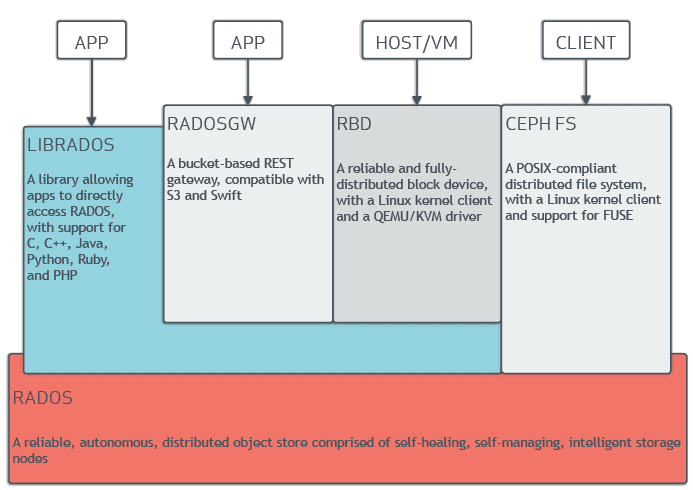
Ceph is an open-source distributed storage system. The foundation of Ceph storage is RADOS : the Reliable Autonomic Distributed Object Store. The RADOS can be accessed in different ways:
- Ceph FS exposes a POSIX compliant network filesystem (like NFS), which allows client to mount a directory backed by a RADOS pool;
- RADOS Block Device (RBD) allows to create block devices (like iSCSI) which can also be mounted or attached to a QEMU VM;
- RADOS REST Gateway (RADOSgw) implements a bucket-based object store compatible with S3 and swift;
- librados is a library that allows applications to directly interact with the distributed storage.
https://ceph.io/en/discover/technology/
RADOS itself is composed of different services:
- Object Storage Daemons (OSD) are responsible for storing data on a local drive and providing access to them over the network (see below);
- Monitors (MON) maintain the cluster map, which contains the location of all Ceph monitors and OSDs;
- Managers (MGR) are responsible for tracking runtime metrics and the current state of the Ceph cluster, and provide a management and monitoring interface.
Most of these services will actually run as containers with Docker or Podman.
https://docs.ceph.com/en/quincy/cephadm/services/
As you may have inferred from the list above, there is no service responsible for tracking the location of each block of data (object) in the cluster. Instead, object’s location is computed using the CRUSH algorithm.
Before clients can read from or write to Ceph OSDs, they must connect to a monitor to get the current cluster map. With the cluster map and CRUSH algorithm, a Ceph client can compute the location for any piece of data (object). The ability to compute data locations allows a Ceph client to talk directly to Ceph OSDs to read or write data, which in turn allows high scalability and performance.
https://docs.ceph.com/en/latest/architecture/
Cluster bootstrapping
The cephadm tool allows to bootstrap and manage a Ceph cluster. The easiest way to install is to:
- install
cephadmfrom your distribution repository:
sudo apt install cephadm
- update
cephadmto the latest version (squidat the time of writing):
sudo cephadm add-repo --release squid
sudo adduser cephadm
sudo cephadm install
https://docs.ceph.com/en/latest/releases/
Once the latest version is installed, you can bootstrap your cluster with:
sudo cephadm bootstrap
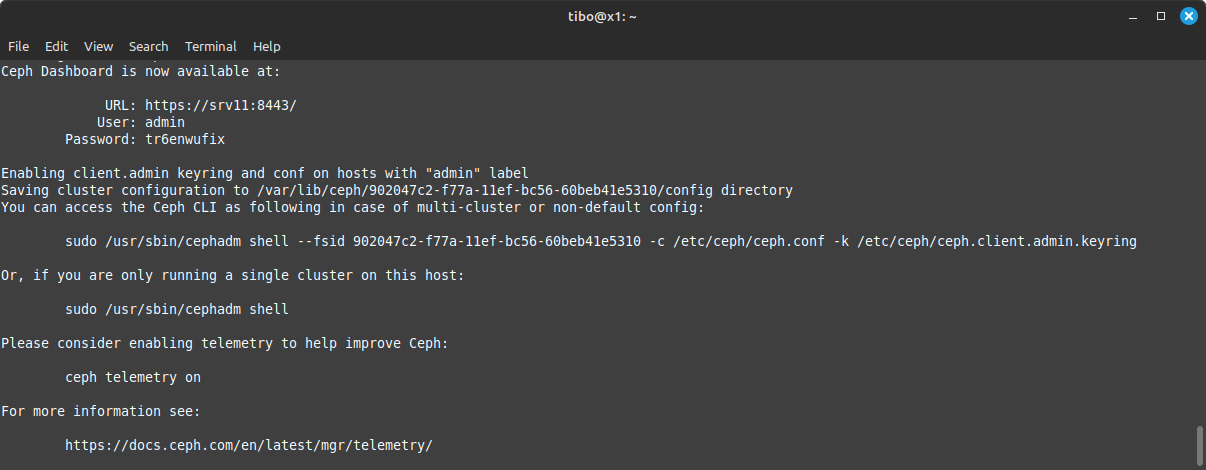
For now the cluster is composed of a single node (I’ll call it the master), so you should first add nodes to your cluster…
Add nodes
A ceph cluster should have at least 3 nodes, to run at least 3 monitor services. Here is how to add nodes to the cluster…
Install dependencies
For the other nodes, you should use the same OS as on the master node (hence Debian Bookworm in my example). And you must first install 2 dependencies:
sudo apt install -y podman lvm2
Copy SSH key
The master node will use SSH to connect and install required services on the new nodes, so you must also allow password based root login over SSH (at least for the time to copy the SSH public key) :
sudo nano /etc/ssh/sshd_config
Add the following line:
PermitRootLogin yes
And restart SSH:
sudo service ssh restart
Back on the master node, you can now copy the SSH public key from the master to the new node:
sudo ssh-copy-id -f -i /etc/ceph/ceph.pub root@<new-node>
Add the node
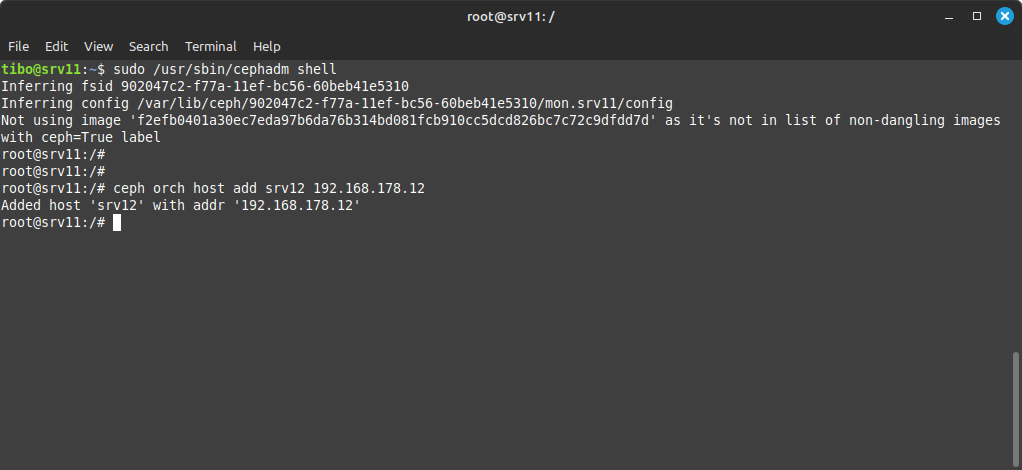
Still on the master node, start the ceph shell:
sudo /usr/sbin/cephadm shell
This will actually create a shell inside the ceph container, where you can add the new node with:
ceph orch host add <nodename> <ip>
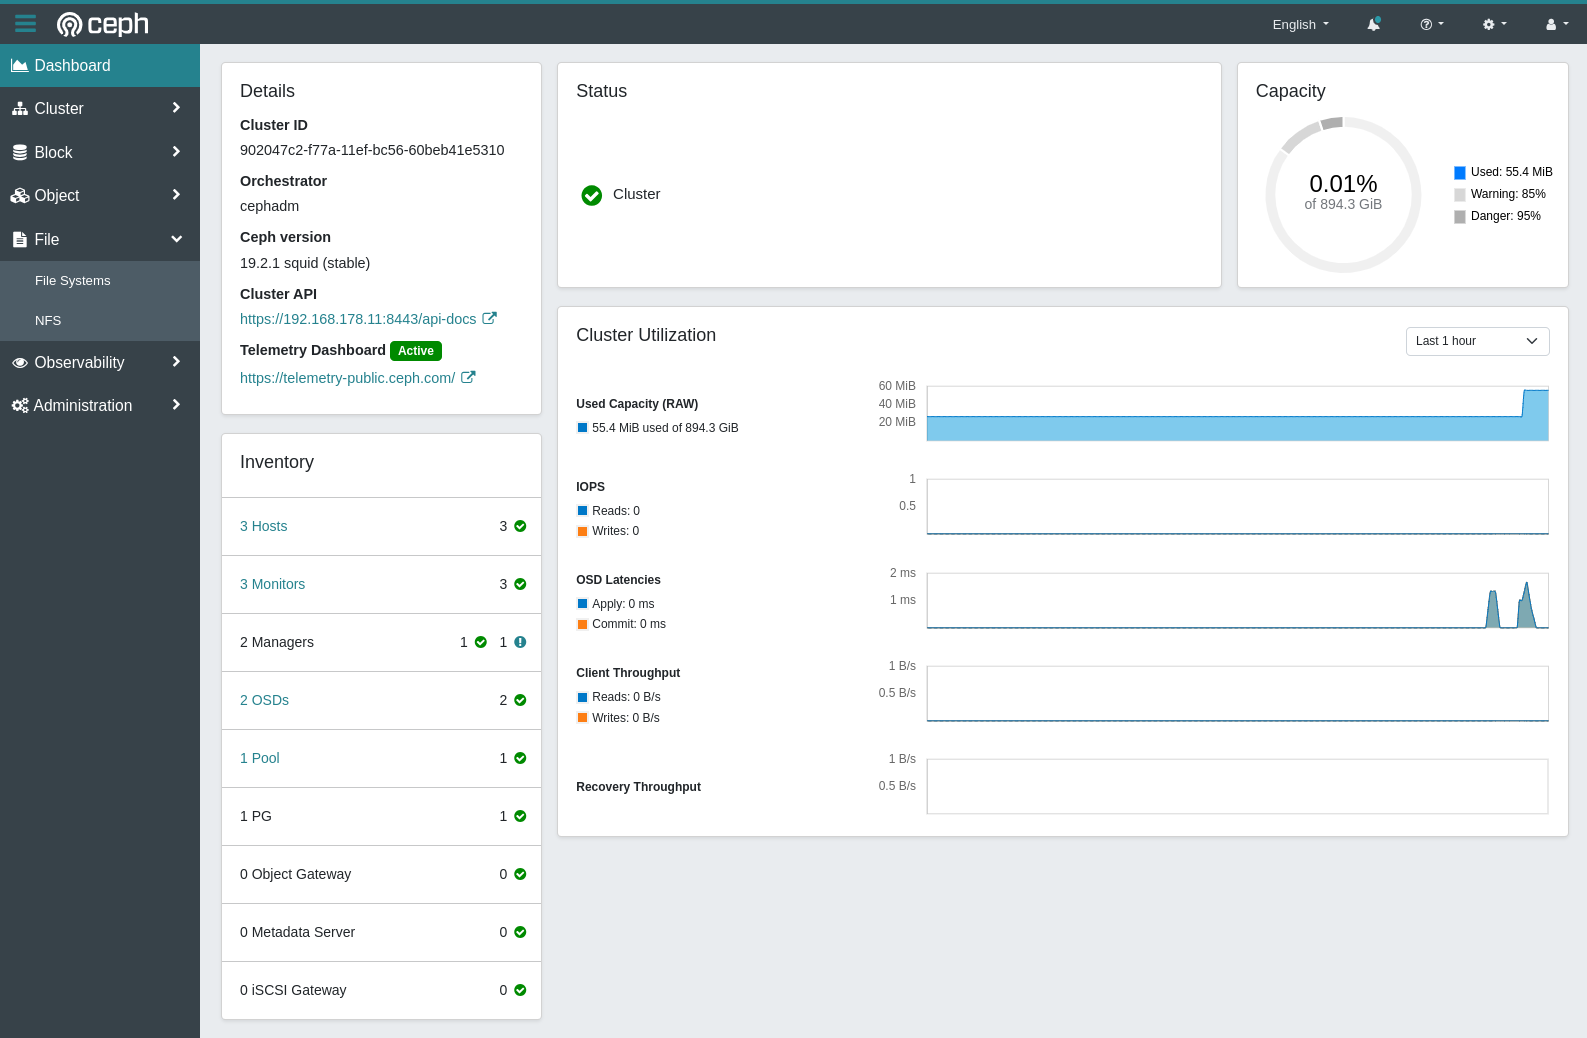
Dashboard
You may have noticed when bootstrapping the cluster, a web dashboard is also created and available at https://<ip.of.node>:8443. Now is a good time to have a look. Your freshly added nodes should appear with some nice usage graphs…
Add storage
We now have a cluster but no space to store data, so we should now add drives. Remember that in Ceph storage is managed by Object Storage Daemons (OSDs) and each OSD is typically responsible for a single drive. Moreover:
- Ceph uses entire drives and wipes the entire content of existing drives;
- As a security measure, Ceph will not accept a drive that already contains a partition table;
- Ceph does not support removable (USB) drives.
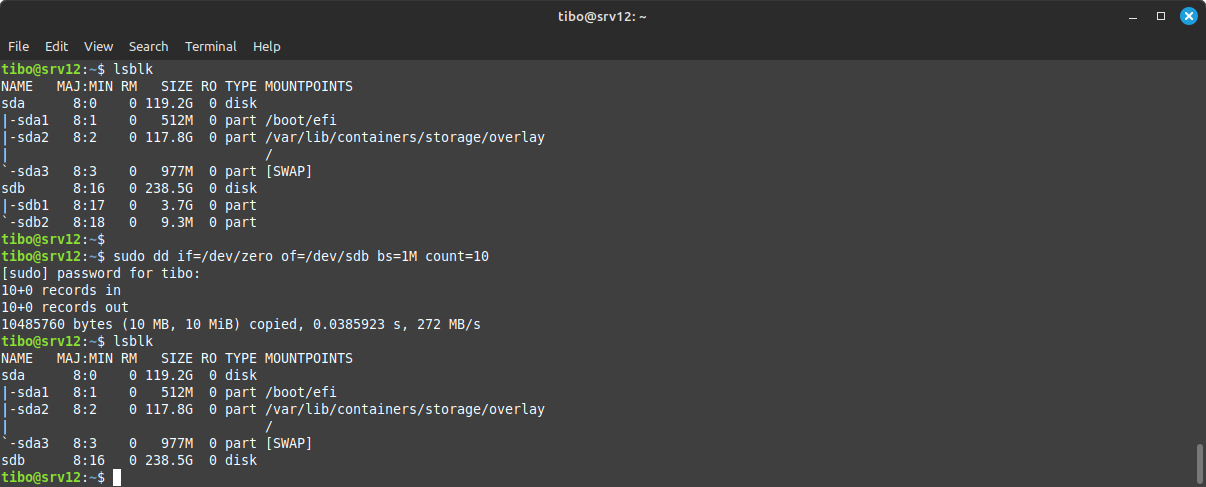
So, to add a drive to Ceph we should first wipe the partition table of the drive (if any) with
lsblk
and
sudo dd if=/dev/zero of=<device> bs=1M count=10
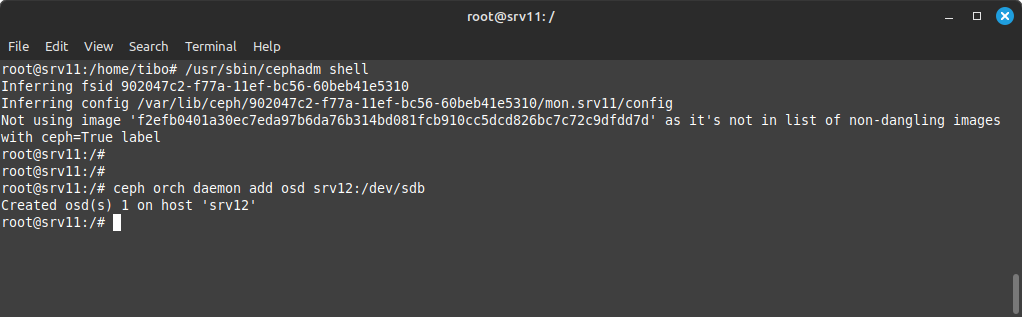
Then, back on the master, we can once again start the ceph shell:
sudo /usr/sbin/cephadm shell
And create an OSD to handle this device:
ceph orch daemon add osd <node>:<device>
With 3 drives (and 3 OSDs), your cluster is ready for use!
Create a File System
The easiest way to use Ceph storage is by creating and mounting a Ceph File System. But first we must create a user that will be allowed to mount, read and write the file system.
Create user
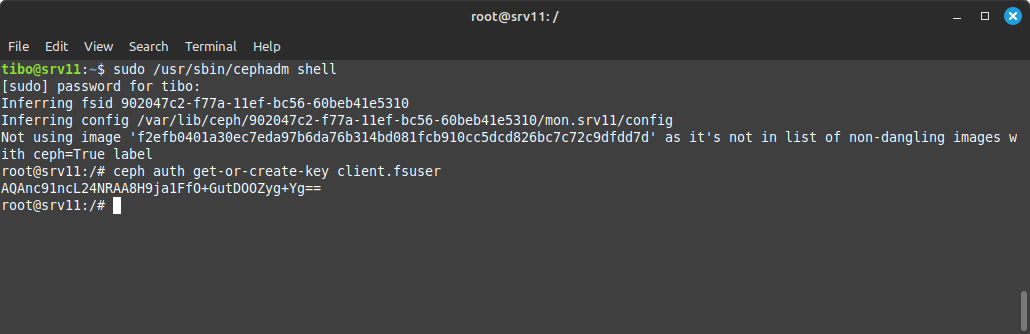
To create a Ceph user without specific capabilities, connect to master node and start the Ceph shell:
sudo /usr/sbin/cephadm shell
You can now create a user and get the user key (secret) with
ceph auth get-or-create-key client.<username>
If needed, you can also get the key of an existing user with:
ceph auth print-key client.<username>
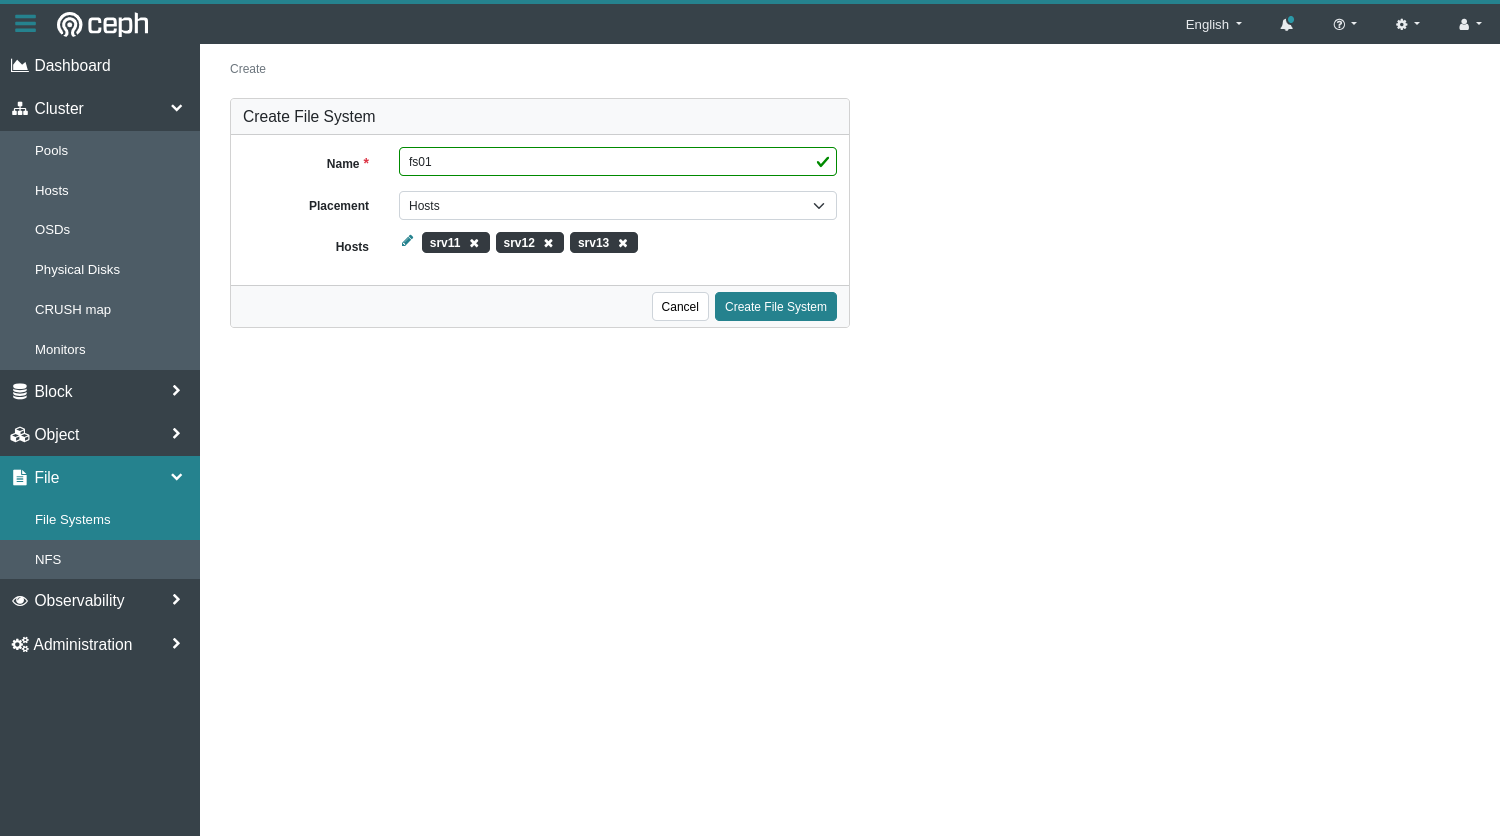
Create File System
To create the File System, we can simply use the web interface. Open File then File Systems and click on Create. In the dialog that appears you can choose where the data will be stored. You would typically use tags for this purpose, but for this example I simply selected my 3 nodes…
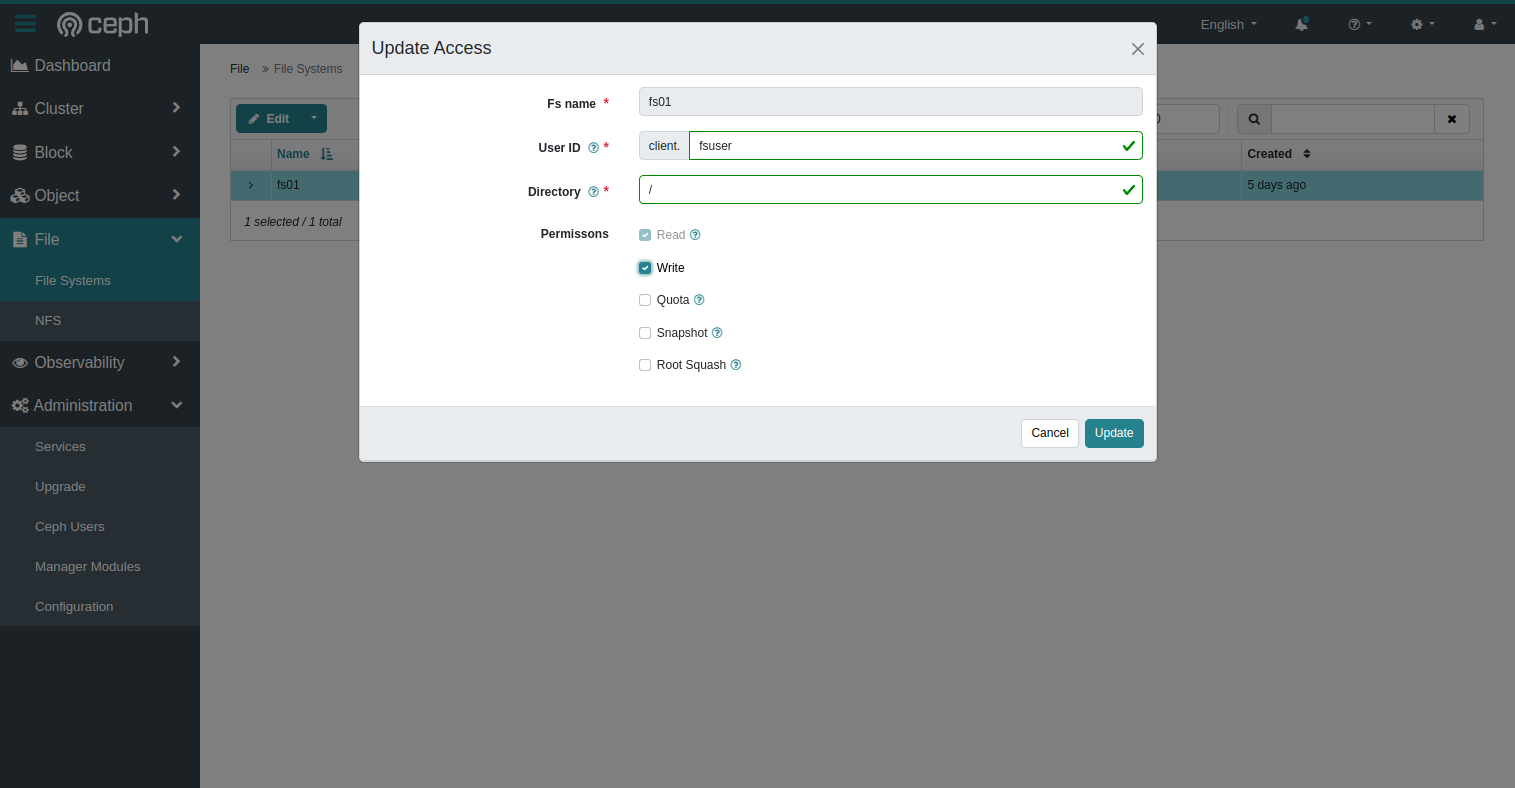
When the FS is created, we must allow our user to mount and use it.
- Select the freshly created file system
- In the menu at the top, select
Authorize - Fill the fields as required
Mount the File System
Now that all pieces are in place, we can finally mount and use the distributed file system.
On the client machine, make sure Ceph tools are installed:
sudo apt install ceph-common
You can now mount the file system with:
sudo mount -t ceph <mon>:/ <mountpoint> -o name=<username>,secret=<secret>,mds_namespace=<fsname>
where:
usernameis the name of the user we just created (without theclient.);fsnameis the name of the file system you created;mountpointis the location where the fs must be mounted (on the local file system);monis the ip (and port) of the monitors separated by a comma andsecretis the secret key of the user.
For example:
sudo mount -t ceph 192.168.178.11,192.168.178.12,192.168.178.13:/ /mnt/fs01 -o name=fsuser,secret=AQAnc91ncL24NRAA8H9ja1FfO+GutDOOZyg+Yg==,mds_namespace=fs01
If something goes wrong, check dmesg as it usually provides more info…
- https://docs.ceph.com/en/latest/cephfs/mount-using-kernel-driver/
- https://docs.ceph.com/en/latest/man/8/mount.ceph/
This blog post is licensed under
CC BY-SA 4.0


