Neovim for YAML
Jun 3, 2025 by José Carrasquel Vera | 8074 views
Neovim for YAML
In this blog post we will turn neovim into a powerful YAML editor. We will install neovim and use kickstart.nvim as a basis for a more-than-functional configuration. Then we will show how to make LSP leverage YAML schemas to provide autocompletion, snippets and docstrings.
Neovim
Neovim is a “hyperextensible Vim-based text editor”. I personally like it because it provides a lightweight, fast and mouseless IDE-like experience. Moreover, it has helped me develop enough Vim muscle memory to quickly do my sysadmin tasks in most systems where only Vim or Vi is installed.
Installation
Installing neovim is quite straightforward in most environments. Just follow the instructions found in the install documentation. In my case, it was as simple as a
$ sudo dnf install -y neovim python3-neovim
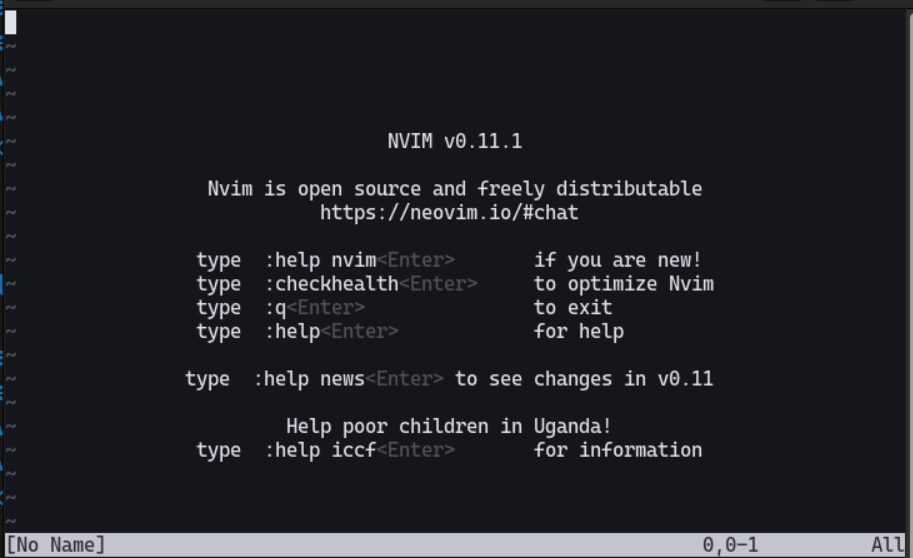
in my Fedora workstation. This installed v0.11.1.
After running nvim on your favourite terminal, you will find yourself with the plain, basic, neovim environment.
But don’t be fooled by its rather dull aspect, vanilla neovim is an extremely powerful text editor. If you’re new to Vim, you must experience the Vim tutor. Go ahead and type :Tutor<Enter> on your neovim.
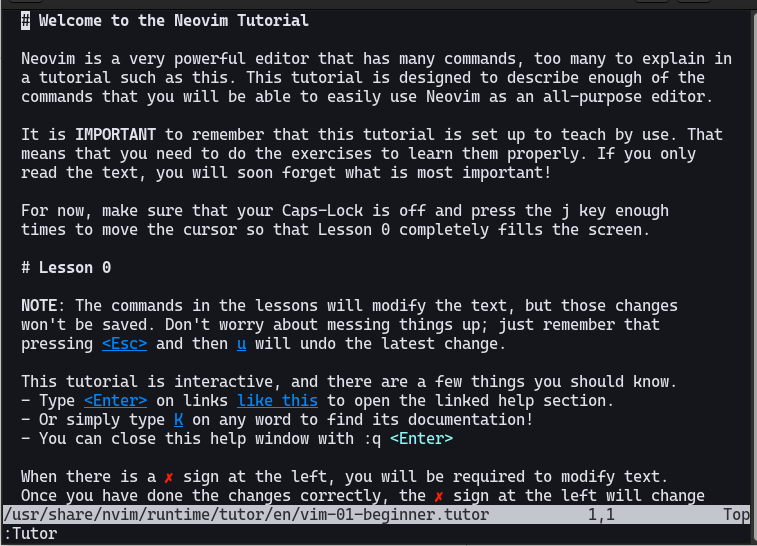
After completing this tutorial (perhaps several times) you will feel the power of vim at the tip of your fingers and hopefully get an understanding of the vast text editing possibilities ahead. This blog post describes just one of many.
Configuration
By now you’re probably starting to master Vim motions and basic commands. Let’s kick it up a notch with a reasonable configuration that leverages neovim plugins and LSP.
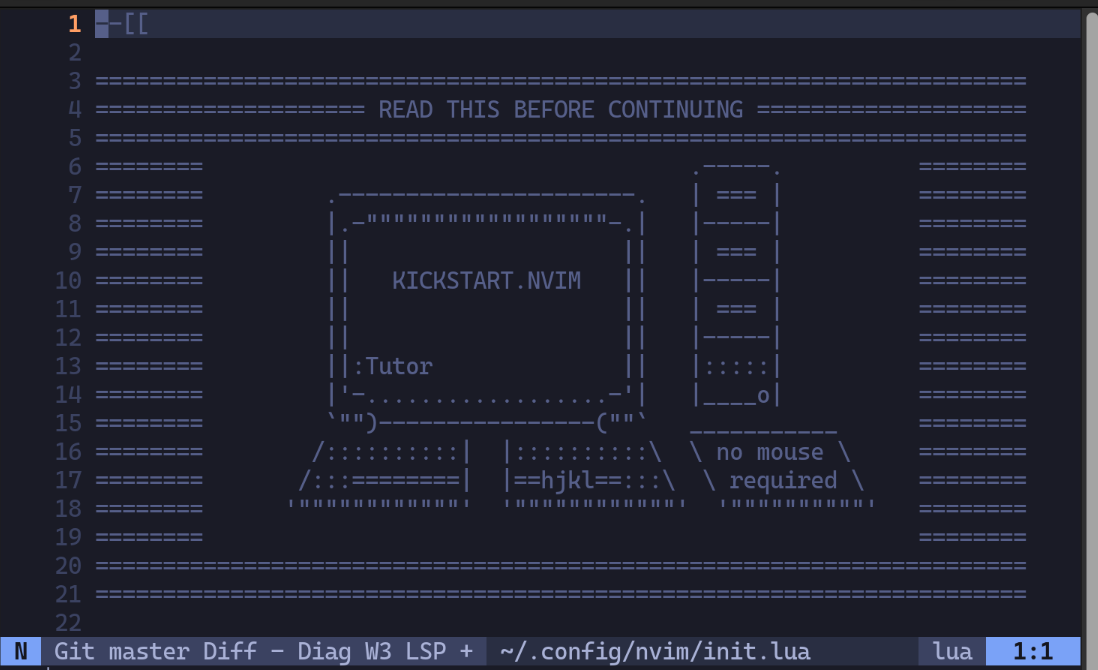
The neovim developers also maintain a “starting point” over which to build your very own neovim configuration: kickstart.nvim. Go through the README to get started.
⚠ Warning: To avoid conflicts with current neovim configurations, feel free to rename your neovim config directory. For example,
$ mv .config/nvim .config/nvim.bak
Now clone the repository
$ git clone https://github.com/nvim-lua/kickstart.nvim.git "${XDG_CONFIG_HOME:-$HOME/.config}"/nvim
Go ahead and start neovim again.
This looks promising! The plugin manager used by this configuration is lazy.nvim. You can check out its status by typing :Lazy<Enter>. Type q when finished.
Now let’s dig into the configuration. Type :e $MYVIMRC<Enter> to start editing your new configuration file.
We see that the neovim configuration is actually a Lua file. Good for you if you’re Lua fluent, if not, you can still achieve great degrees of customisations.
You will also notice that neovim is git aware as it is telling us that we’re currently in the master (!) branch.
💡 Tip: You probably already figured out it is a good idea to branch out of
masterfor several reasons and perhaps set a different remote for your new branch.
$ git checkout -b my_very_own_neovim_config
As suggested, read through the file. I will do the same and point out some interesting points.
MOST IMPORTANTLY, we provide a keymap "<space>sh" to [s]earch the [h]elp documentation,
While pressing <space>sh we see that some help is shown. This is handy, but what is better is that we have the possibility to search other elements such as files, content in files (search grep), current word, etc… Type <space>s to see all the options.
Take some time to understand all the elements of the “plugins” part to comprehend how they enhance neovim.
If you attempt to modify the file (by entering insert mode, as you’ve learned), you will notice that there are some autocomplete features, including snippets. This is in fact our Language Server Protocol feature. By typing :LspInfo<Enter> you’ll see that our file is “attached” to the lua_ls language server. At this point, neovim is almost an IDE.
Go ahead and type :Mason<Enter> to show the Mason pane. Mason will help us install LSP servers, linters, formatters and debug adapters. It is these components that turn neovim into a powerful IDE.
There are plenty of supported languages. You can press Ctrl+f to filter on your preferred ones, including YAML. Move down to yaml-language-server and type i for installation. Once this is done, you can already open your favourite YAML file and start playing with it. If you don’t have one, you can copy, paste ( yank, put 😉) the following example:
# myApp configuration file
thread_count: 2
api_endpoint:
  hostname: localhost
  port: 234
kafka:
  bootstrap_servers:
    - kafka1:1000
    - kafka2:1000
    - kafka3:1000
  topics:
      - topic1
      - topic2
  consumer_group: myApp-prod
Once you save this file as yaml :w myApp-config.yaml, you’ll see already some linting suggestions:
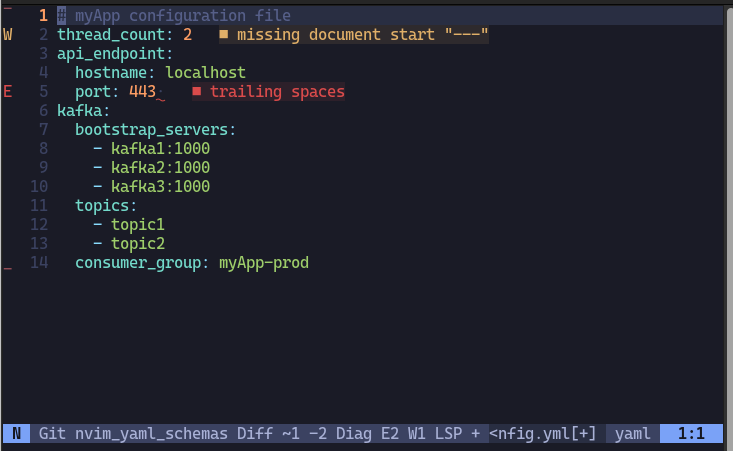
These are non-critical, aesthetic warnings. But we can play around with the yaml to see real critical errors:
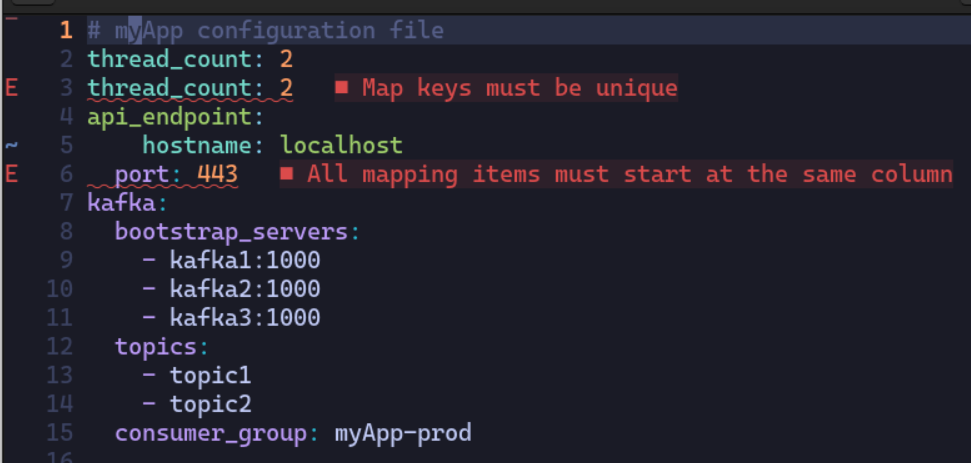
By pressing <Space>q, you can navigate through all the errors and warnings to quickly fix them, hence the name “quickfix list”.
This is already pretty good but we can do even better if we have extra information on the “format” of YAML file we’re working on.
YAML Schemas
A YAML schema provides additional specifications for YAML files. These can be regarding the objects allowed, their types, their accepted values, etc… YAML schemas can be specified in YAML or JSON, but most documentation exists in the JSON format. Below is a reasonable YAML schema for myApp’s config above:
---
title: myApp
description: Schema for configuration of myApp
type: object
required:
  - kafka
  - api_endpoint
additionalProperties: false
properties:
  thread_count:
    type: integer
    description: How many threads to span for the processing
  api_endpoint:
    type: object
    description: The API endpoint for the stats and diagnostics
    required:
      - hostname
      - port
    properties:
      hostname:
        type: string
        description: The hostname to be used by the API endopoint
      port:
        type: integer
        description: The port to be used by the API endopoint
  kafka:
    type: object
    description: Configuration of the Kafka client
    required:
      - bootstrap_servers
      - topics
    additionalProperties: false
    properties:
      bootstrap_servers:
        description: Bootstrap server list for Kafka
        type: array
        minItems: 1
        items:
          type: string
      topics:
        description: Kafka topics to consume from.
        type: array
        minItems: 1
        items:
          type: string
      consumer_group:
        description: Consumer group for myApp's Kafka consumer.
        type: string
As you can see, the schema above is quite self-explanatory. Not only it gives a precise specification of the format of the file, but also additional description of the fields. This will be leveraged by LSP to provide validation, autocomplete, and quick documentation. For a complete description, take a read at json-schema.org.
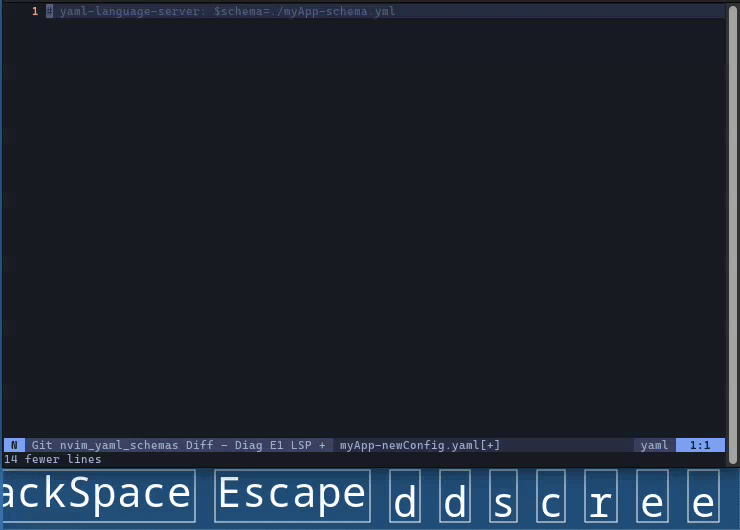
You can save the schema in the same directory as the config file: :w myApp-schema.yaml and create a new config file :e myApp-newConfig.yaml. Now we only need to tell LSP to use the schema above, to do so we add # yaml-language-server: $schema=./myApp-schema.yml to the empty document.
Go ahead and try to write a configuration file from scratch. The following tips might help while in insert mode:
<Ctrl><Space>to trigger autocompletion<Ctrl>pand<Ctrl>nto move to previous and next suggestions.<Ctrl>yto accept suggestions.- Once a particular suggestion is accepted,
<Tab>to navigate between fields.
Notice that the suggestions only include the required fields. For optional ones, you have to trigger their autocompletion with <Ctrl><Space>.
In normal mode, press K to read a documentation on the field your cursor is on.
Here’s my editing experience:
Extra: Kubernetes manifests
If you want yamlls to help you with Kubernetes manifest, add the following lines to the neovim config in the lsp configuration section:
        yamlls = {
          settings = {
            yaml = {
              schemas = {
                ['kubernetes'] = '*.k8s.yaml',
              },
            },
          },
        },
This will use Kubernetes schemas for files matching *.k8s.yaml.
Happy YAML editing and remember to always provide schemas for your app’s config files.
This blog post is licensed under
CC BY-SA 4.0


