Manage Open WebUI users and roles with Keycloak
Jun 12, 2026 by Thibault Debatty | 2636 views
https://cylab.be/blog/510/manage-open-webui-users-and-roles-with-keycloak
In a previous blog post I have presented you how to install and get started with Keycloak for central Identity Management. We can now continue and integrate Keycloak with client applications. In this blog post I will illustrate the process with Open WebUI.
Keycloak
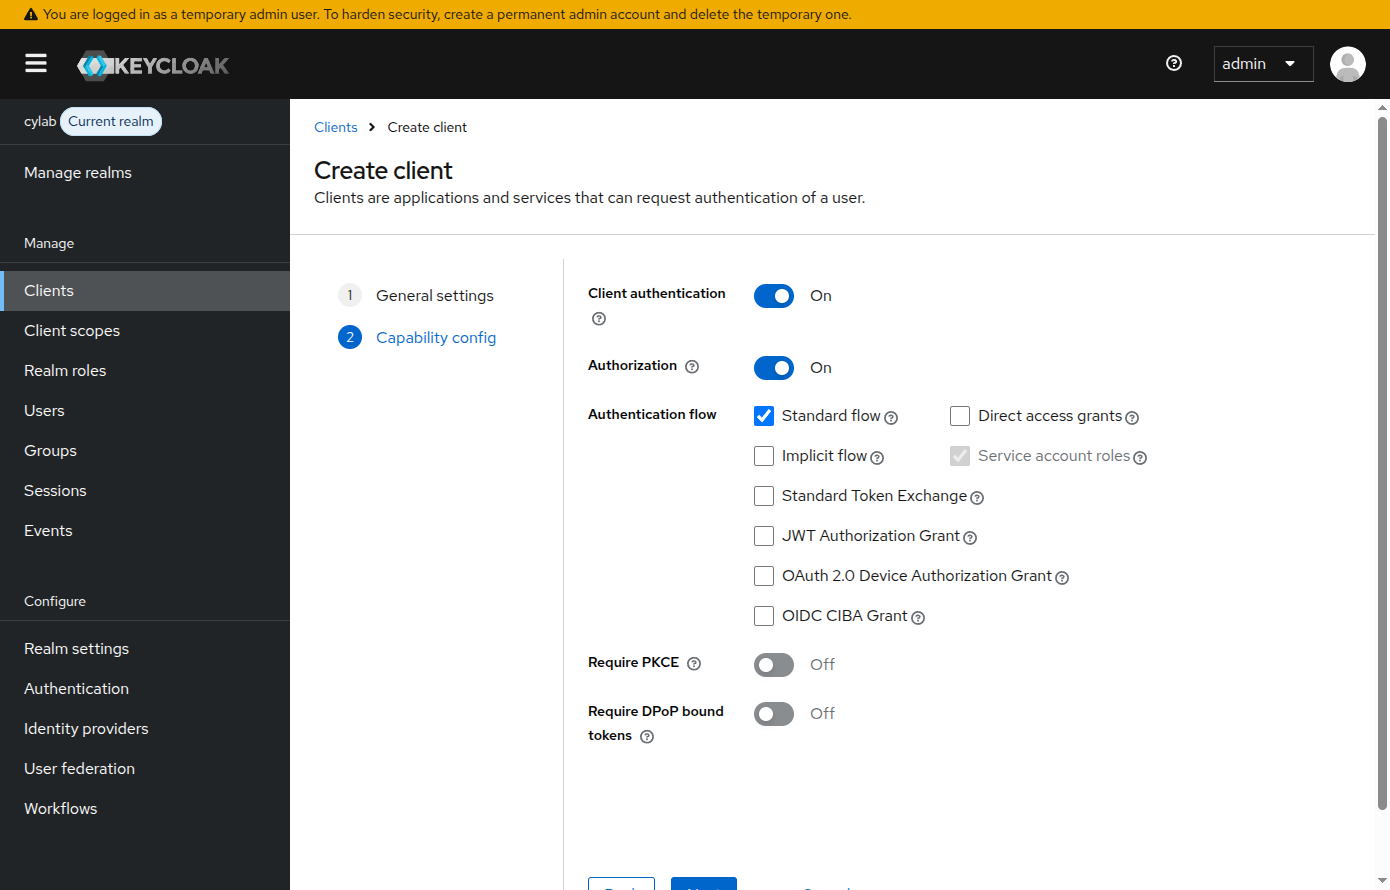
In Keycloak, open the Clients menu and create a client called openwebui. At the second step, make sure that the following options are enabled:
Client authentication: requires the client to provide a secret key;Standard flow: this is the standard way to provide authentication to the client application, and the one supported by Open WebUI.
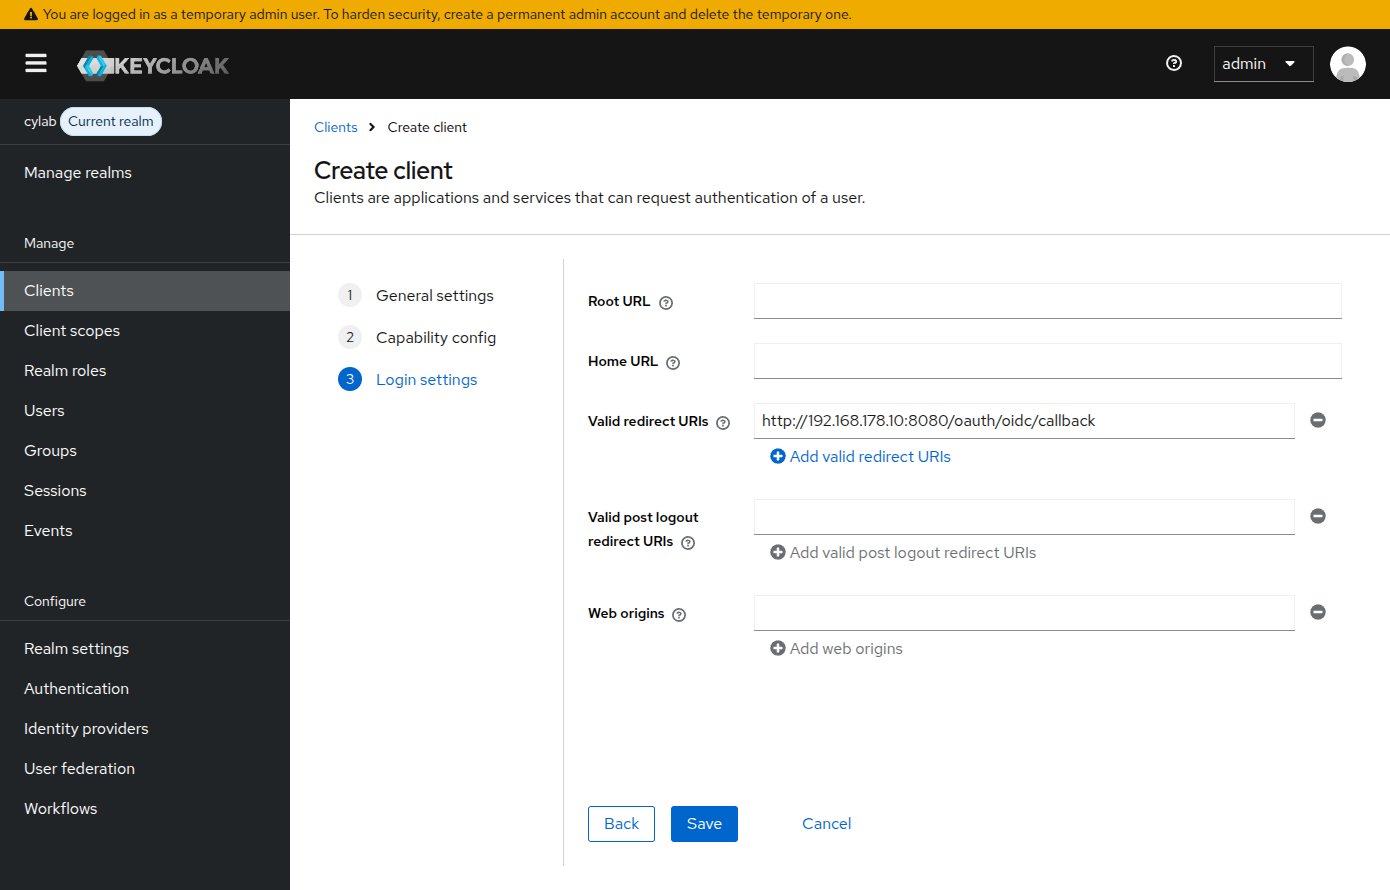
At the second step (Login settings), the field Valid redirect URIs must indicate the address (and port) of your Open WebUI instance, with the path /oauth/oidc/callback. This is where the user browser will be redirected after a successful login.
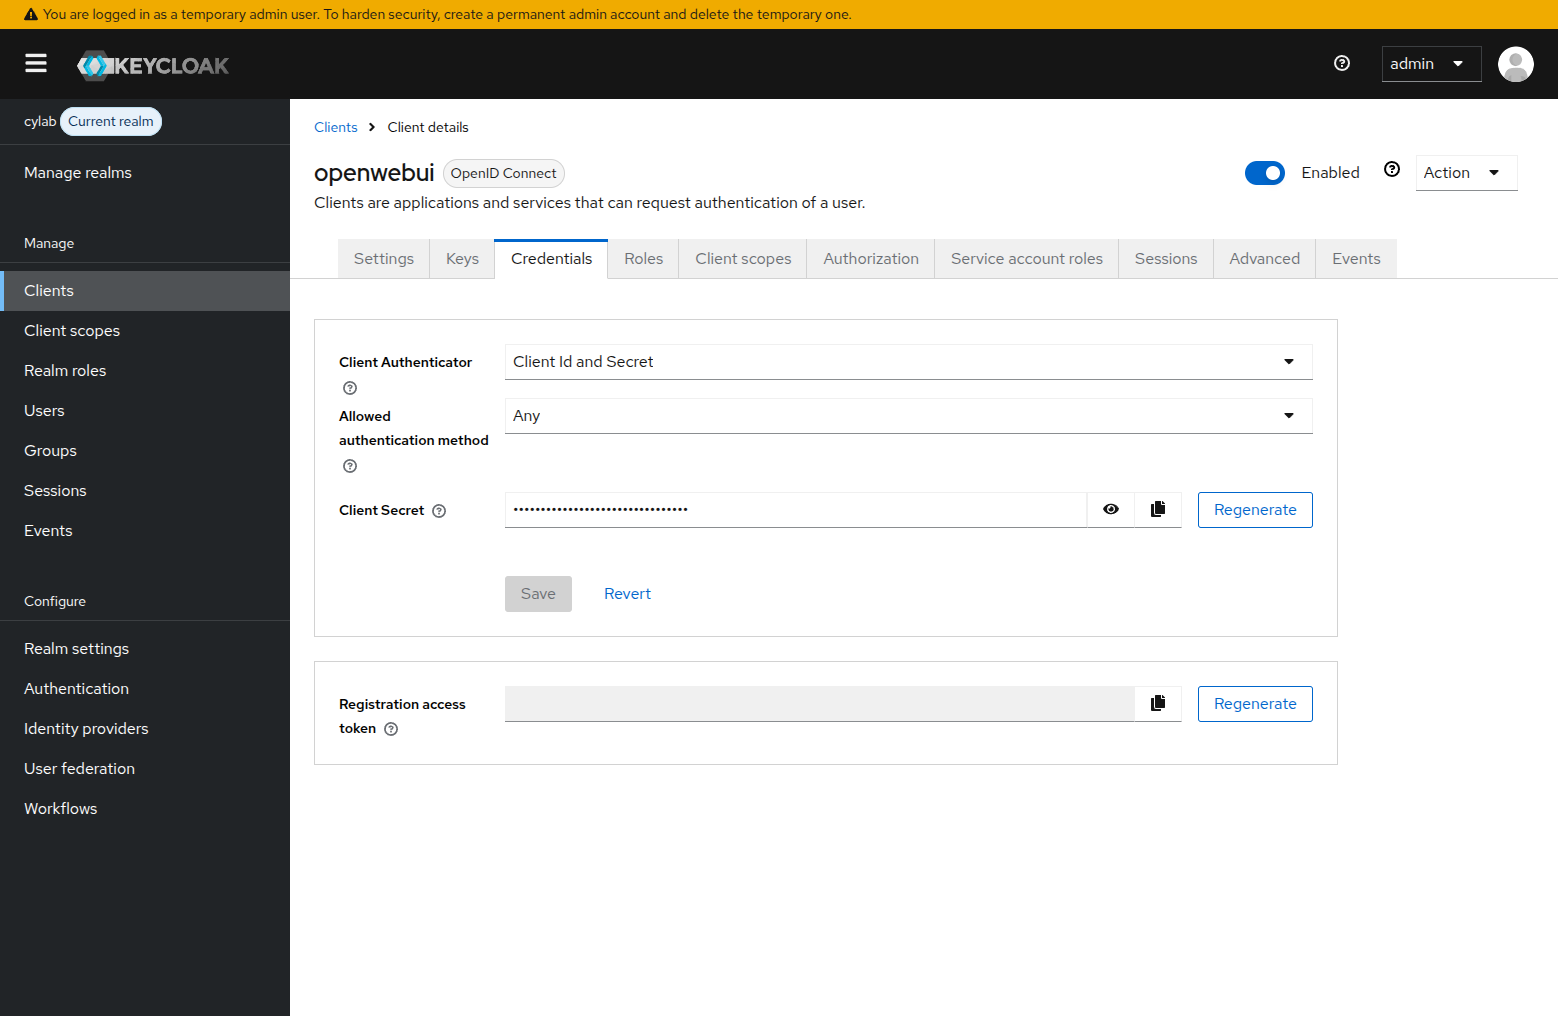
Once the client configuration is created, open the openwebui client, then the Credentials tab, and copy the value of the Client Secret. It will be used by Open WebUI when connecting to Keycloak.
Open WebUI
Now we can head to Open WebUI. I assume you have it already running. In my case I’m using a docker version, with the following docker-composer.yaml:
services:
  open-webui:
    image: ghcr.io/open-webui/open-webui:0.9
    env_file: env.stack
    network_mode: "host"
    volumes:
      - ./data:/app/backend/data
    restart: always
So I can directly change the configuration in env.stack:
#
# Debugging
#
#GLOBAL_LOG_LEVEL=DEBUG


#
# Open WebUI with Keycloak users management
# https://cylab.be/blog/510/open-webui-keycloak
#
# Don't store OAUTH config in database, always read from environment variables
ENABLE_OAUTH_PERSISTENT_CONFIG=false
ENABLE_OAUTH_SIGNUP=true
OPENID_PROVIDER_URL="http://192.168.178.180:8080/realms/cylab/.well-known/openid-configuration"

OAUTH_CLIENT_ID=openwebui
OAUTH_CLIENT_SECRET=Una2uNrxGWQ9vvOmE5MDxxxxxx

# Optional
OAUTH_PROVIDER_NAME="Cylab Keycloak"
In this example, here are the values you should modify:
192.168.178.180:8080is the IP and port of my keycloak instance. I’m running in development mode, so HTTPS is not required. In production this should be https and a valid hostname!cylabis the realm that I created (see the previous blog post)OAUTH_CLIENT_SECRETis the secret key for the openwebui client (which you copied earlier)
.well-known/openid-configuration is a standardized OpenID Connect (OIDC) discovery endpoint defined in the OpenID Connect Discovery 1.0 specification that allows client applications to dynamically retrieve an identity provider’s configuration metadata.
By appending this path to an issuer’s base URL (e.g., https://example.com/.well-known/openid-configuration), clients automatically obtain a JSON document containing essential information such as:
- Authorization and Token Endpoints: URLs required for authentication and token exchange.
- JWKS URI: The location of the provider’s public keys for verifying JWT signatures.
- Supported Features: Lists of allowed grant types, response types, scopes, claims, and cryptographic algorithms.
This mechanism eliminates the need for hardcoding endpoint URLs and keys into applications, ensuring interoperability and resilience against provider changes, such as key rotation or URL updates.
You can now restart the stack to apply the changes:
docker compose down
docker compose up
Now when a user tries to log in, an new option is available to login using Keycloak.
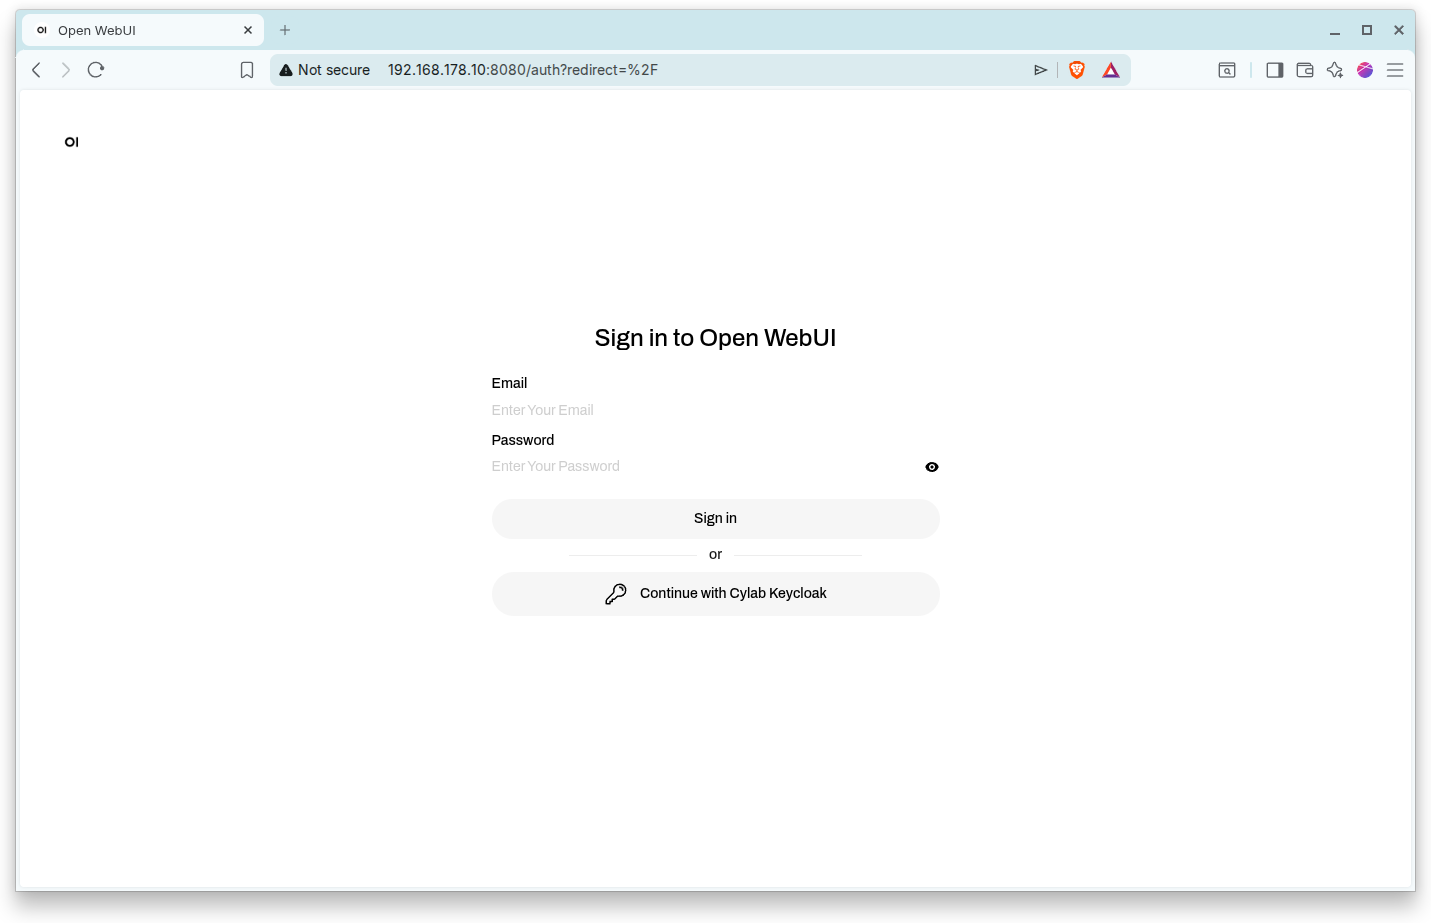
When clicking, the user is redirected to the Keycloak instance.
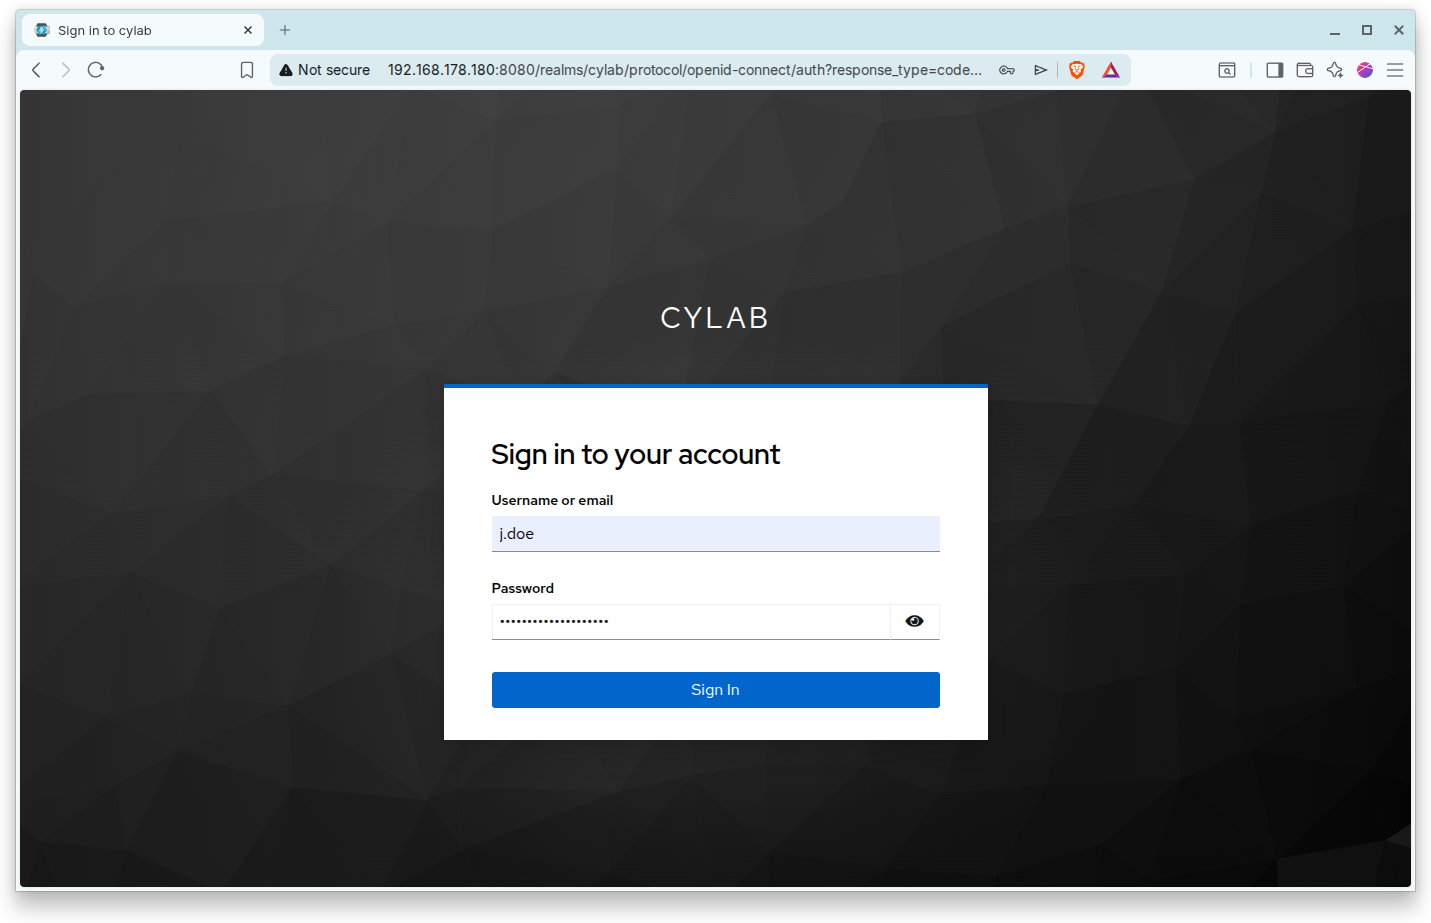
And after successful login, back to Open WebUI.
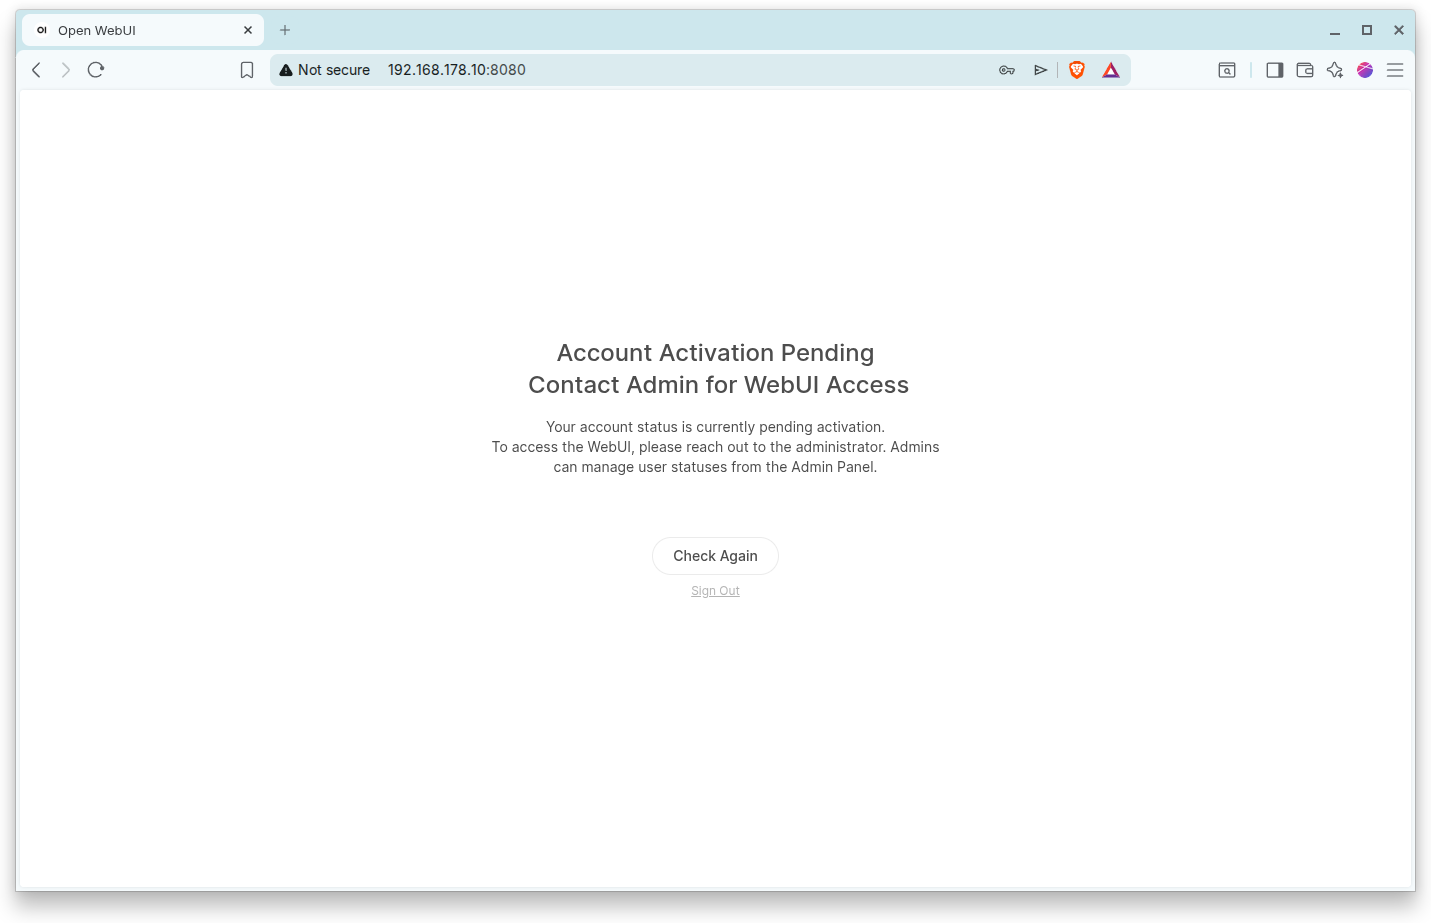
However, by default new Open WebUI users have the status pending, which means the Administrator still has to manually assign a role… To fix this, there are 2 possibilities:
- Change the default role in Open WebUI to
useror - Use Keykcloak to manage Open WebUI roles.
Setting a default role
To change the default role in Open WebUI, login as an administrator, then open the Administration settings, and go the the General section. Here you can change the default user role from pending to user
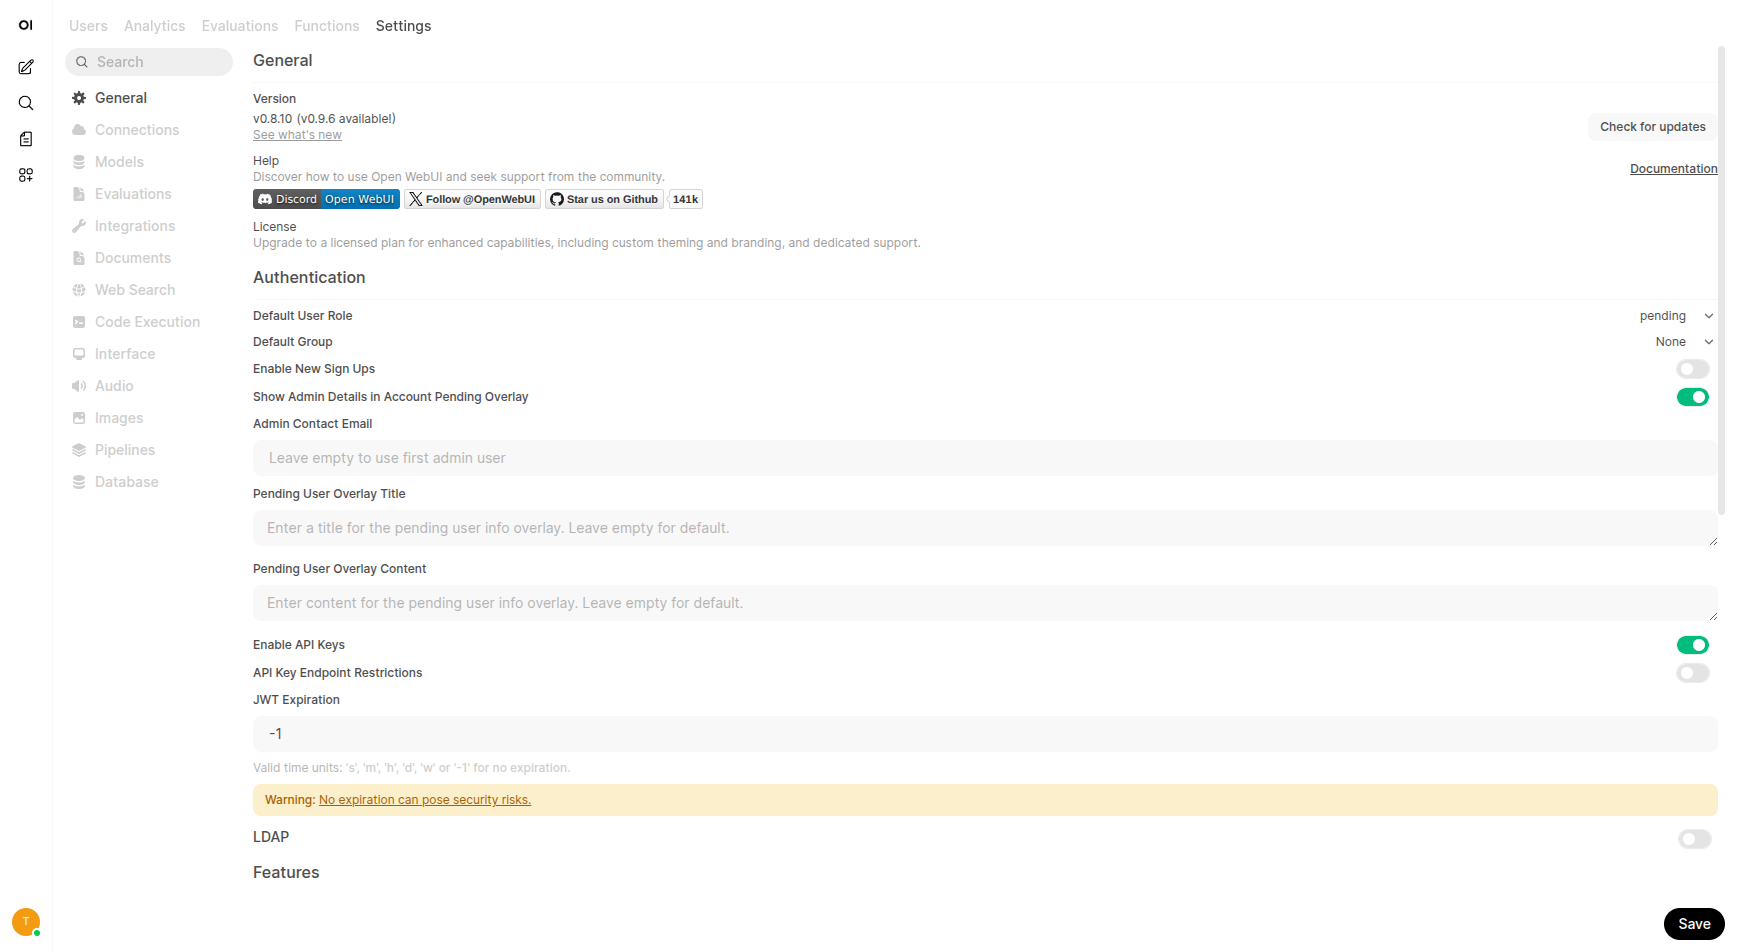
You could also set the environment variable DEFAULT_USER_ROLE=user for this purpose, but this may not work as expected…
Open WebUI utilizes a hybrid configuration system where environment variables serve as the initial source of truth, but PersistentConfig variables stored in the database take precedence on subsequent restarts. This means that once you modify a setting via the Admin Panel, that value is saved to the database and will override any corresponding environment variable.
Open WebUI roles management with Keycloak
The other solution is to manage Open WebUI roles directly from Keycloak.
Keycloak : Client role
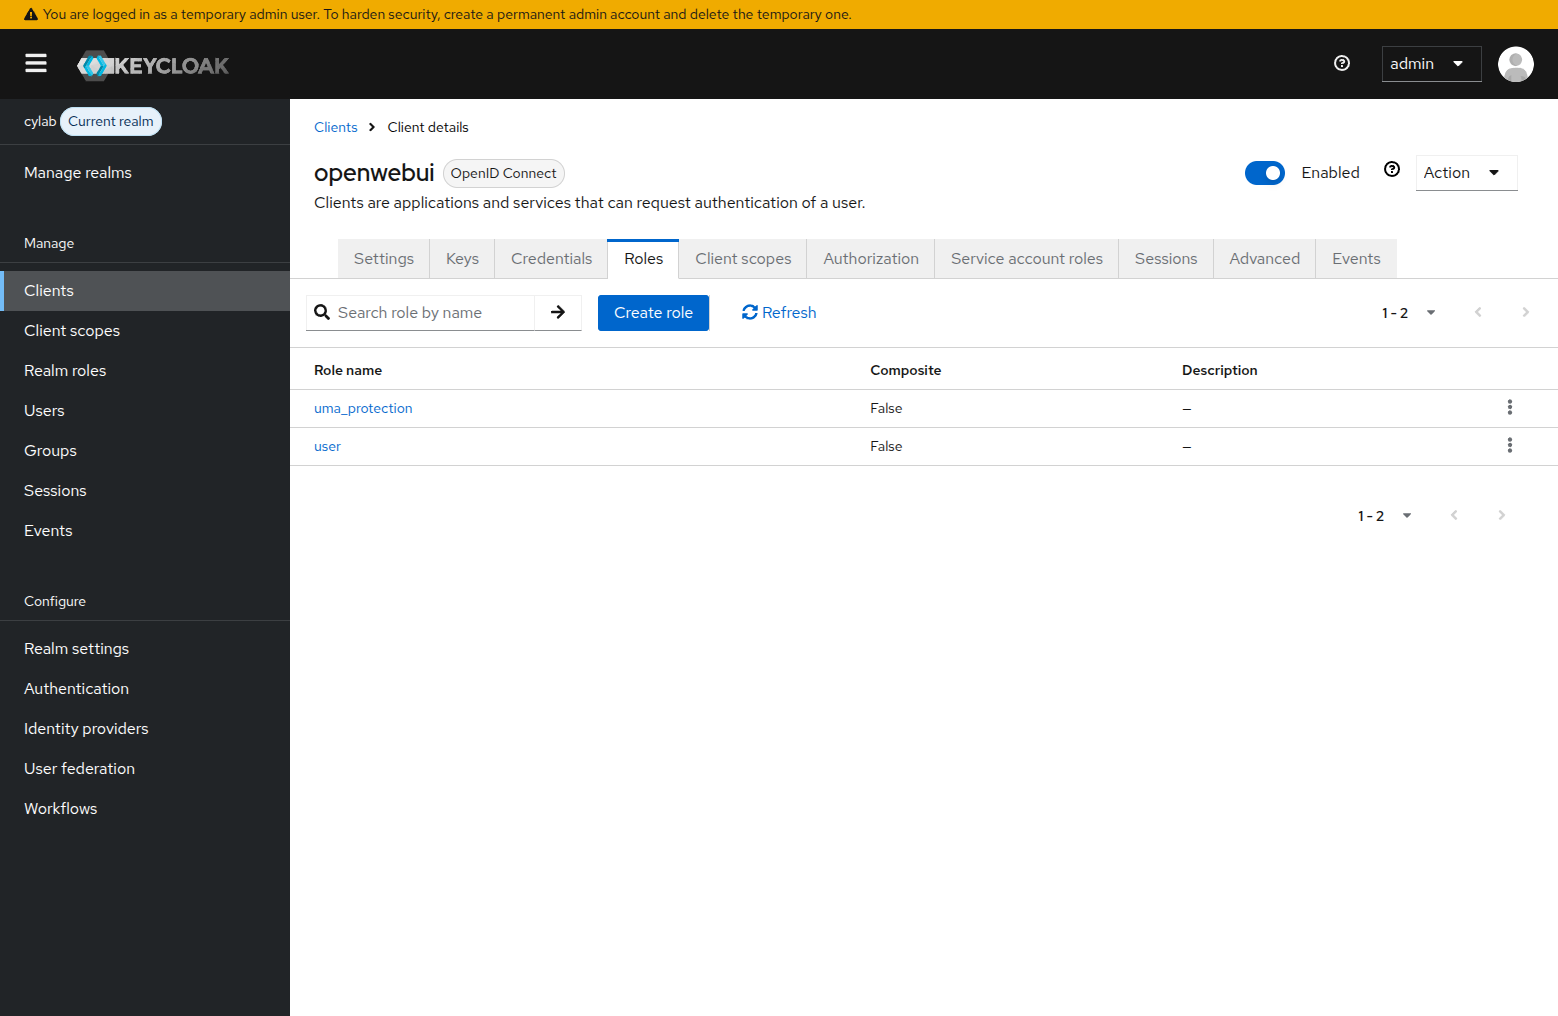
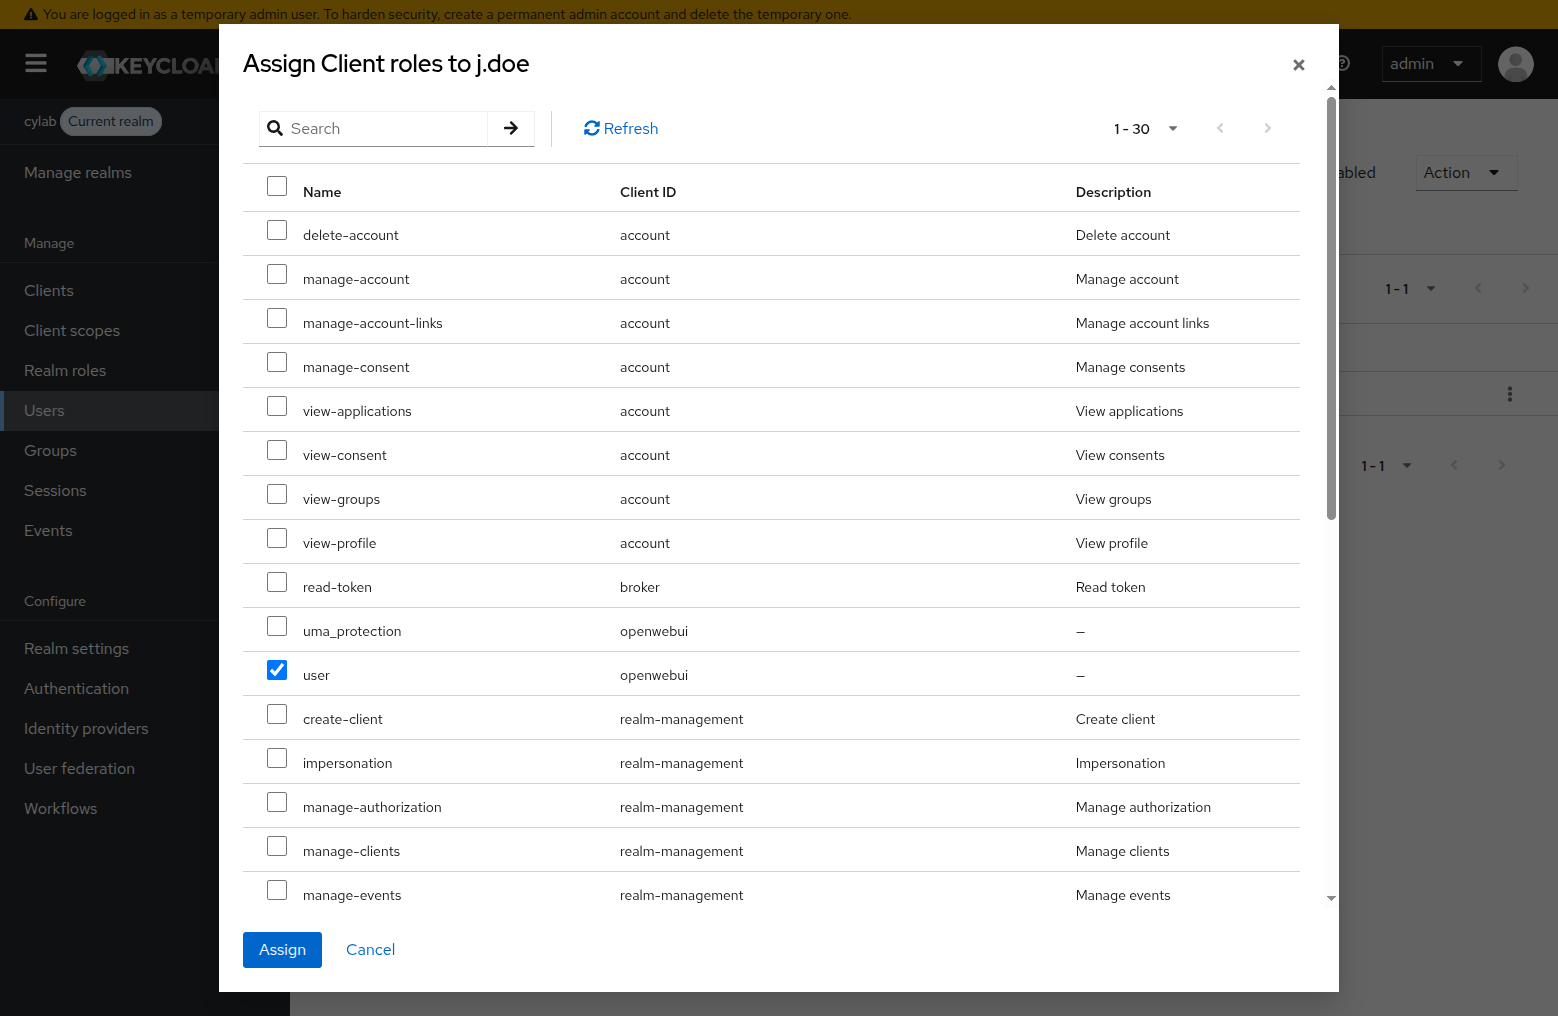
First, in Keycloak, open the openwebui client, then the Roles tab and create a new role called user.
Open the user Jane Doe and add the role User for the application Open WebUI
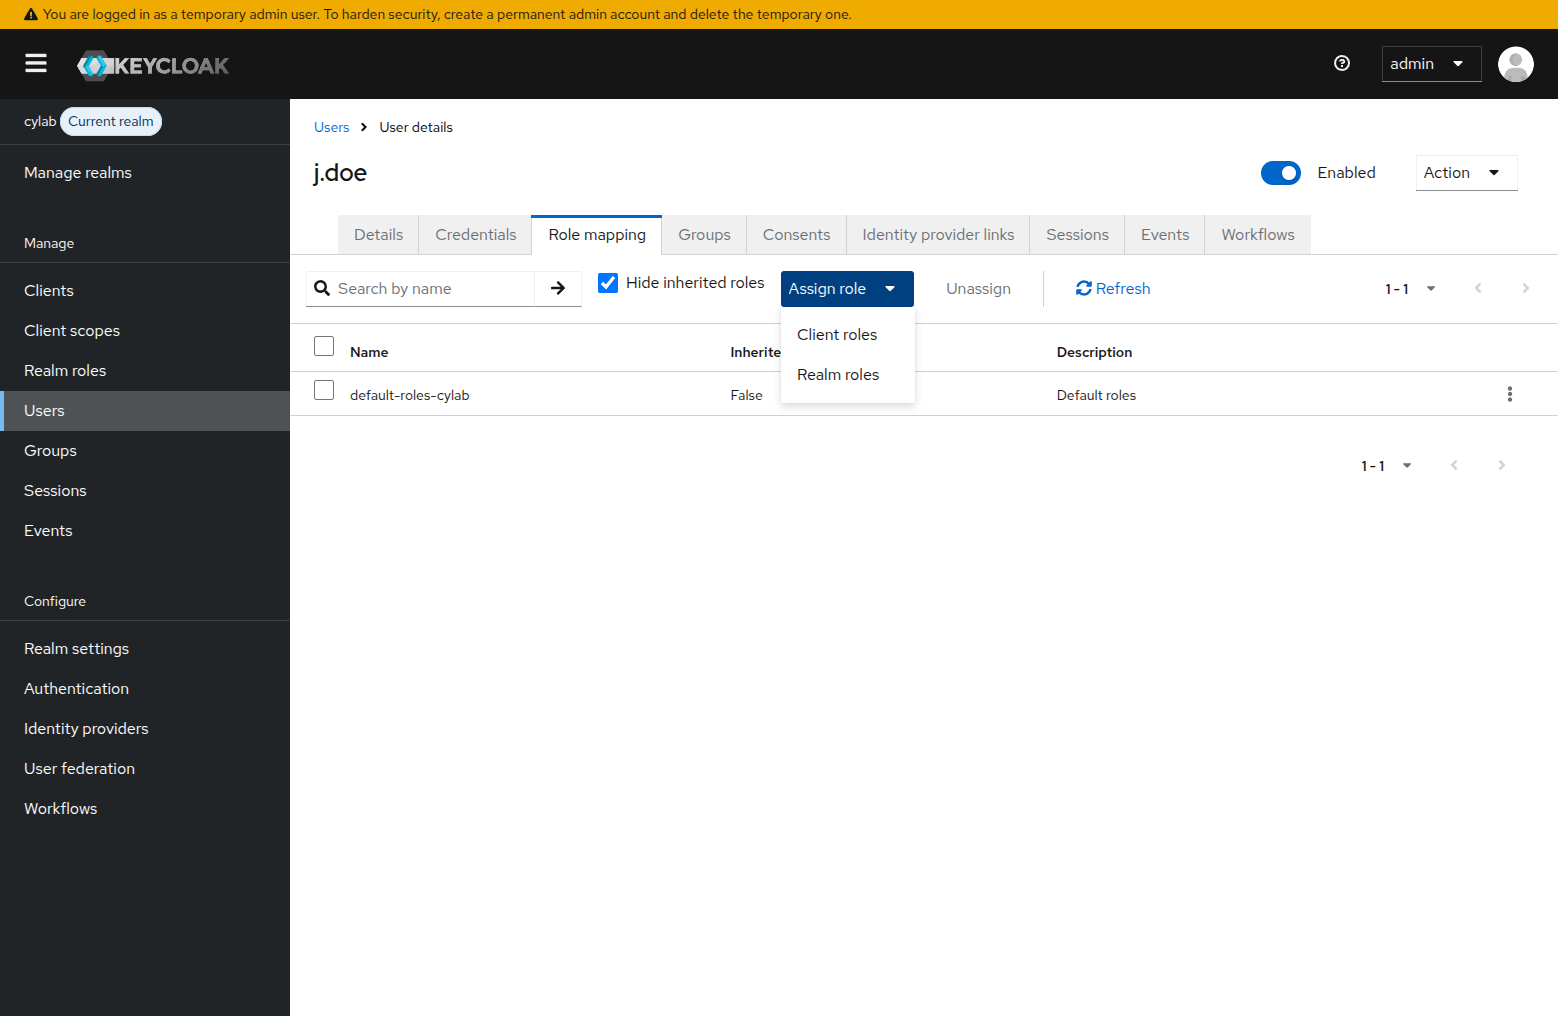
⚠ When managing multiple users and client applications, you should use groups instead of directly assigning roles to users…
Keycloak : Role mapping
By default Keycloak will append roles to the access tokens, while Open WebUI will check roles in the ID token, so we must add a custom mapper.
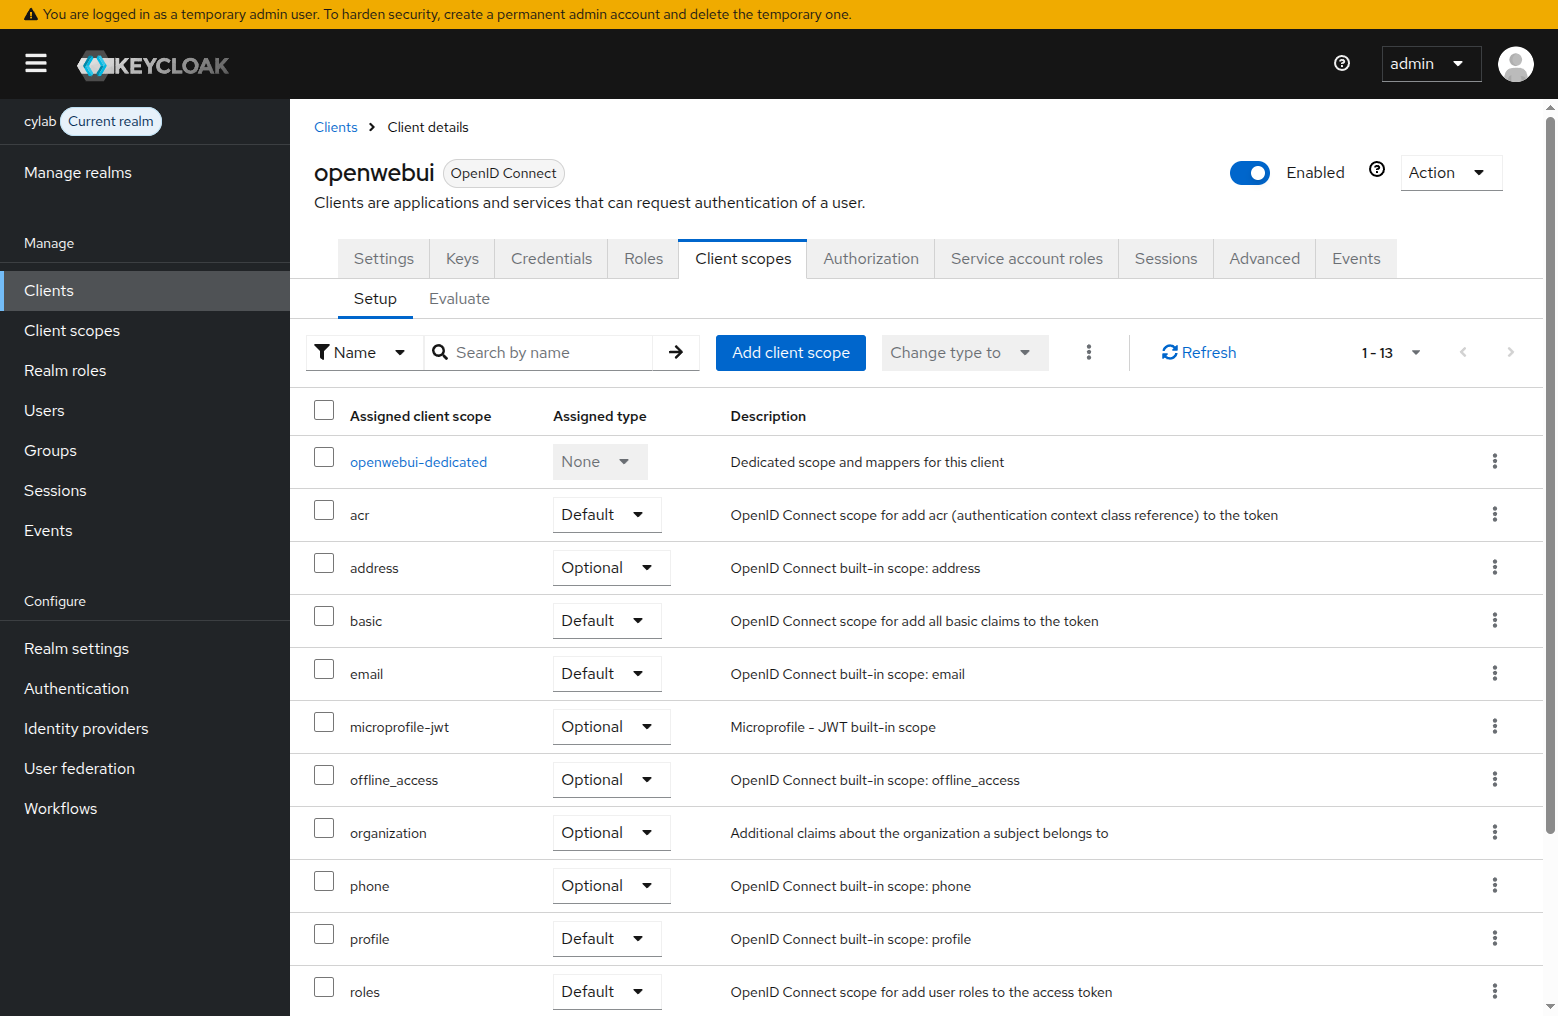
Open the client openwebui, then the tab Client scopes and click on the dedicated scope (openwebui-dedicated).
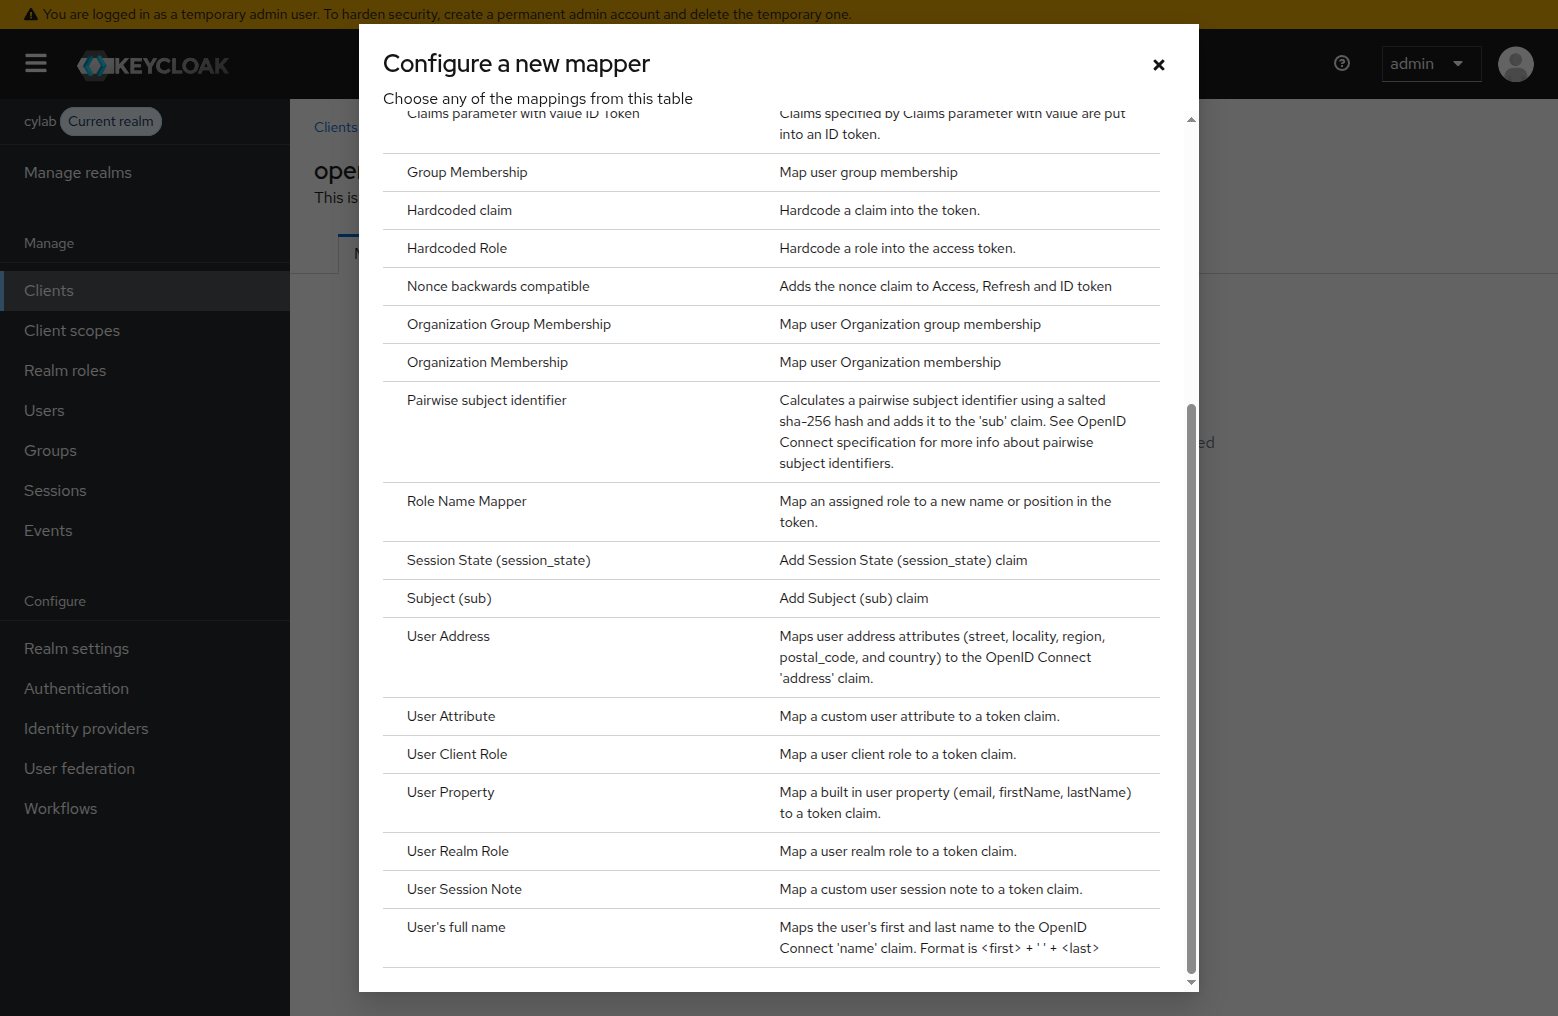
In the Mappers tab click on Create a new mapper and in the list, select User Client Role
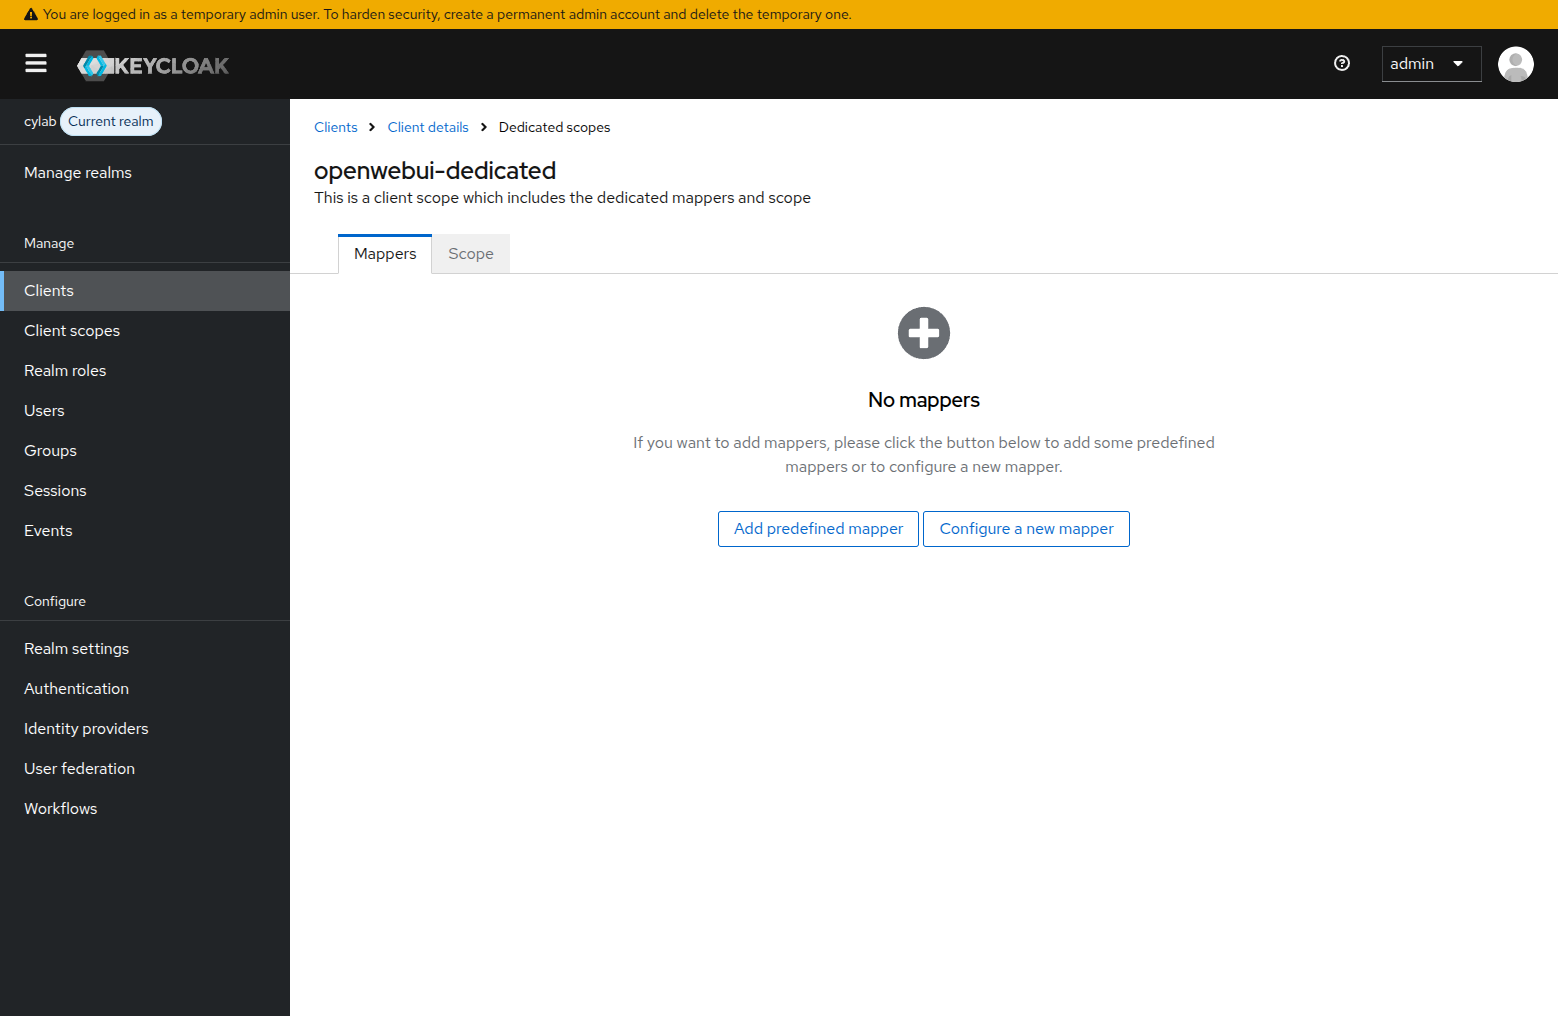
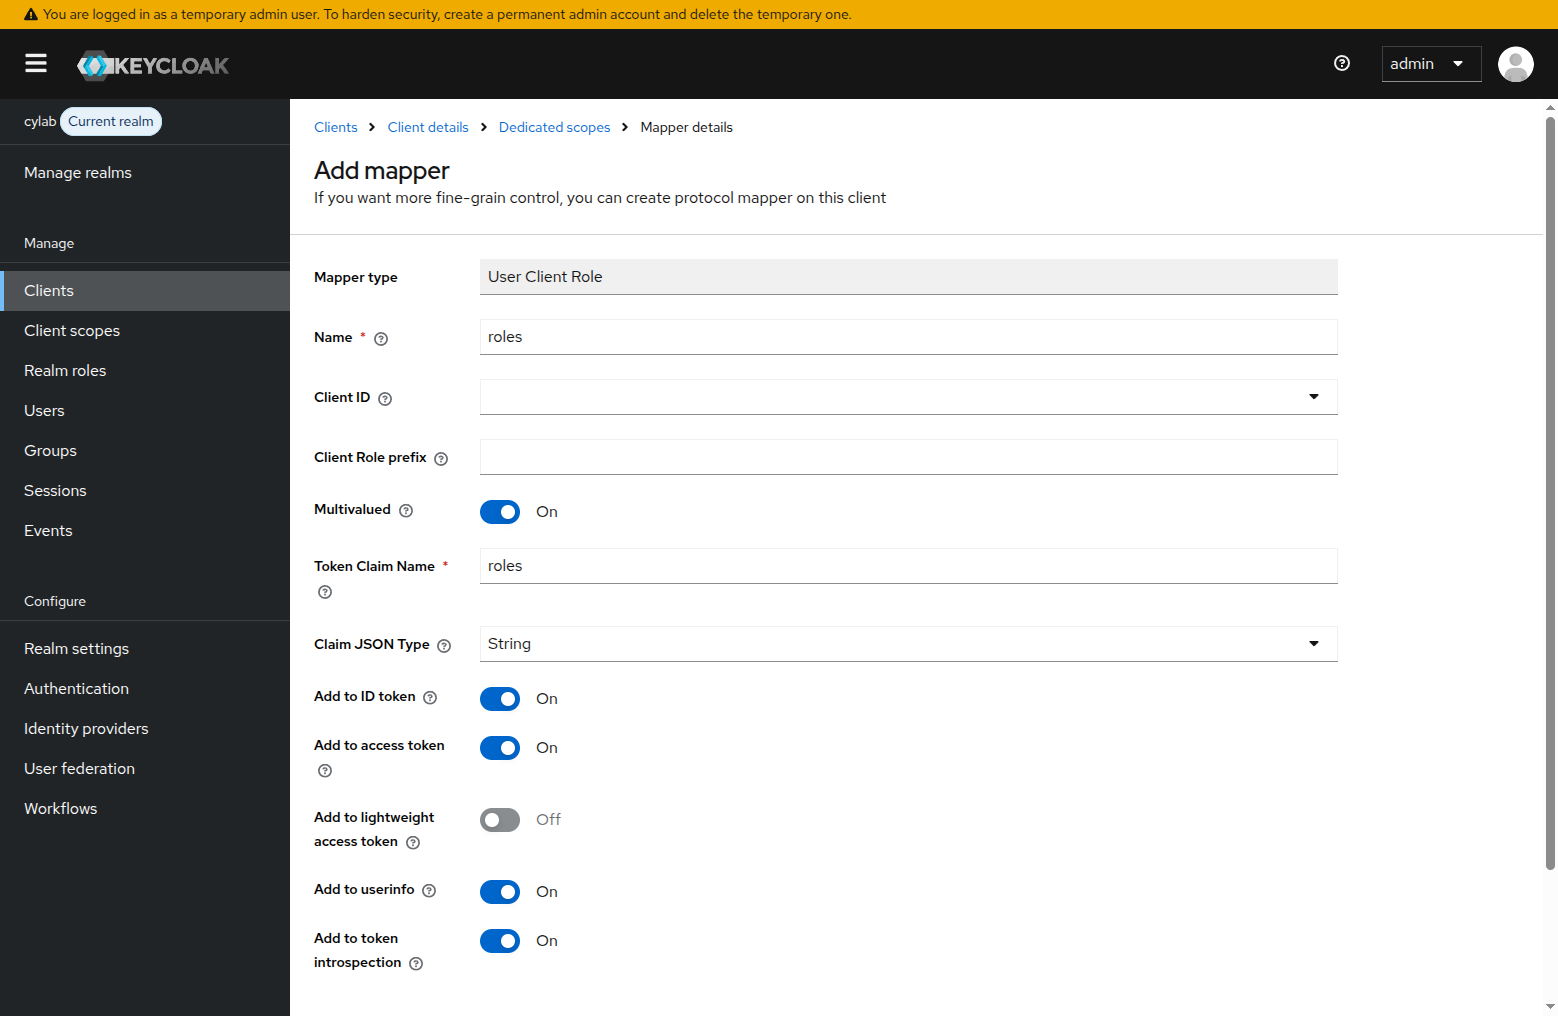
Assign the following values and save:
- Name :
roles - Token Claim Name:
roles - Make sure that
Add to access tokenis enabled
Open WebUI
Now we can update the configuration of Open WebUI, in env.stack for example, to enable role management:
# Roles management
# https://docs.openwebui.com/features/authentication-access/auth/sso#oauth-role-management
ENABLE_OAUTH_ROLE_MANAGEMENT=true

# The claim that contains the roles. Defaults to roles. Can also be nested, for example user.roles
OAUTH_ROLES_CLAIM=roles

# A comma-separated list of roles that are allowed to log in (receive open webui role user). Use * as a wildcard to allow any role.
OAUTH_ALLOWED_ROLES=user
OAUTH_ADMIN_ROLES=admin
And restart the stack to apply the changes:
docker compose down
docker compose up
Now when a new user tries to connect, it will directly be assigned the appropriate role (user or admin).
Debugging tokens
When running in dev mode, traffic between Keycloak and Open WebUI is unencrypted http, so you can debug using Wireshark to capture traffic, and use the filter http.request.uri contains "token" to find the request sent by Open WebUI to Keycloak to get user information.
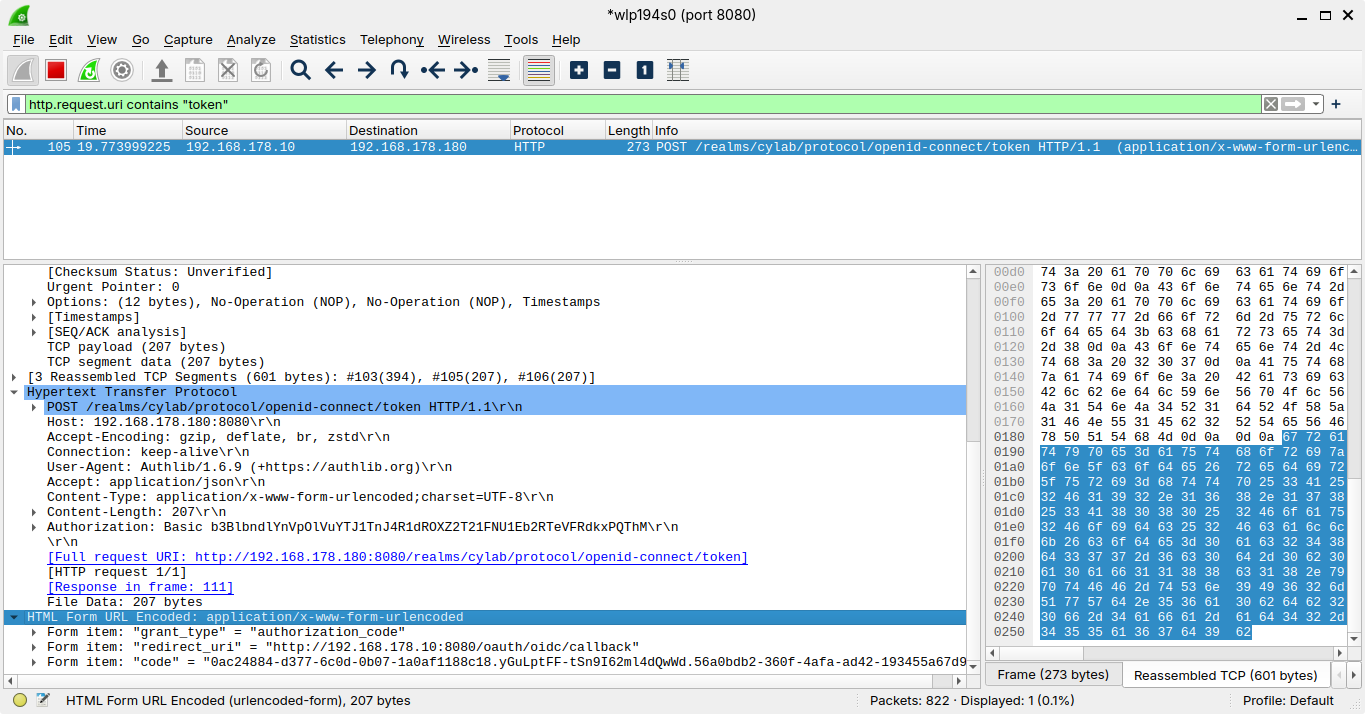
Then use the contextual menu Follow > TCP Stream to get the response from Keycloak.

The response is a JSON object that contains, a.o. the access token.
The access token is itself JSON Web Token (JWT), a JSON object with a signature.
https://en.wikipedia.org/wiki/JSON_Web_Token
You can then use an app like token.dev to decode the the token.

This blog post is licensed under
CC BY-SA 4.0


