Continuous Deployment with GitLab and Kubernetes
Dec 17, 2020 by Thibault Debatty | 12467 views
https://cylab.be/blog/112/continuous-deployment-with-gitlab-and-kubernetes
If you have a web application, with the appropriate Dockerfile, you can now go the next step and use GitLab to automatically deploy your application to a kubernetes cluster. Here is how…
For this blog post, you’ll need:
- your source code and Dockerfile hosted in a GitLab project
- a GitLab runner with a docker-in-docker executor
- access to a kubernetes cluster
The process actually consists of 2 steps:
- build the Docker image and push to GitLab’s built-in Docker registry
- use kubectl apply to deploy the new version
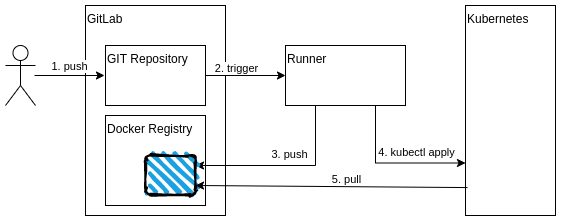
1. Build
If your Dockerfile is ready, building the image is simply a matter of running docker build ... and docker push .... However, there are a few more tricks:
- we will use push to GitLab’s built-in Docker registry;
- we will use GitLab’s predefined environment variables to get the appropriate login, password, image name etc.;
- we need docker-in-docker runner, image and service.
So your .gitlab-ci.yml should look like this:
stages:
  - test
  - build
  - deploy

build:
  stage: build
  # this job requires docker-in-docker
  tags:
    - dind
  image: docker:19.03.12
  services:
    - docker:19.03.12-dind
  before_script:
    - docker login -u $CI_REGISTRY_USER -p $CI_REGISTRY_PASSWORD $CI_REGISTRY
  script:
    - docker build --tag $CI_REGISTRY_IMAGE:$CI_COMMIT_SHORT_SHA --tag $CI_REGISTRY_IMAGE:latest .
    - docker push $CI_REGISTRY_IMAGE:$CI_COMMIT_SHORT_SHA
    - docker push $CI_REGISTRY_IMAGE:latest
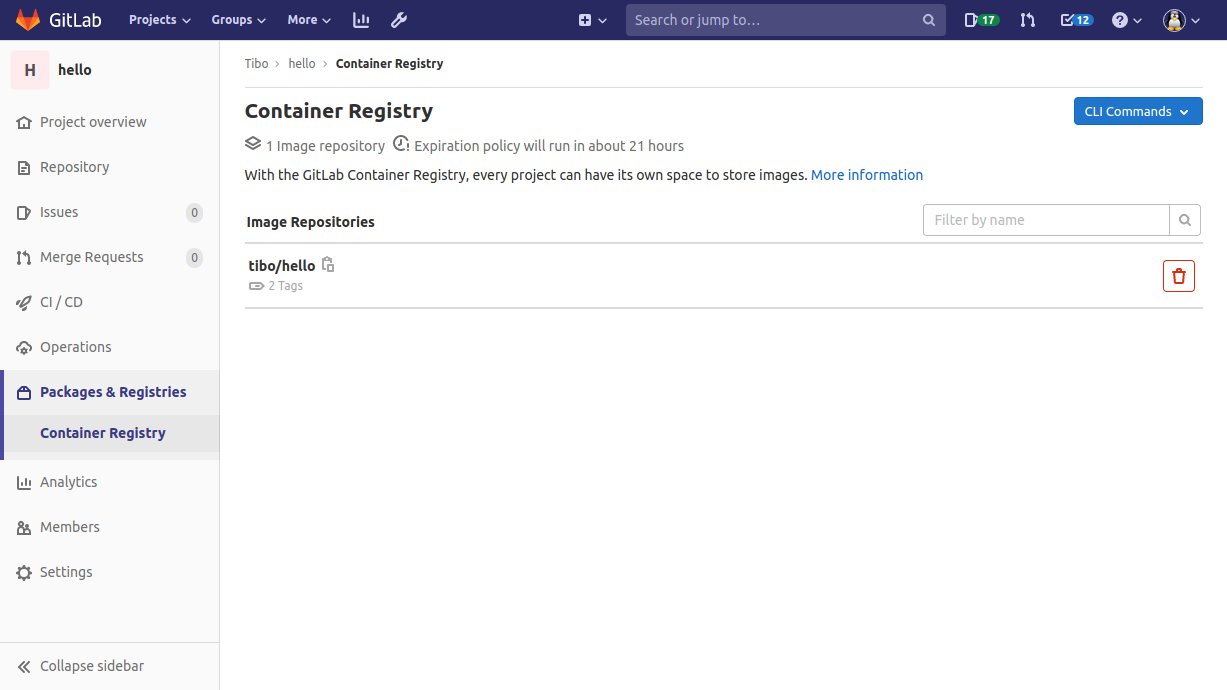
Once the Build stage is completed, your image should appear in GitLab’s container registry:
2. Deploy
To perform the deploy, we have to add a deploy job that
- creates the appropriate deploy.yml
- starts the deployment:
kubectl apply -f deploy.yml
But first, we must ensure that:
- the GitLab runner is able to access the kubernetes cluster
- the kubernetes cluster is allowed to pull the image from our private GitLab registry
a. GitLab access to kubernetes
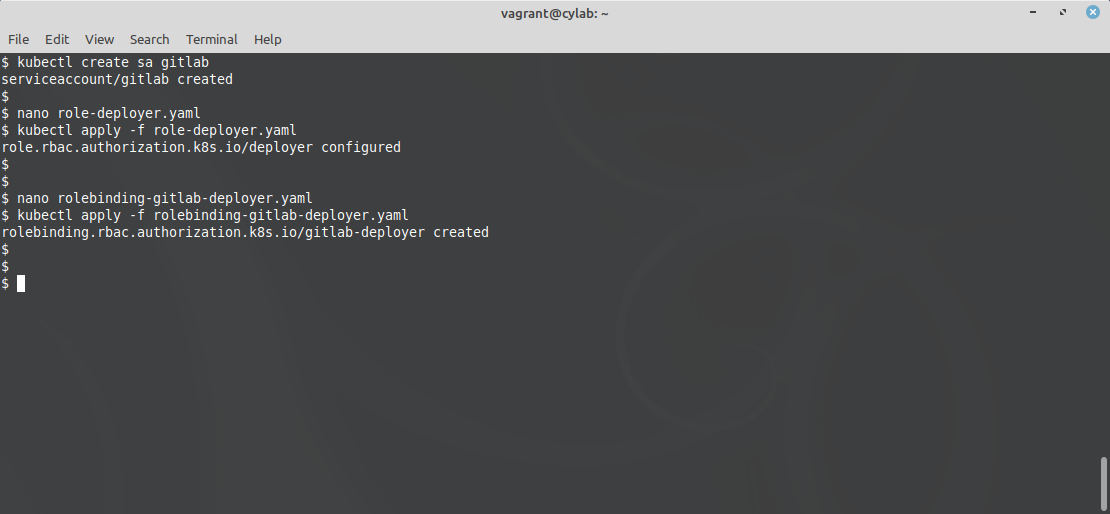
To give GitLab access to your kubernetes cluster, use kubectl to create a Service Account (SA):
kubectl create sa gitlab
This account is currently allowed to login, but it has absolutely no other rights. This is pretty useless! So we must define a role, for example in a file called role-deployer.yaml:
kind: Role
apiVersion: rbac.authorization.k8s.io/v1
metadata:
  namespace: default
  name: deployer
rules:
- apiGroups: ["", "extensions", "apps"]
  resources: ["services", "deployments", "replicasets", "pods", "configmap"]
  verbs: ["*"]
In this example, the role is called deployer and is defined in the default namespace. You should obviously adapt to your setup.
To apply this configuration:
kubectl apply -f role-deployer.yaml
Now we have to bind this role to our gitlab account, using another file called rolebinding-gitlab-deployer.yaml:
kind: RoleBinding
apiVersion: rbac.authorization.k8s.io/v1
metadata:
  name: gitlab-deployer
  namespace: default
subjects:
- kind: User
  name: system:serviceaccount:default:gitlab
  apiGroup: ""
roleRef:
  kind: Role
  name: deployer
  apiGroup: ""
And once again we apply the configuration:
kubectl apply -f rolebinding-gitlab-deployer.yaml
Now we have to extract the token that kubernetes created for the gitlab account:
kubectl get sa gitlab -o yaml
kubectl get secret gitlab-token-??? -o yaml | grep token:

Finally, in GitLab, we define 2 variables in Settings > CI / CD / Variables:
K8S_TOKENwith the token that we just extractedK8S_SERVERwith the address of the kubernetes API server (https://kube.example.com:6443)

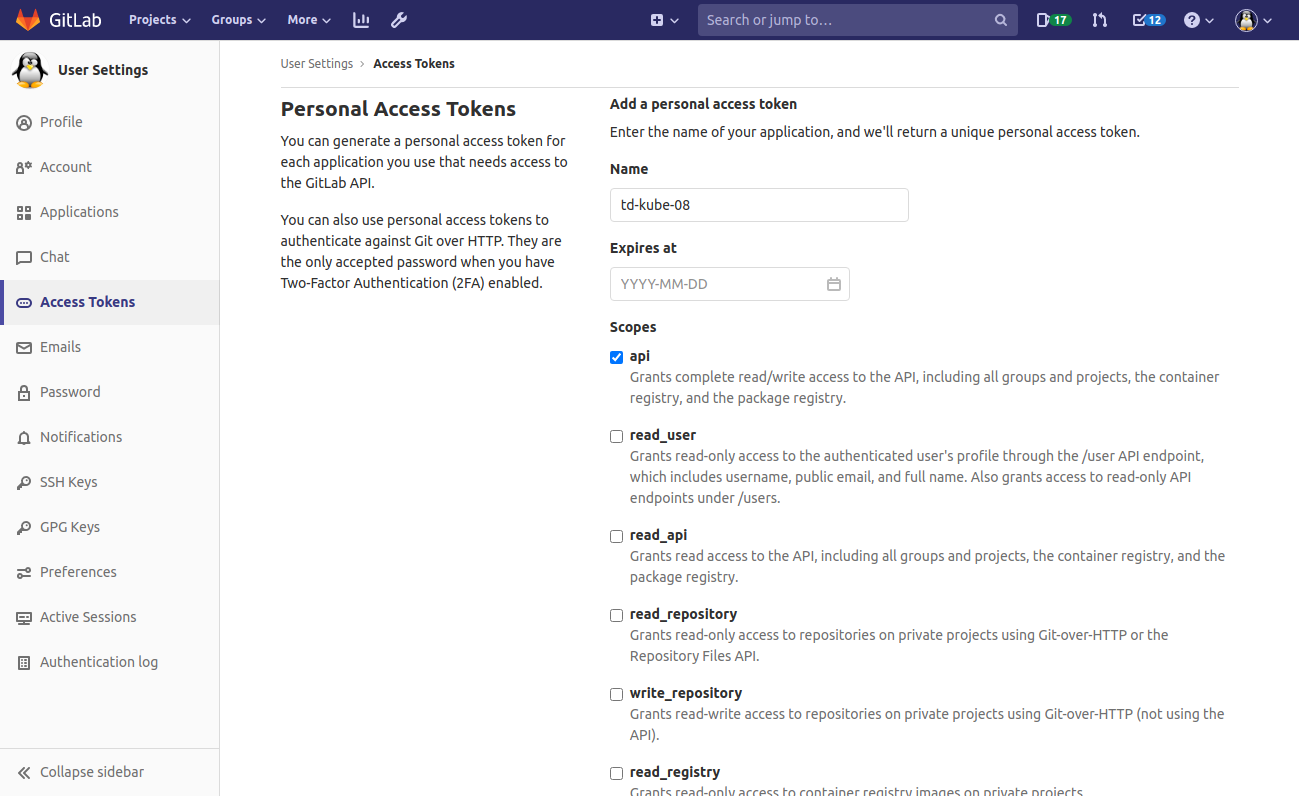
b. Kubernetes access to GitLab
To allow access from Kubernetes to the GitLab registry, navigate to Personal menu > Settings > Access Tokens and create a Personnal Access Token with the scope api.
Then, back on kubernetes, use kubectl to create a PullSecret called gitlab-token:
kubectl create secret docker-registry gitlab-token
  --docker-server=<gitlab.server:port>
  --docker-username=<gitlab-token-name>
  --docker-password=<gitlab-token>
c. deploy job
We can add the deploy job to .gitlab-ci.yml:
deploy:
  stage: deploy
  image: cylab/kubectl
  before_script:
    # create the configuration (context) for our kubernetes cluster
    - kubectl config set-cluster deploy-cluster --server="$K8S_SERVER" --insecure-skip-tls-verify
    - kubectl config set-credentials gitlab --token=$(echo $K8S_TOKEN | base64 -d)
    - kubectl config set-context deploy-cluster --cluster=deploy-cluster --namespace=default --user=gitlab
    - kubectl config use-context deploy-cluster
  script:
    - envsubst < deploy.tmpl > deploy.yaml
    - kubectl apply -f deploy.yaml
As you can see:
- the
before_scriptsection uses the variables$K8S_SERVERand$K8S_TOKENto create the appropriate kubectl context - the
scriptsection usesenvsubstcommand anddeploy.tmpltemplate to create the appropriatedeploy.yaml
Here is an example of deploy.tmpl that you should obviously tune for your application. It contains a single container and 4 replicas, it uses the gitlab-token PullSecret, and it has a NodePort service to expose the app:
apiVersion: v1
kind: Service
metadata:
  name: hello-svc
spec:
  type: NodePort
  ports:
  - port: 80
    nodePort: 30001
    protocol: TCP
  selector:
    app: hello-app

---
apiVersion: apps/v1
kind: Deployment
metadata:
  name: hello-deploy
spec:
  replicas: 4
  selector:
    matchLabels:
      app: hello-app
  minReadySeconds: 10
  strategy:
    type: RollingUpdate
    rollingUpdate:
      maxUnavailable: 0
      maxSurge: 1
  template:
    metadata:
      labels:
        app: hello-app
    spec:
      containers:
      - name: hello-pod
        image: $CI_REGISTRY_IMAGE:$CI_COMMIT_SHORT_SHA
        ports:
        - containerPort: 80
      imagePullSecrets:
      - name: gitlab-token
Finally
If all goes well, at the next push to your GitLab repository:
- the new Docker image will be built;
- the kubernetes Deployment will be updated to use to the new Docker image;
- kubernetes will create and update the required ReplicaSets;
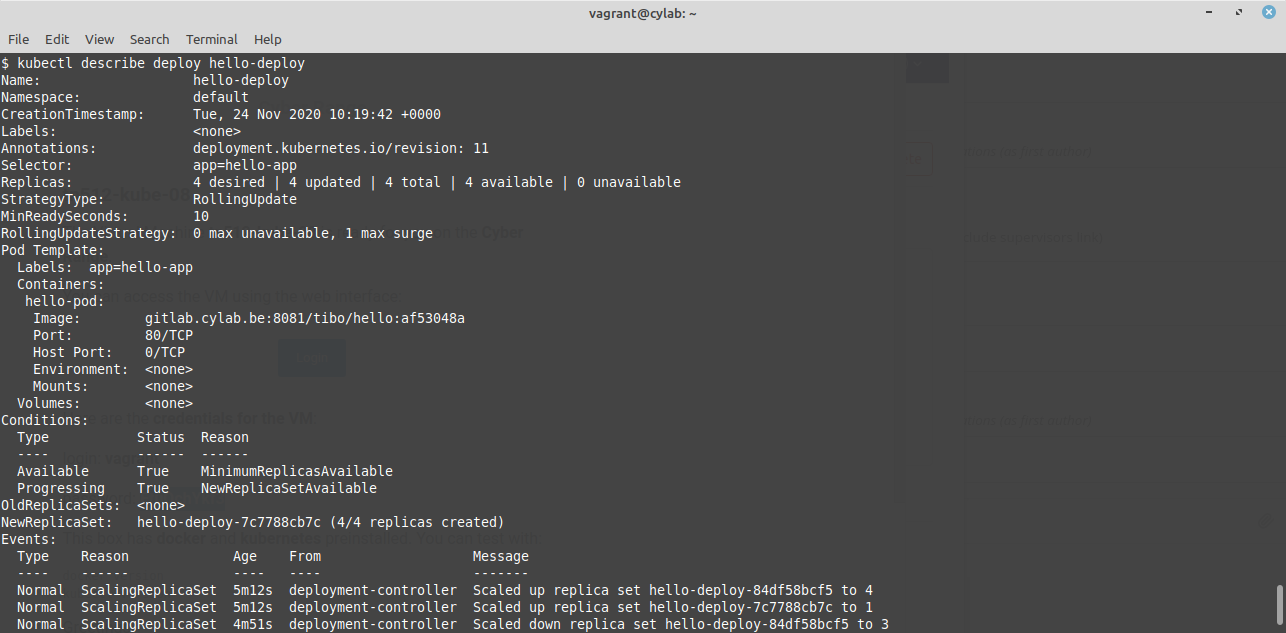
- the new Docker image will be pulled;
- the new version of your app will appear online!

This blog post is licensed under
CC BY-SA 4.0


