Simplify CI/CD pipelines with GitLab components
Jun 20, 2025 by Thibault Debatty | 11614 views
https://cylab.be/blog/423/simplify-cicd-pipelines-with-gitlab-components
When working with complex CI/CD pipelines, it’s easy to get bogged down in repetitive and time-consuming tasks. One way to streamline your pipeline definitions is by using GitLab components. These reusable snippets allow you to break down long job definitions into smaller, more manageable pieces that can be easily shared and reused across your projects.

In this blog post, we’ll explore how to use GitLab components to simplify your CI/CD pipelines. We’ll cover how to create and use components, as well as how to make them available in the GitLab CI/CD catalog.
Using components
Components allow to replace long job definitions by reusable snippets.
You can use them by adding an include statement in you .gitlab-ci.yml. For each component you must specify the full name and version, and the input values. For example:
include:
  - component: $CI_SERVER_FQDN/components/docker/build-and-push@1.0.0
    inputs:
      stage: build
      docker_image: cylab/hello:latest
      docker_username: $DOCKER_USER
      docker_password: $DOCKER_PASSWORD
You can find a list of available components in the CI/CD catalog of your GitLab instance.
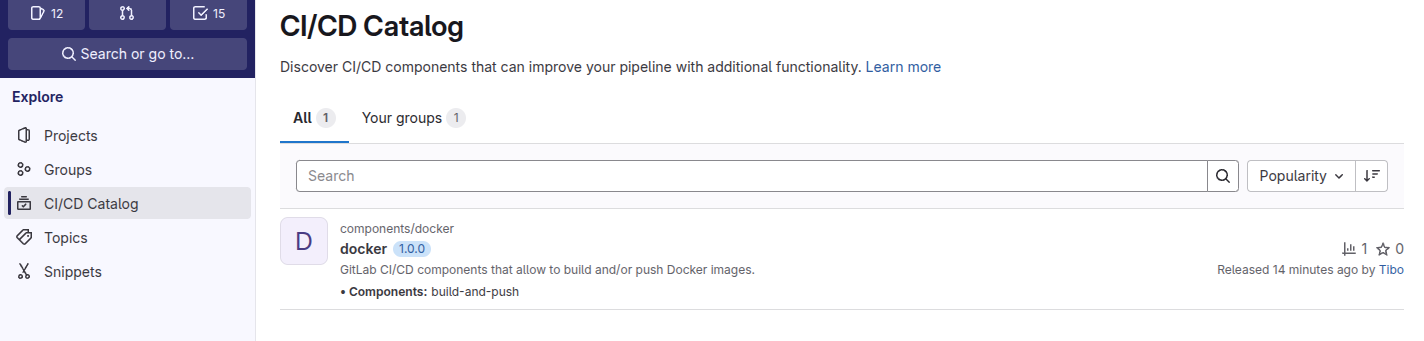
On gitlab.com the CI/CD catalog is available at https://gitlab.com/explore/catalog and currently contains 465 components.
Create a reusable component
You can also create your own reusable components. For this you will have to
- Create a repository with the appropriate files and directory structure. A single repository may contain multiple components.
- Publish the components to the CI/CD catalog.
1. Create a repository
Create a classical GitLab repository and add a README.md file that contains the description of the different components. You can find a simple example at
https://gitlab.cylab.be/components/docker
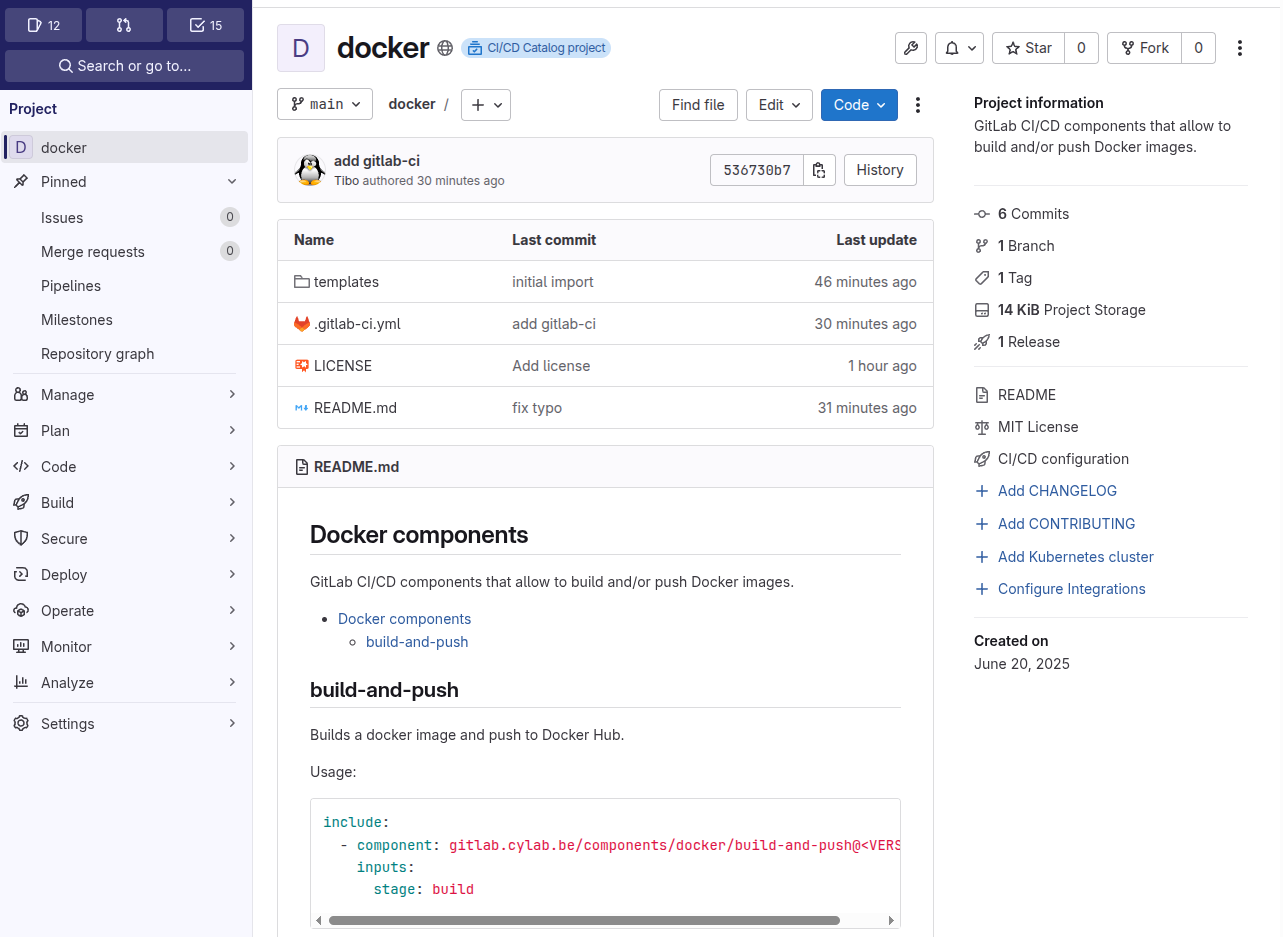
The repository must have a top level directory called templates that will contain the different components:
- a single yaml file for simple components (for example
build-and-push.ymlor - for complex components you can create a subdirectory with a file called
template.yml(for exampletemplates/complex-component/template.yml.
In each template file you can define the different jobs of the components. Each component will also typically take input values, which you must define, and which you can use with $[[ inputs.name ]], like in the example below:
spec:
  inputs:
    stage:
      default: build

---
hello:
  stage: $[[ inputs.stage ]]
  image: alpine
  script:
    - echo "hello world!"
You can use the components as soon as they are pushed to your repository, but it’s usually a good idea to publish your components to the CI/CD catalog to facilitate usage…
2. Publish components to the CI/CD catalog
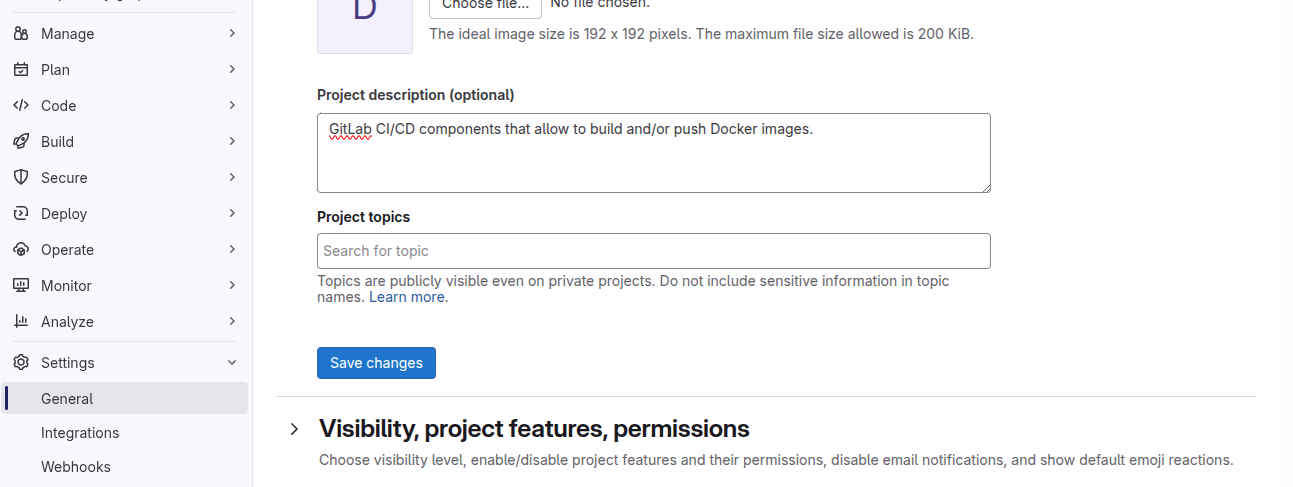
Project description
To appear in the CI/CD catalog, the project must have to description, which you can provide in Settings > General
Project settings
In the project that contains CI/CD components, go to Settings > General > Visibility, project features, permissions
Enable CI/CD Catalog project toggle

Automatically create component releases
The component will appear in the catalog only if releases are automatically created using the gitlab-ci pipeline. So you must add a release job to your .gitlab-ci.yml:
release:
  stage: release
  image: registry.gitlab.com/gitlab-org/release-cli:latest
  script: echo "Creating release $CI_COMMIT_TAG"
  rules:
    - if: $CI_COMMIT_TAG
  release:
    tag_name: $CI_COMMIT_TAG
    description: "Release $CI_COMMIT_TAG of components in $CI_PROJECT_PATH"
Then push a tagged version of the component (for example 1.0.0):
git tag 1.0.0
git push --tags
Once pushed and released, the component(s) will appear in the CI/CD Catalog…
This blog post is licensed under
CC BY-SA 4.0


