Continuous Deployment with GitLab and Laravel Envoy
Jan 18, 2021 by Thibault Debatty | 7530 views
https://cylab.be/blog/120/continuous-deployment-with-gitlab-and-laravel-envoy
There are multiple ways to implement Continuous Deployment (CD) for a Laravel project. The current trends consists in deploying containers to a kubernetes cluster. In this blog post however, we will present the good old way: we will use Laravel Envoy to deploy our code directly to our server(s). This method has the advantage of simplicity as it does not require to build containers, nor does it require a kubernetes cluster: Laravel Envoy uses a simple SSH connection to the target server(s) to perform the deployment.
Server configuration
On the target server(s), create a dedicated user, called deployer:
sudo adduser deployer
For this blog post we will assume that the server(s) are running Apache web server. So we add deployer to the same group (www-data):
sudo adduser deployer www-data
Give deployer full access to the /var/www directory (or the directory where your web application will be deployed):
sudo apt install acl
sudo setfacl -R -m u:deployer:rwx /var/www/
Create a SSH key with no passphrase:
sudo su deployer
cd ~
ssh-keygen -t ed25519
Here there is a trick: the same key will be used
- by GitLab runner to connect to the server and execute the deployment and
- by the server to connect to the GitLab repository and download the source code
To allow the first step (from GitLab to the server), we have to
a. copy the public key in the list of authorized keys:
cat .ssh/id_ed25519.pub >> .ssh/authorized_keys
b. extract the private key:
cat ~/.ssh/id_ed25519
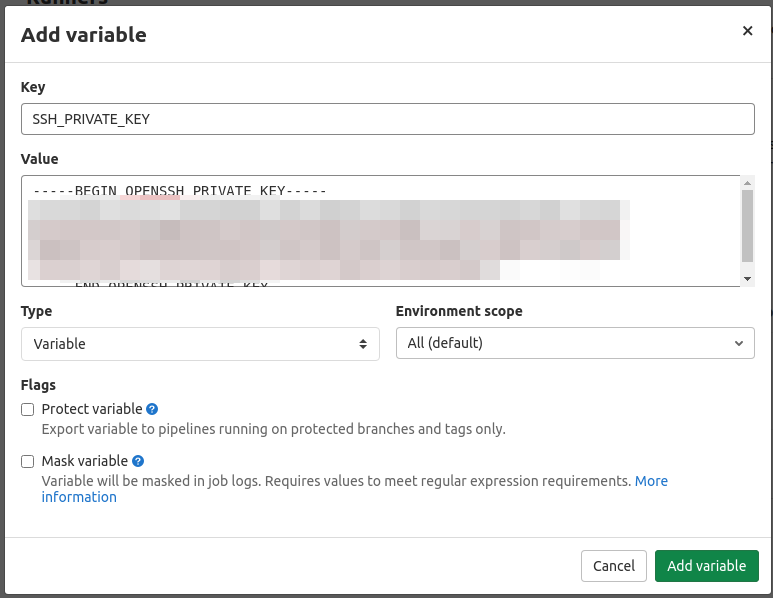
c. in GitLab > Settings > CI / CD > Variables create a variable called SSH_PRIVATE_KEY with the content of the private key
To allow the second step (from the server to the GitLab repository) we have to:
a. extract the public key:
cat ~.ssh/id_ed25519.pub
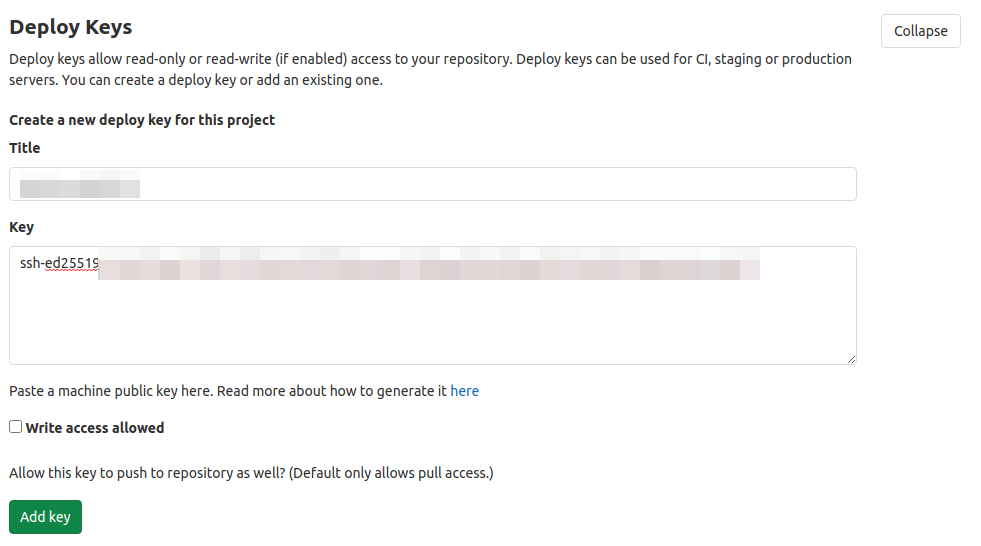
b. in GitLab > Settings > Repository > Deploy keys create a new deploy key with the content of our public SSH key.
c. perform a first test clone:
git clone git@my.git.repository.git
Envoy
Laravel Envoy is a PHP tool that allows to execute code on one or multiple remote servers using SSH. It uses a syntax that is similar to the Blade syntax used in Laravel views. Here are the main syntax elements:
- @servers defines the server(s) on which the tasks must be executed
- @setup allows to define some code that must be executed locally, before Enoy runs the tasks on remote server(s)
- @task is used to define the tasks
- @story allows to group tasks together
Here is a very simple example, that defines a single task called pwd. You can copy this code in a file called Envoy.blade.php:
@servers(['web' => 'deployer@my.web.server'])

@task('pwd')
  pwd
@endtask
To test our Envoy tasks list, we must first install Envoy:
composer require --dev laravel/envoy
We can then execute a task or story with:
./vendor/bin/envoy run <task>
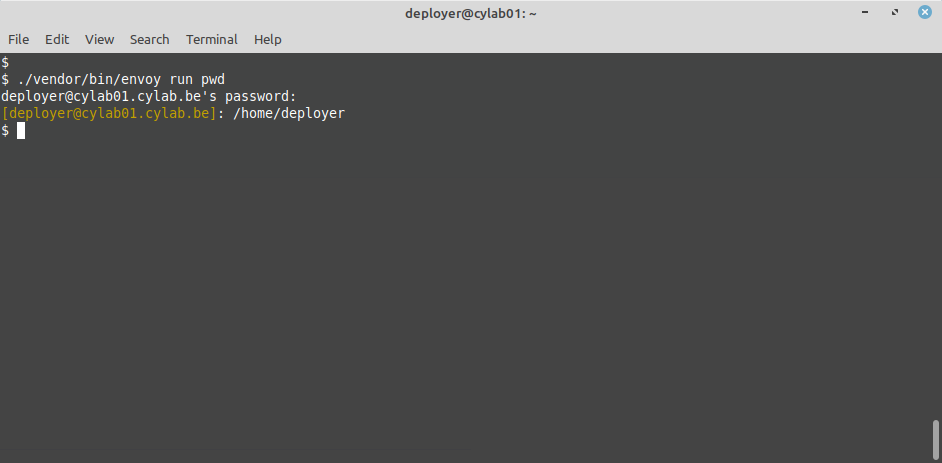
For example:
./vendor/bin/envoy run pwd
Deploy a Laravel application
Below is a full example that defines a deploy story, with the required steps to deploy a Laravel application:
- clone the repository
- link the
storagedirectory to a unique directory on the server - ensure that
bootstrap/cacheis writable - install composer dependencies
- copy the appropriate
.envfile - migrate the database
- create a symlink that points to the new version of the app
You can copy this example in Envoy.blade.php and tune for your setup:
@servers(['web' => 'deployer@my.web.server'])

@setup
    $repository = 'git@my.git.repository.git';
    $root = '/var/www';
    $current_dir = $root . '/current';
    $releases_dir = $root . '/releases';
    $release = date('YmdHis');
    $release_dir = $releases_dir .'/'. $release;
    $storage_dir = $root . '/storage';
    $env = $root . '/env.prod';
@endsetup

@story('deploy')
    clone
    storage
    writable
    composer
    .env
    migrate
    symlink
@endstory

@task('clone')
    echo 'clone {{ $repository }} ...'
    [ -d {{ $releases_dir }} ] || mkdir {{ $releases_dir }}
    git clone --depth 1 {{ $repository }} {{ $release_dir }}
    cd {{ $release_dir }}
    git reset --hard {{ $commit }}
@endtask

@task('storage')
    echo 'create storage link to {{ $storage_dir }} ...'
    [ -d {{ $storage_dir }} ] || mkdir {{ $storage_dir }}
    cd {{ $release_dir }}
    rm -Rf storage
    ln -s {{ $storage_dir }} storage
@endtask

@task('writable')
    echo 'make bootstrap/cache writable ...'
    cd {{ $release_dir }}
    chgrp -R www-data bootstrap/cache
    chmod -R g+w bootstrap/cache
@endtask

@task('composer')
    echo "install composer dependencies ..."
    cd {{ $release_dir }}
    composer install --prefer-dist --no-dev -o
@endtask

@task('.env')
    echo "copy .env file {{ $env }} ..."
    cd {{ $release_dir }}
    cp {{ $env }} ./.env
@endtask

@task('migrate ')
    echo "migrate database ..."
    cd {{ $release_dir }}
    php artisan migrate
@endtask

@task('symlink')
    echo 'create symlink to the new version ...'
    ln -nfs {{ $release_dir }} {{ $current_dir }}
@endtask
As you might notice, in the clone task we are using the variable $commit, which is not defined in the file. Hence if we run this task (or the deploy story), we must provide the value for this variable on the command line, like this:
./vendor/bin/envoy run clone --commit <some.commit>
GitLab
Now that our server and blade definitions are ready, we can add a deploy job to .gitlab-ci.yaml. Typically, we should run this job after the tests, if they succeed:
deploy:
  image: cylab/php:7.2
  stage: deploy
  script:
    # import ssh private key
    - eval $(ssh-agent -s)
    - ssh-add <(echo "$SSH_PRIVATE_KEY")
    - mkdir -p ~/.ssh
    - echo -e "Host *
	StrictHostKeyChecking no

" > ~/.ssh/config
    # in cylab/php:7.2, envoy is already installed...
    - ~/.composer/vendor/bin/envoy run deploy --commit="$CI_COMMIT_SHA"
This blog post is licensed under
CC BY-SA 4.0


