New ways to run Kali Linux on Windows using WSL
Nov 19, 2021 by Georgi Nikolov | 5890 views
Pentesting Offensive Security Linux Virtualization
https://cylab.be/blog/186/new-ways-to-run-kali-linux-on-windows-using-wsl
Some time ago I wrote a blog about Installing Linux Bash Shell (and Metasploit) on Windows 10. This is great, when we want to enjoy the best of both worlds- keep using Windows, with its out-of-the-box configuration and set-up, and still be able to use the powerful tools available for the Linux distribution. In my previous blog I went through the steps necessary for setting up WSL and installing an Ubuntu and Kali Linux distribution. Since then, a lot of advancements have been made to facilitate the use of these distributions for Windows Users.
Kali Linux
Kali Linux has been regarded as the best Linux distribution for Penetration Testing for some time now. It comes with a large suite of tools and dedicated support. For people in the Cyber Security field, it is an indispensable tool to have and know how to use. In my previous blog I explained how to configure your Windows machine and how to install the Kali distribution for easy access via the WSL. Since then, the people responsible for developing Kali have worked hard to make it even easier to manage for us, the simple Windows users.
Win-KeX
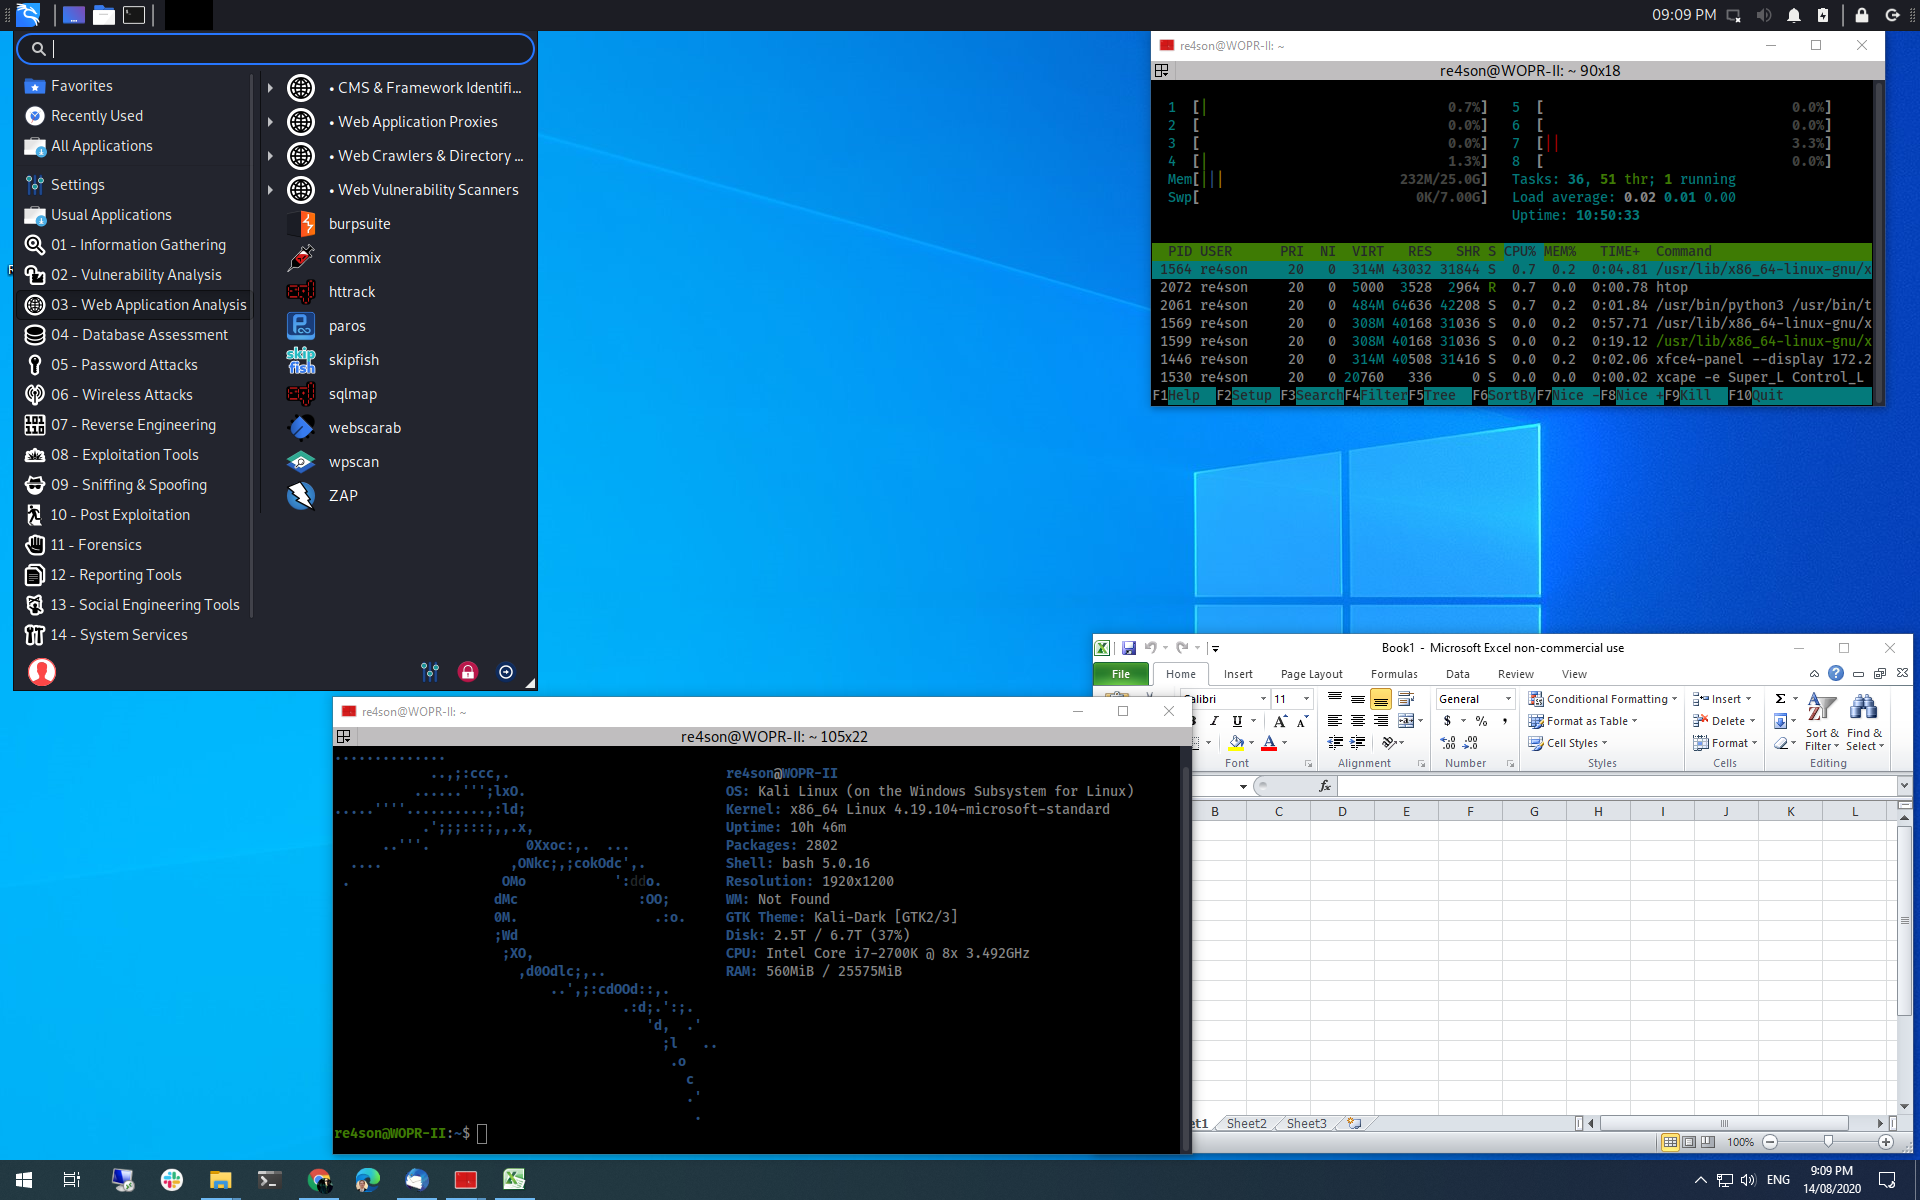
The Win-KeX tool, developed by Kali, provides users with a way for us to run the Kali Linux distribution in Windows, with the extra bonus of having a GUI (or as they put it “a Kali Desktop Experience”). To be able to use it, the Windows machine needs to have Windows Subsystem for Linux (WSL 2), so we can enjoy some great features:
- run Kali Linux in a dedicated window on your Windows machine or in seamless mode, where you can switch on the fly between the two Operating Systems
- sound support
- different types of sessions available, unprivileged and root sessions available
- shared clipboard between the two systems
- multi-session support, where we can run multiple instances of Kali concurrently
Installation
First, we need to be sure we have the last version of WSL and then selecting which version we want to use. This can be easily done by running the following command through an elevated PowerShell:
> wsl --update
> wsl --set-default-version 2
Now we are running the latest version of the Linux kernel and we have told WSL to use version 2. Cool little tidbit: we can specify which version of WSL should be use globally, but we can also do this for each Linux distribution individually and even switch between versions on the fly. This can be done with the following command:
> wsl --set-version kali-linux 2
The next step is to install the Win-KeX tool via the kali terminal:
kali@kali:~$ sudo apt update
kali@kali:~$
kali@kali:~$ sudo apt install -y kali-win-kex
We update the list of update repositories Kali needs to contact to download updates and afterwards we install the tool, supplying it with the -y parameter, to tell it to say “Yes” to all installation prompts.
When the Win-KeX tool has been installed, we can run it using the kex command. There are three possible ways to run Win-KeX inside our Kali Linux distribution for Windows:
- Window Mode (documentation): opens Kali in a new window with sound support (important note: if you are running multiple screens, there might be unintended behavior)
kali@kali:~$ kex --win -s
- Enhanced Session Mode (documentation): opens Kali via RDP with sound support and arm workaround
kali@kali:~$ kex --esm --ip -s
- Seamless Mode (documentation): opens Kali in a seamless mode further boosting the integration between the Linux distribution and Windows (important note: i had some difficulties to get this mode to work, but it could be again caused by running multiple screens)
kali@kali:~$ kex --sl -s
(OPTIONAL) As the Kali Linux distribution we install via the Windows Store is quite bare-bones, we might need to install all the tools separately. Luckily, there is a command we can run inside Kali to do just that:
kali@kali:~$ sudo apt install -y kali-linux-large
It takes awhile and you will be prompted on multiple occasions to choose how to configure certain tools.
In the end, we can run our Kali Linux machine and make use of the multitude of powerful tools available not only in Kali, but also in Windows.
This blog post is licensed under
CC BY-SA 4.0


