Install TP-Link Omada WiFi Controller on Ubuntu
May 16, 2025 by Thibault Debatty | 9099 views
https://cylab.be/blog/418/install-tp-link-omada-wifi-controller-on-ubuntu
Have a few TP-Link WiFi antennas? Here is how you can install Omada controller software on Ubuntu 24.04 to centrally configure, manage and monitor your wifi networks.
But first, there are a few requirements:
- Java and JSVC
- MongoDB
Java and JSVC
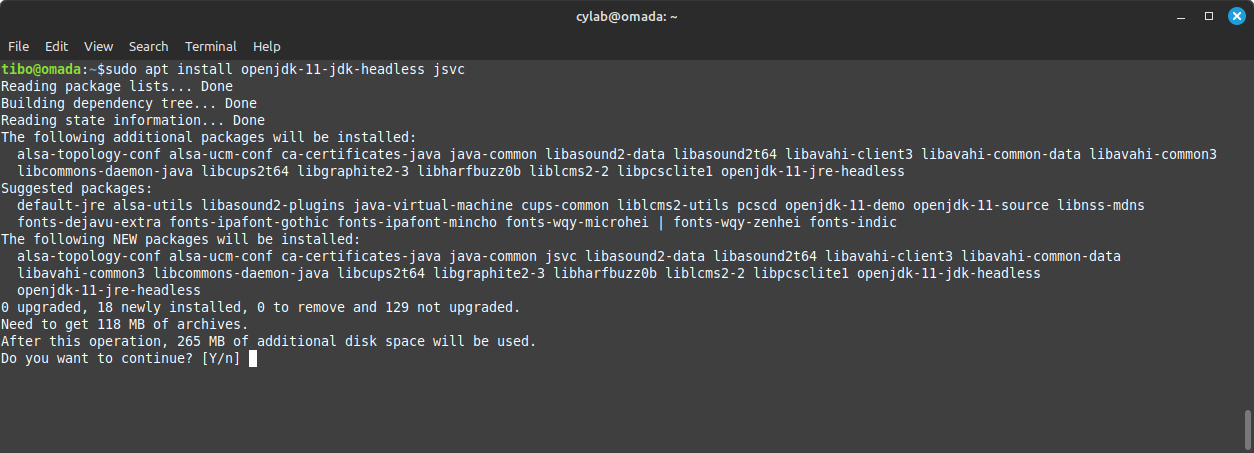
For a start, you’ll have to install Java runtime environment (JRE) and JSVC.
JSVC, part of the Apache Commons Daemon project, is a tool used to launch Java applications as daemons on Unix systems. It allows Java applications to perform privileged operations as root, such as binding to ports below 1024, and then switch to a non-privileged user for normal operation.
sudo apt update
sudo apt upgrade
sudo apt install openjdk-17-jre-headless jsvc
MongoDB
Next we’ll install MongoDB 4.4. This is an old version, but apparently the best supported by TP-Link Omada. Additionnaly, MongoDB 4.4 requires libssl 1.1, which we must install manually on Ubuntu 24.04:
wget http://archive.ubuntu.com/ubuntu/pool/main/o/openssl/libssl1.1_1.1.1-1ubuntu2.1~18.04.23_amd64.deb

sudo dpkg -i libssl1.1_1.1.1-1ubuntu2.1~18.04.23_amd64.deb
Now we can install MongoDB 4.4:
wget -qO - https://www.mongodb.org/static/pgp/server-4.4.asc | sudo apt-key add -

echo "deb [ arch=amd64,arm64 ] https://repo.mongodb.org/apt/ubuntu focal/mongodb-org/4.4 multiverse" | sudo tee /etc/apt/sources.list.d/mongodb-org-4.4.list

sudo apt update
sudo apt install -y mongodb-org
Start MongoDB and make sure it’s running properly:
sudo systemctl enable mongod
sudo systemctl start mongod
sudo systemctl status mongod
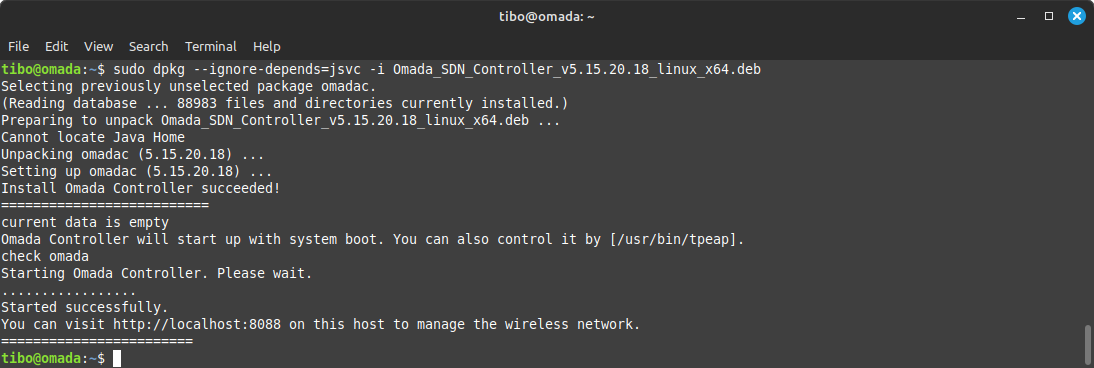
Omada
Finally we can install Omada controller software. At the time of writing, the current version is 5.15.20.18. You can check for the latest version at
https://support.omadanetworks.com/fr-be/product/omada-software-controller/?resourceType=download
wget https://static.tp-link.com/upload/software/2025/202503/20250331/Omada_SDN_Controller_v5.15.20.18_linux_x64.deb

sudo dpkg --ignore-depends=jsvc -i Omada_SDN_Controller_v5.15.20.18_linux_x64.deb
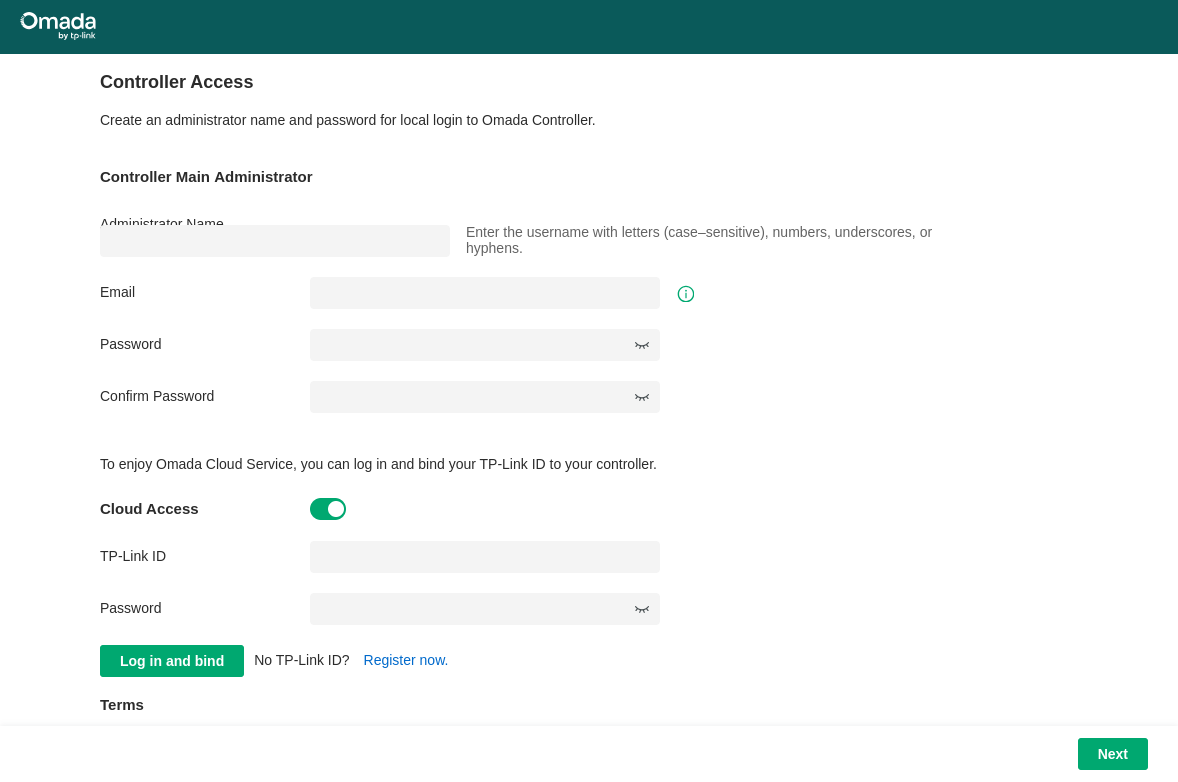
First steps
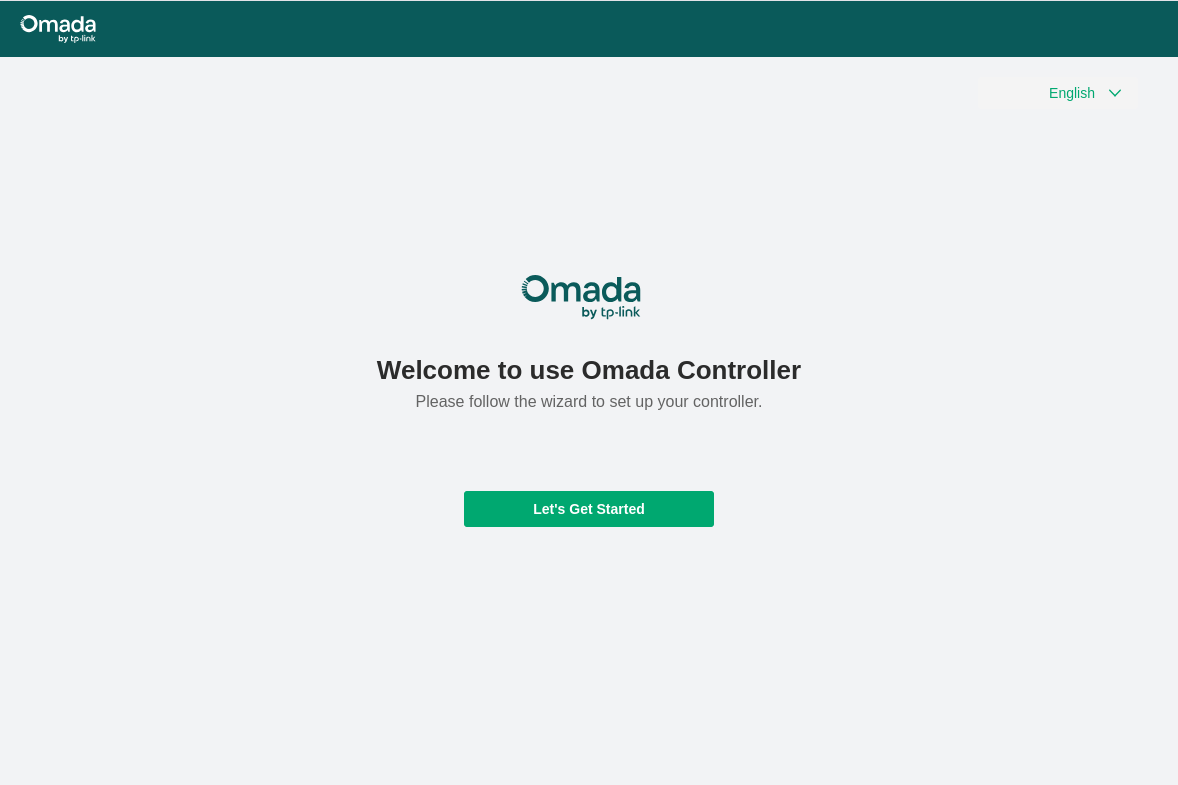
The Omada controller has a web interface available at http://ip.of.server:8088
The first time you connect, you will be welcomed by a installation wizard that will guide you through the basic access configuration.
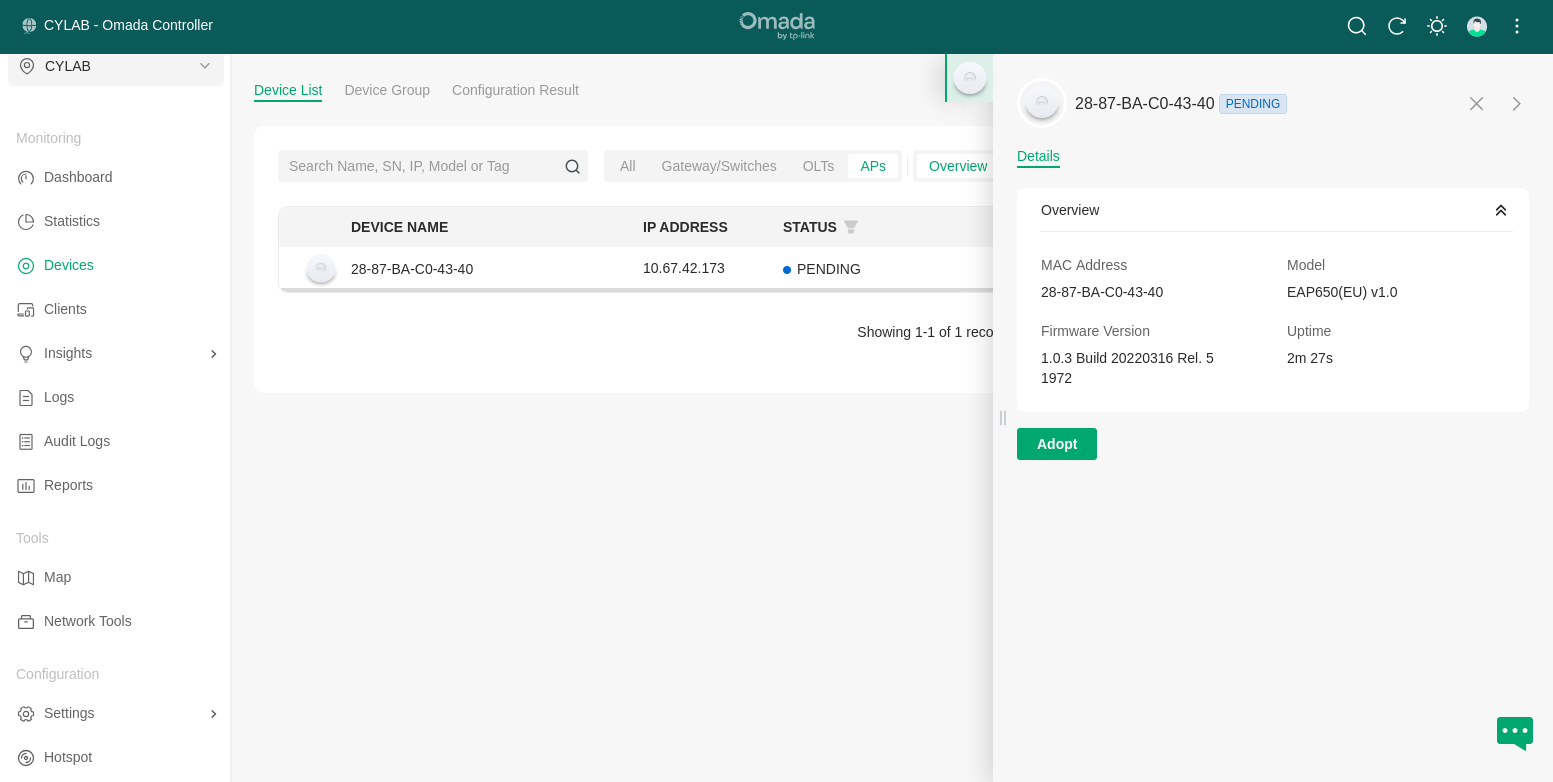
Adopt WiFi antennas
Once initial configuration is completed, you can start adding your antennas. Open the Devices menu. Any antenna connected to the same subnet as the controller will appear in the list. Simply click on Adopt to link your antenna to the controller.
Adopt antennas in a different subnet
Your WiF antennas and the controller may be installed in different subnets, but there are 2 conditions:
- the antenna must be able to reach the controller on ports 29810-29813
This means you may have to configure a VPN, port forwarding, or open these ports in a firewall.
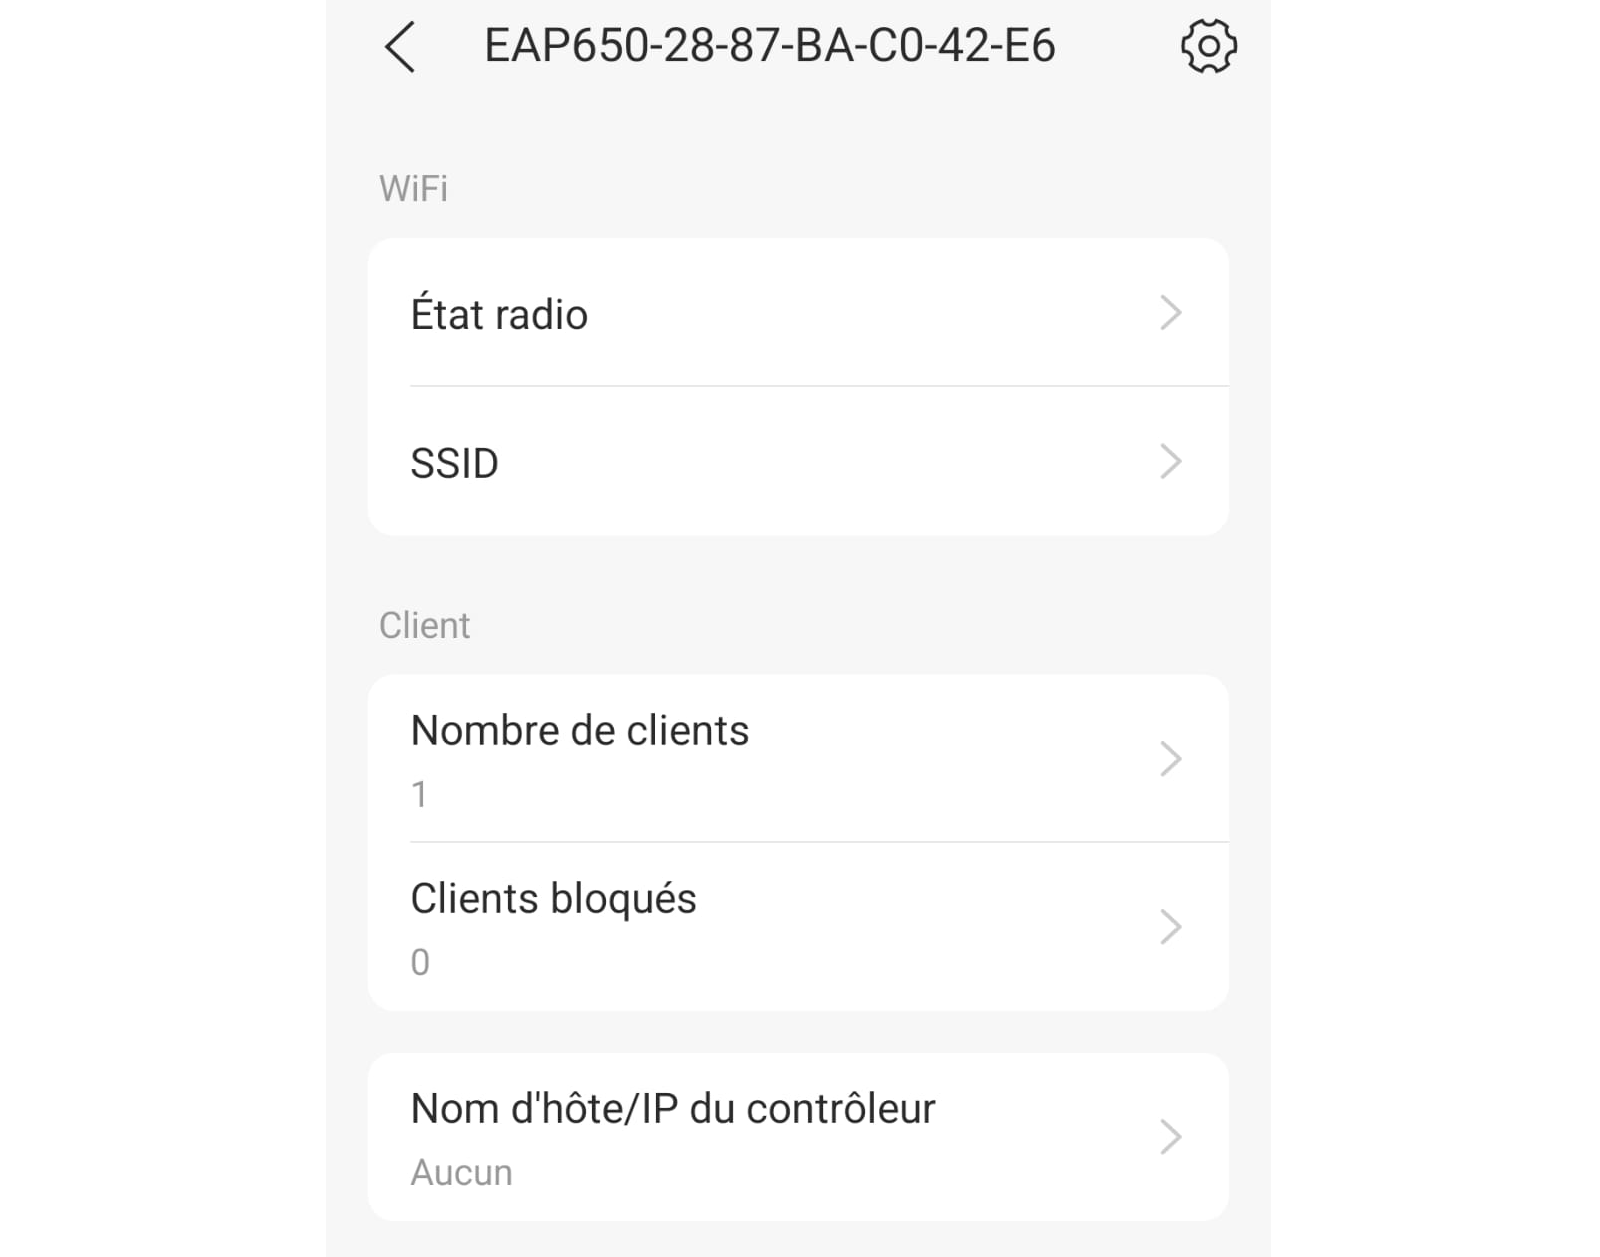
- you must manually configure the IP or hostname of the controller in each antenna as autodiscovery will not work.
The easiest way to do this is (IMHO) using the Omada smartphone app. With the app you can directly connect to the antenna, then manually enter the IP of the controller.
Enjoy
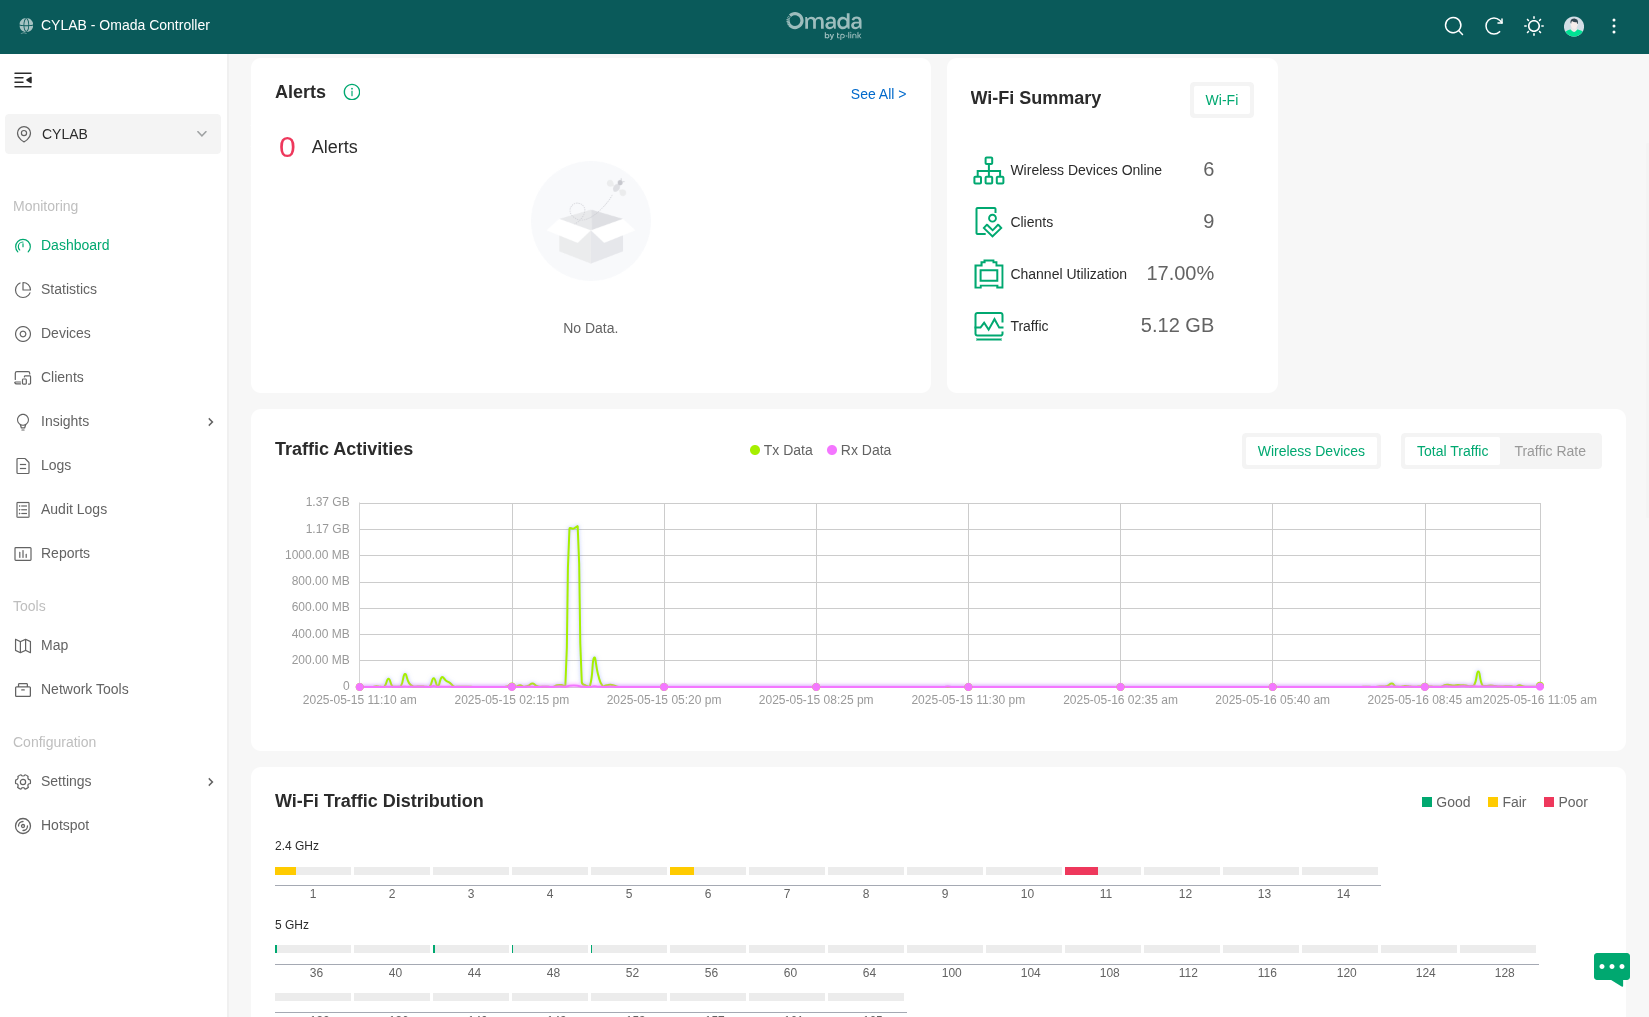
Once done, the Omada controller offers a a nice and powerful interface which allows to easily monitor devices and clients.
The interface also allows to optimize or troubleshoot WiFi connectivity issues, optimize WiFi channels and power, and detect WiFi clients with a weak signal.
Conclusion
In this blog post, we have walked through the process of installing the Omada controller software on Ubuntu 24.04 to centrally configure, manage, and monitor WiFi networks using TP-Link WiFi antennas. We have also discussed the additional steps required when the WiFi antennas and the controller are installed in different subnets.
With the Omada controller software installed and configured, you can enjoy a powerful and easy-to-use interface to monitor devices and clients, optimize or troubleshoot your WiFi.
This blog post is licensed under
CC BY-SA 4.0


