Configure client-server OpenVPN on OPNSense
Dec 20, 2025 by Thibault Debatty | 7686 views
https://cylab.be/blog/467/configure-client-server-openvpn-on-opnsense
OpenVPN is an extremely powerful and secure VPN solution! But it requires multiple certificates and a little work to configure. Here is a step-by-step guide to get an up-and-running client-server (aka road warrior) OpenVPN on OPNSense.
Certificate Authority (CA)
Got to System > Trust > Authorities
Click on the + button to create a Root CA

Most options are self-explanatory, and the issuer should be Self-signed or Nothing selected
The root CA will be used to sign a server certificate, and a certificate for each user connecting to the VPN.
Server Certificate
Go to System > Trust > Certificates and click on the + to create a new server certificate.
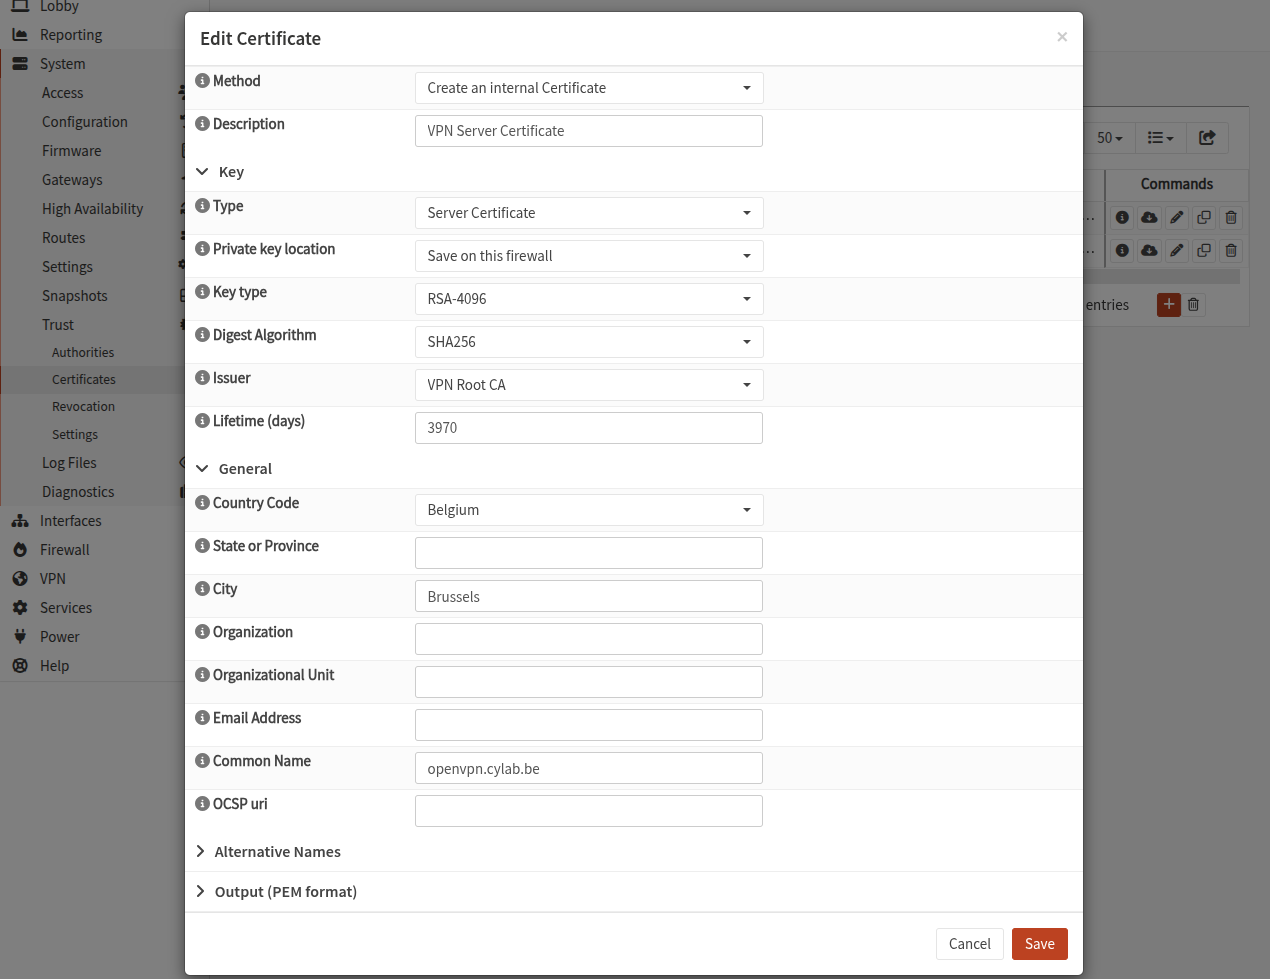
Here are the crucial options:
Method: Create an internal CertificateType: Server CertificatePrivate key location: Save on this firewallIssuer: select the Root CA you just createdCommon Namemust be the FQDN of the OPNSense instance
OpenVPN configuration
With root and server CA ready, we can now configure the OpenVPN server.
TLS static key
This step is optional but provides additional security. In OpenVPN the tls-auth directive adds an HMAC signature to all SSL/TLS handshake packets for integrity verification. Any packet not bearing the correct HMAC signature can be dropped without further processing.
Go to VPN > OpenVPN > Instances and open the Static Keys tab. Click on the + button to create a TLS static key.
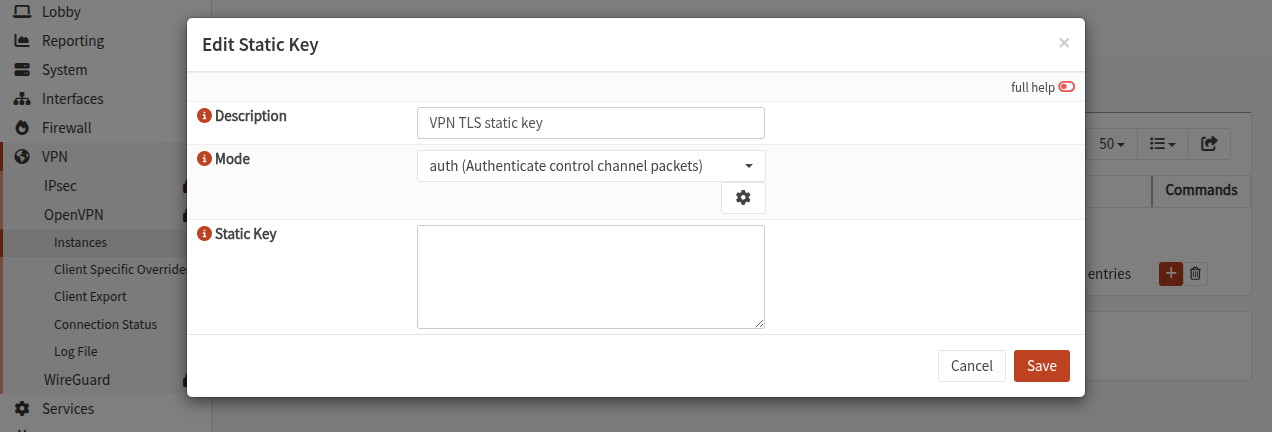
- Fill the Description
- Select
authmode - Click on the ⚙ icon to generate the key
- Save
OpenVPN instance
Go to VPN > OpenVPN > Instances and click on the + button to create a new instance.

Select the following options:
Role: ServerPort: default is 1194 but you can choose anotherBind address: indicate one or more address. Otherwise the OpenVPN server will listen on all ports (0.0.0.0)Server (IPv4): this is the subnet that will be used to create the tunnel between the server and the clientsCertificate: select the server certificate you just created “TLS static key: select the key you just createdAuthentication: Local DatabaseStrict User/CN Matching: Yes is better : the CN of client certificate must match the usernameLocal Network: list the local networks that should be accessible by VPN clients
You may also select additional Options if needed:
client-to-clientallows clients to ping and connect to each-otherduplicate-cn: allows the same certificate to be used by multiple connections (devices) at the same time
Firewall configuration
Allow incoming VPN connections
Go to Firewall > Rules > WAN and add a rule to allow incoming connections on the port you chose (default is 1194).

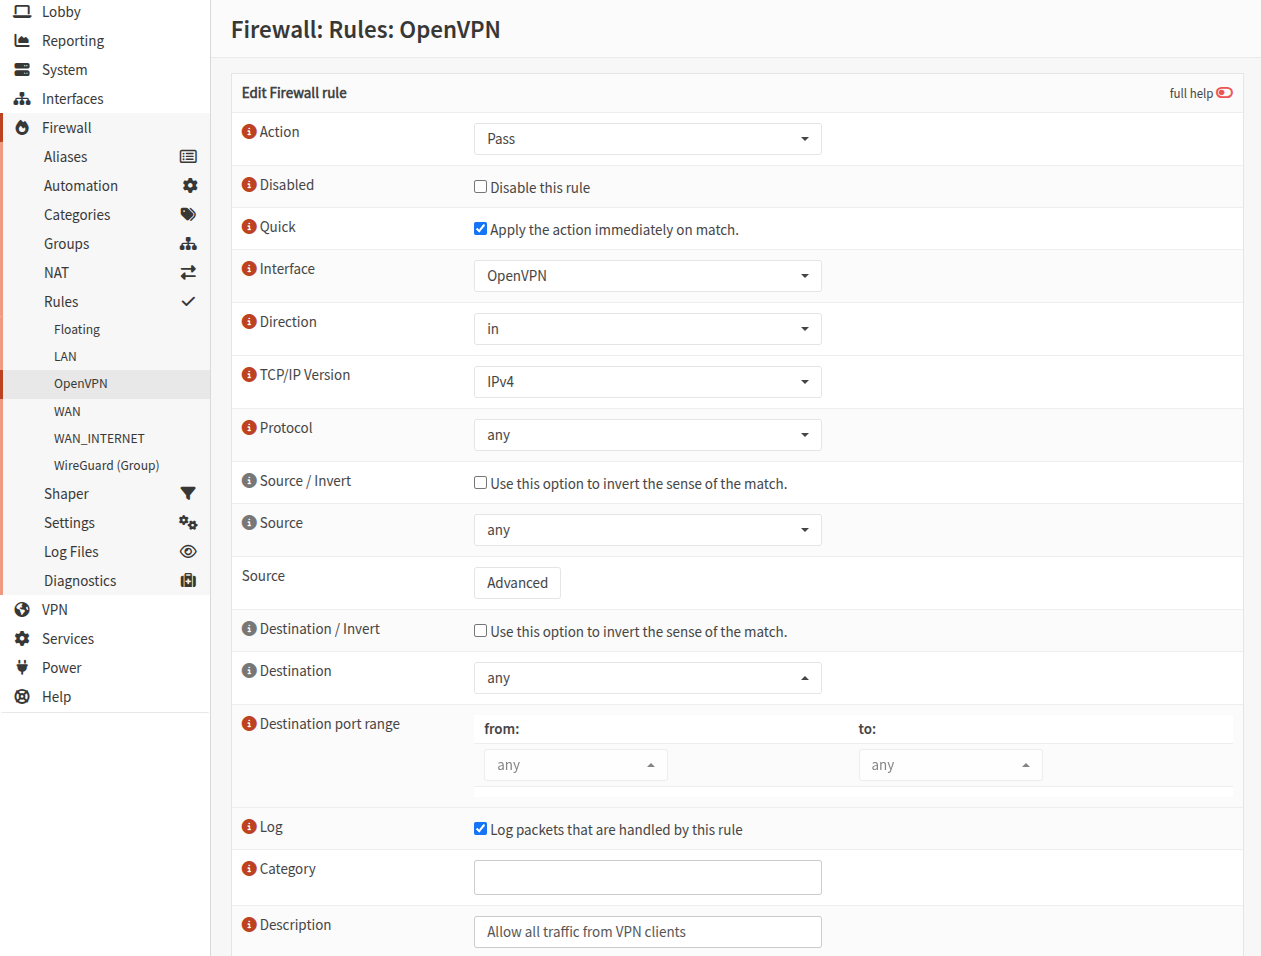
Allow VPN clients traffic
Now we also need a rule to allow traffic from VPN clients once they are connected. For this example we can create a simple rule that allows all incoming traffic from VPN clients.
Add users
Go to System > Access Users and create a new user (if needed).
Once done, on the list of users, next to the user click on the ☀ icon to Search certificates. There should be no certificate, so click on + to create a new one.

Type: Client CertificatePrivate key location: Save on this firewallIssuer: select the Root CA you createdCommon Name: must be the same as the user name
Export and download OpenVPN client configuration
Go to VPN > OpenVPN > Client Export.
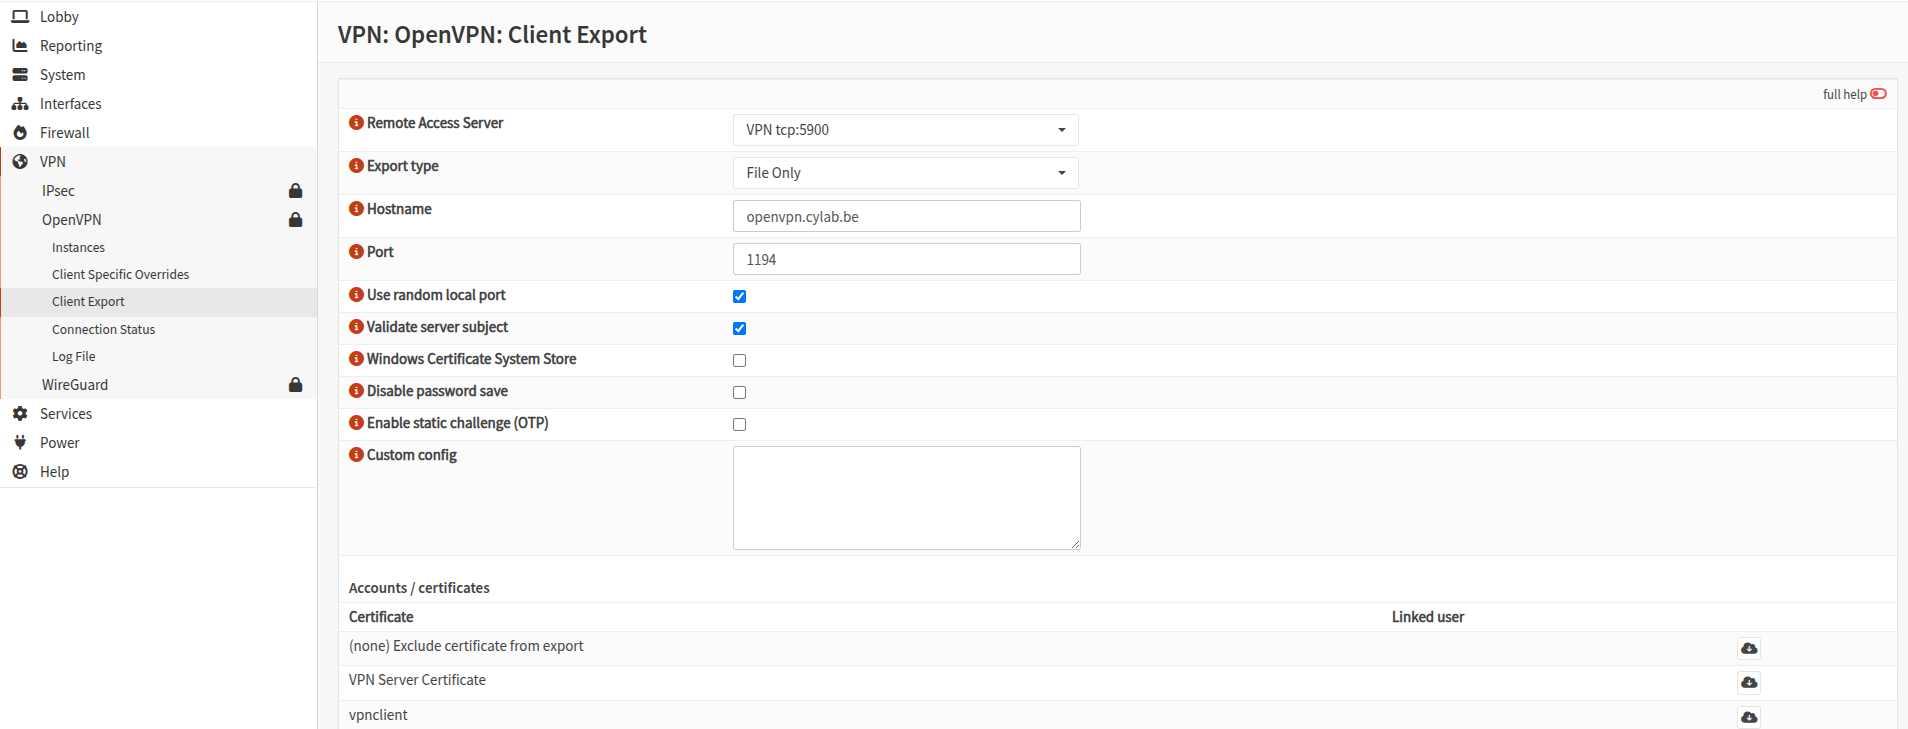
- Select the appropriate
Access server Export type: select File only- And check that the
hostnameandportare correct
Then click on the ☁ icon to download the OpenVPN configuration file of the corresponding user.
Test
You can now test your configuration with something like
sudo openvpn vpnclient.ovpn
⚠ Ideally you should test while you are NOT connected to the LAN network of the firewall.
This blog post is licensed under
CC BY-SA 4.0


