Build a bare-metal kubernetes cluster
Aug 30, 2020 by Thibault Debatty | 4028 views
https://cylab.be/blog/91/build-a-bare-metal-kubernetes-cluster
kubernetes is a very powerful system, with a lot of available plugins to handle different situations. That’s why tools like minikube exist that handle the whole configuration for you. In this blog post we show you how it works under the hood, and how to manually configure a kubernetes cluster.
For this blog post we will need a debian (or ubuntu) system and we will:
- install Docker
- install kubeadm, kubelet and kubectl
- create a single node master (control-plane)
- install flannel overlay network
Docker
curl -fsSL https://download.docker.com/linux/ubuntu/gpg | sudo apt-key add -
sudo add-apt-repository "deb [arch=amd64] https://download.docker.com/linux/ubuntu $(lsb_release -cs) stable"
sudo apt-get update
sudo apt-get install -y docker-ce
Update November 2021: with current versions of Docker and Kubernetes, you must configure Docker to use systemd cgroup driver:
sudo tee /etc/docker/daemon.json <<EOF
{
    "exec-opts": ["native.cgroupdriver=systemd"]
}
EOF

sudo systemctl restart docker
kubeadm, kubelet and kubectl
We can now install the required kubernetes tools:
- kubeadm is the command line tool to setup the cluster;
- kubelet is the component that runs on all machines (nodes) in your cluster and does things like starting pods and containers;
- kubectl is the command line tool to talk to the API server and control the cluster when it is running.
sudo apt-get update && sudo apt-get install -y apt-transport-https curl
curl -s https://packages.cloud.google.com/apt/doc/apt-key.gpg | sudo apt-key add -
echo "deb https://apt.kubernetes.io/ kubernetes-xenial main" | sudo tee /etc/apt/sources.list.d/kubernetes.list

sudo apt-get update
sudo apt-get install -y kubelet kubeadm kubectl
Attention: kubernetes is a rapidly evolving project, with changes between versions that can break your application. So it’s strongly encouraged to disable automatic upgrades for the packages kubelet, kubeadm and kubectl:
sudo apt-mark hold kubelet kubeadm kubectl
We also have to disable the swap:
sudo sed -i '/ swap / s/^/#/' /etc/fstab
sudo swapoff -a
Create a single node master (control-plane)
The kubernetes control-plane are the components that will manage the cluster:
- apiserver
- etcd server
- kube-controller
On a real production cluster, they should be installed on multiple nodes, to ensure high-availability. Here we will deploy all the components required for a kubernetes master on a single server. The --pod-network-cidr option will be used by our overlay network (see below):
sudo kubeadm init --pod-network-cidr=10.244.0.0/16
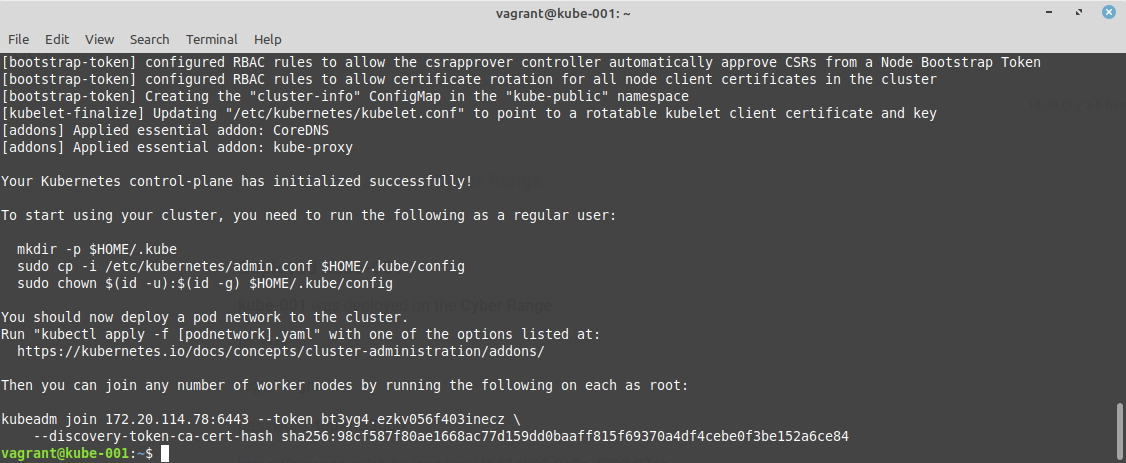
Updated November 2021: as shown at the end of the kubeadm process, you must execute the following commands to use your cluster:
mkdir -p $HOME/.kube
sudo cp -i /etc/kubernetes/admin.conf $HOME/.kube/config
sudo chown $(id -u):$(id -g) $HOME/.kube/config
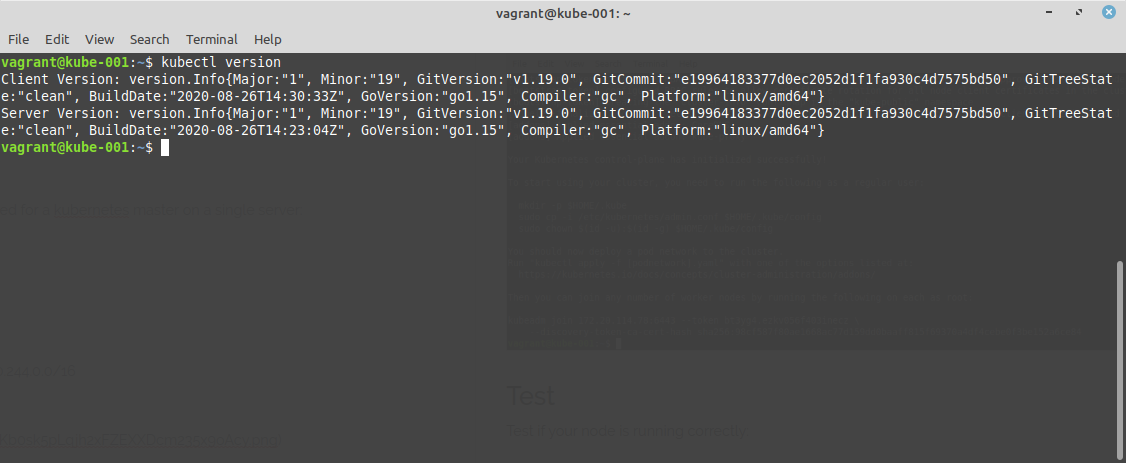
Test kubectl
Test if your node is running correctly:
kubectl version
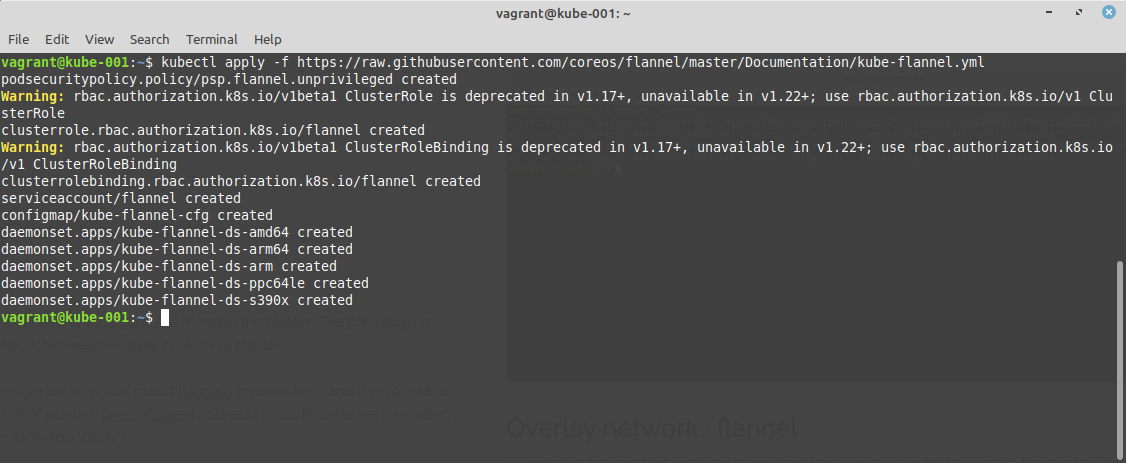
Overlay network : flannel
Kubernetes assume that each container (pod) has a unique, routable IP inside the cluster. The CNI plugin is responsible for providing an IPv4 network between multiple nodes in a cluster. A lot of plugins exist. For this blog post we will use Flannel.
To achieve this goal, Flannel runs a small, single binary agent called flanneld on each host, and is responsible for allocating a subnet lease to each host out of a larger, preconfigured address space. In our example, we will use the network 10.244.0.0/16. Packets are forwarded using one of several backend mechanisms including VXLAN.
kubectl apply -f https://raw.githubusercontent.com/coreos/flannel/master/Documentation/kube-flannel.yml
Optionally : schedule pods on the master node
Normally, kubernetes will not run pods on the master node(s). For a small cluster, you can enable the master node using the following command:
kubectl taint nodes --all node-role.kubernetes.io/master-
Add nodes
At the end of the init command, kubeadm created a token that you can use to add other nodes to your cluster. These join tokens have a limited lifetime (24h by default). You can create new tokens with the following commend (on the master):
kubeadm token create --print-join-command
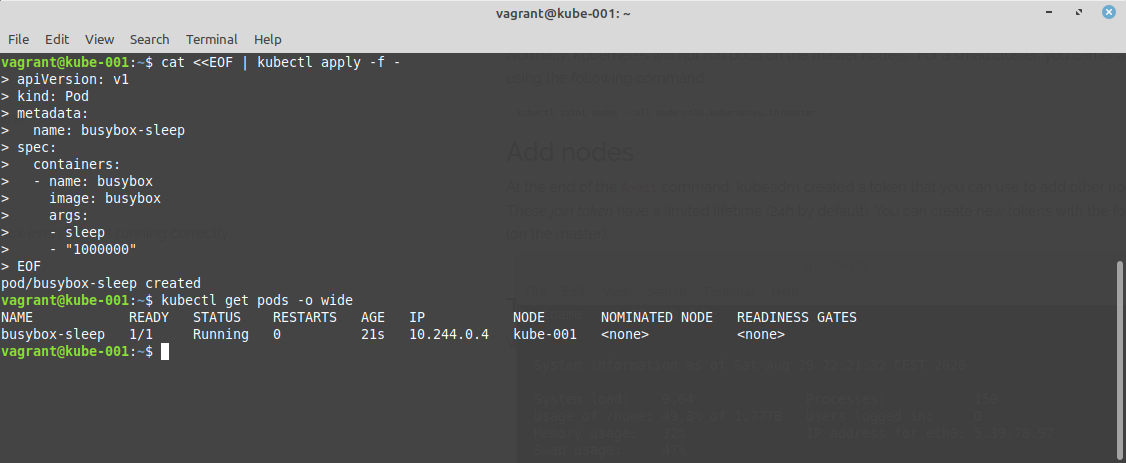
Test
We can now schedule a simple pod to check everything is running correctly:
cat <<EOF | kubectl apply -f -
apiVersion: v1
kind: Pod
metadata:
  name: busybox-sleep
spec:
  containers:
  - name: busybox
    image: busybox
    args:
    - sleep
    - "1000000"
EOF
This blog post is licensed under
CC BY-SA 4.0


