Cyrange : scenarios
Today we released version 1.1.0 of the cyrange Cyber Range platform. This version brings an important new feature : scenarios. A scenario allows to define a large scale exercise, involving multiple virtual machines, that can be interconnected using a complex network. Moreover, to run the exercise, the cyrange platform will deploy a copy of each defined VM for each trainee. Let’s see how…
Scenario

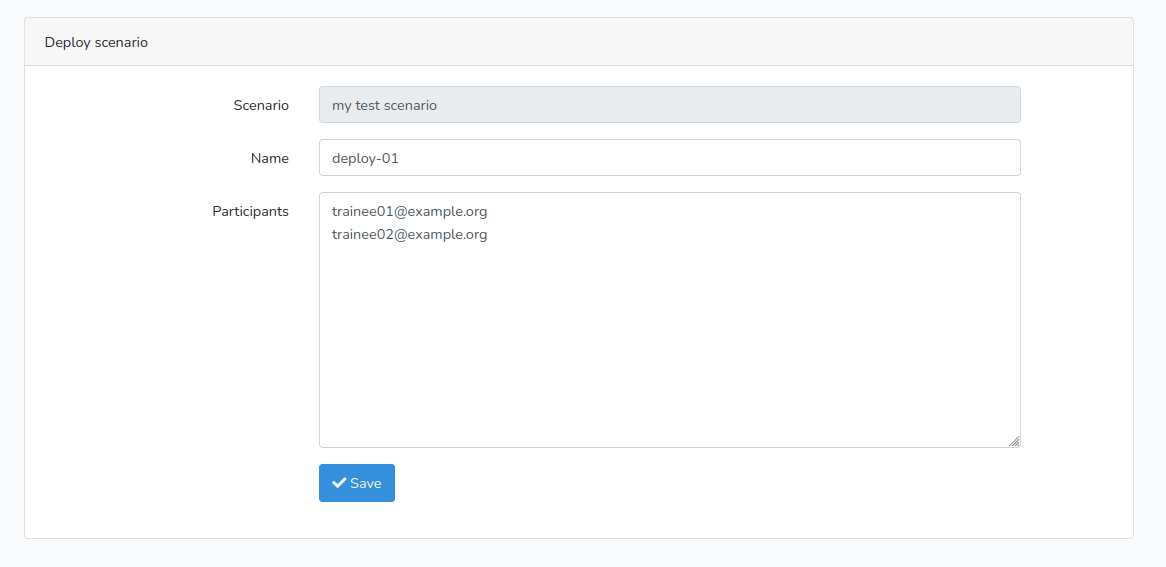
Scenarios are available from the “Scenarios” link, on the top of the interface.
A scenario is actually a yaml file, that describes how the different virtual machines must be deployed and interconnected. This yaml has 2 main sections: machines and extra_machines
- The machines section lists the virtual machines that must be deployed for the trainees. So cyrange will deploy one of each listed machine for each trainee.
- The extra_machines section allows to list virtual machines used for the ‘infrastructure’ of the exercise. These are typically only used by the teacher. Cyrange will only deploy one instance of each of these…
Machine
The format for describing a VM is the same in the machines section and in the extra_machines section:
- Each machine has a name.
- It will be deployed from an image. The image must already be available on the server, and it is identified by a hashtag and its id, for example
"#1". To help writing the scenario, available images are listed on the right of the screen… - Each machine can have one more network interfaces (see below).
- remote_desktop : true (or false) indicates that cyrange must create an access through the web interface (guacamole) for this VM;
- configure_guest : true (or false) indicates if cyrange must try to configure the guest OS during the deployment. If yes, cyrange will modify the hostname of the VM, set a new password, configure the IP address etc.
- If configure_guest is set to true, the provision key can list commands that will be executed on the guest during the deployment.
- name: router
  image: "#1"
  configure_guest: true
  remote_desktop: true
  interfaces:
  - mode: bridged
    bridge_interface: enp0s31f6
  - mode: internal
    network_name: intranet
    address: 192.168.1.1
    mask: 255.255.255.0
    dns-nameservers: 8.8.8.8
  provision:
  # enable packet forwarding
  - sudo sysctl -w net.ipv4.ip_forward=1
Network interfaces
For each network interface, you must define the type of connection using the mode key:
- bridged is the classical ‘bridge’ mode from most hypervisors: the virtual network interface is directly plugged to the physical network. With this mode, you must also specify the bridge_interface on which the virtual interface is plugged.
- internal creates a virtual network (a virtual switch) inside the server, on which the virtual network interface is plugged. In this mode you must specify a network_name for this virtual network.
- For the machines of the trainees, you can also indicate the private mode. This will create a separate virtual network for each trainee. This allows to create exercises where each trainee has its own private network. For this mode you must also indicate a network_name.
If nothing else is specified, the network interfaces will be configured using DHCP. Otherwize (and if configure_guest is set to yes), you can specify a manual configuration using the following keys:
- address
- mask
- gateway
- dns-nameservers
Example
The scenario corresponding to this network is illustrated below:
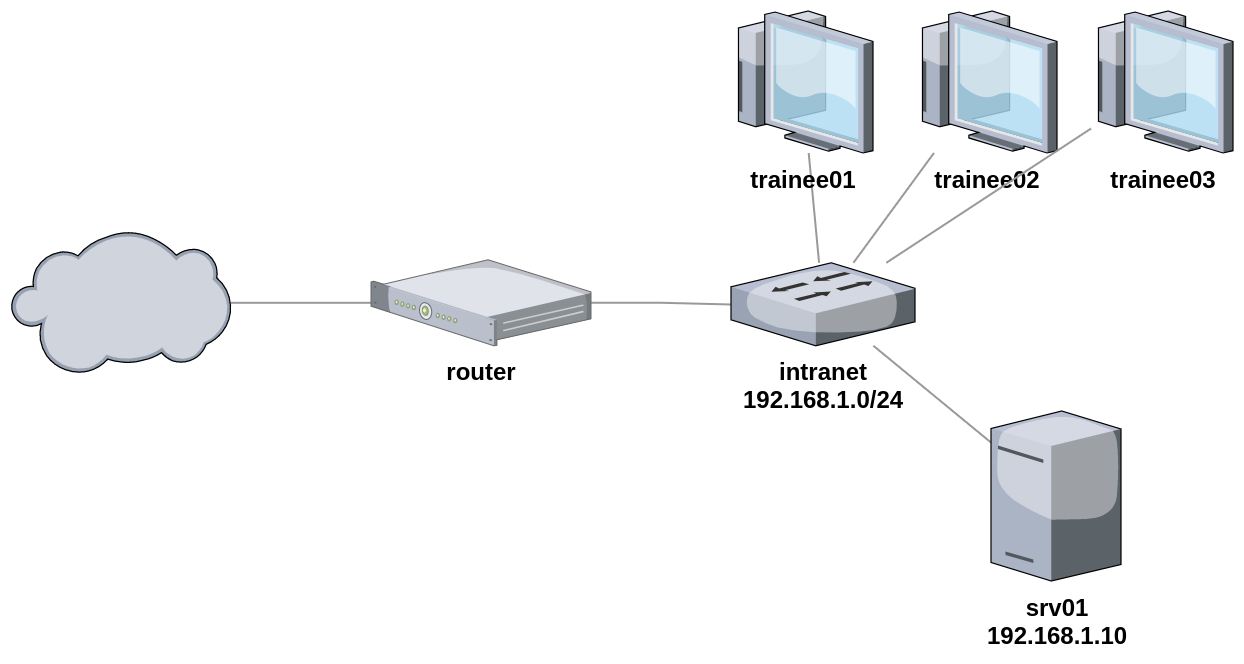
#
# VM's for the trainees (1 per participant)
#
machines:
- name: trainee
  image: "#1"
  configure_guest: false
  remote_desktop: true
  interfaces:
  - mode: internal
    network_name: intranet

#
# VM's for teacher only
#
extra_machines:

# router between the real network (bridge) and the
# intranet network
- name: router
  image: "#2"
  configure_guest: false
  remote_desktop: true
  interfaces:
  - mode: bridged
    bridge_interface: INTERNET
  - mode: internal
    network_name: intranet
    address: 192.168.1.1
    mask: 255.255.255.0
  provision:
  # enable packet forwarding
  - sudo sysctl -w net.ipv4.ip_forward=1

# web server, connected to the intranet
# 192.168.1.10
- name: srv01
  image: "#2"
  configure_guest: false
  remote_desktop: true
  interfaces:
  - mode: internal
    network_name: intranet
    address: 192.168.1.10
    mask: 255.255.255.0
    gateway: 192.168.1.1
    dns-nameservers: 8.8.8.8
  provision:
  # install apache
  - sudo apt-get -y install apache2
Deployement
Once the scenario is defined, in can be deployed multiple times…
Each machine will be deployed and connected to the specified network.
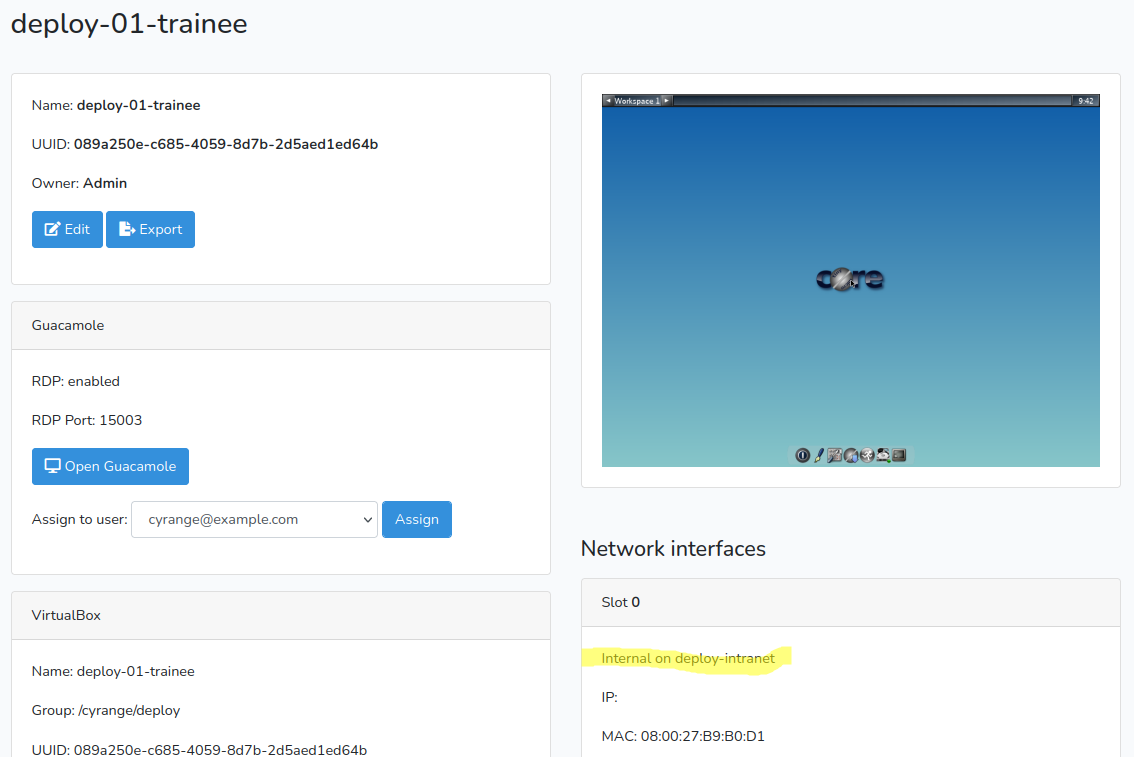
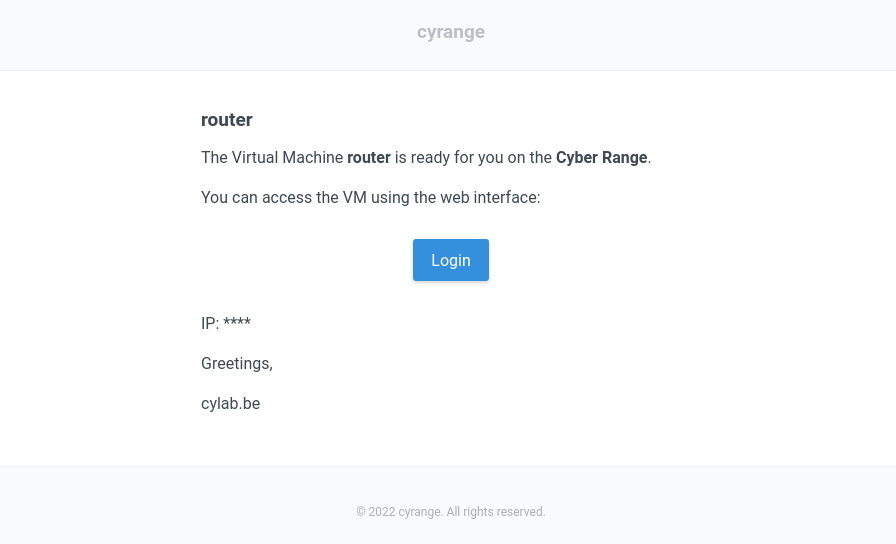
And each participant (including the teacher) will receive an email when the machine is up and ready…
This blog post is licensed under
CC BY-SA 4.0


