File upload, validation and storage with Laravel
Jun 17, 2022 by Thibault Debatty | 23445 views
https://cylab.be/blog/223/file-upload-validation-and-storage-with-laravel
Laravel is a powerful framework, that offers all functionalities required to implement file upload, validation and storage. Here is a complete and concrete example.
Context
This example is taken from our cyrange Cyber Range project. For this project we have a list Virtual Machine (VM) images that can be deployed by the user. VM images are modelized using a class AppImage. For this example, we want to add a screenshot for each VM image, so the user has an idea of what to expect when the VM is deployed.
For this we will:
- create a form so the administrator can upload the screenshot;
- create a controller method to handle the file upload, with corresponding route and validation;
- choose a storage mechanism to save the uploaded file;
- depending on the choices that were made, create a database migration, store files appropriately, and create a symlink;
- retrieve and use files.
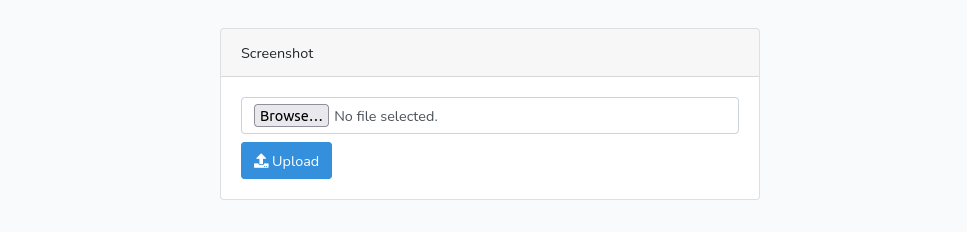
1. Upload form
The upload form is actually the easiest part. You can put it in a dedicated view, or add it to an existing view:
<form method="POST"
      action="{{ action("ImageController@uploadScreenshot", ["image" => $image]) }}"
      enctype="multipart/form-data">

    {{ csrf_field() }}

    <input class="form-control mb-2" type="file"
           accept="image/png"
           id="screenshot" name="screenshot">

    <button type="submit" class="btn btn-primary">
        <i class="fas fa-upload"></i> Upload
    </button>

</form>
There are 4 attention points here:
- you have to choose the name of the controller method (in our case
ImageController@uploadScreenshot); - don’t forget the
enctype="multipart/form-data"form parameter; - don’t forget the
{{ csrf_field() }}; - we can indicate the type of accepted file with the
<input accept=''>parameter, but the actual file type will be validated in the controller.
2. Route, controller, and validation
In routes/web.php, we must add a route for our new controller method:
Route::post(
    'app/images/{image}/screenshot',
    'ImageController@uploadScreenshot');
And in app/Http/Controllers/ImageController.php we can add the controller method.
use IlluminateSupportFacadesStorage;

/**
 * Upload screenshot
 * https://cylab.be/blog/223/file-upload-validation-and-storage-with-laravel
 * @param Image $image
 */
public function uploadScreenshot(Image $image, Request $request)
{
    $request->validate([
        "screenshot" => [
            'required', 'file',
            'mimes:png',
            // max file size in kB
            'max:1024',
            // for images, specify dimension constraints
            // https://laravel.com/docs/9.x/validation#rule-dimensions
            'dimensions:min_width=500,max_width=1500'
            ]
    ]);

    // store screenshot
    $filename = Storage::putFile(
        'public/images/screenshots',
        $request->file('screenshot'));

    $image->screenshot = $filename;
    $image->save();

    return redirect(action('ImageController@show', ['image' => $image]));
}
In this method, we
- use the method
$request->validate()to validate the type and size of the uploaded file; - use the
Storagefacade to save the uploaded file. There are different possibilities here that will be explained below…
3. Storage
Laravel provides a Storage facade to handle file storage. As the name states, this is a facade that provides a uniform interface for different implementations. The most commonly used implementation drivers are local and s3.
- the
localdriver will store files in (and fetch files from) the local directorystorage/app; - the
s3driver will store files in a cloud storage compatible with Amazon S3 API (so it can be AWS S3 itself, or any other like MinIO, wasabi, ceph etc.)
The implementation used by your application can be configured in config/filesystems.php and in your .env file.
Moreover, there are different ways to use the Storage facade:
- you can choose the name of the stored file, or you can let the facade and driver choose a unique name;
- the stored file can be public, so it can be downloaded or viewed by anyone with the file URL, or private, so the file can only be accessed by your Laravel application.
So it makes a total of 8 (2 x 2 x 2) combinations, each with pros and cons.
For example, if you are using the s3 driver, with auto-generated names and public files:
- commercial s3 solutions offer redundancy guarantees so your files are safer than if they are store on a single local server;
- because your files are stored on distinct cluster, you can have multiple instances of your Laravel application storing and retrieving files, thus opening the door for high-performance / high-availability distributed application;
- if the stored files are public, when a user (web browser) is viewing or downloading the file, it will directly connect to the s3 cluster, thus reducing the number of requests for your Laravel application and server (as illustrated below), which also improves performance;
- auto-generated names make sure files have a unique name, so there is no risk of name collision.

However:
- you have to setup or buy s3-compatible storage space;
- the auto-generated names are usually ugly, like
u3f8eu6s1sRefSsDiGBAdF2zW.png, for an image integrated in a view this is not an issue, but for a PDF that can be downloaded this is not an option… - the auto-generated name must be saved in database, so our application can later fetch the file, or generate the download URL (for public files);
- there is no access control: anyone with the URL can view or download the file.
In this example, we are be using a local driver, with auto-generated names and public files. This also has some pros and cons:
- with the local driver, public files will be served directly by the web server (Apache or Nginx) and not by the Laravel application, which is faster
But:
- as mentioned above, the auto-generated filename must be stored in the database, so we will need a database migration to add a column;
- with the public driver, public files must be stored in the
storage/app/publicdirectory; - there must be a symlink from
public/storagetostorage/app/public.
4. Migration, storing files and symlink
Migration
So first we will need a database migration to add a new column screenshot where we can save the auto-generated filename:
php artisan make:migration --table images images_add_screenshot
with the following content:
public function up()
{
    Schema::table('images', function (Blueprint $table) {
        $table->string('screenshot')->nullable();
    });
}
and run the migration:
php artisan migrate
Storing files
The code to store file is already present in the example controller above:
$filename = Storage::putFile(
    'public/images/screenshots',
    $request->file('screenshot'));

$image->screenshot = $filename;
$image->save();
In this example we use the Storage::putFile() method to save the uploaded file in the public/images/screenshots directory. We choose to make the file public, so it must be somewhere in the ‘public’ directory. Indeed, with the ‘local’ driver, this corresponds to the actual directory storage/app/public/images/screenshots, which will be publicly accessible thanks to the symlink that we will create…
The Storage::putFile() also return the unique filename generated, that we must save in the database.
NB: if you want to choose the filename yourself, you can use the method Storage::putFileAs($directory, $file, $filename)
Symlink
When using the ‘local’ driver with public files, we must create a symlink from from public/storage to storage/app/public to make public files accessible. You can create this symlink with artisan:
php artisan storage:link
5. Retrieving and accessing files
Storage offers multiple methods to retrieve and use files:
$filename = $image->screenshot;

$contents = Storage::get($filename);
$size = Storage::size($filename);
$unix_timestamp = Storage::lastModified($filename);

// check if the file exists:
Storage::exists($filename);

// download the file in the browser of the user
// useful for files that are *not* public, combined with access control
if (is_allowed()) {
  return Storage::download($filename);
}
We chose that these files are public, so we can simply use the public URL of the file in our views:
<img src="{{ Storage::url($image->screenshot) }}">
This blog post is licensed under
CC BY-SA 4.0


