Create & Deploy a Discord Bot (Part 1/3 - Bot Creation)
May 23, 2022 by Zacharia Mansouri | 6813 views
https://cylab.be/blog/216/create-deploy-a-discord-bot-part-13-bot-creation
There are times when you need to manage a community. Mailing lists are still in use nowadays but there exists other modern ways like creating a Discord server to chat with a bot that can fulfill many tasks for you and your community!
In this blog post you will learn how to create a bot application using the Discord interface. This blog post is the first of a series of three. The two next blog posts will cover the following subjects:
- Adding features to the bot using discord.py
- Deploying the bot on the cloud using Heroku
Creating a discord bot requires many steps that will be illustrated hereunder. It is assumed that you already possess a Discord account. Otherwise, here is the register link. It is only after successfully completing all the below steps that we will dive into the Python code needed to add features to the bot in the next post.
Here are the 3 steps we’ll first go through:
- Create a server
- Create a bot application
- Link the bot to the server
I personally used Discord’s web interface but you can also use the Discord app client. The steps are the same, only the visuals might change a little.
Create a server
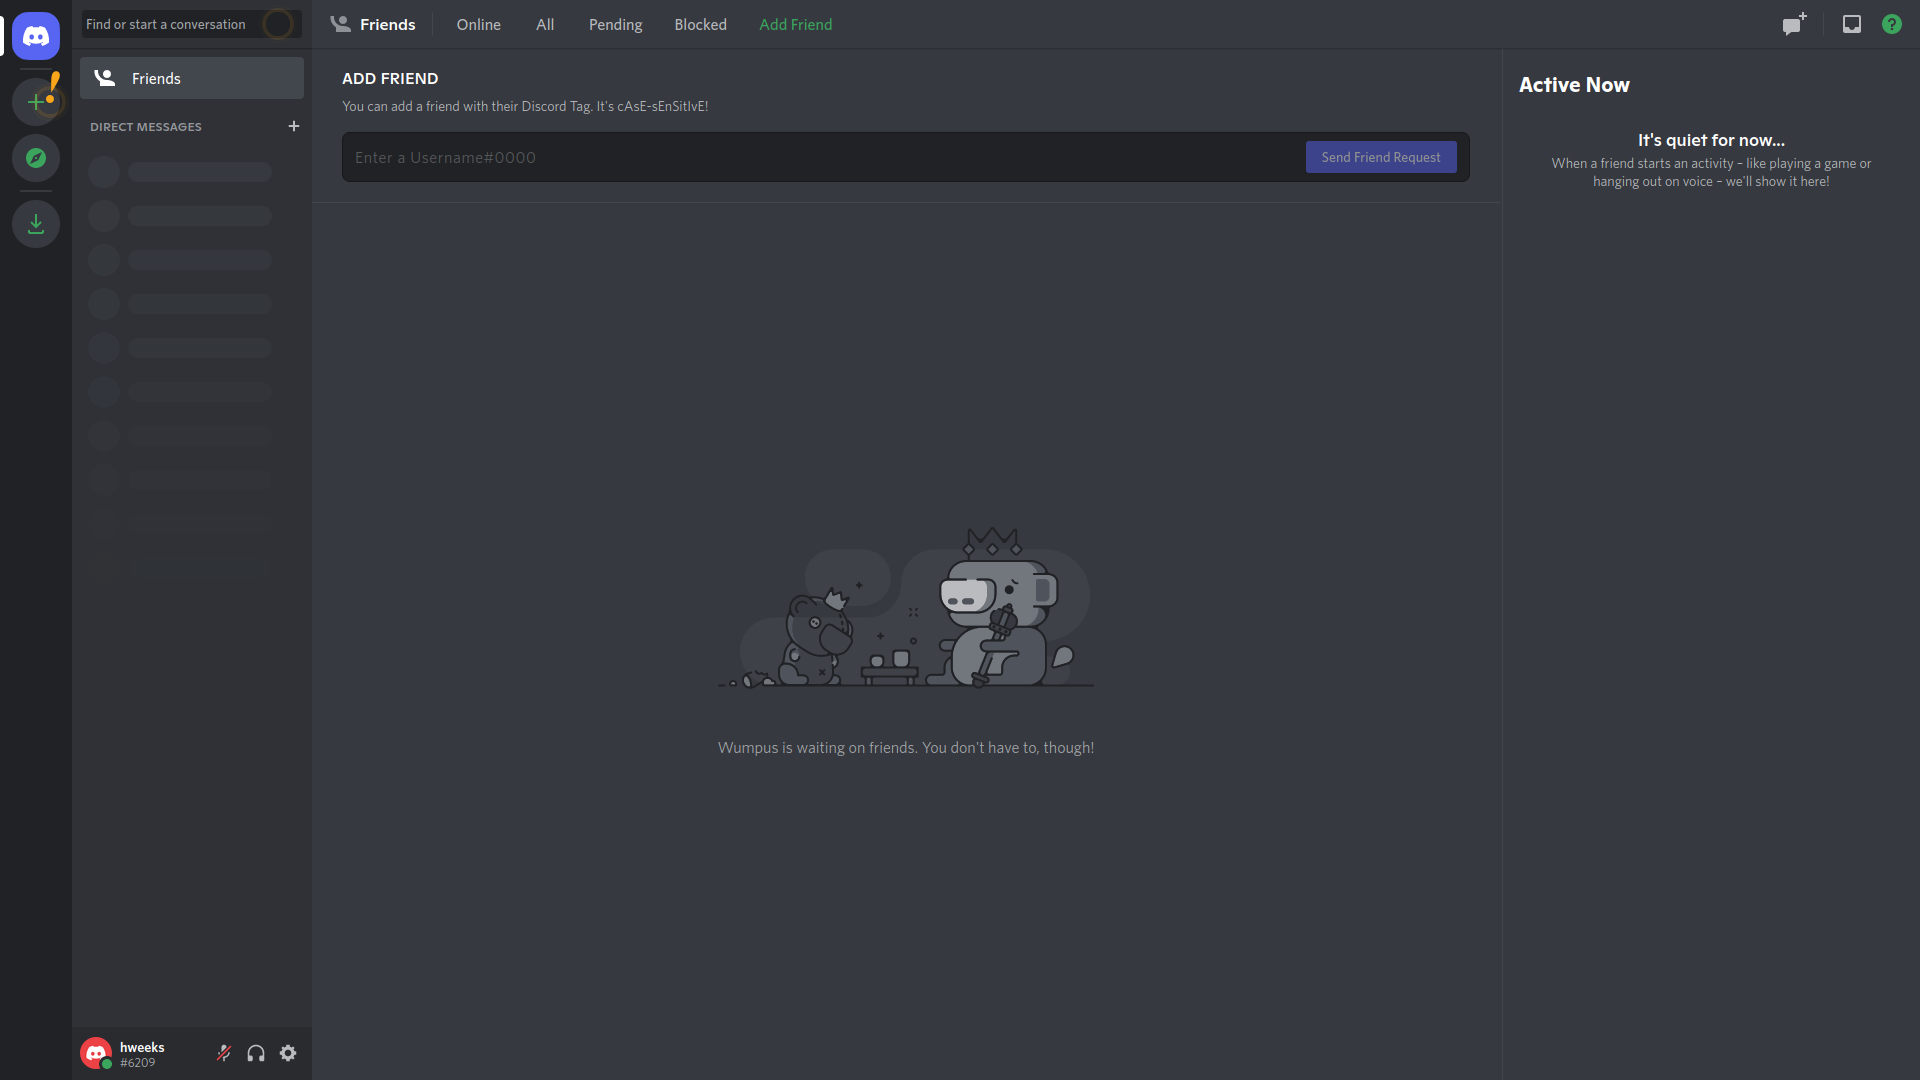
Open Discord. You should see something like the following screen:
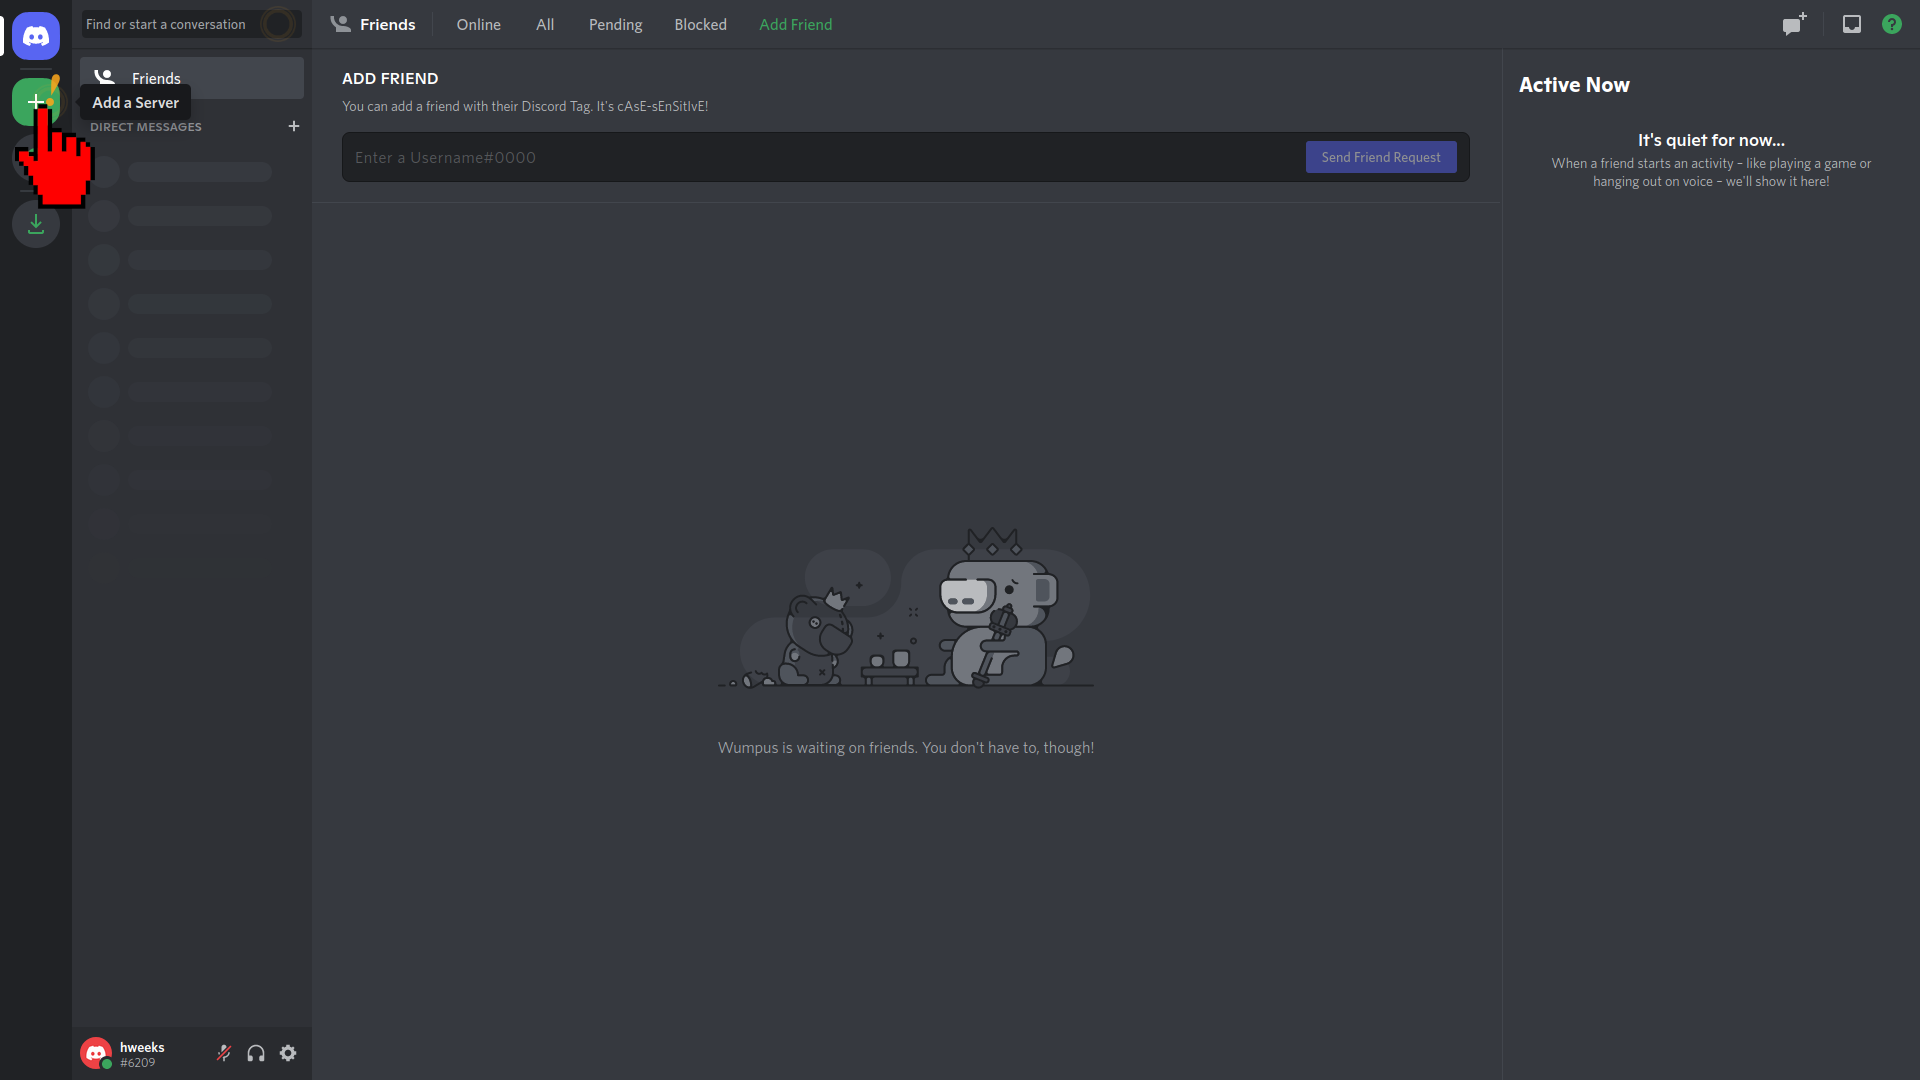
You can add a server by clicking the top left icon in green:
It opens the following options. Choose to create your own server:
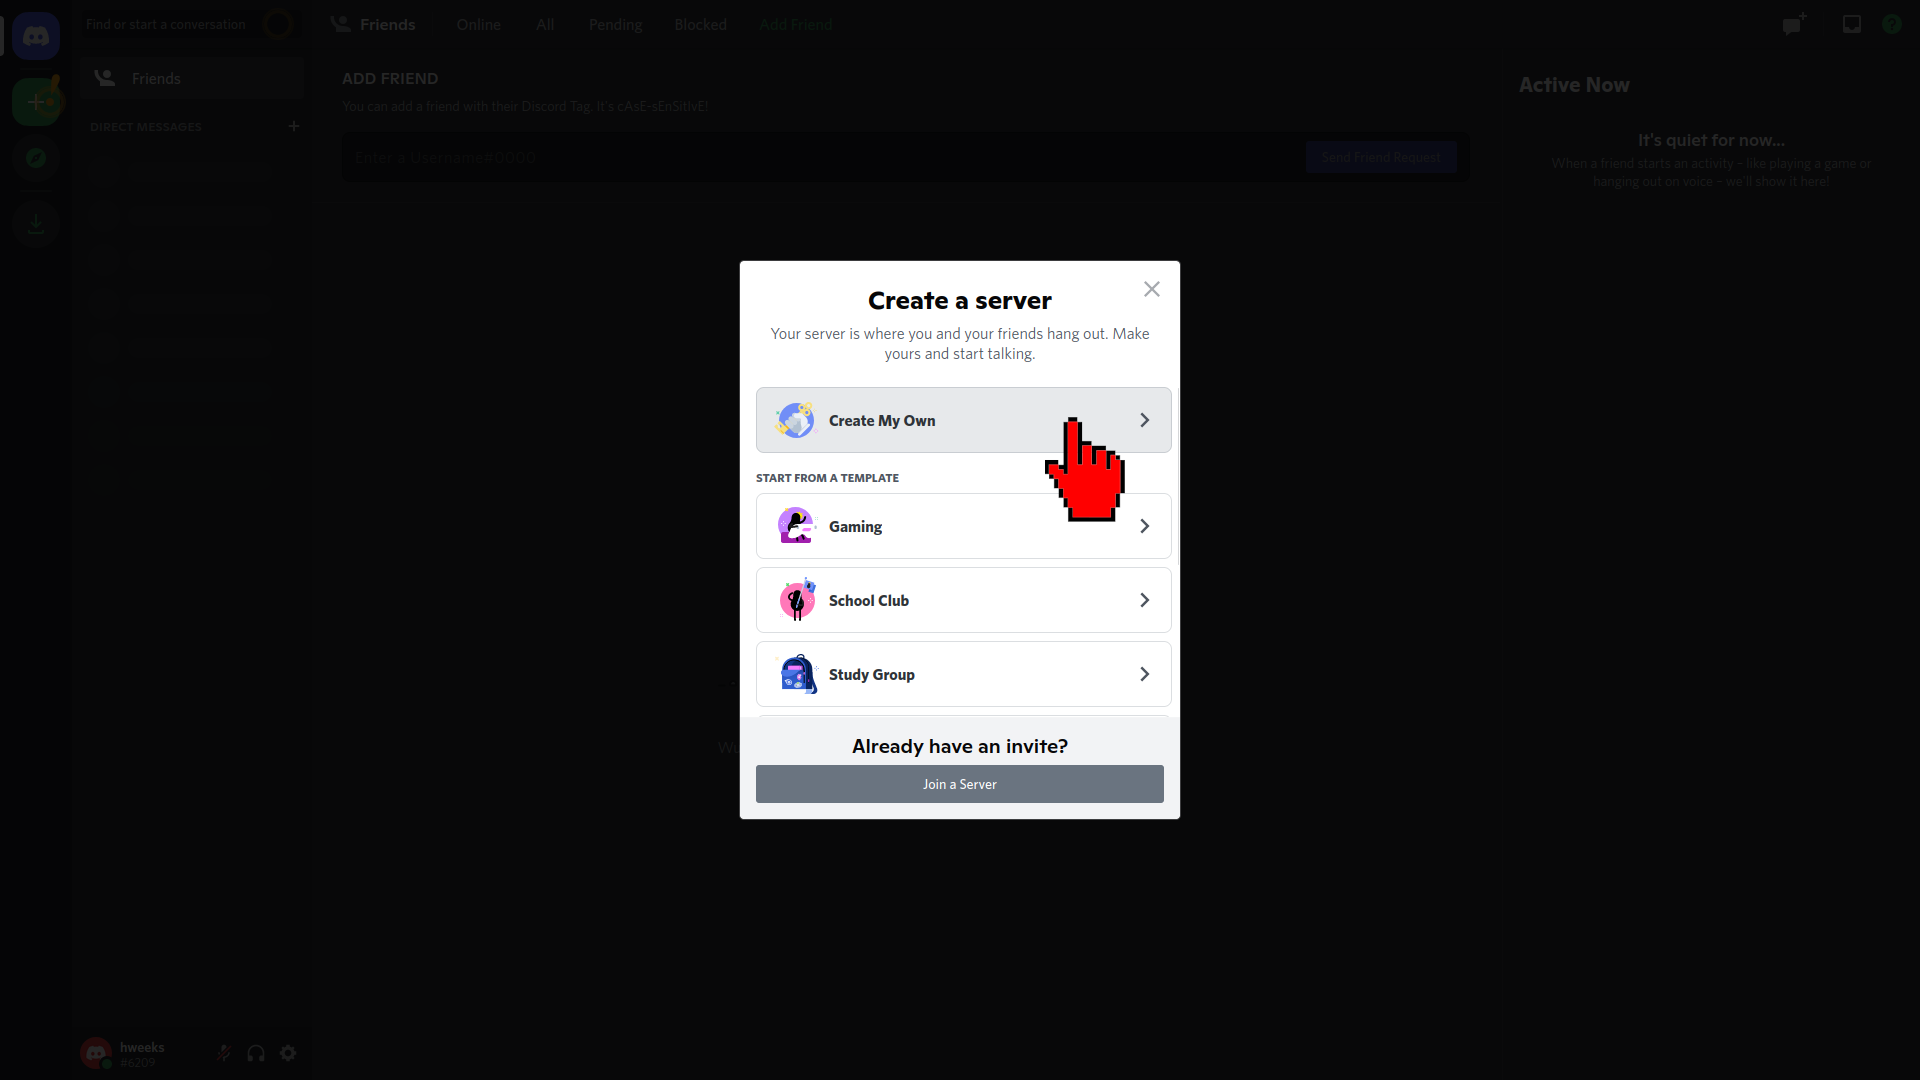
Here we choose to create a simple server for us and our friends but you could also do it for a club or a community:

Then you can name and add an image to your server. The server is named EventServer. Click on Create to complete the server creation:

Your new server created, it contains two channels, a text channel called general and a voice channel called General:
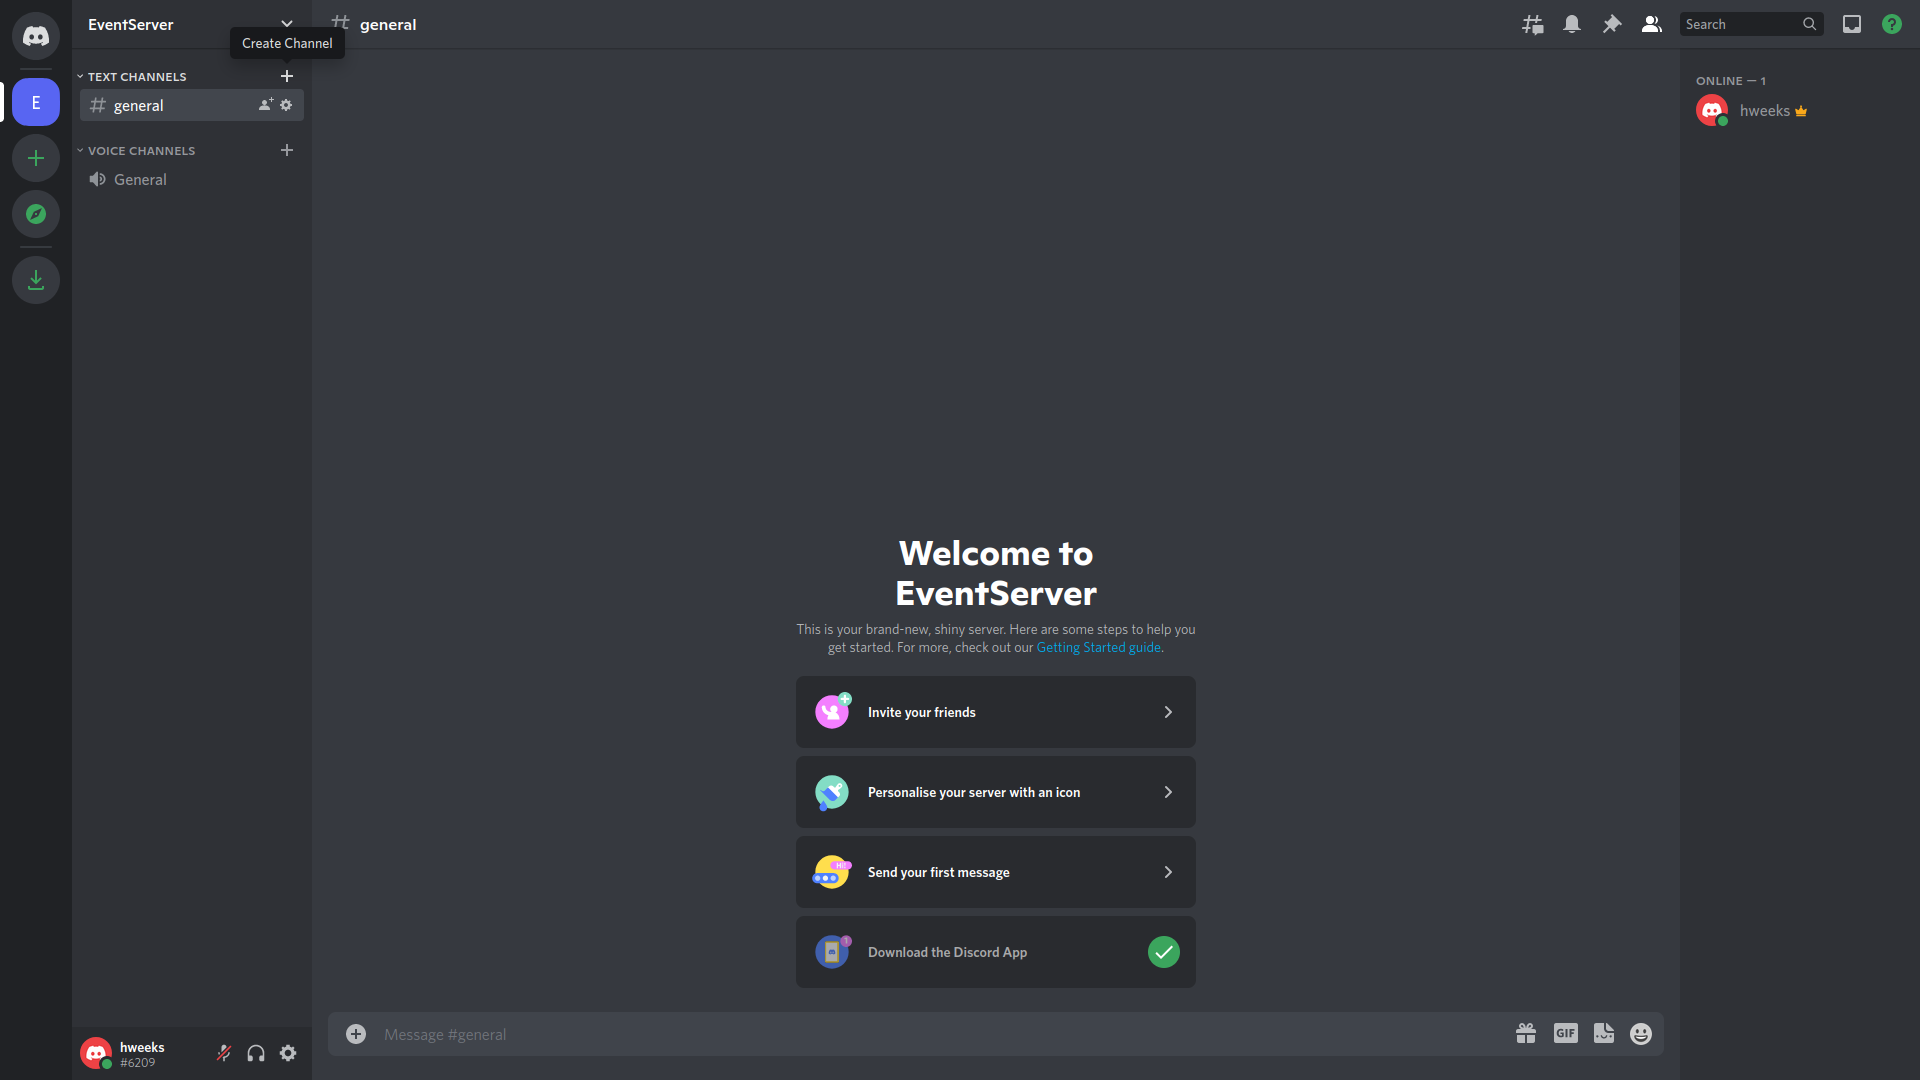
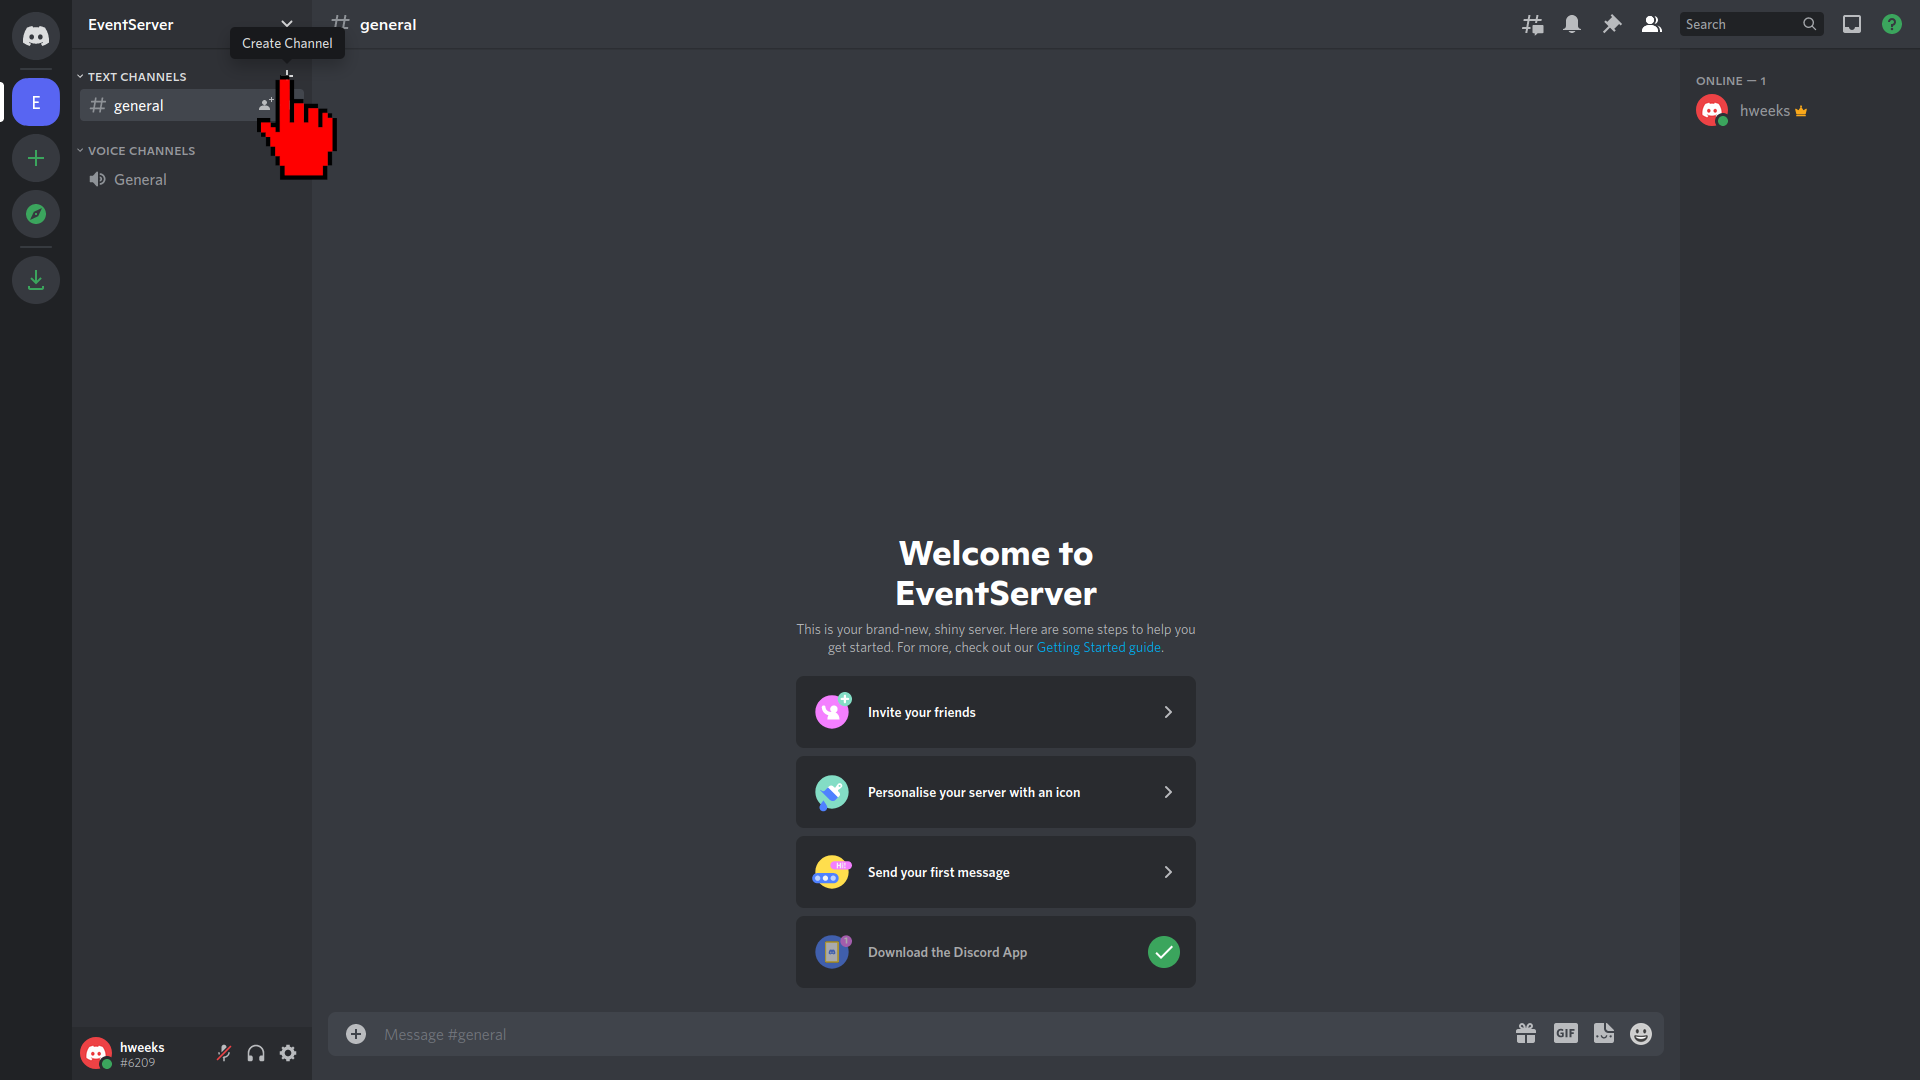
You can add a new channel by clicking on the little + sign next to the text channels list:
It opens the following channel creation window:
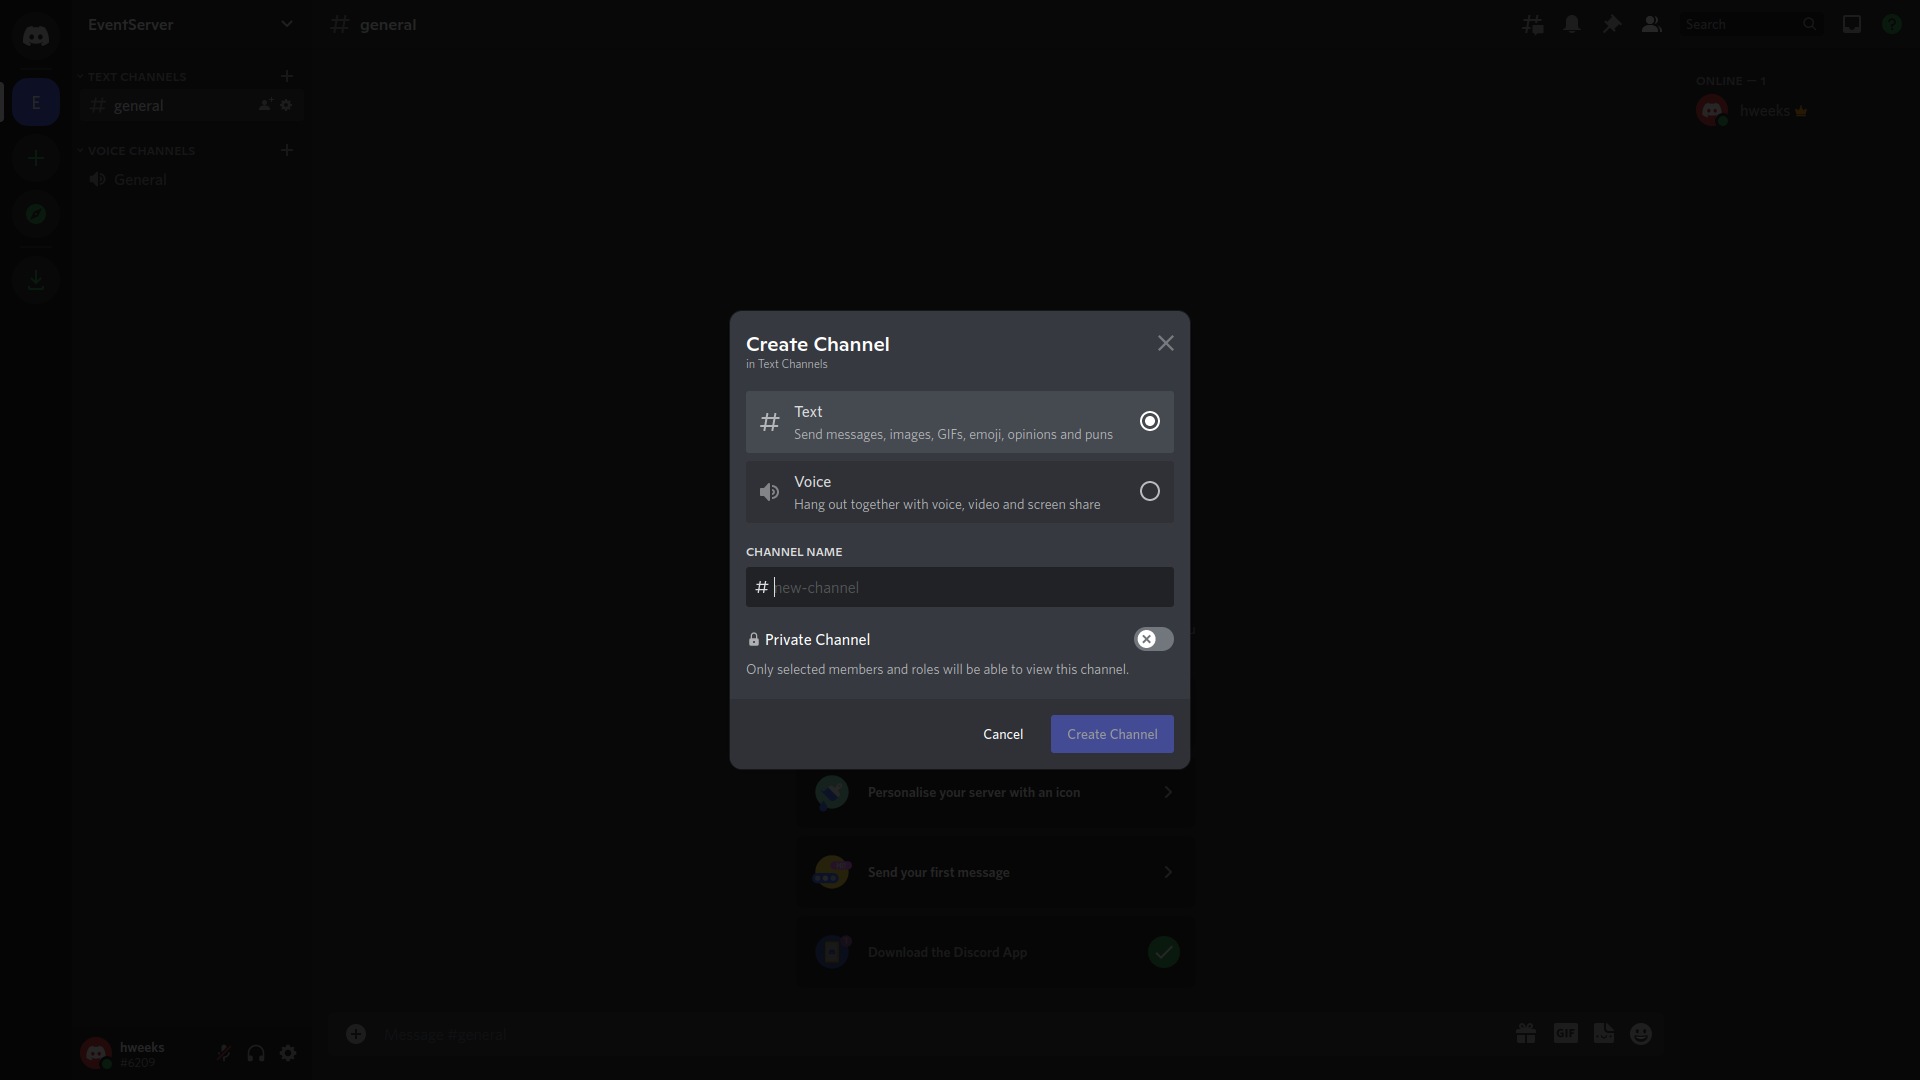
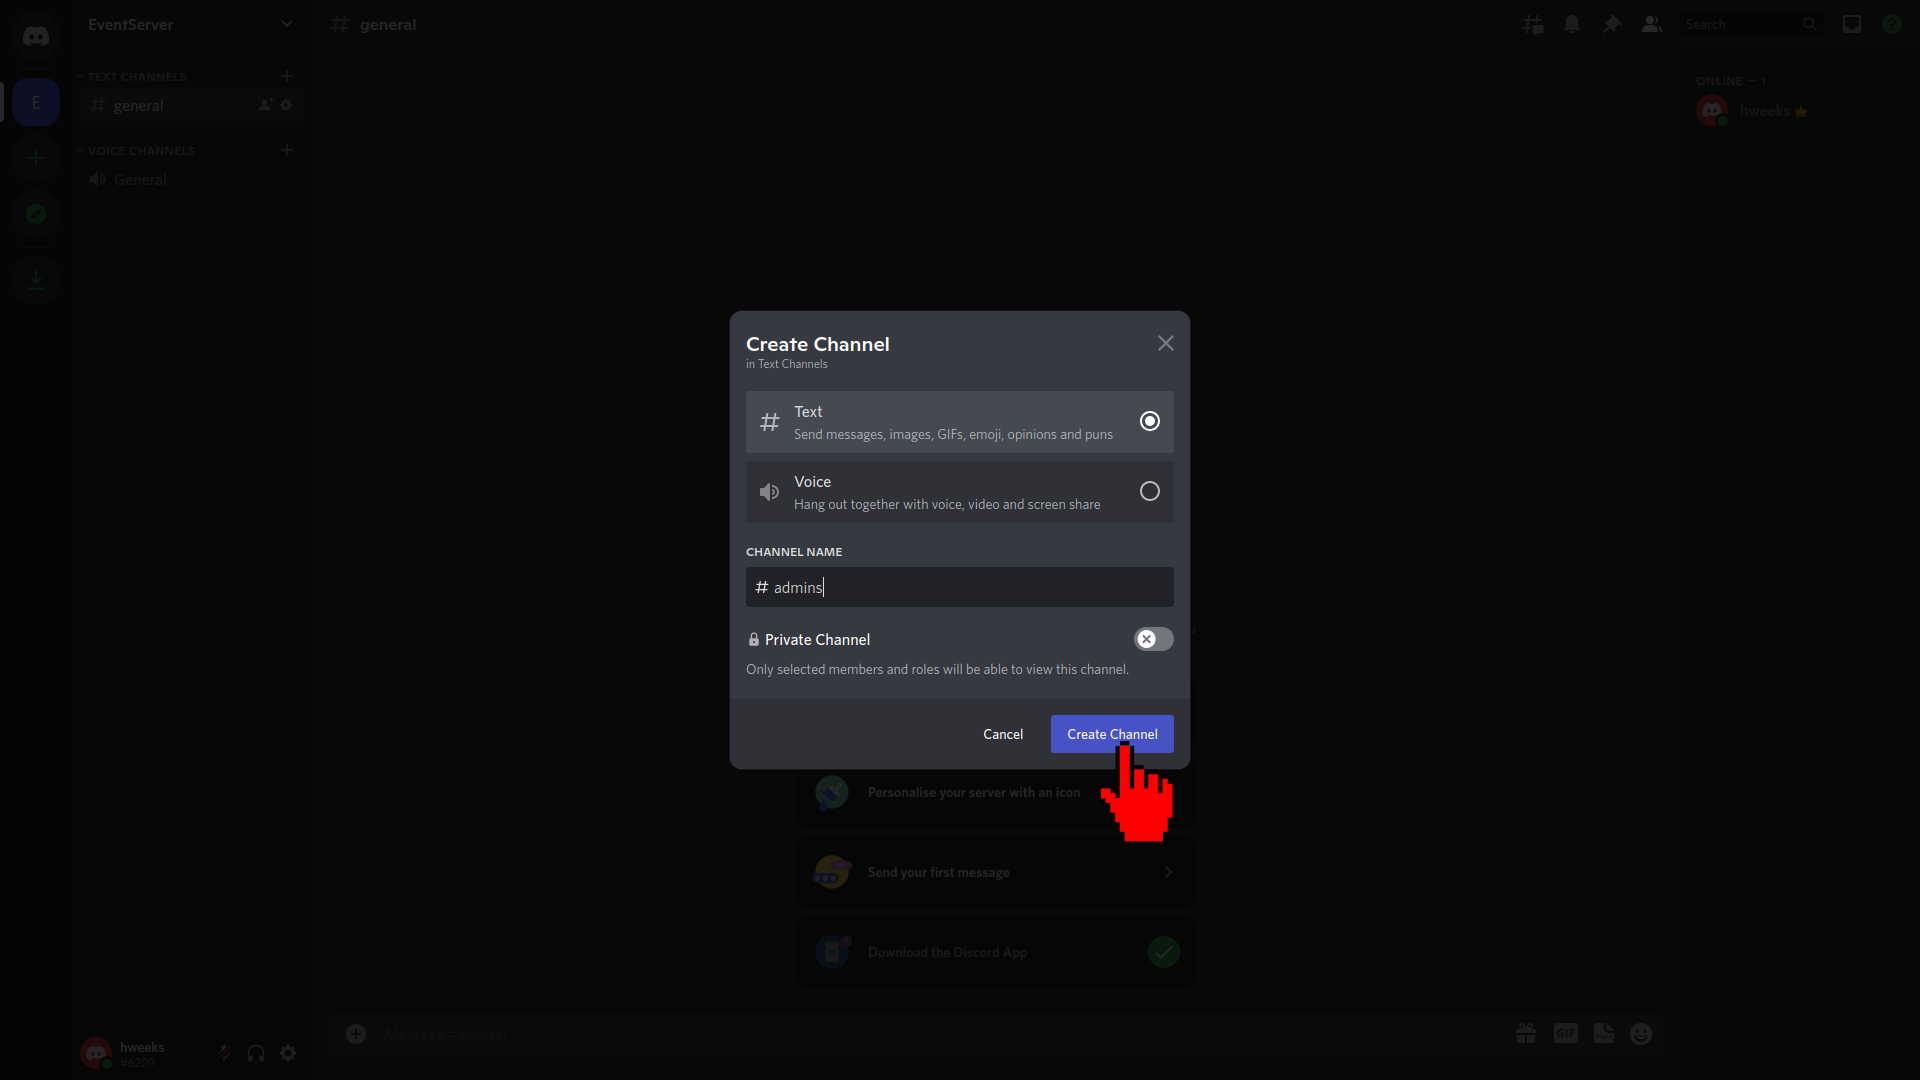
Name that new channel admins and click on Create Channel to complete its creation:
Repeat the channel creation process to add a second channel called events.
You should now have a server with three text channels called: general, admins and events.
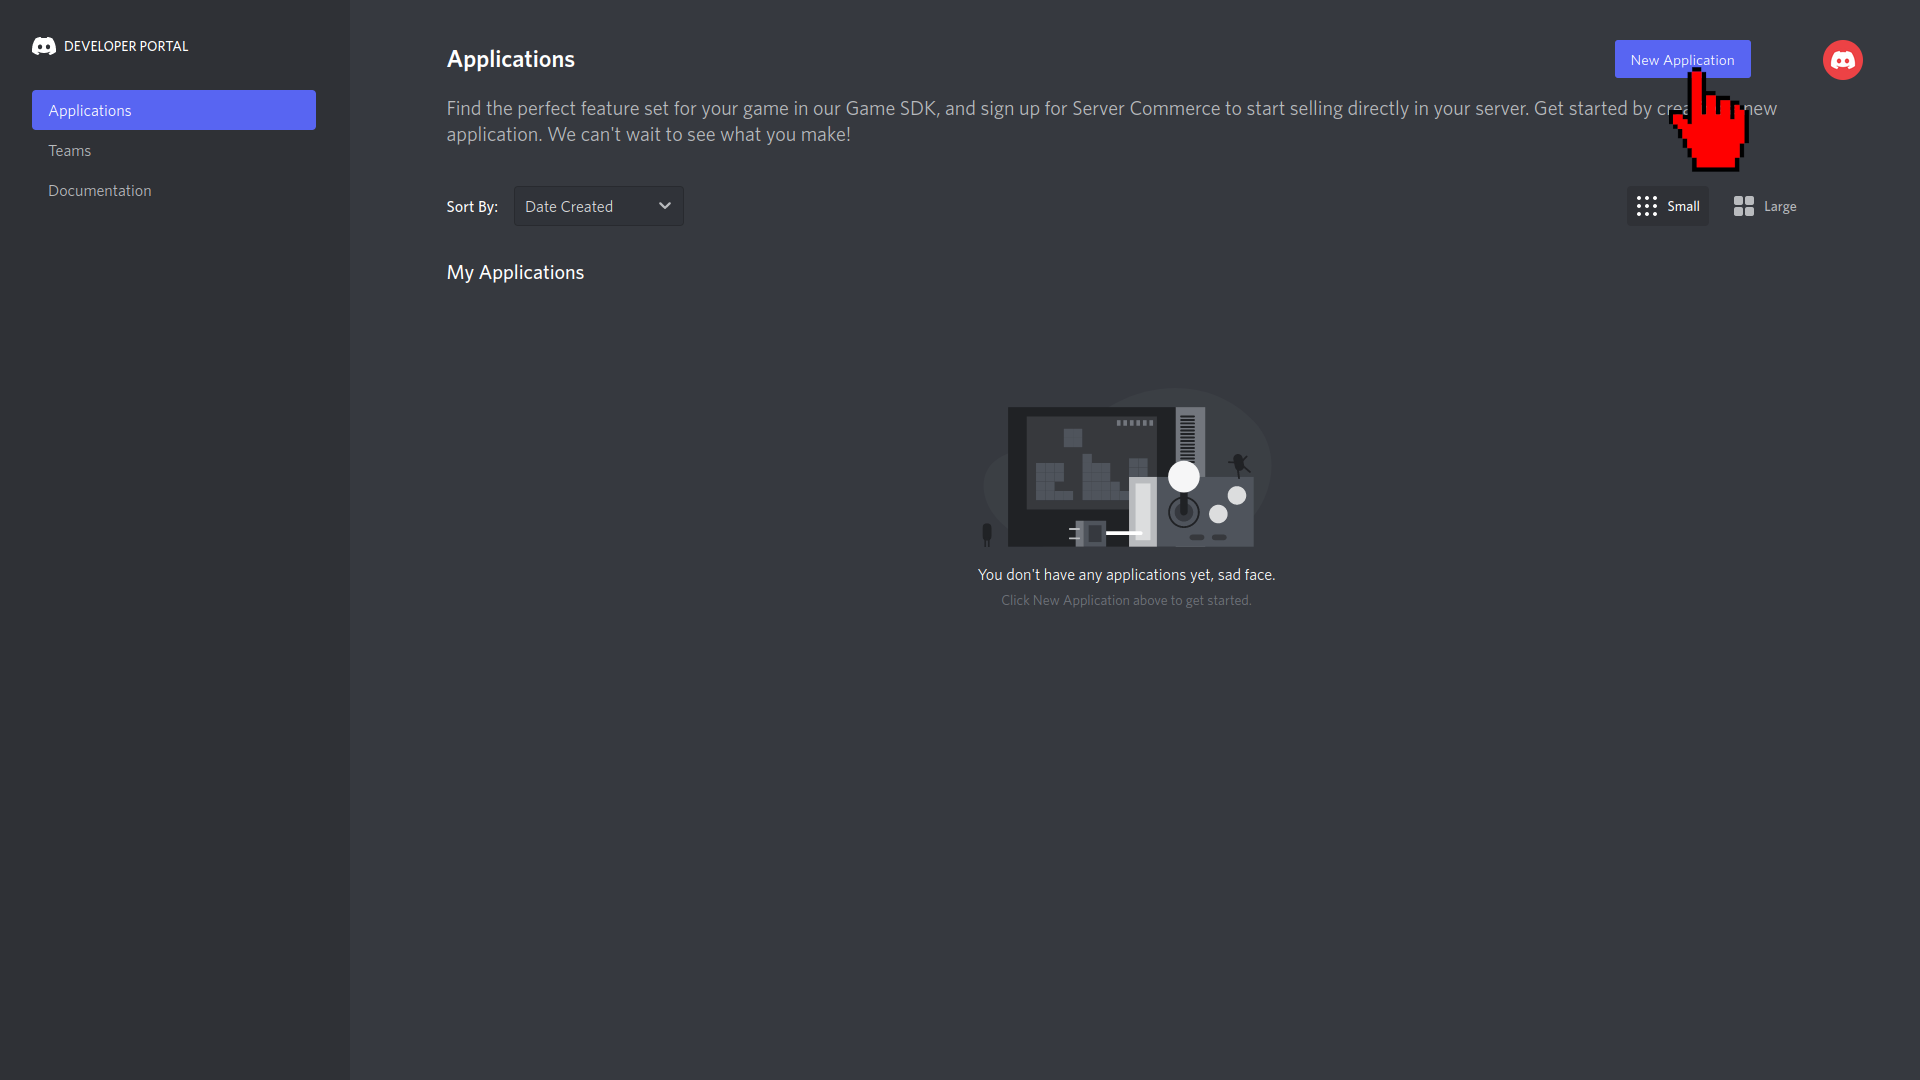
Create a bot application
This step will require you to connect to the Discord Developer Portal that proposes you to add a new application. That is a Discord application that we will later configure in order to make Discord recognize it as a bot. To start this bot creation process you must click on New Application:
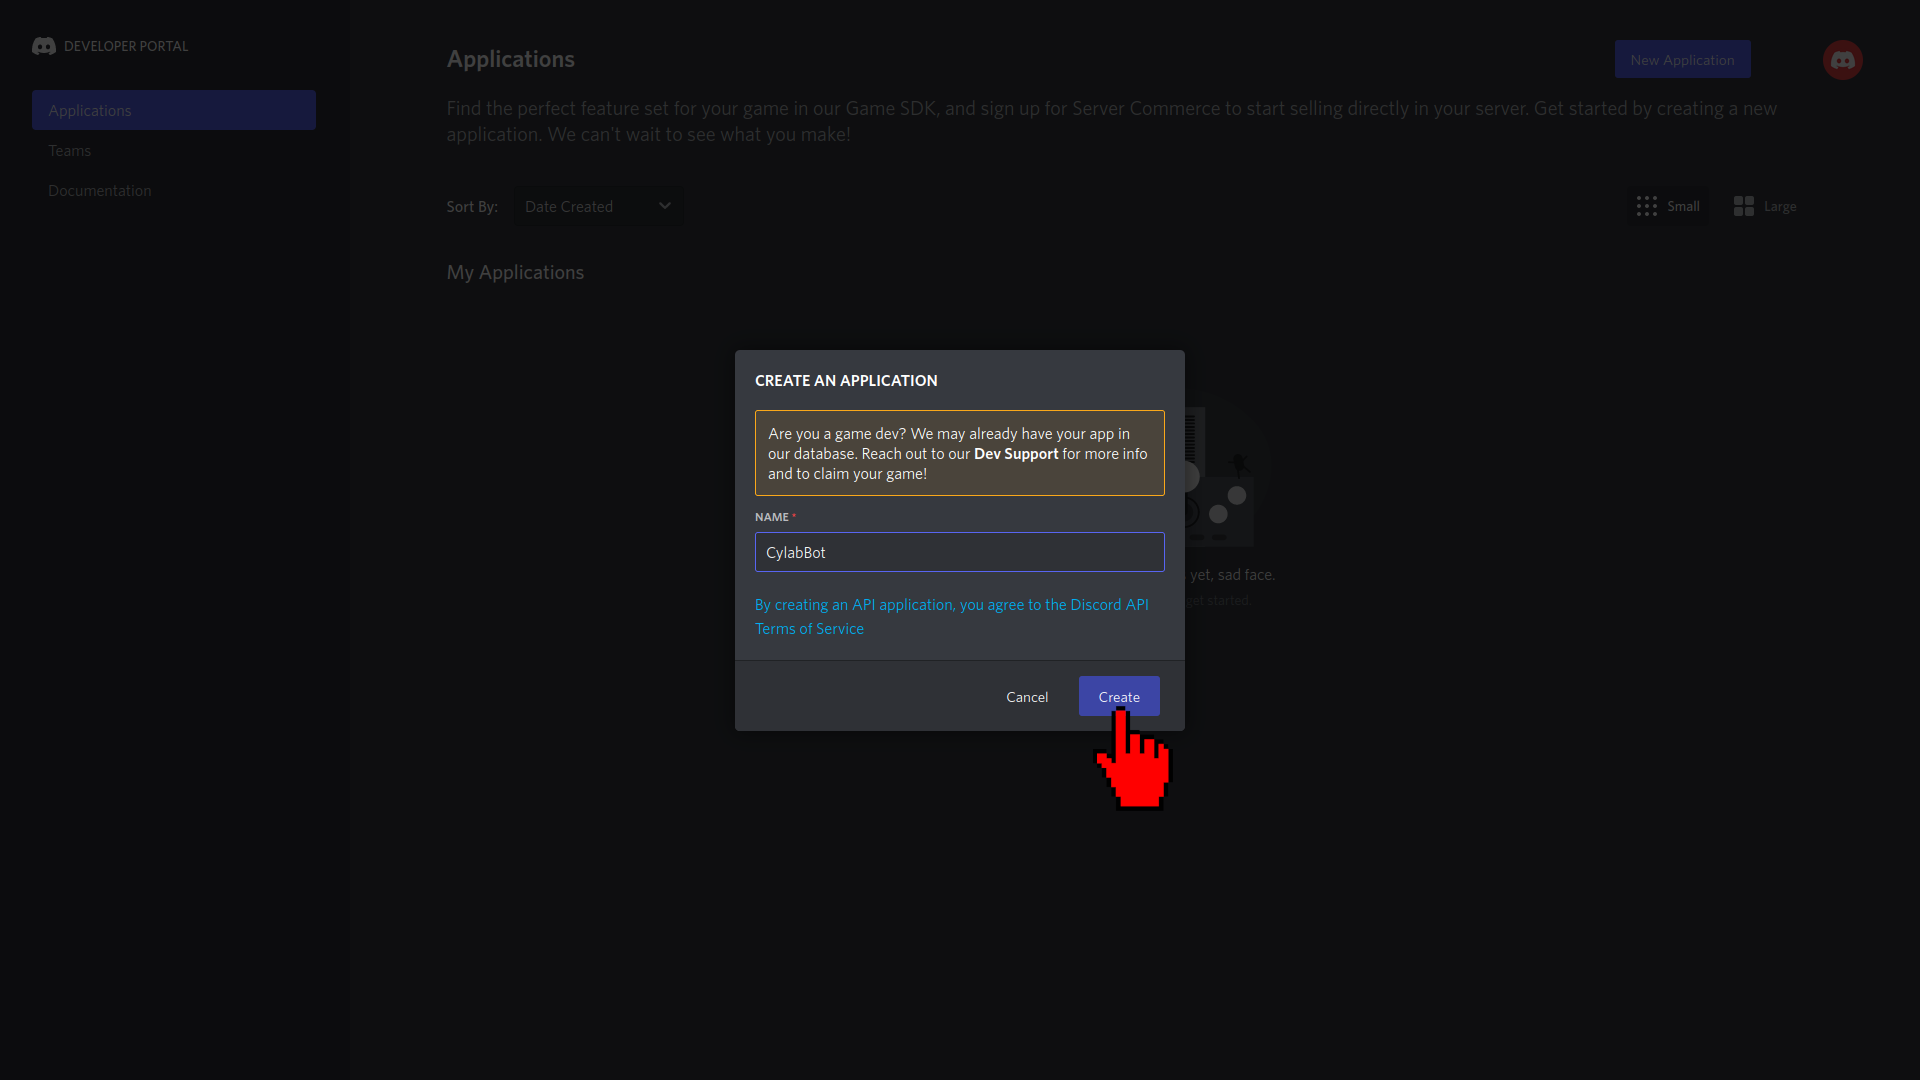
It should open the following window that asks you to name your application:
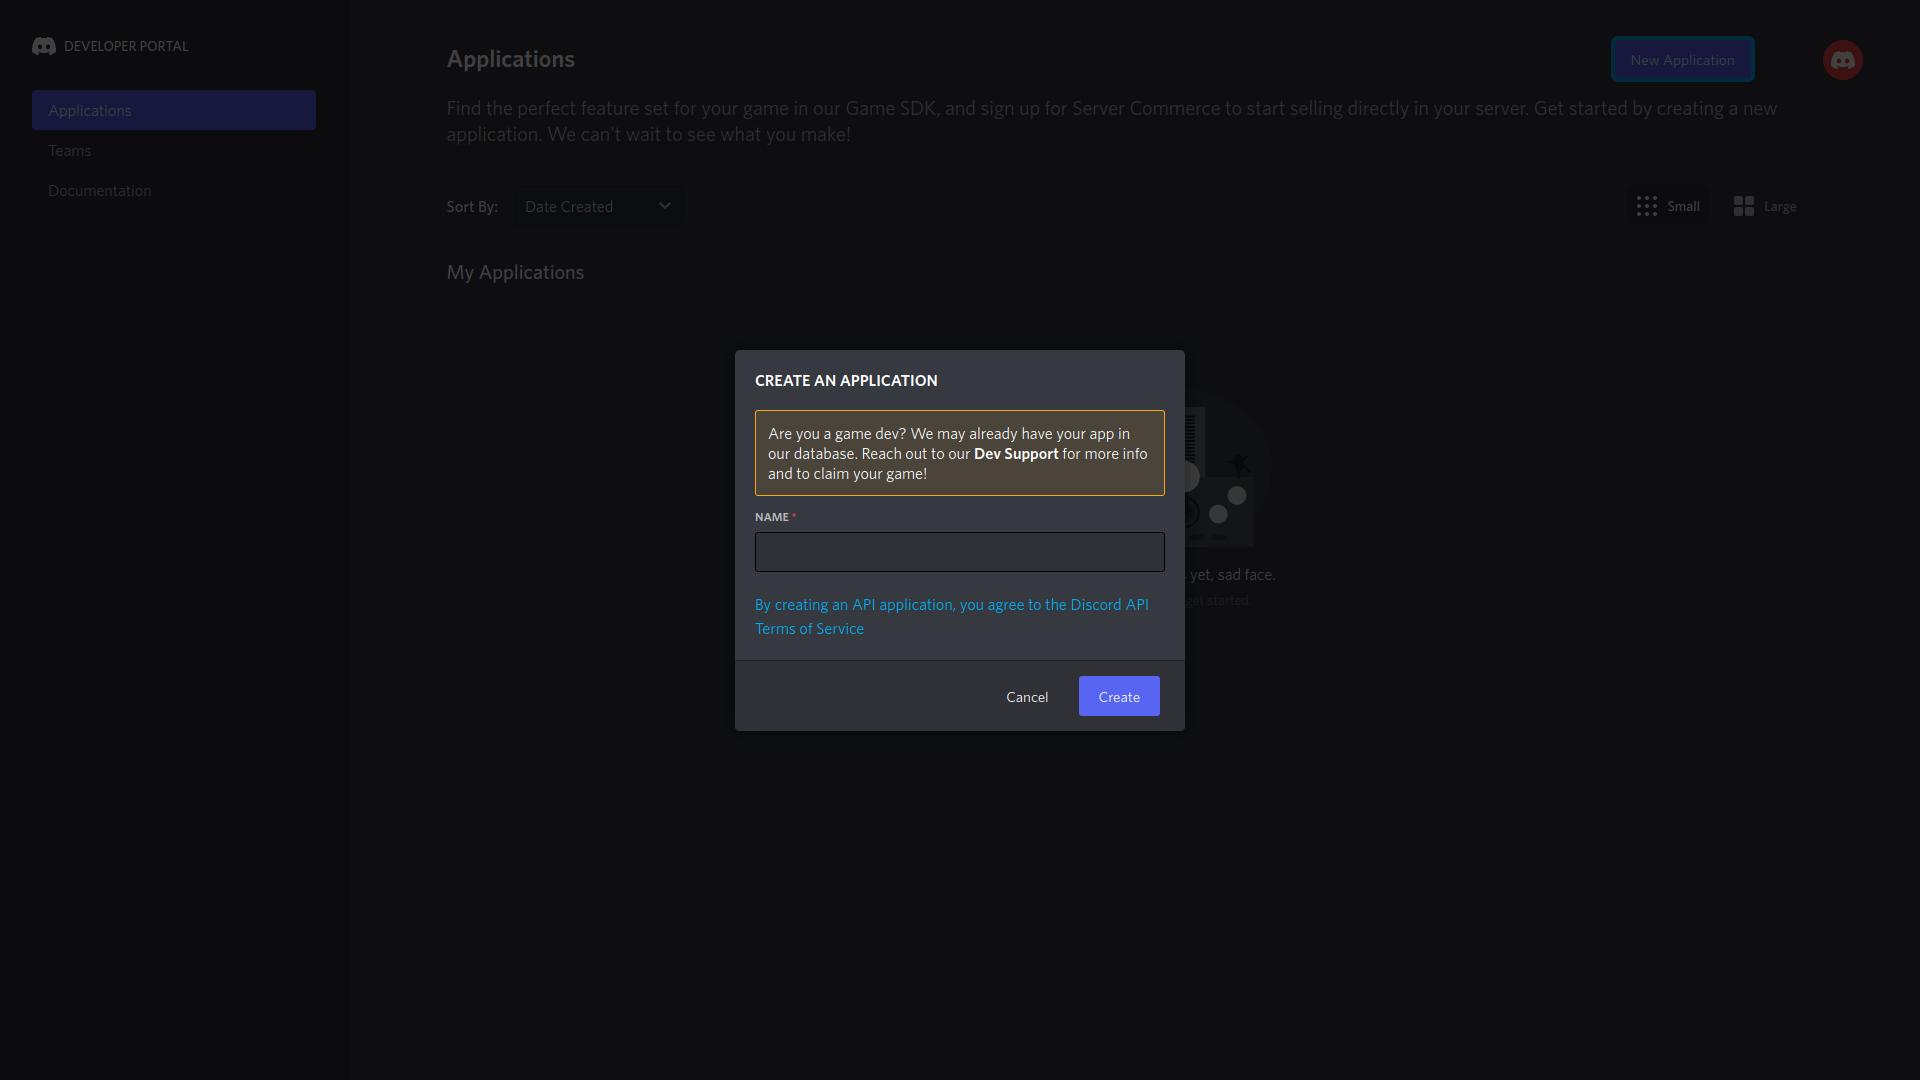
Do not use the word discord in the name of the application. If you do so, you will fail to convert your application to a bot application later. In fact, Discord does not want people to create bots containing the word discord in their names. Here the application is called CylabBot. Click Create to complete the creation of the application:
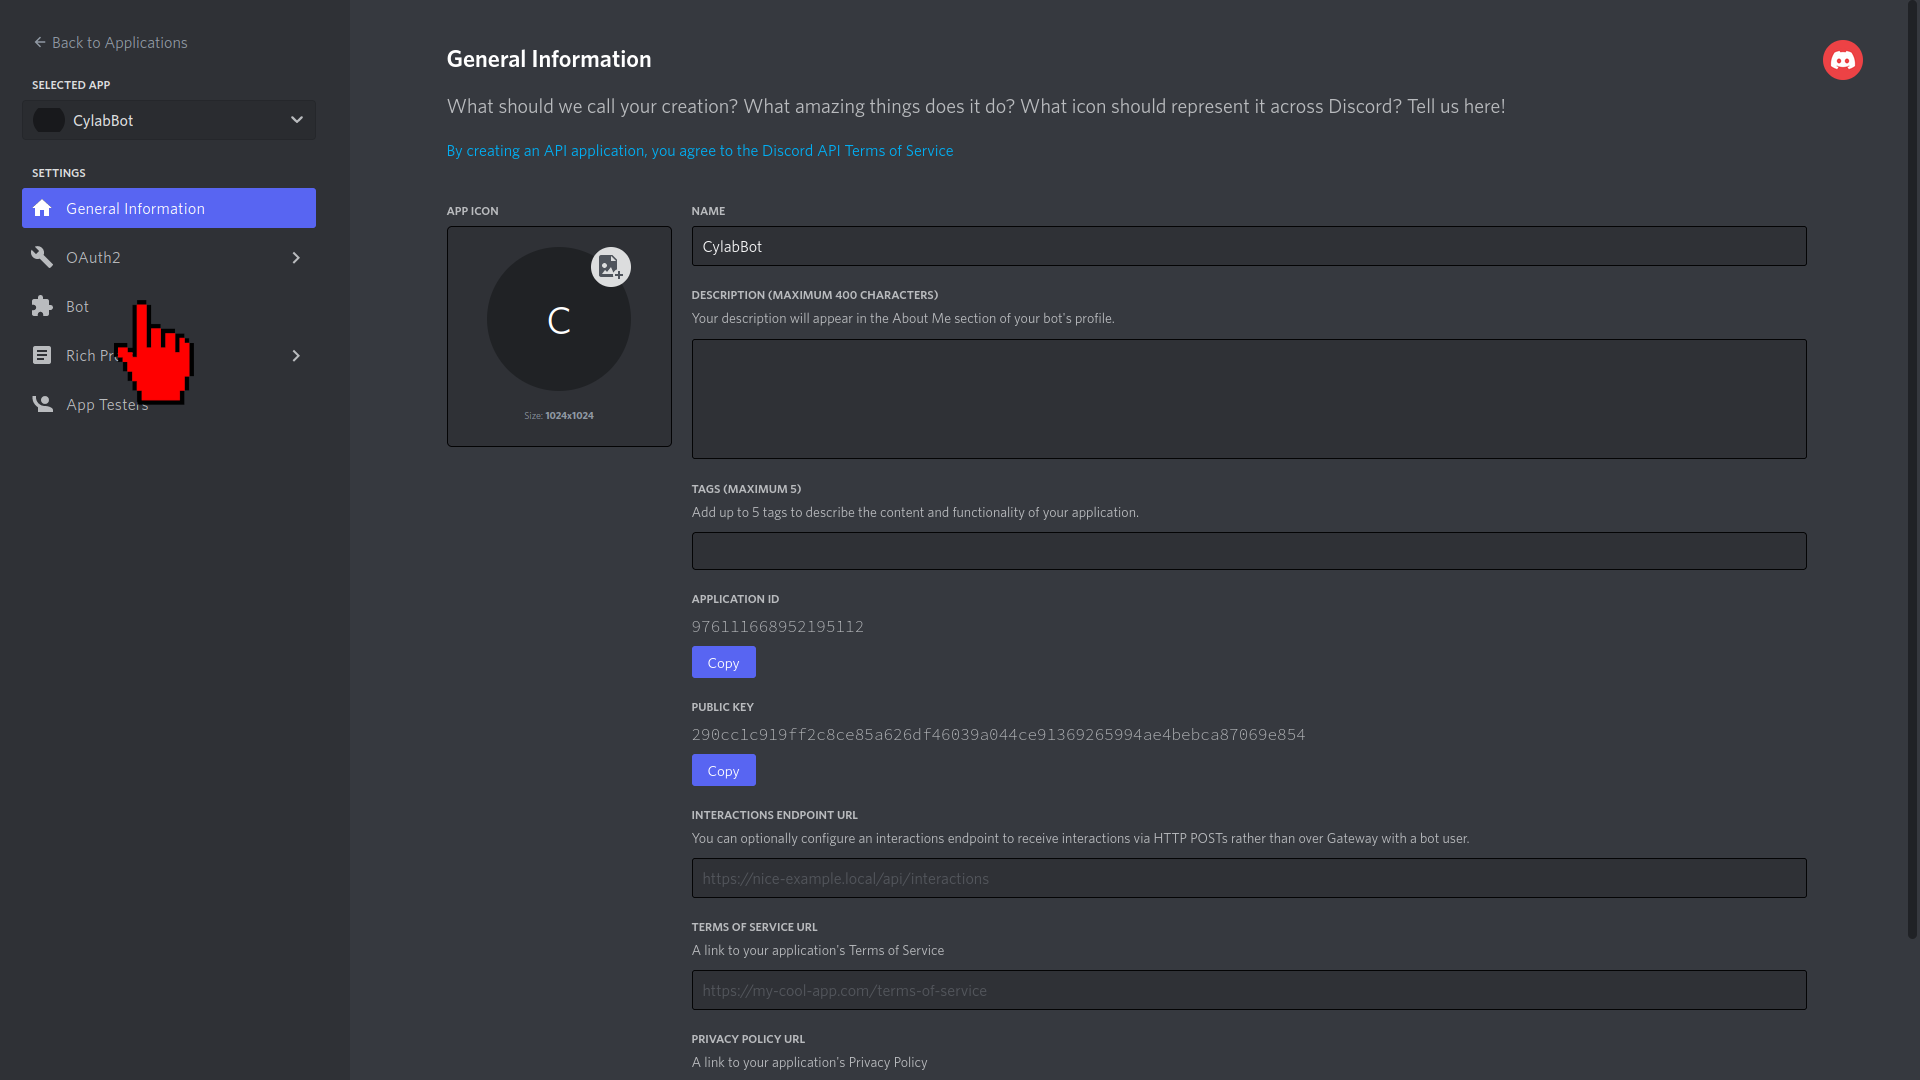
The application is now created. You can add an icon to it, complete its description, etc. Here we do not need to customize it so we’ll click on the Bot tab on the left to tell Discord that it must consider this CylabBot application as a bot:
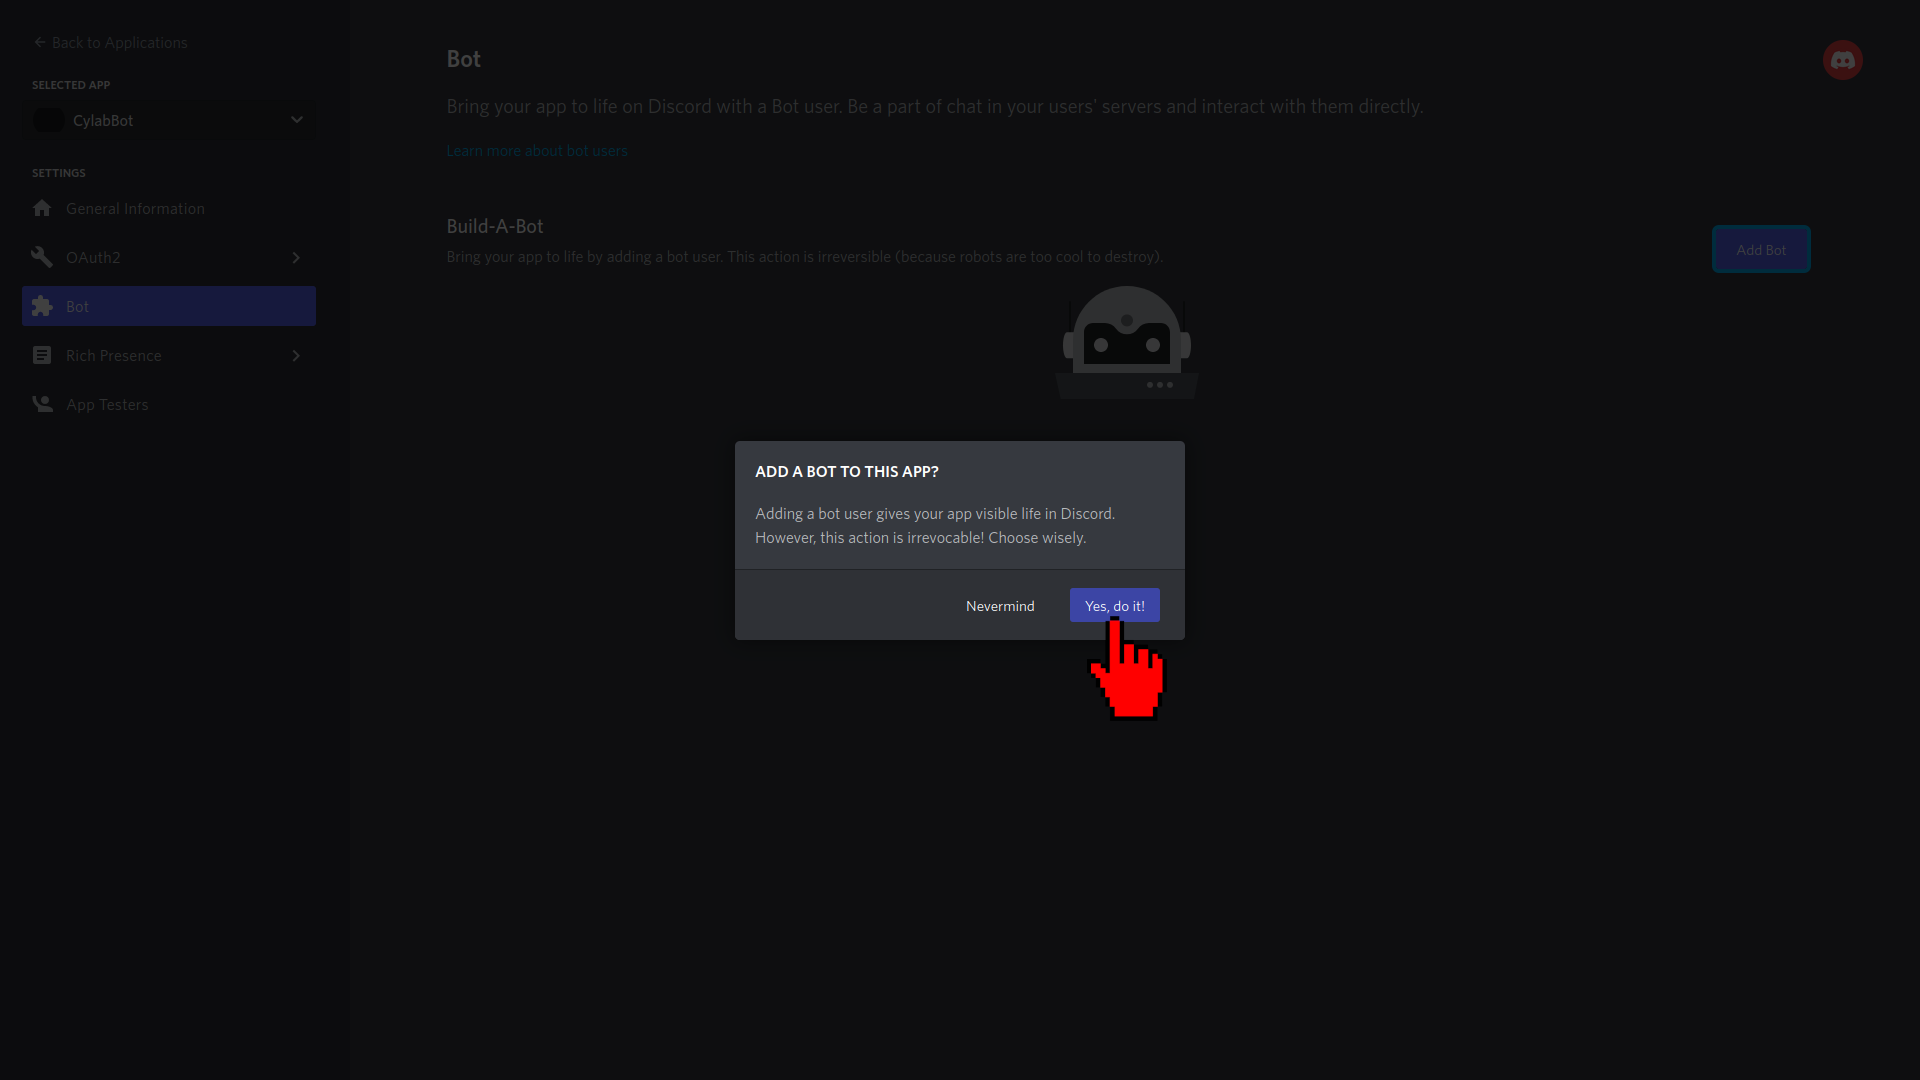
Click on Add Bot:

And confirm:
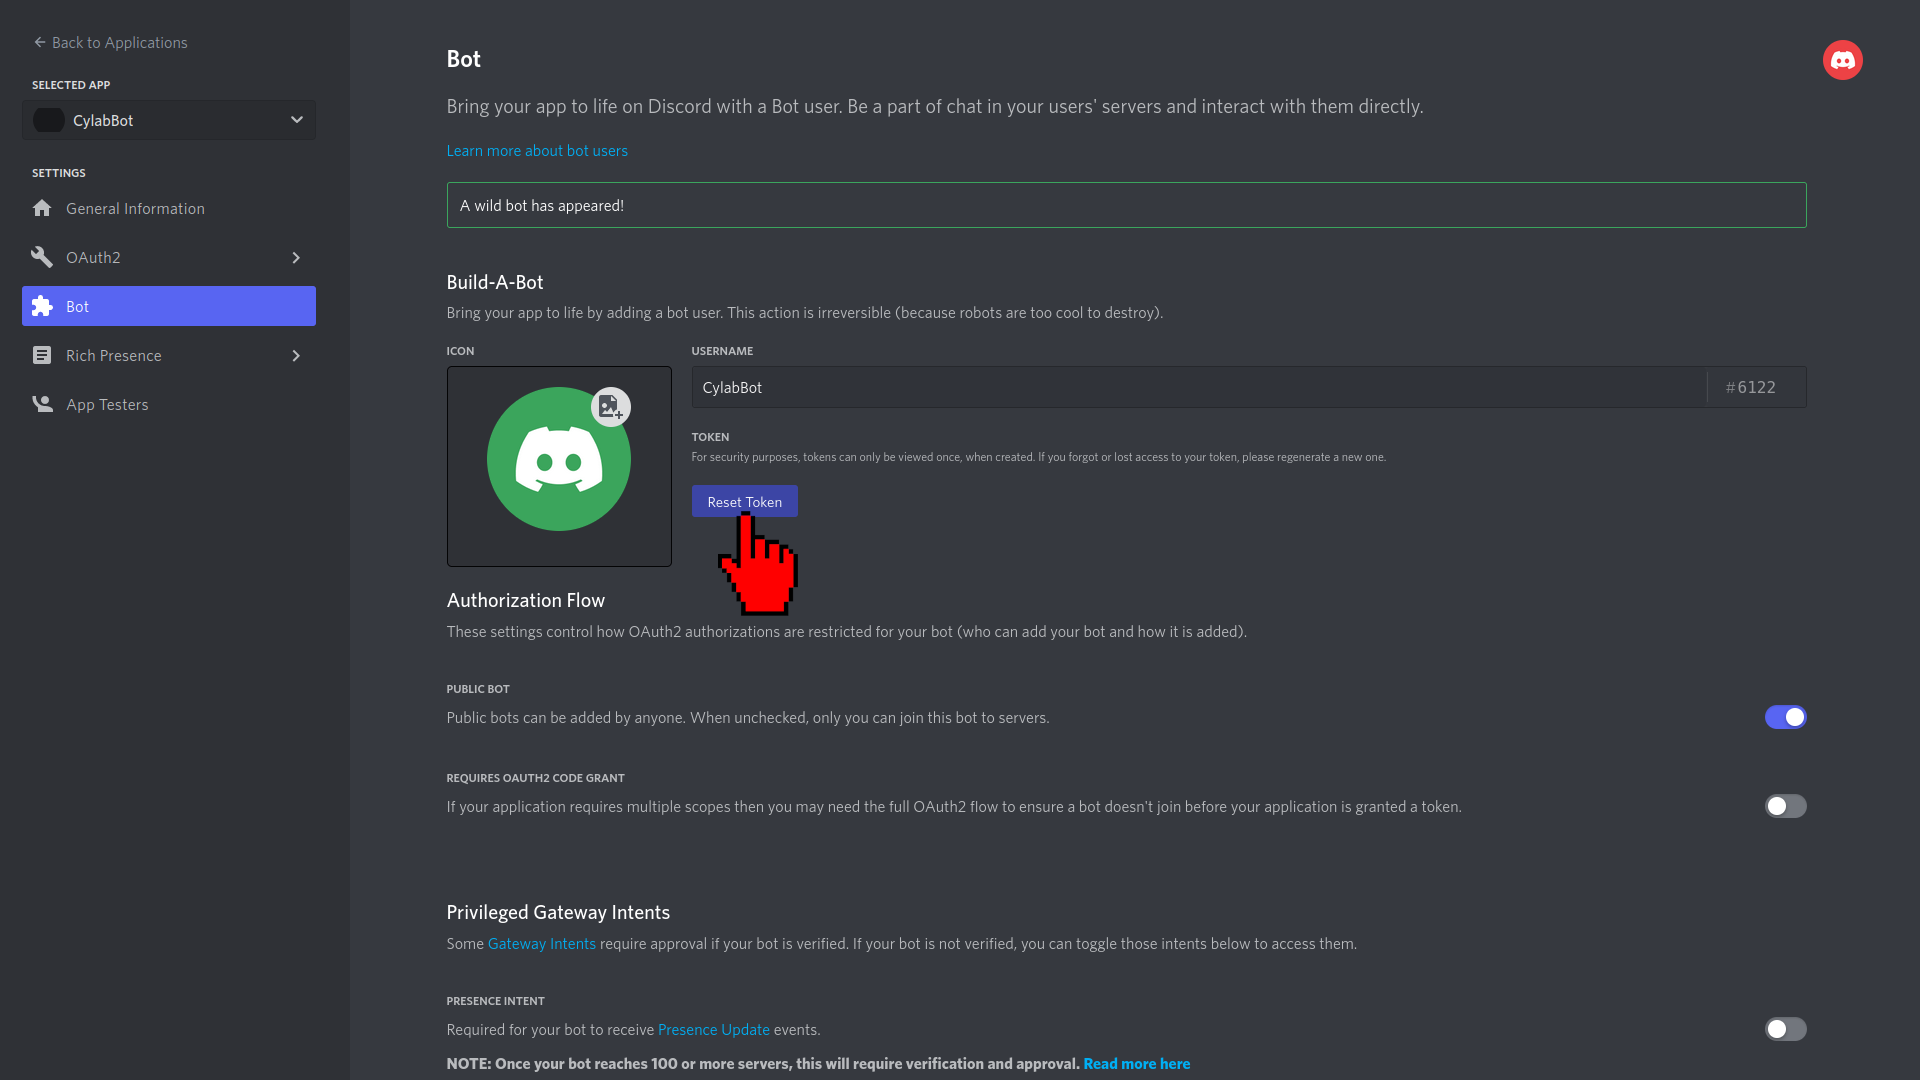
The application can now be used as a bot. You will make use of that bot application with a token that is needed to connect to the bot. That token can be seen by clicking on Reset Token:
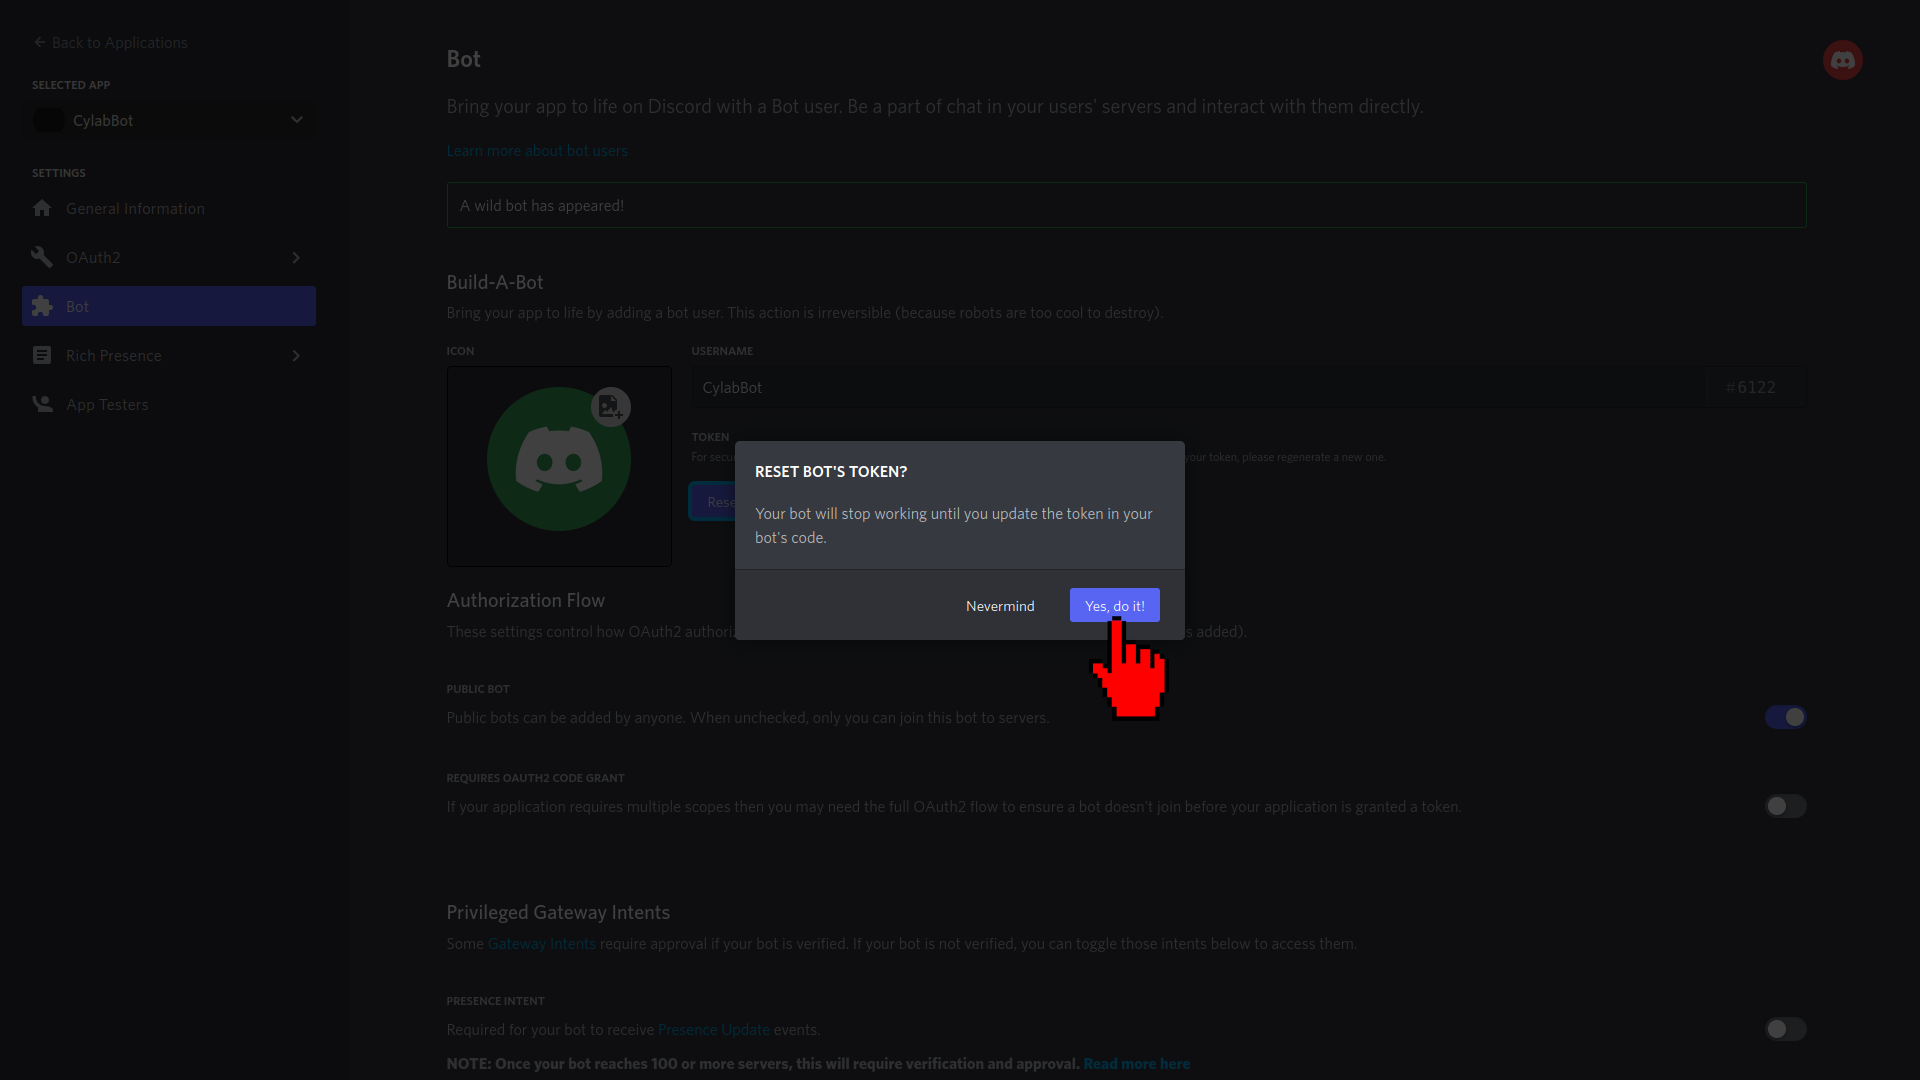
Confirm the reset of the token:
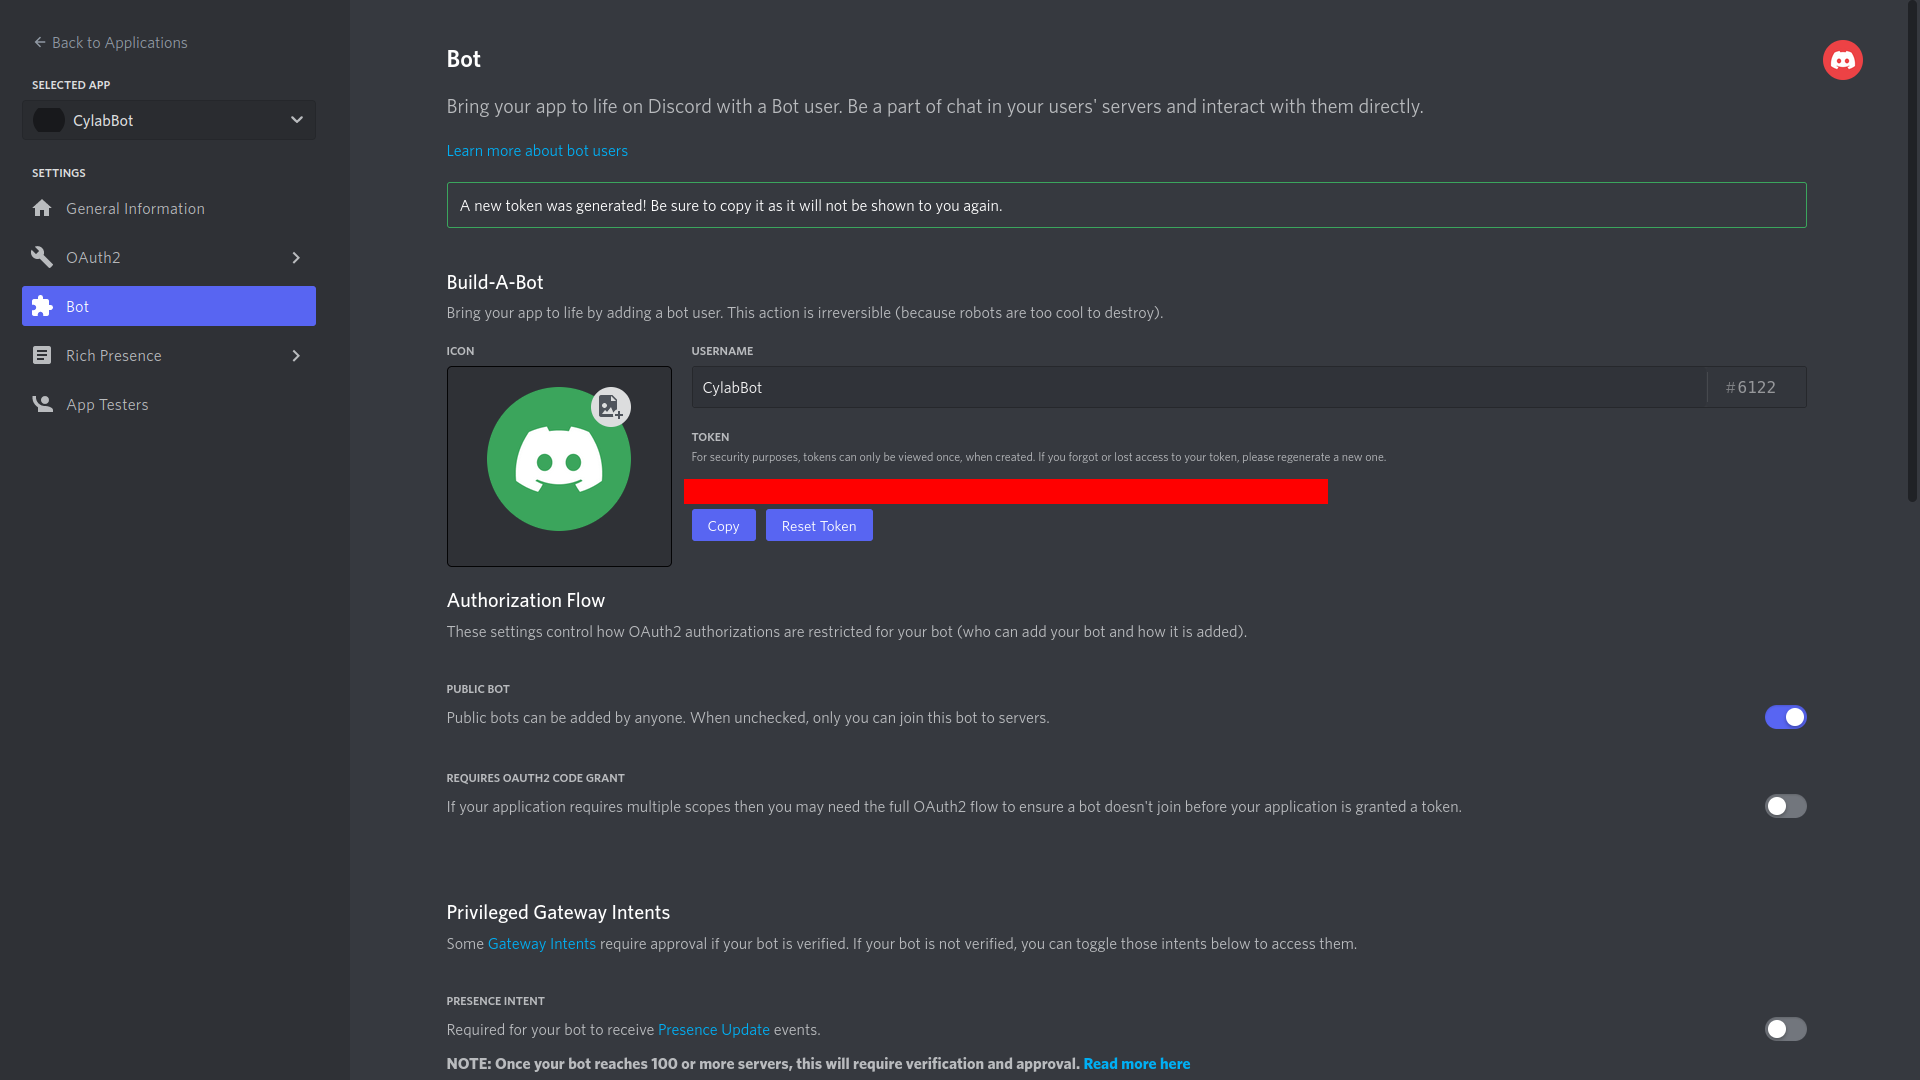
Copy the token that appears (I hid it by a red rectangle, it must be kept secret for obvious reasons) and paste it somewhere to retrieve it later. You’ll need it for Part 2 when you’ll run a Python script that can connect and add features to that bot:
You now possess a Discord server and a custom Discord bot. The next step is to link that bot to the server and give it the permissions needed for the features we’ll add to the bot.
Link the bot to the server
In this last step, you will add your freshly created bot to your server. First click on the OAuth2 tab in the left panel:

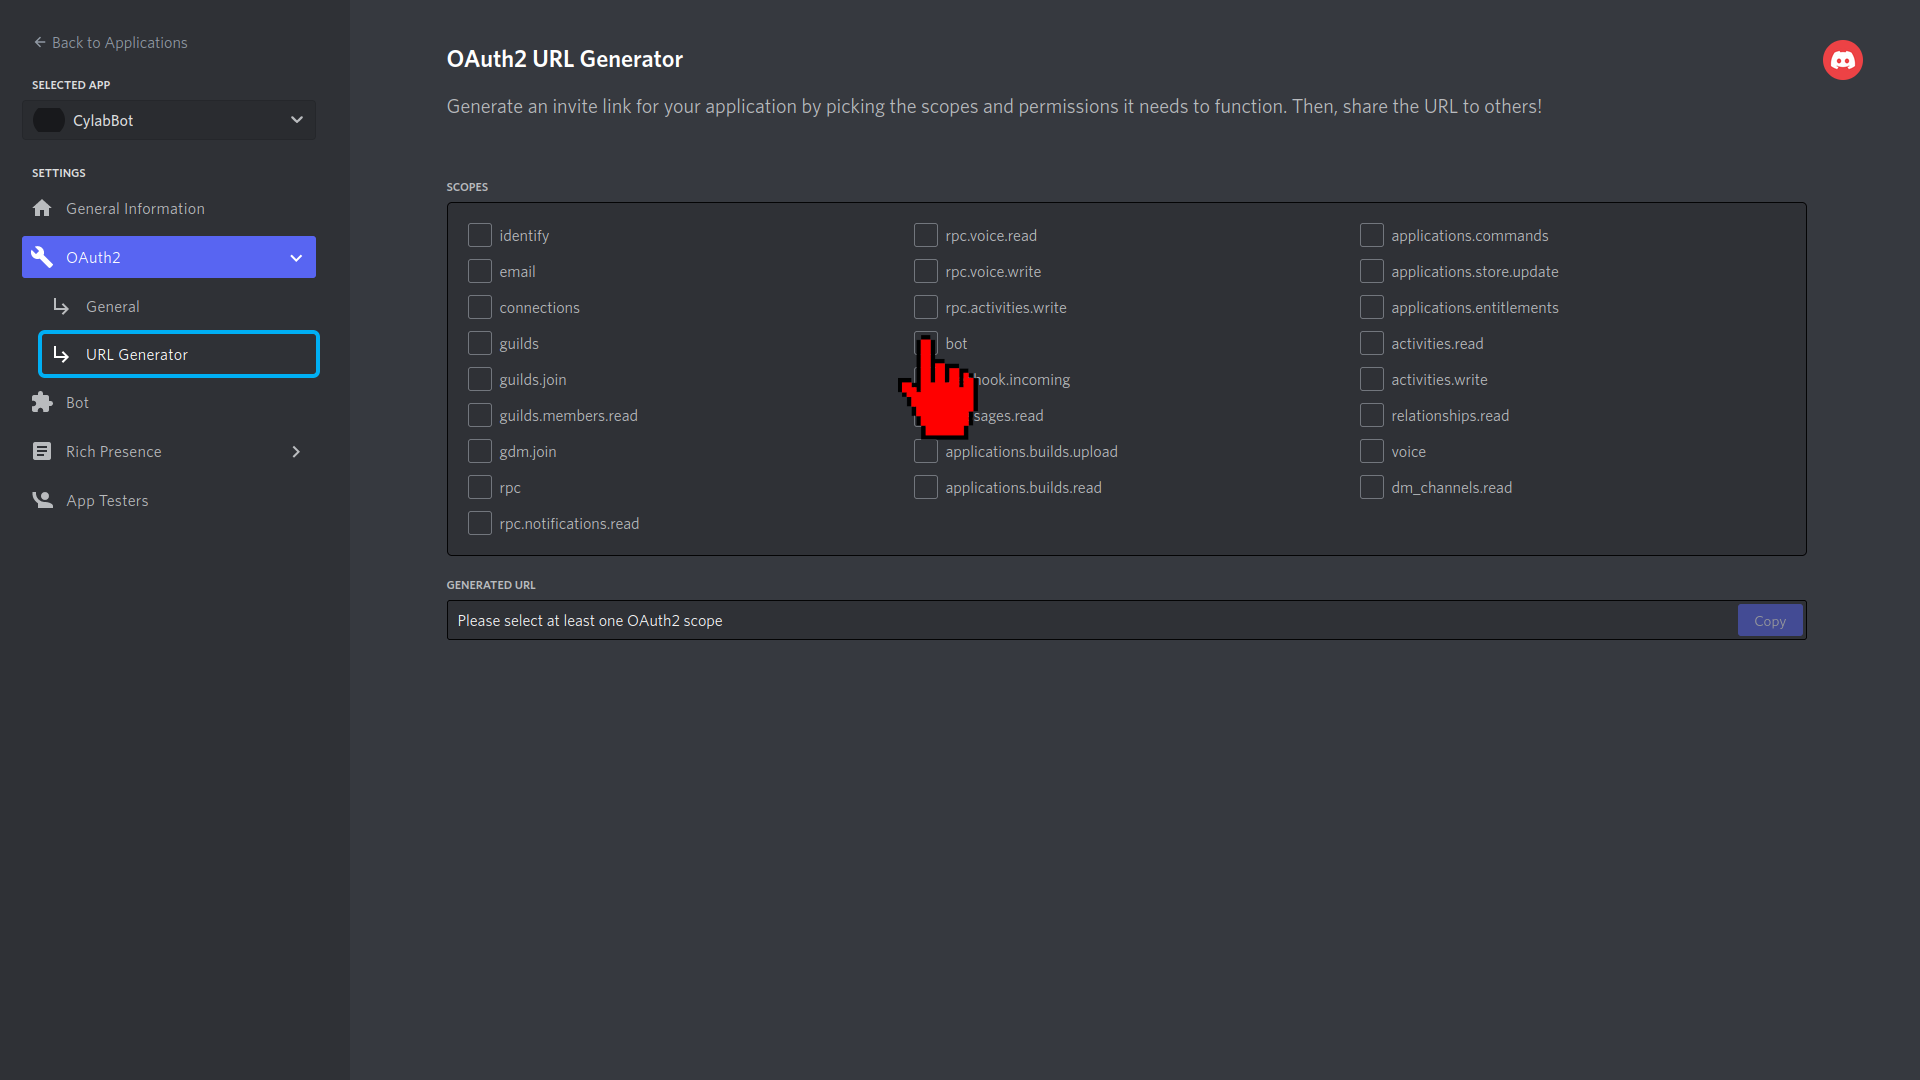
Two new sub-tabs should appear: General and URL Generator. Since we’ll generate an url that will add the bot to the server, click on URL Generator:

Select the scope of the URL as a bot scope:
A list of bot permissions should appear. These are all the actions your bot will be granted to achieve on the servers you’ll link it to. Keep in mind that it’s better to only give necessary permissions, imagine what could happen if Discord vulnerabilities are exploited and your bot gets hacked!
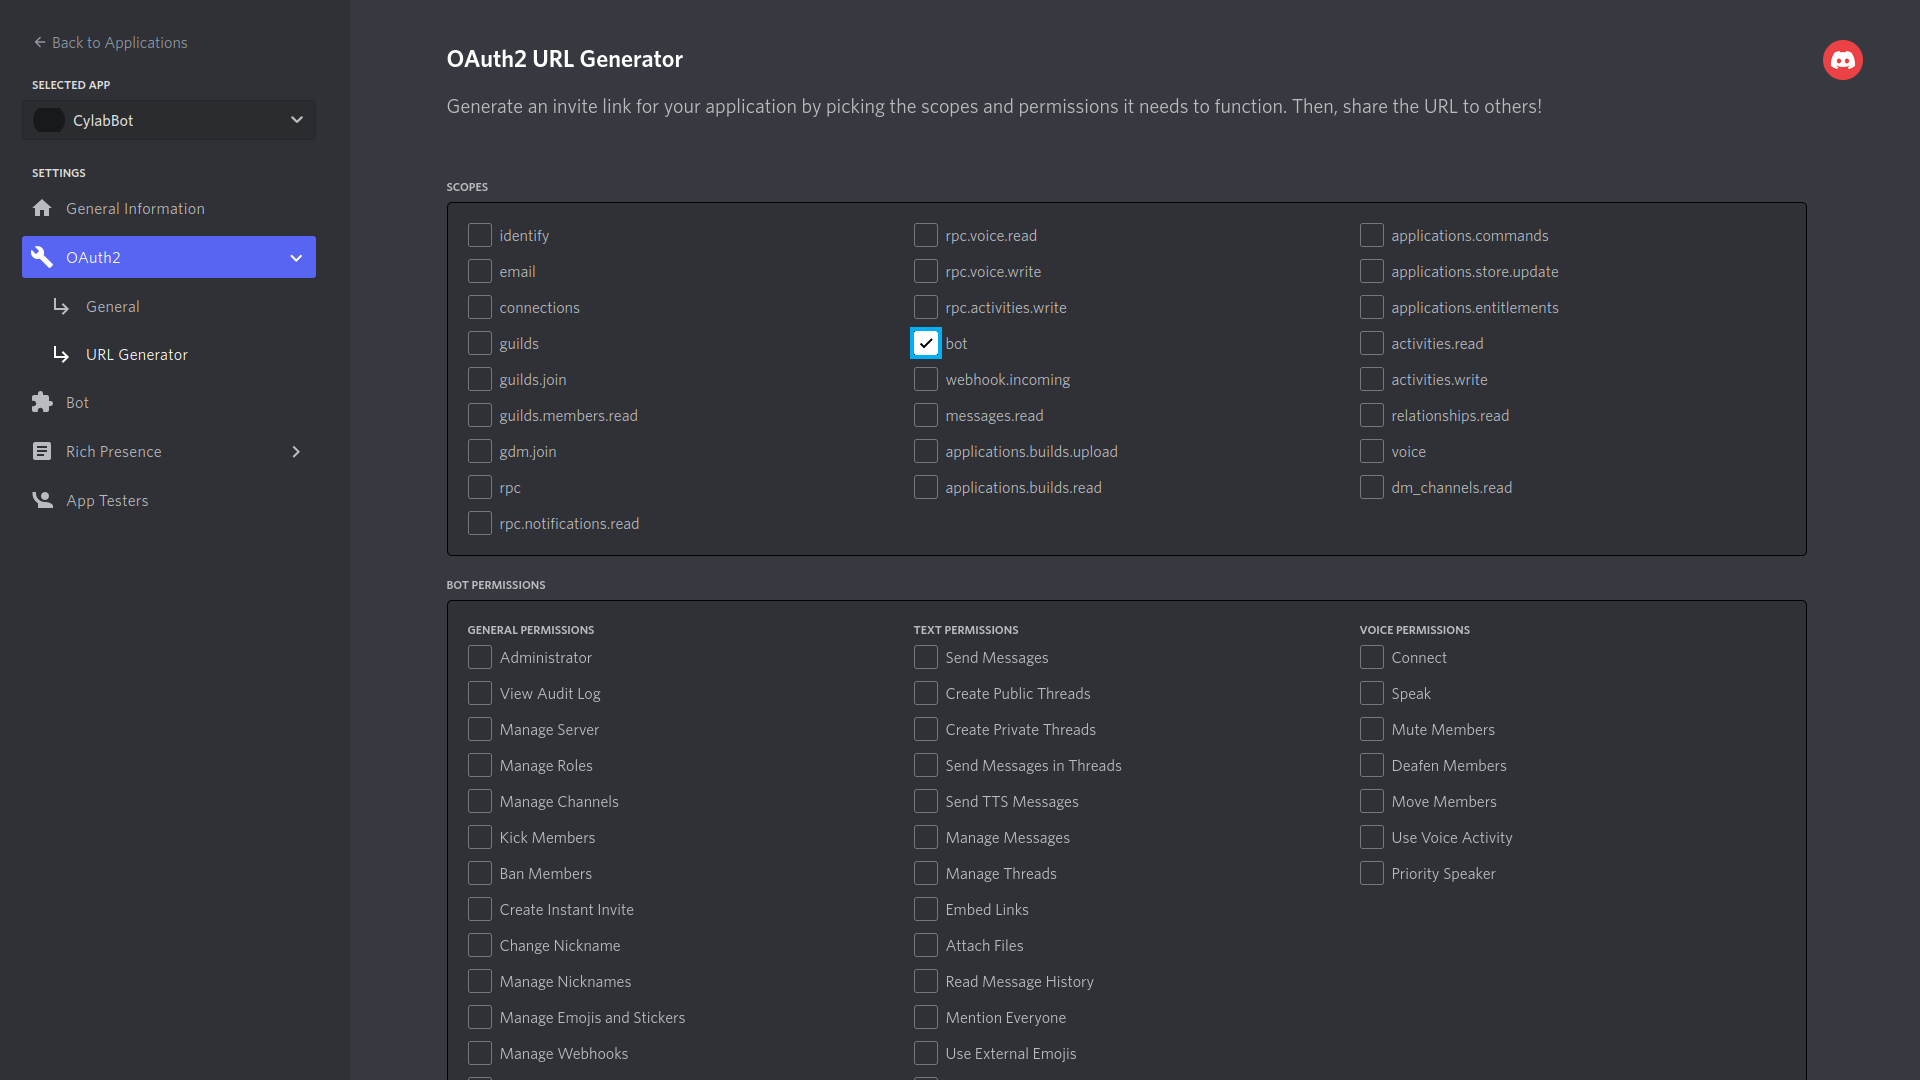
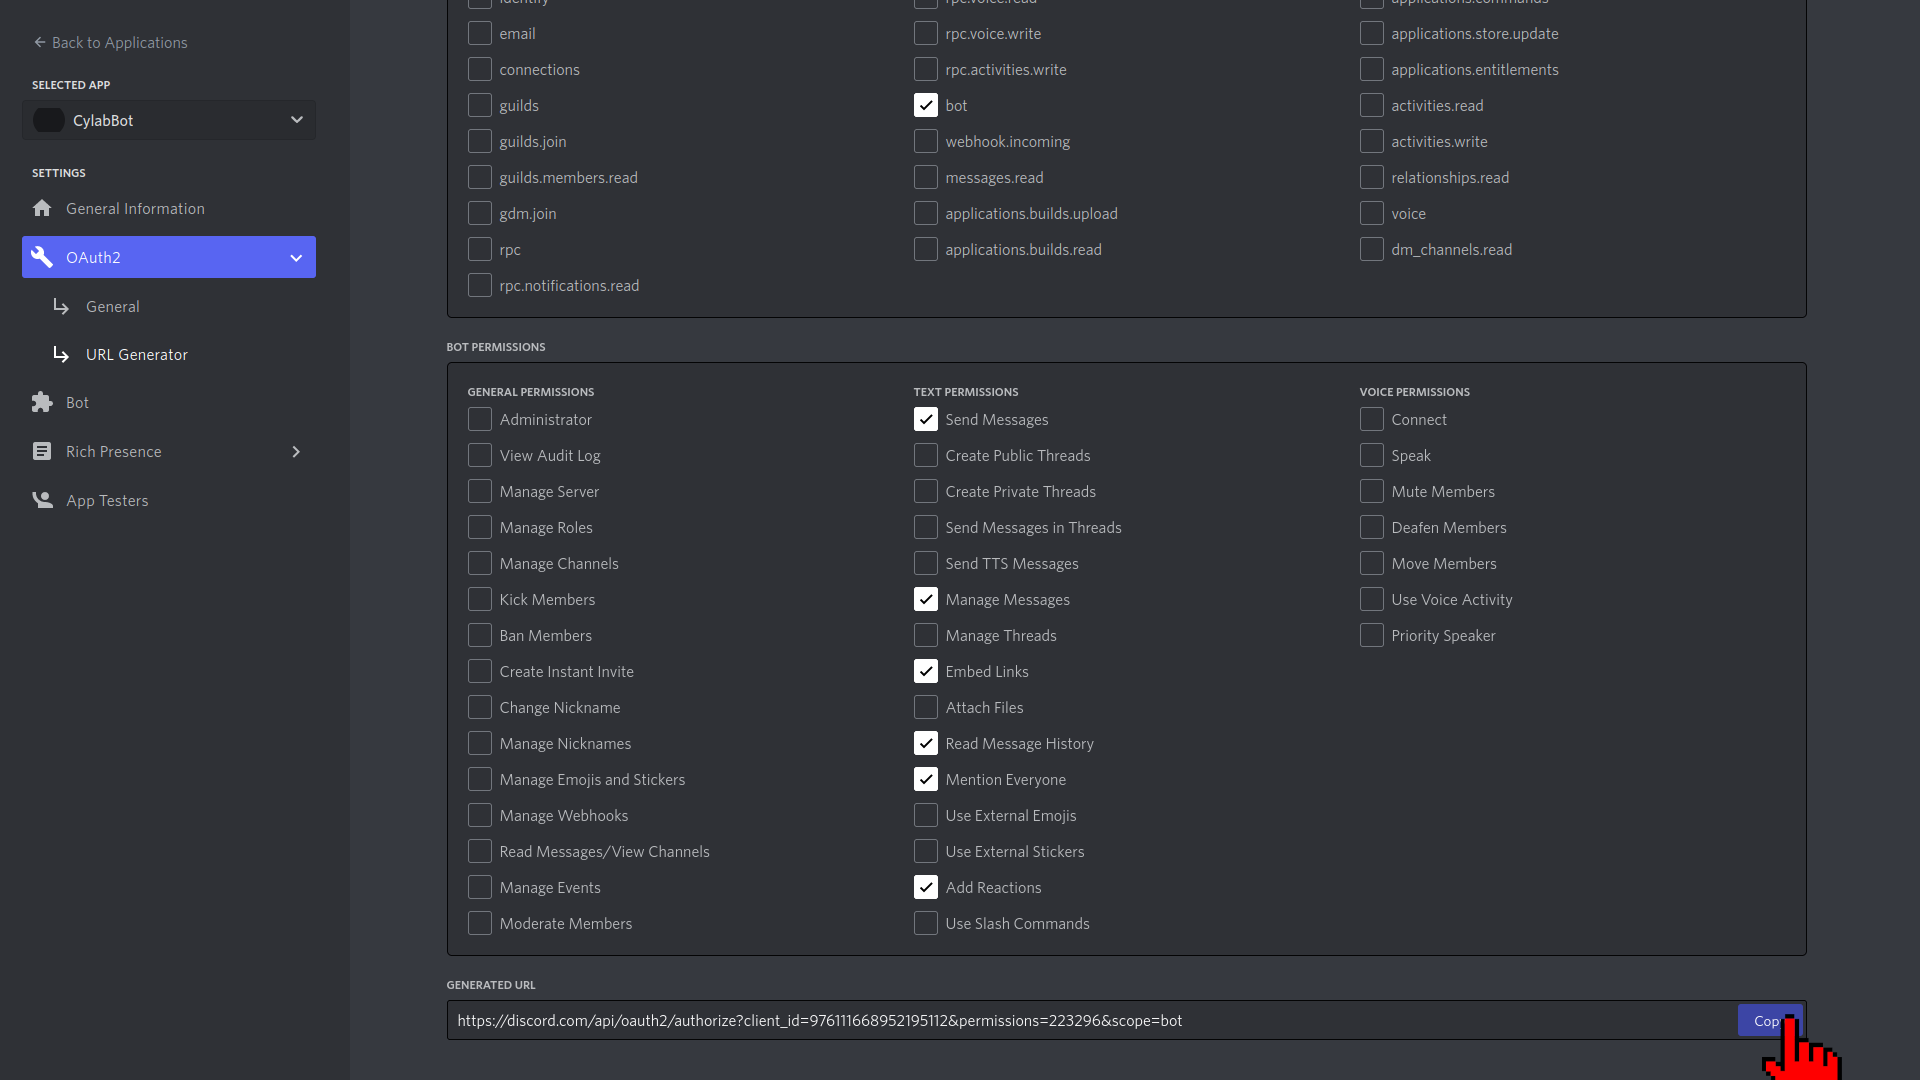
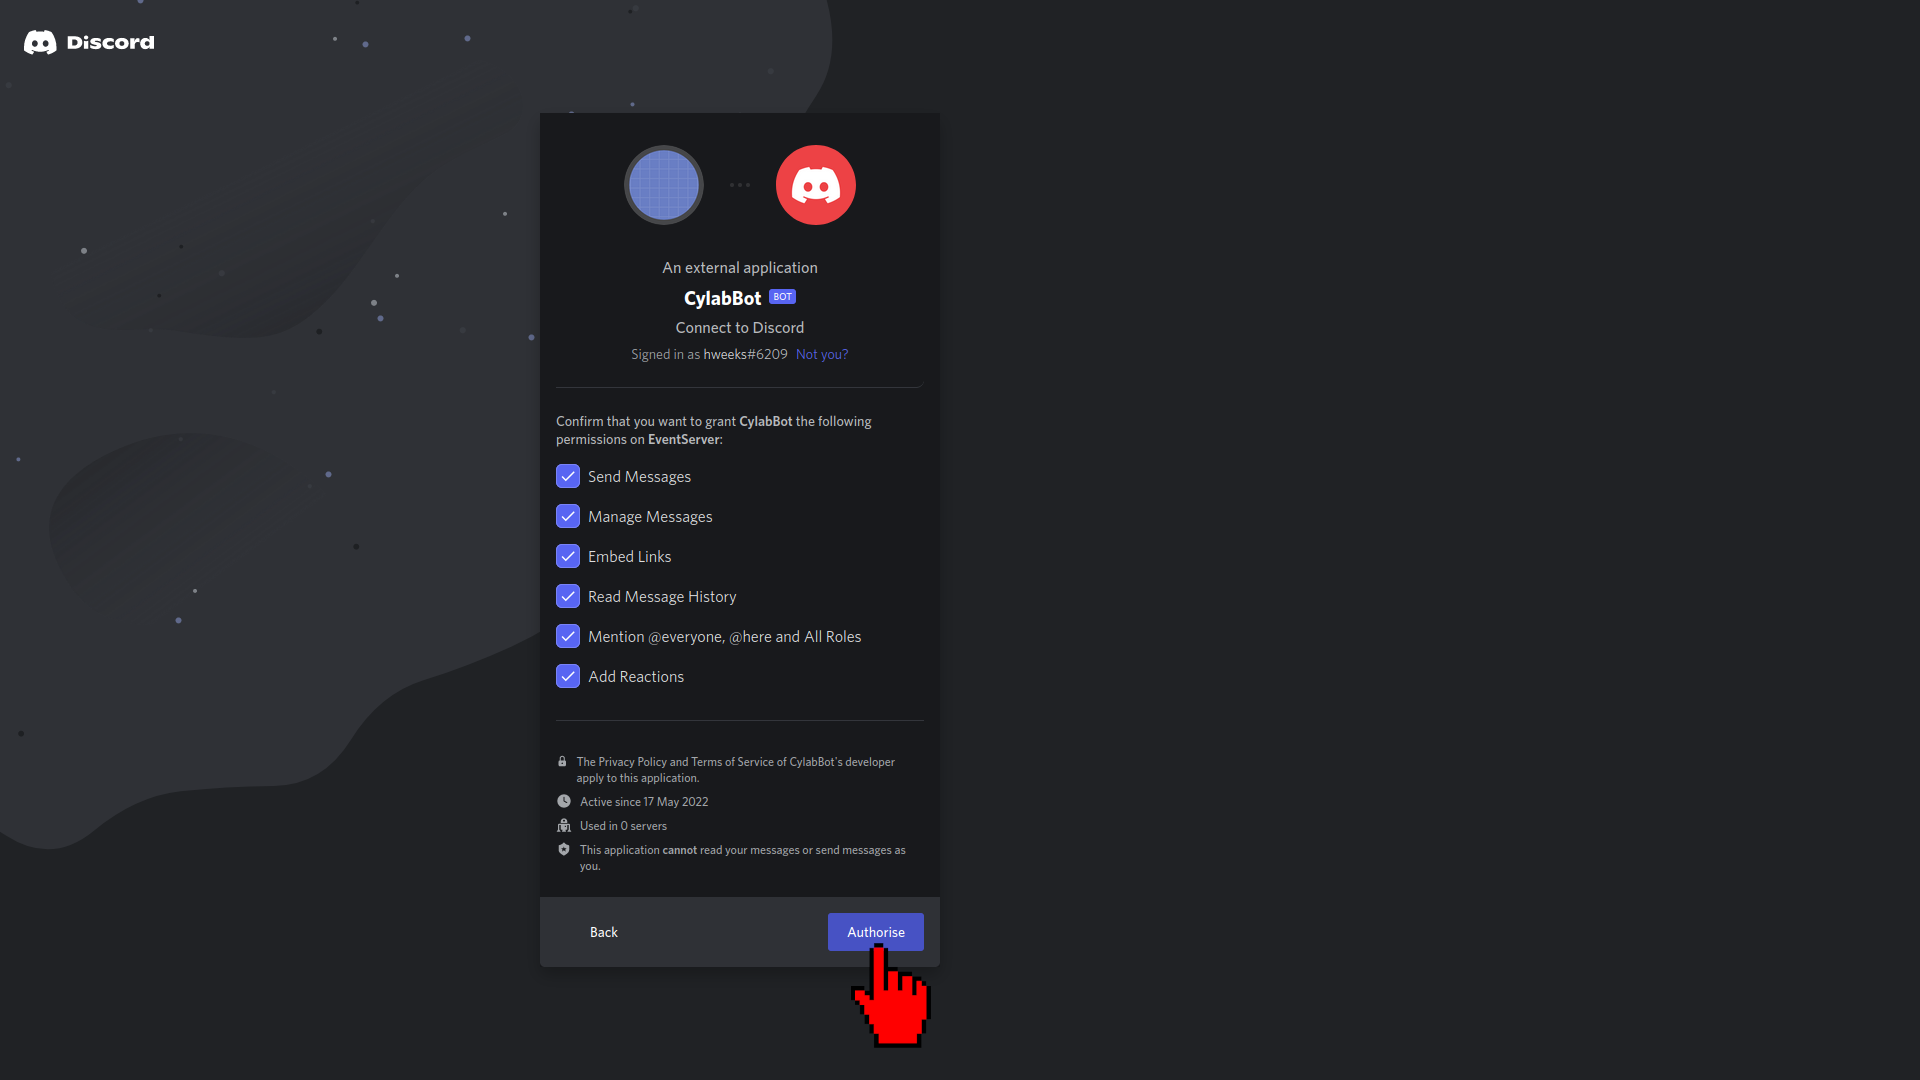
For this blog post, let’s give the bot 6 text permissions: Send Messages, Manage messages, Embed Links, Read Message History, Mention Everyone, Add Reactions:
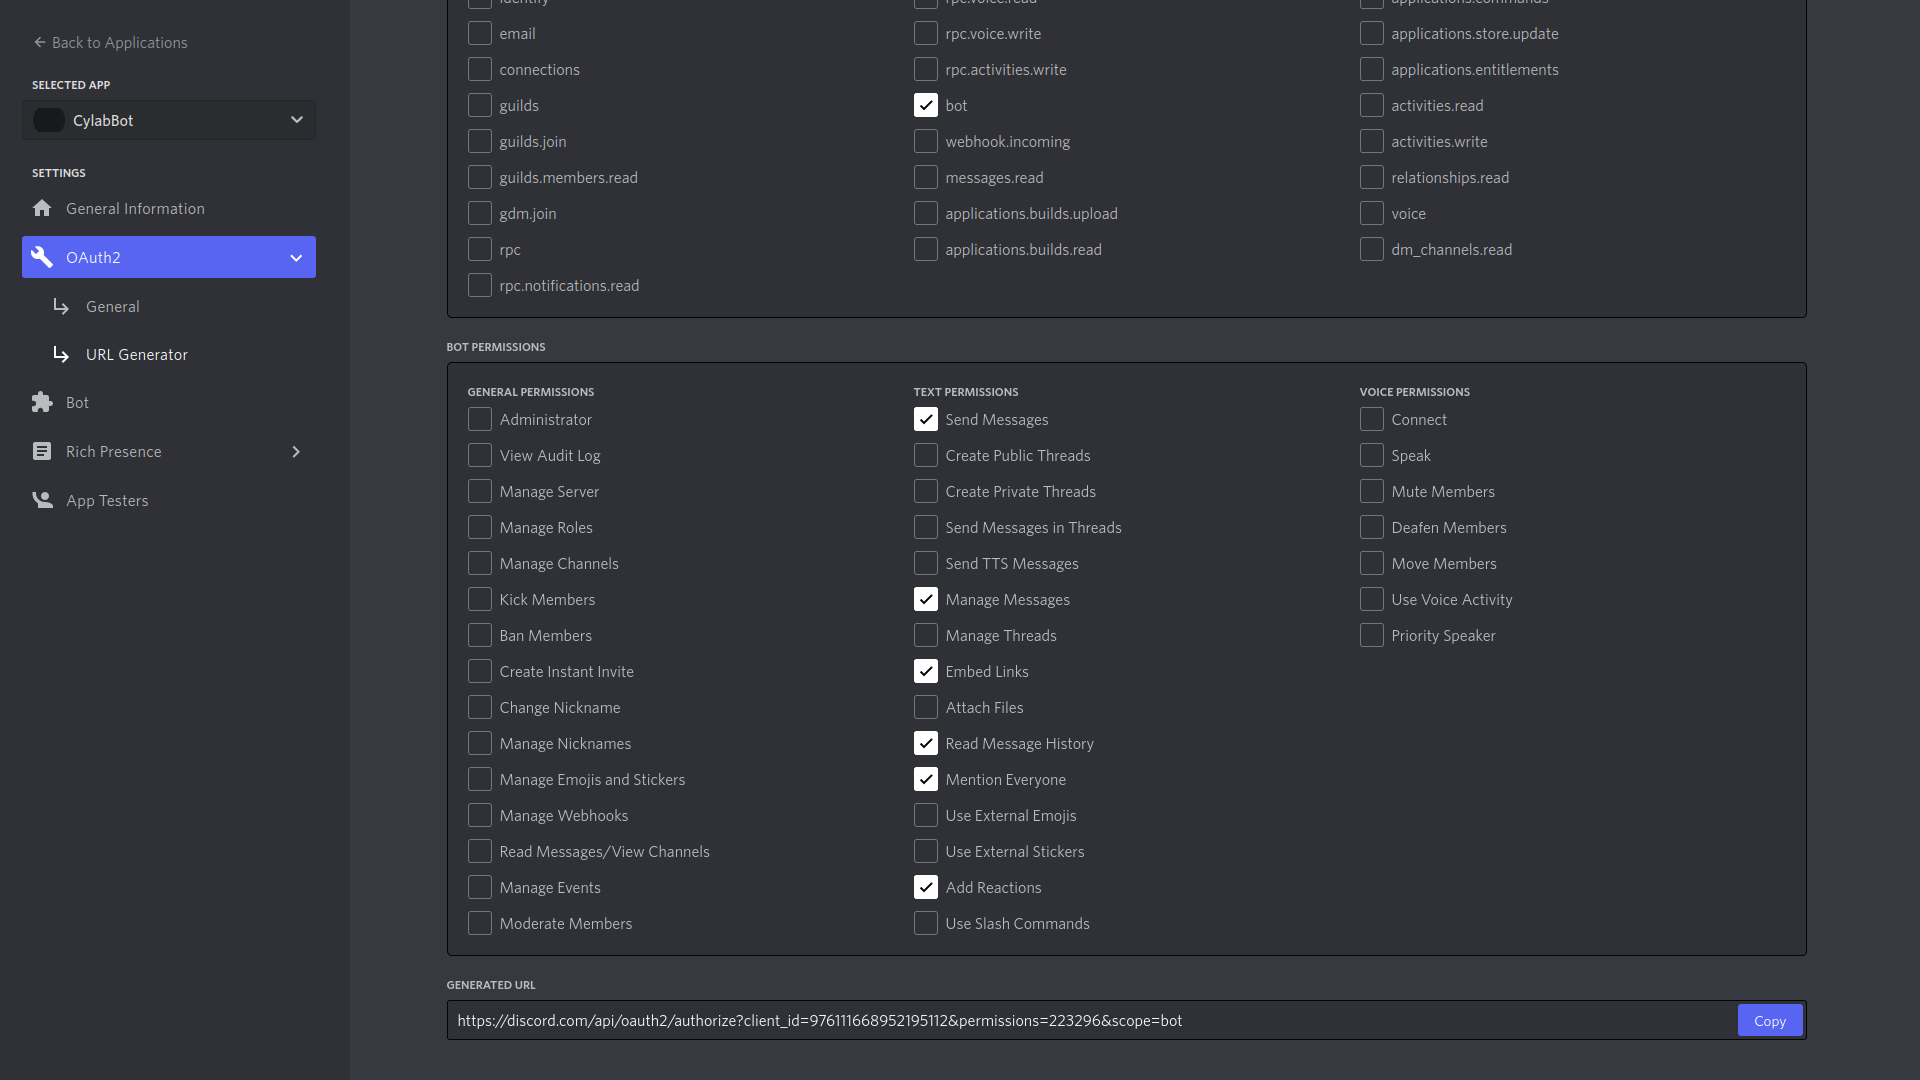
You can now copy the generated URL that is under the list of the bot permissions:
And paste it in your browser, where the following page should appear:
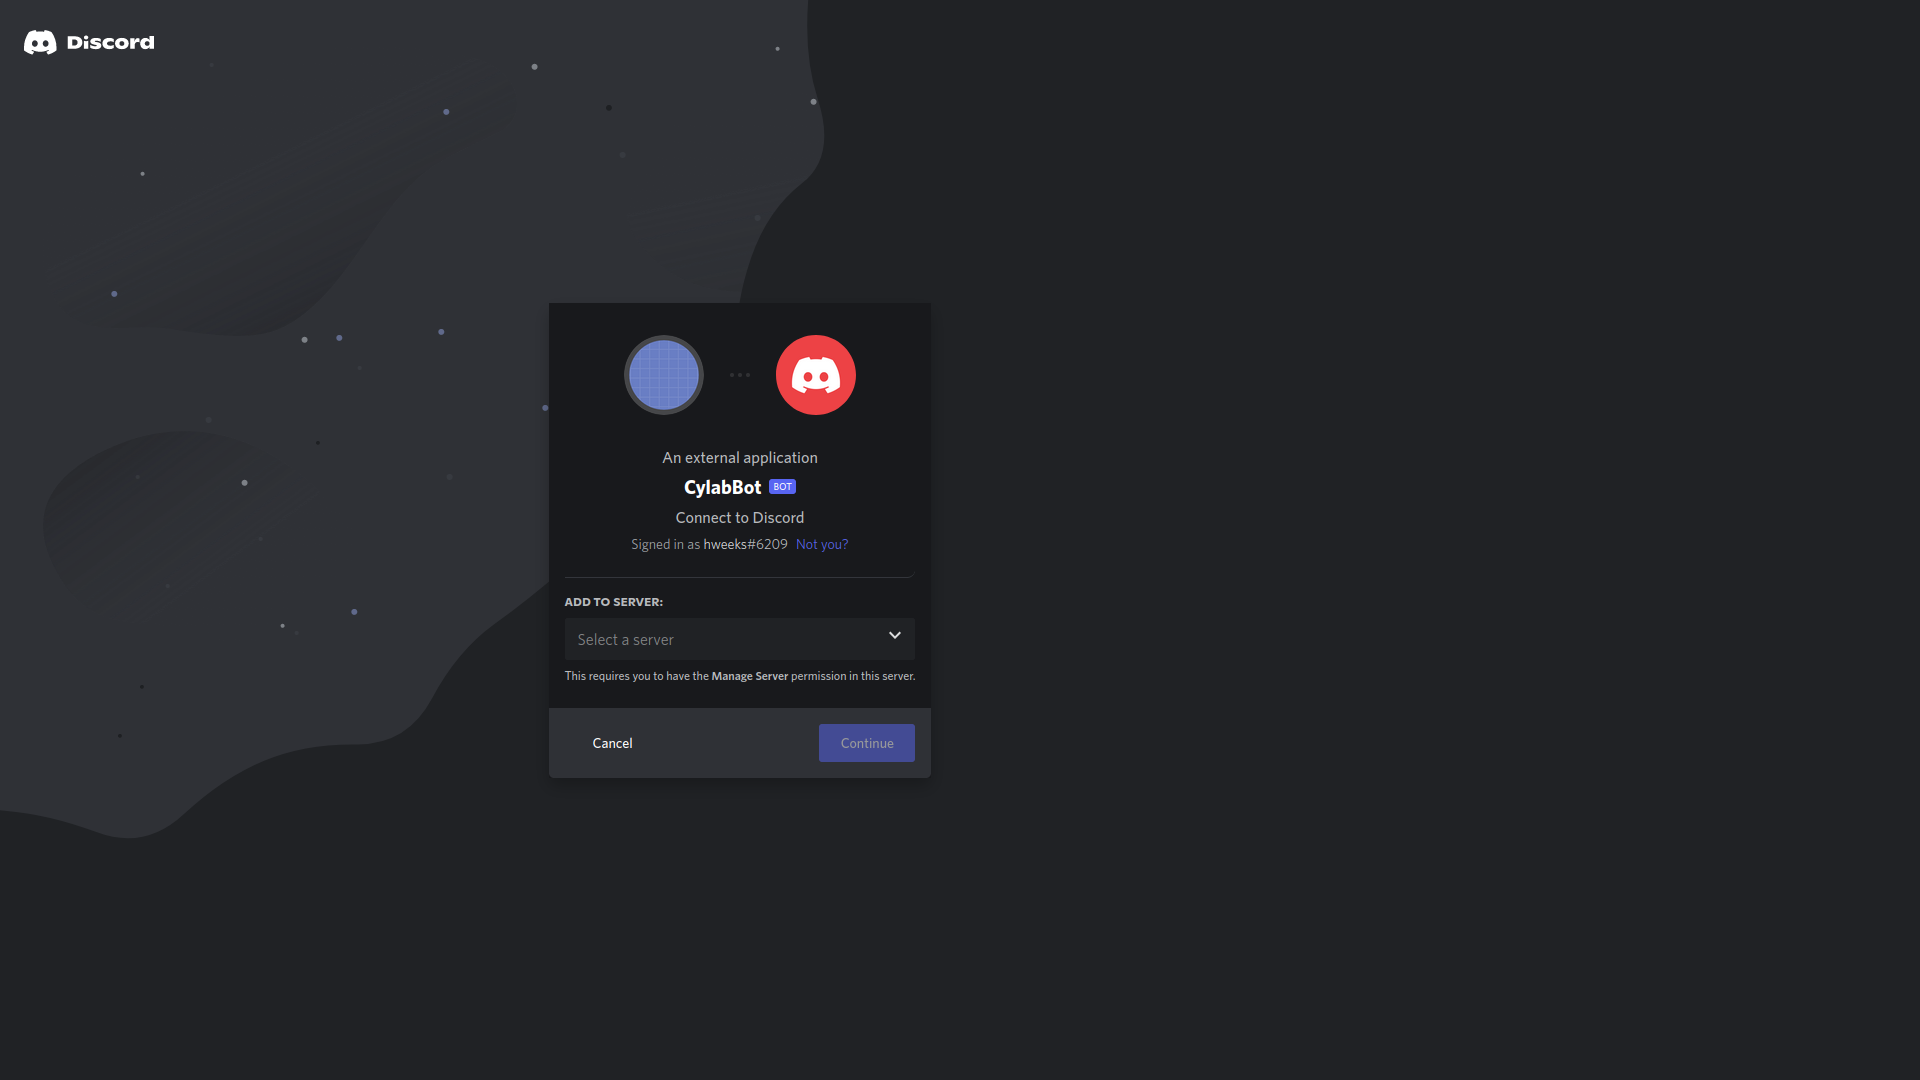
Select your new EventServer from the list that contains all your servers:
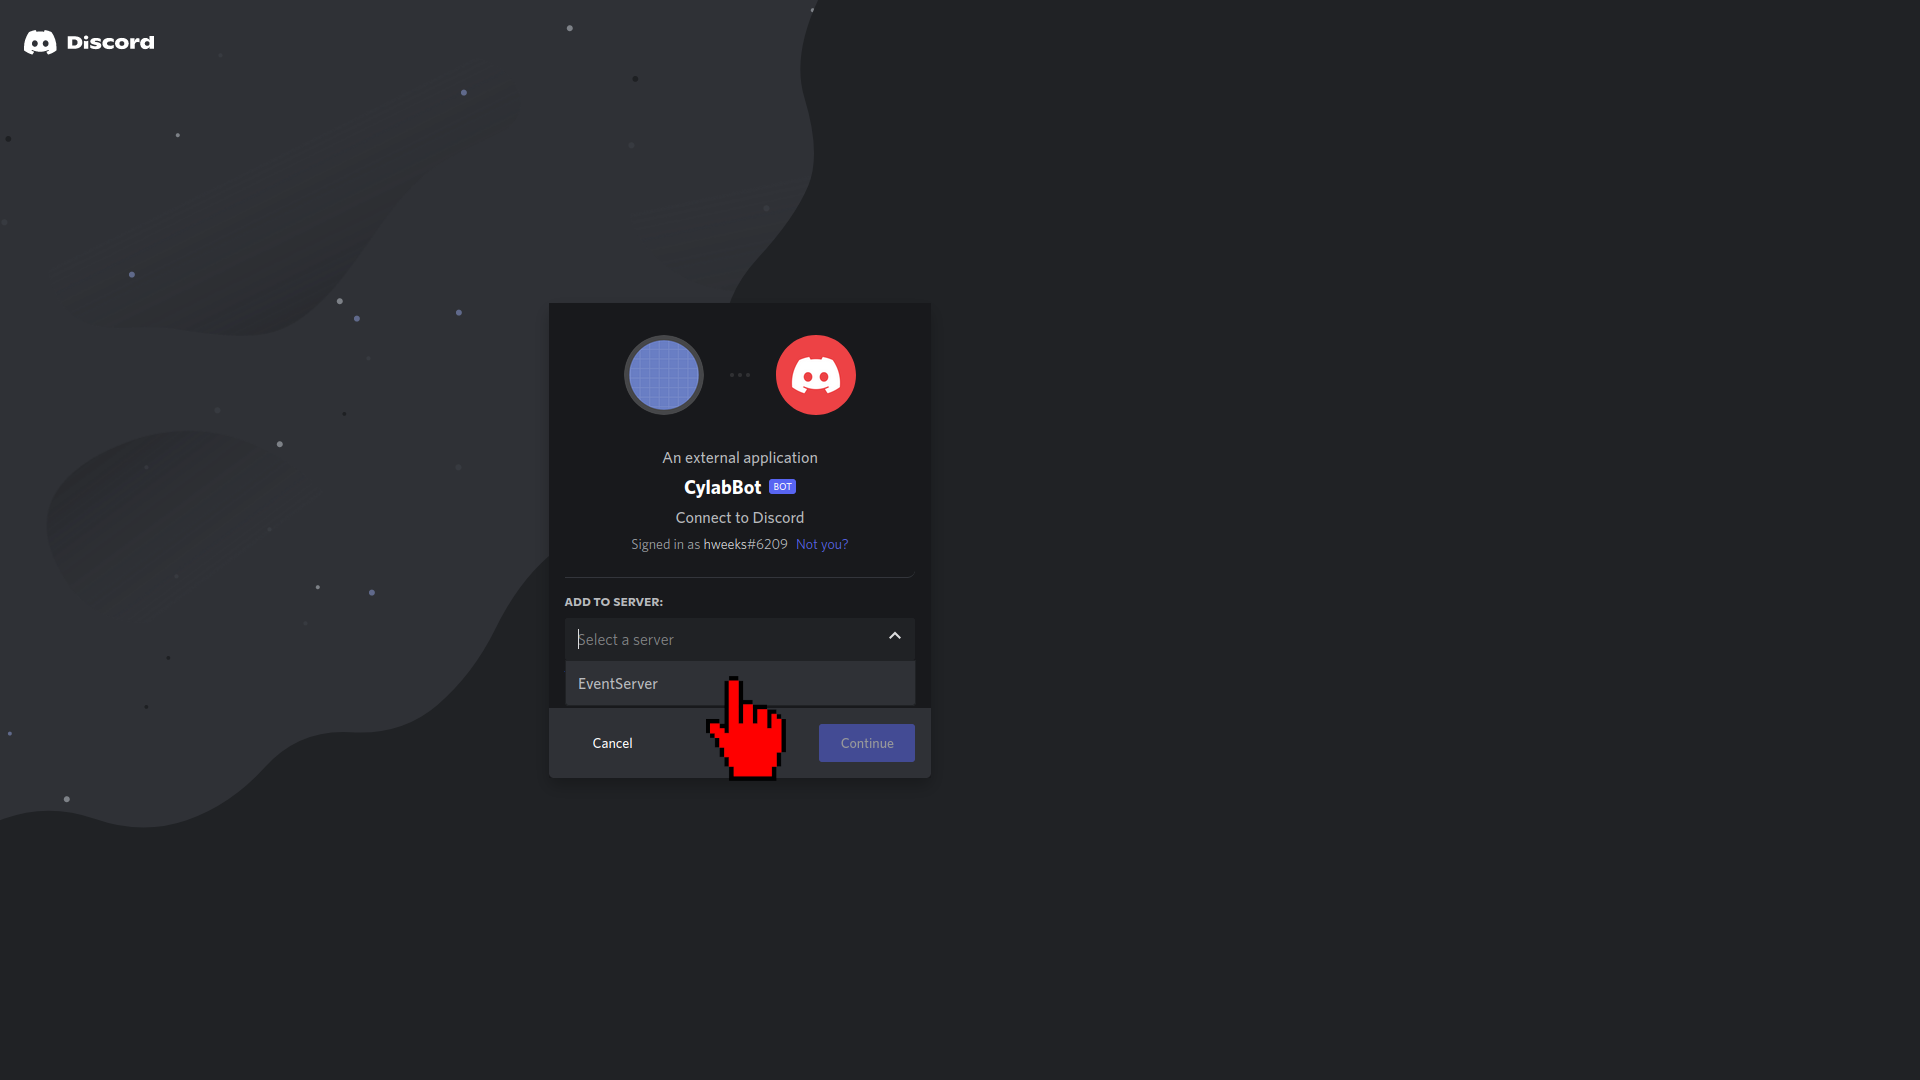
Click on Continue to continue the process:
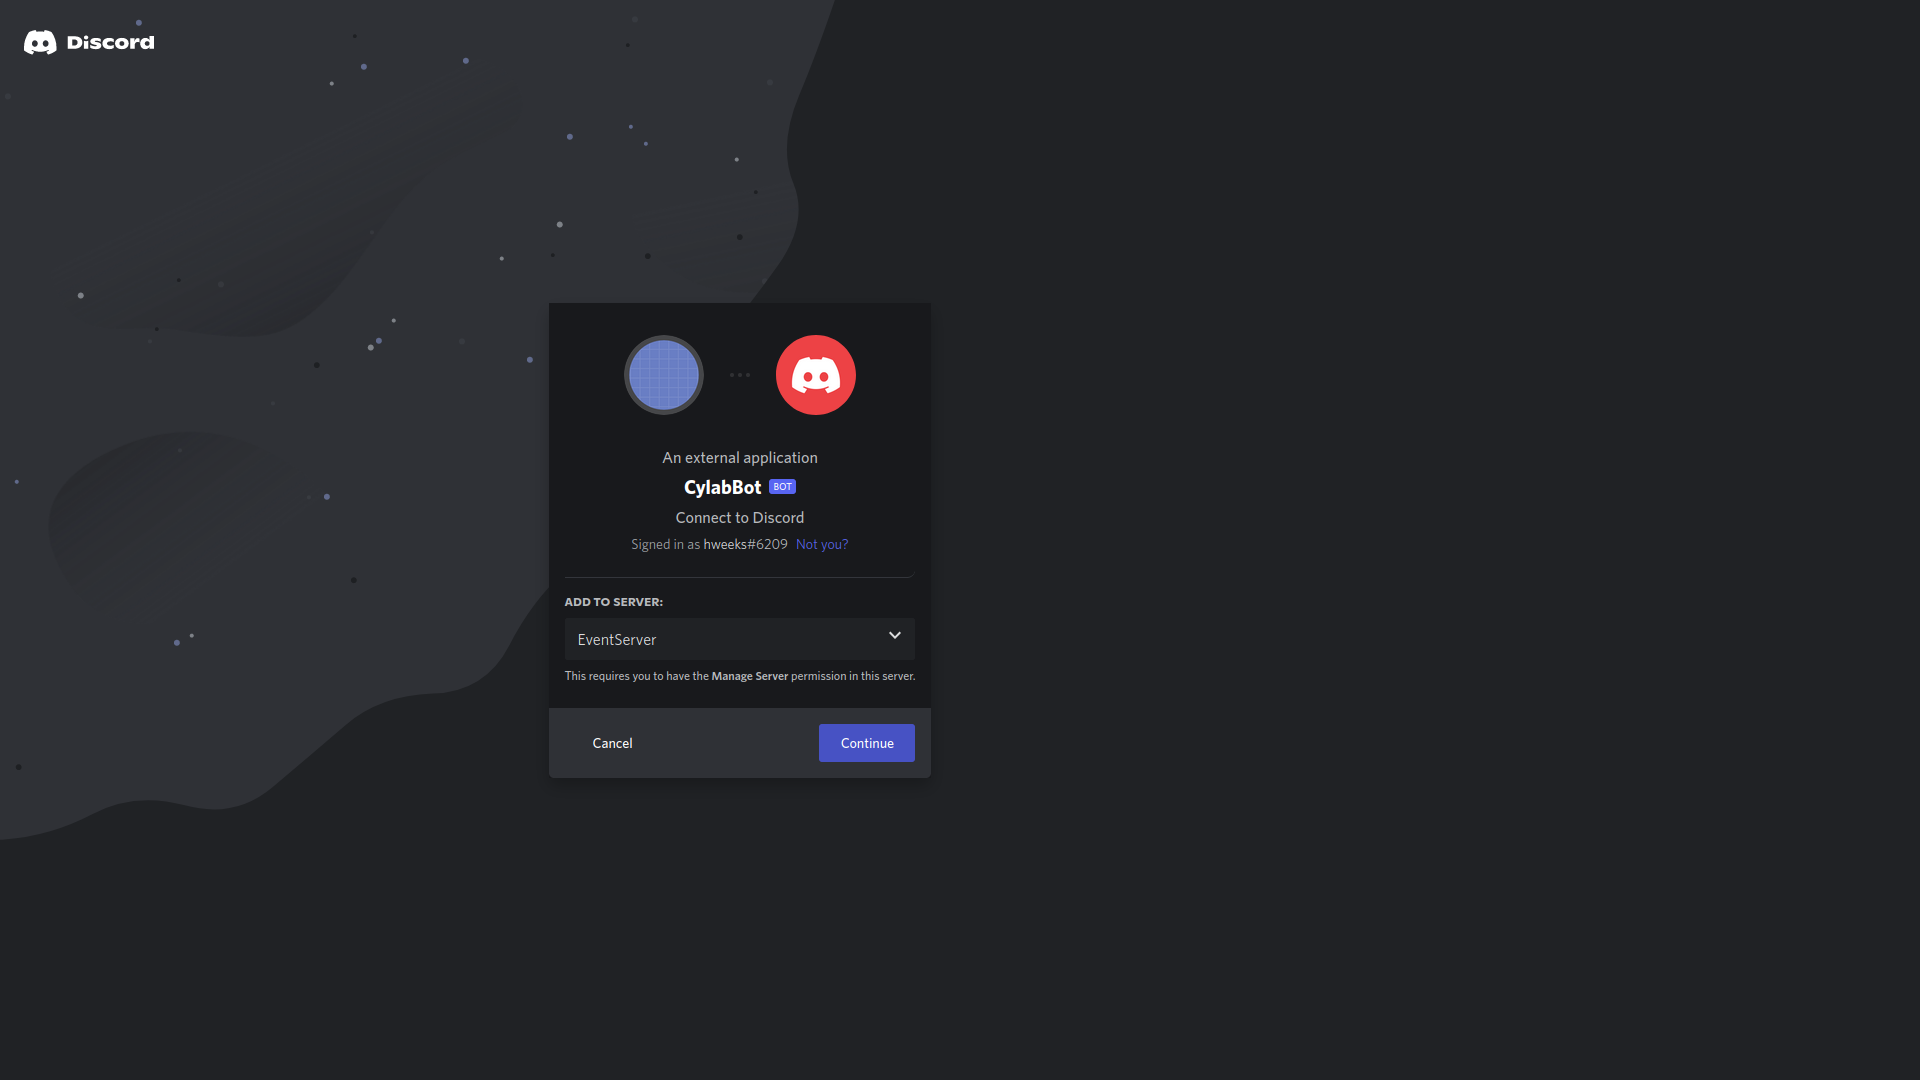
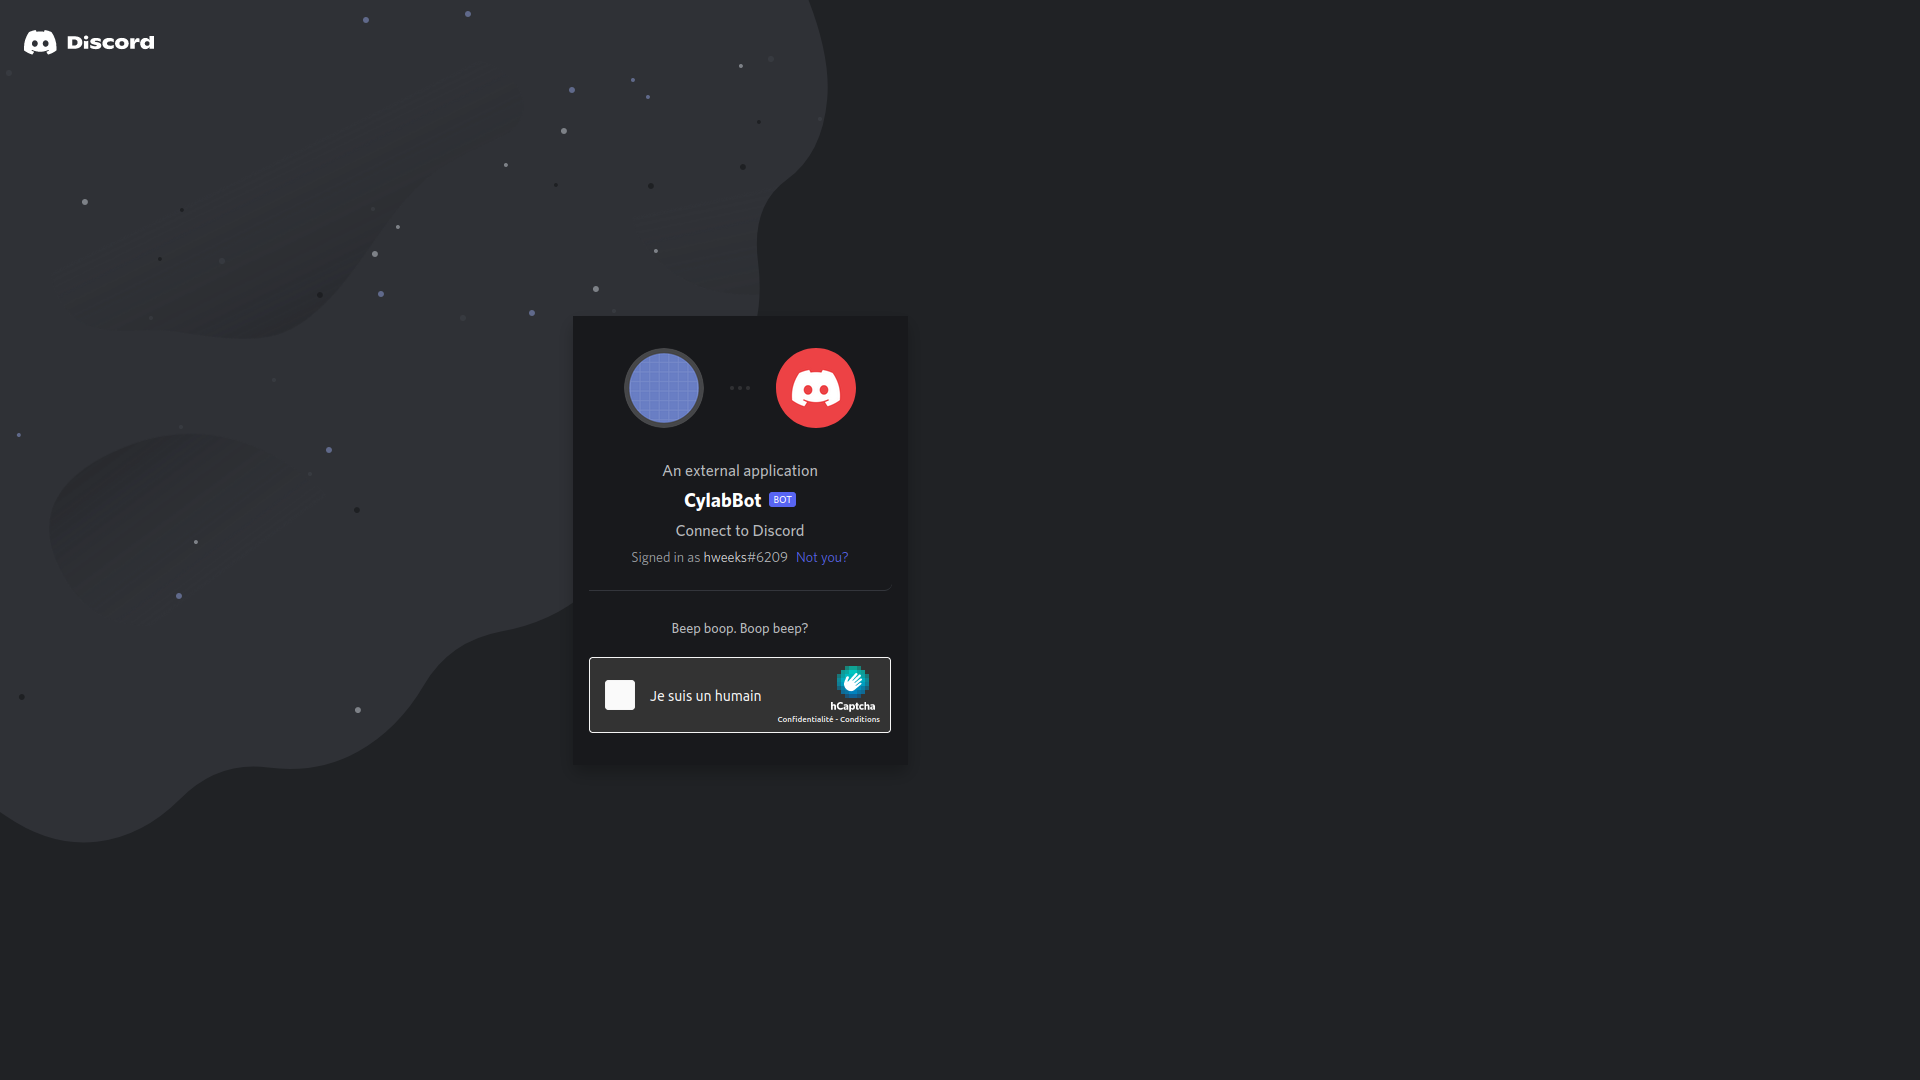
From the list of bot permissions you gave to the bot, you can decide which ones you want to apply to the server you just selected. Here keep them all selected and click on Authorise:
You might need to resolve a captcha:
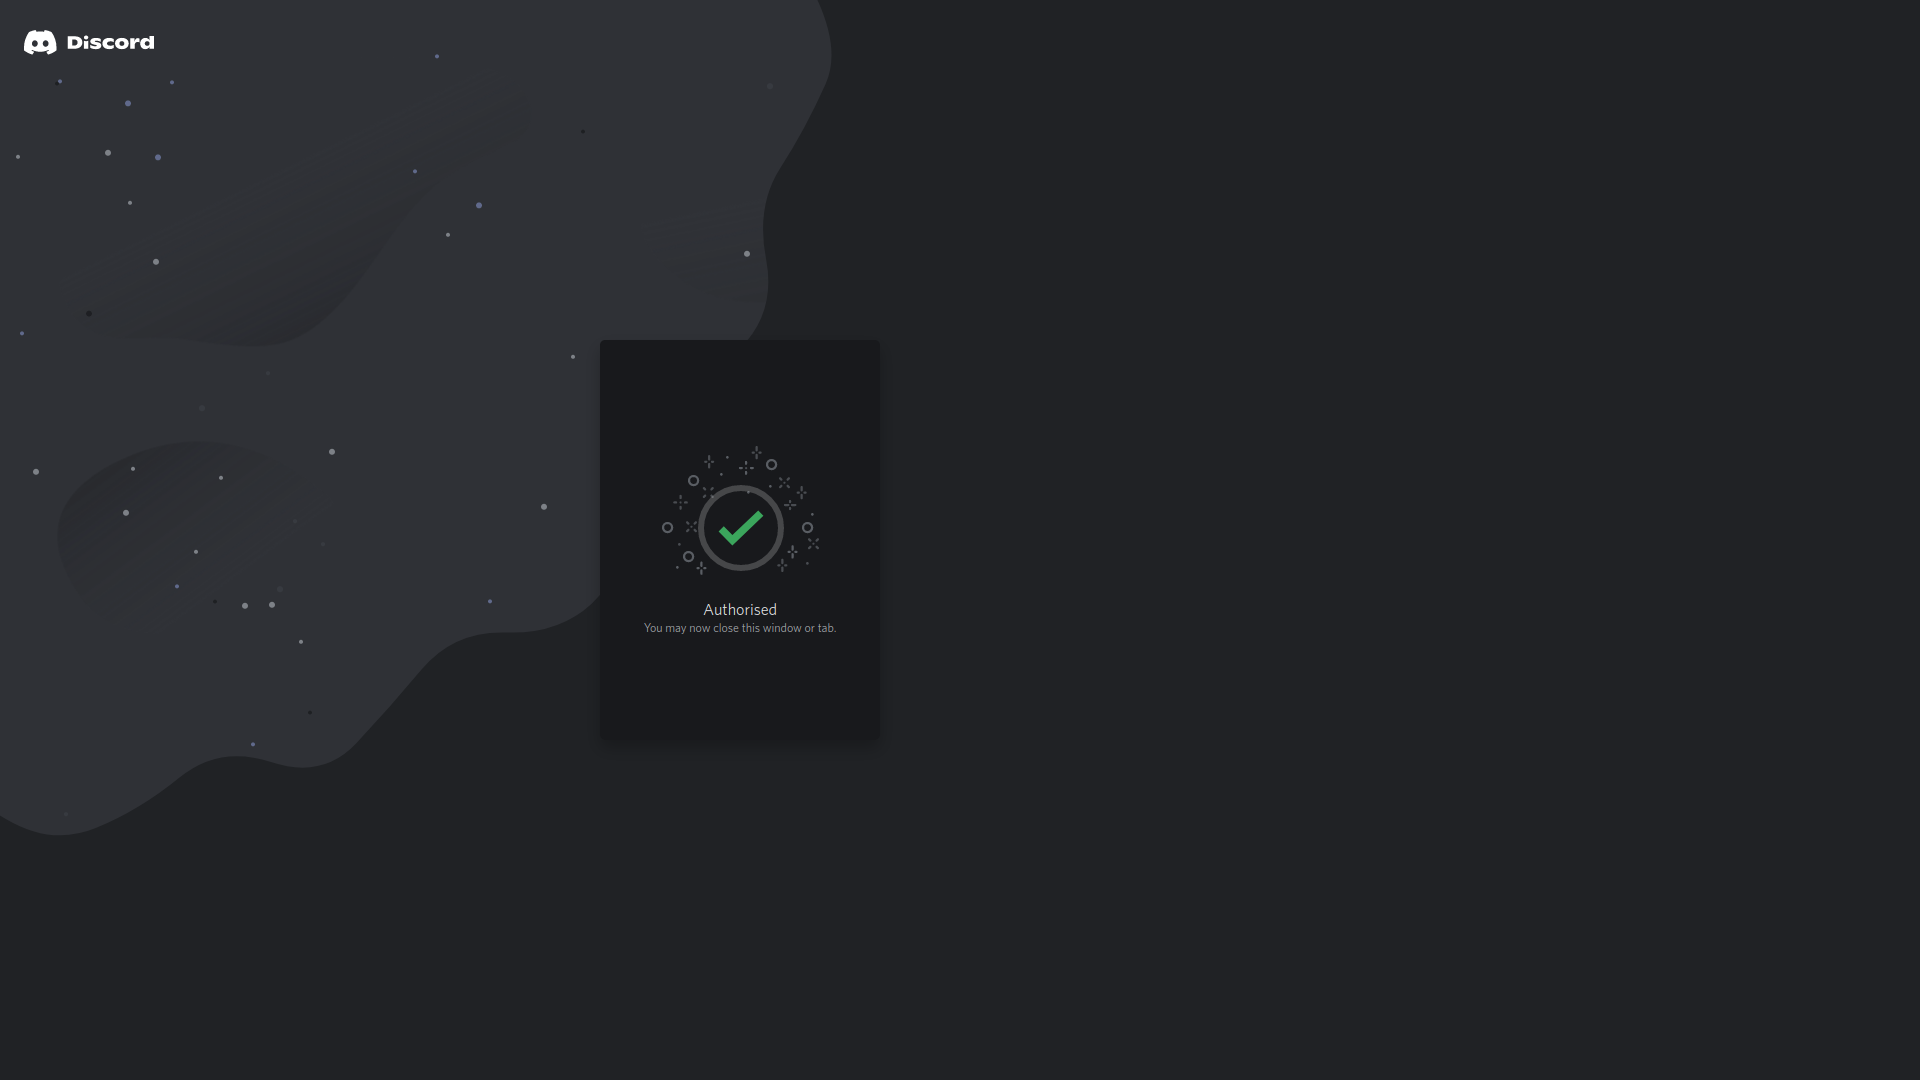
The bot has been added to the server! Discord tells you so with the following web page:
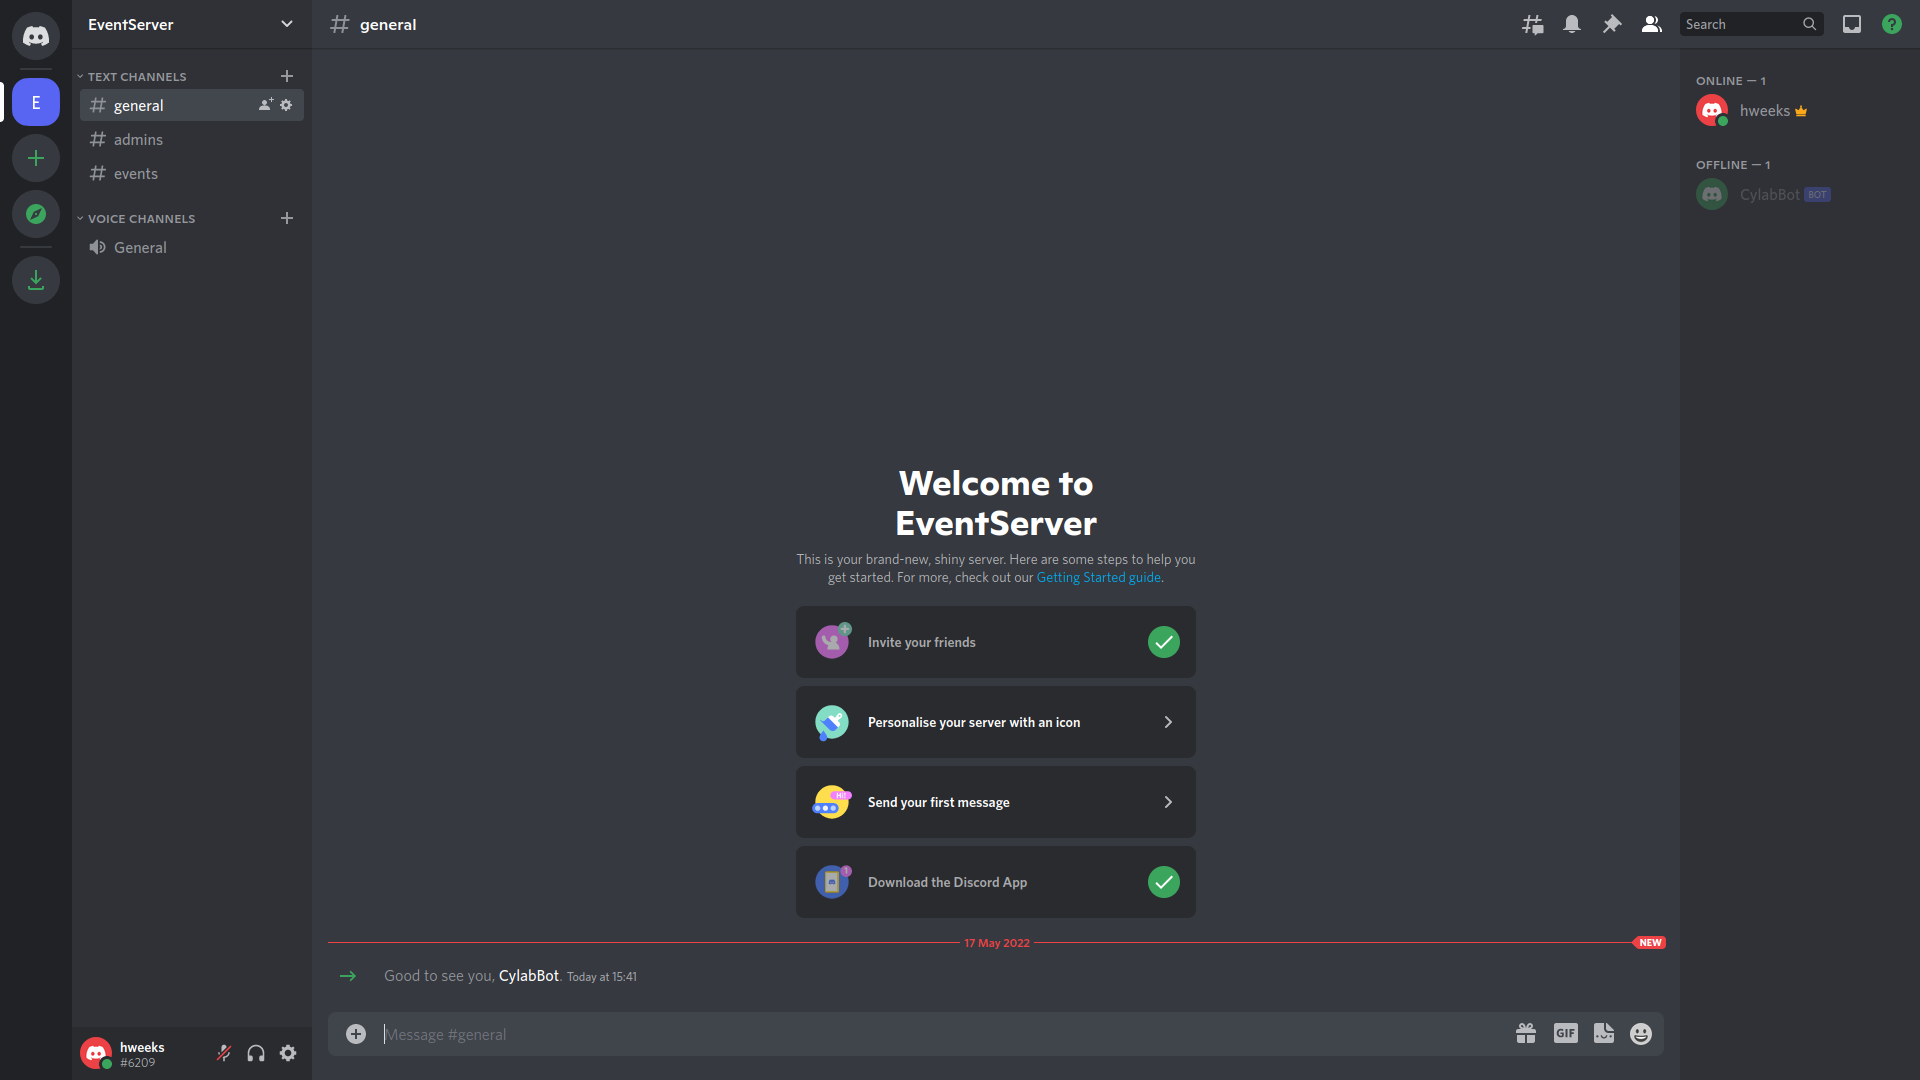
You should also receive a Discord notification in the general channel of your EventServer server, in fact, the CylabBot has now been added to your server with the 6 permissions you gave it:
That was already quite long wasn’t it? Don’t hesitate to take a break… The next blog post about Creating & Deploying a Discord Bot will teach you how to add features to the bot using a Python script based on discord.py.
This blog post is licensed under
CC BY-SA 4.0


