Velociraptor : hunt malwares as a pack
Nov 22, 2023 by Thibault Debatty | 6962 views
https://cylab.be/blog/312/velociraptor-hunt-malwares-as-a-pack
Velociraptor is a digital forensic and incident response tool that allows to collect information on multiple endpoints at once, and easily analyze the collected data using Notebooks and a query language (called Velociraptor Query Language, VQL), which is very similar to SQL. This makes Velociraptor a valuable tool for threat hunting over a large network.

Velociraptor uses a client-server architecture, where the clients connect to the server using https (over port 8000 by default). The clients then wait for instructions (called artifacts), and upload the result of the execution (which can be json text or files) to the server. The analysts can visualize and process the data using a web interface (on port 8889 by default).
In this blog post we will show:
- how to install a local test instance of Velociraptor on Linux
- how to start hunting!
- how to deploy Velociraptor to multiple clients
Local installation
For a quick test, you can simply launch a local instance of Velociraptor. First, download the latest version of Velociraptor from https://github.com/Velocidex/velociraptor
At the time of writing, the latest version is 0.7.0-4:
wget https://github.com/Velocidex/velociraptor/releases/download/v0.7.0/velociraptor-v0.7.0-4-linux-amd64
chmod +x velociraptor-v0.7.0-4-linux-amd64
Now you can launch a local server and client:
./velociraptor-v0.7.0-4-linux-amd64 gui
First steps
Artifacts
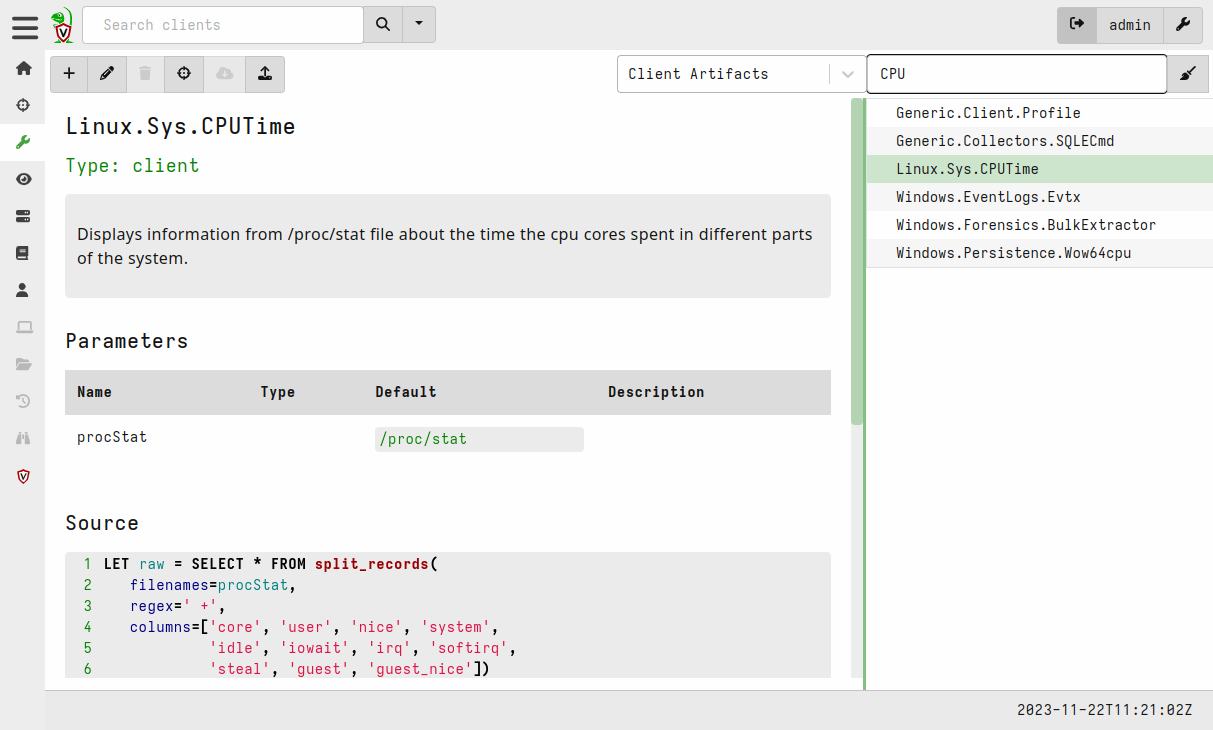
In the left menu, the wrench represents Artifacts, which are basically tasks that can be executed on all the clients. On the right side, you can search and select artifacts. The example below shows Linux.Sys.CPUTime. As you can see:
- artifacts are written in Velociraptor Query Language (VQL), which is very similar to SQL;
- this artifact will parse
/proc/statto extract CPU information - the artifact takes one optional parameter,
procStat(more on this later)
Hunts
Also in the left menu, the viewfinder represents Hunts, tasks that have been executed on the clients.
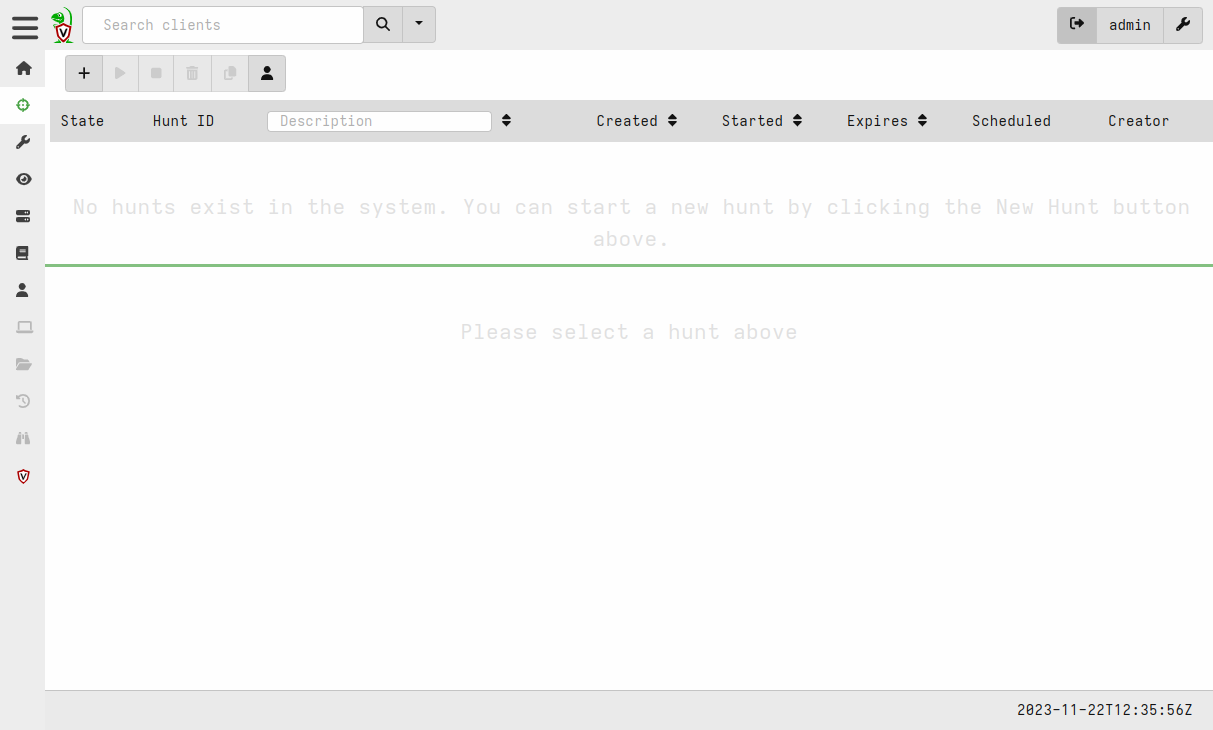
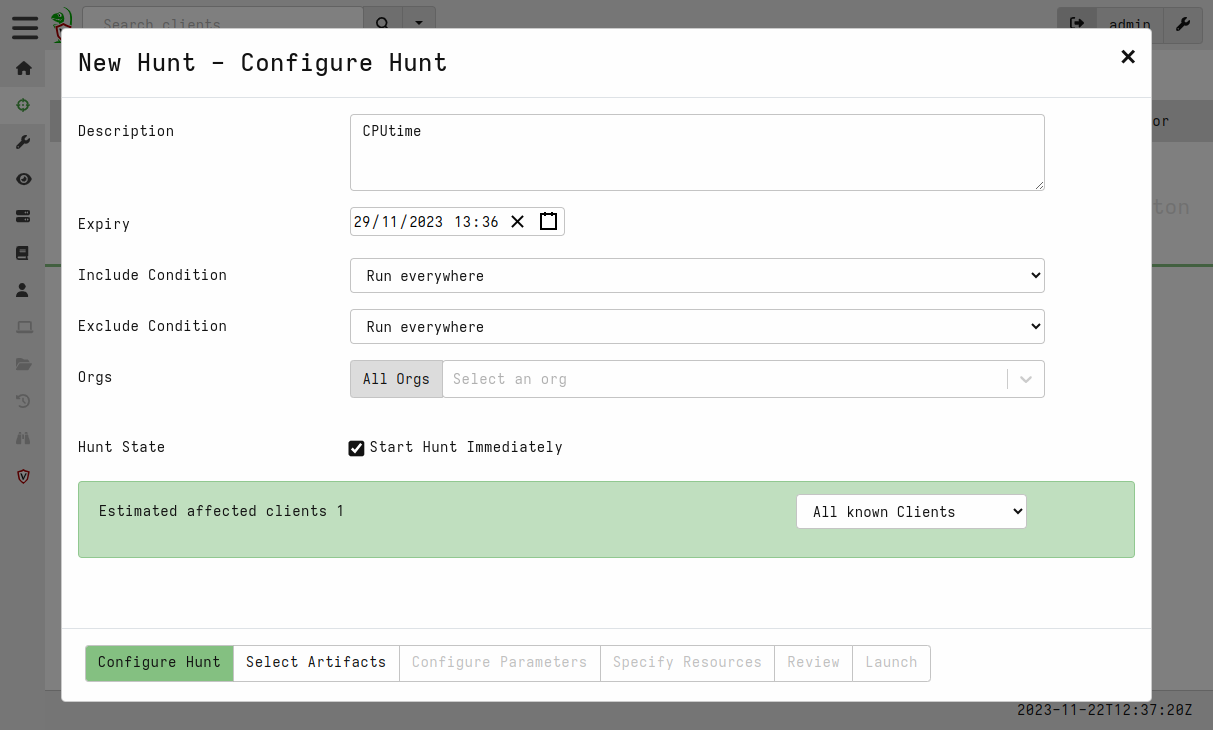
You can create a new hunt by clicking on the ➕ button. The wizard will allow you to define a name, select artifacts (tasks) to execute on the clients, define parameters (like procStat we saw earlier) etc.
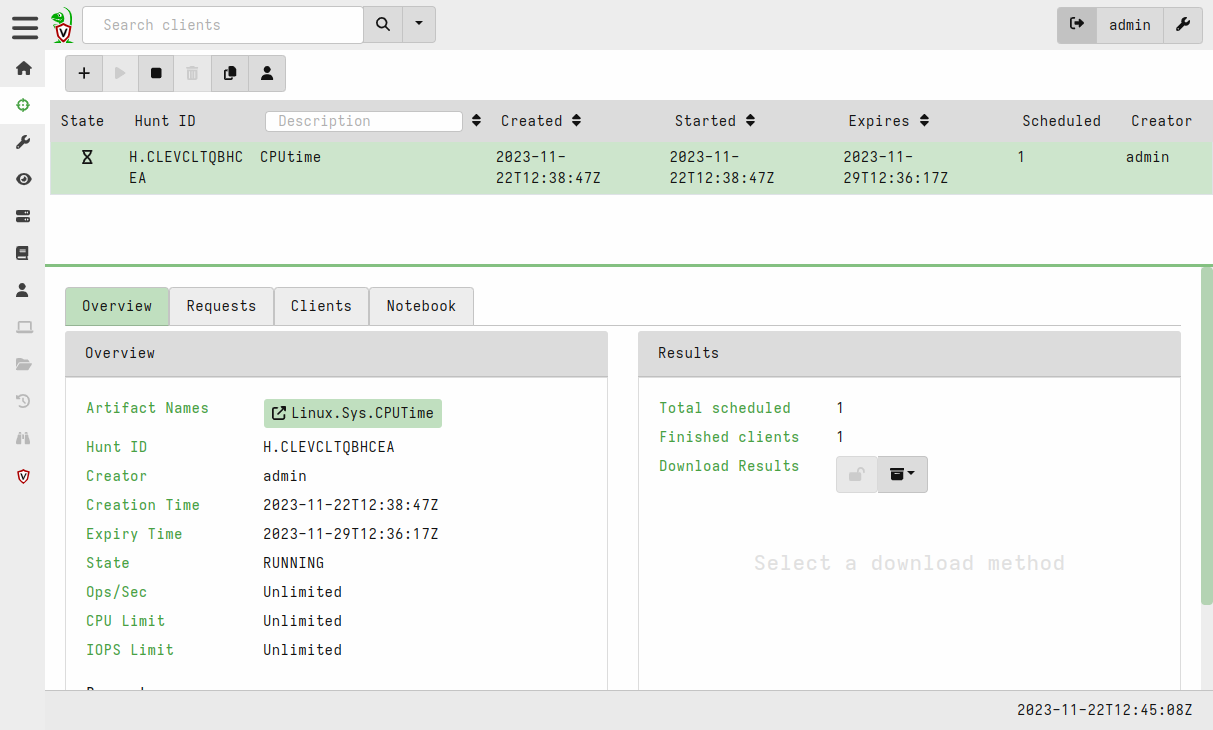
After a few seconds, the results of your first hunt will be available. The overview gives basic information, including the number of clients on which the task was executed.
Notebook
The Notebook tab allows to visualize and process (using VQL) the collected results. However there is a trick: you must click on the artifact name (Linux.Sys.CPUTime in the example) to reveal the edition buttons.
Now you can modify the query to further process the data. For example, the following query counts the number of vcores for each client:
SELECT ClientId,count() AS vcores FROM source(artifact="Linux.Sys.CPUTime") GROUP BY ClientId
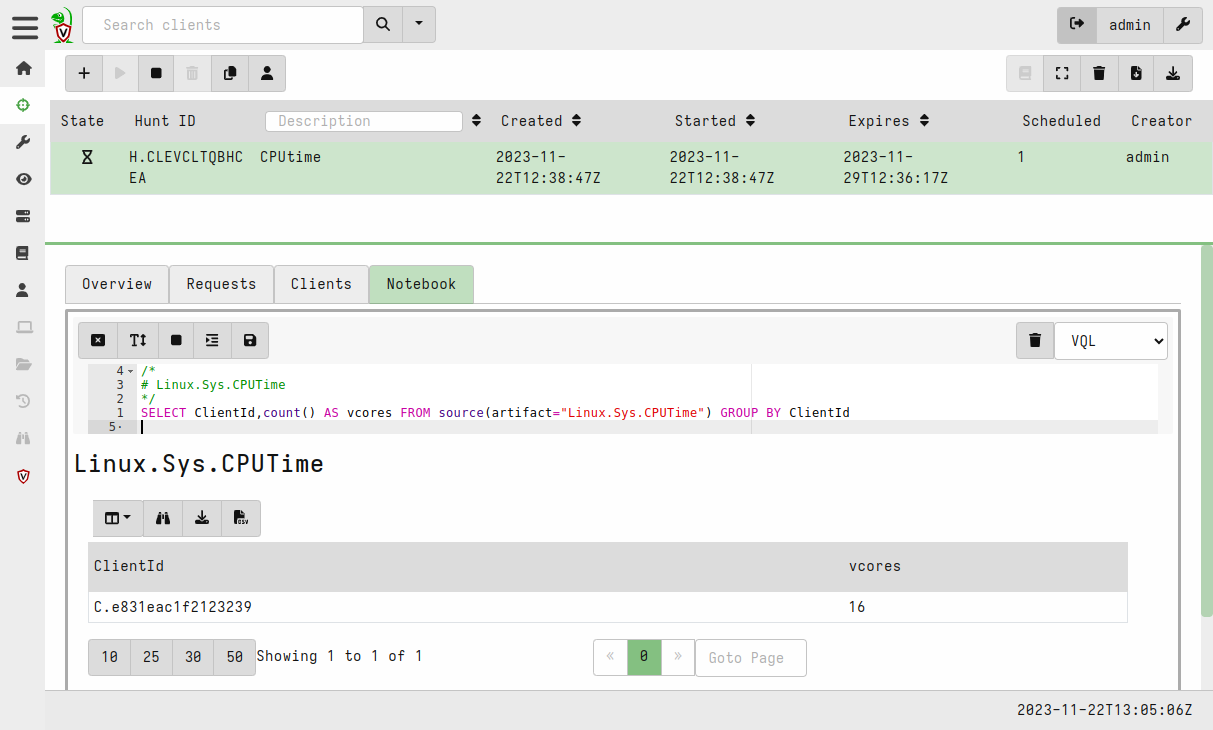
Unlike the artifact query, the Notebook query is executed by the server, on the data that has been previously collected. The nice feature is that both artifact and notebook queries are written in the same VQL language.
Production deployment
For a production deployment (with distinct clients), the process is slight more complex. You will have to:
- Download velociraptor binary
- Create configuration
- Create and install a server installation package
- Create and install client installation packages
Download
wget https://github.com/Velocidex/velociraptor/releases/download/v0.7.0/velociraptor-v0.7.0-4-linux-amd64
chmod +x velociraptor-v0.7.0-4-linux-amd64
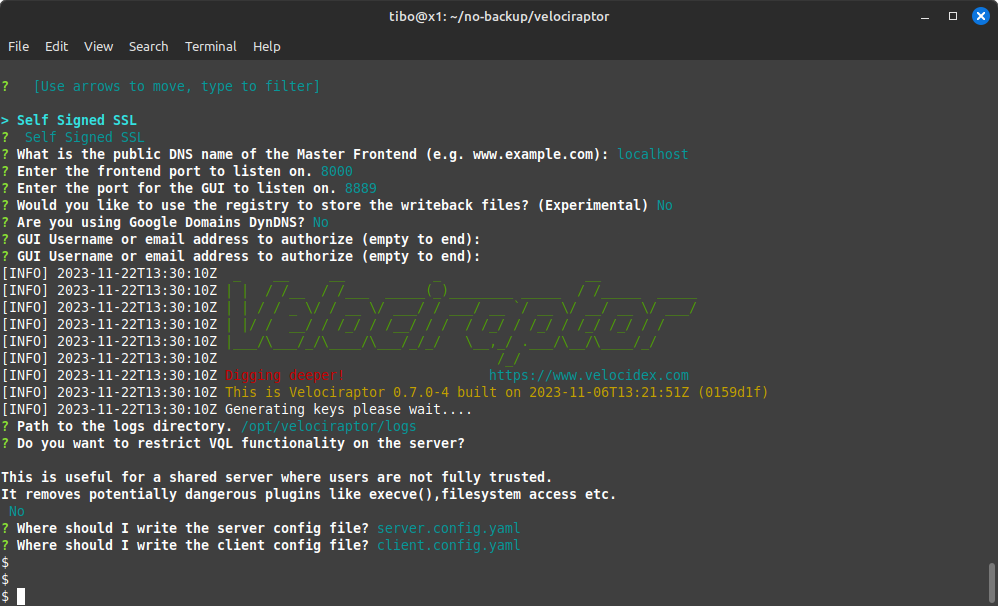
Create configuration
Velociraptor includes an interactive wizard to help you create your configuration file:
./velociraptor-v0.7.0-4-linux-amd64 config generate -i
Most options are self-explanatory, but don’t forget to:
- indicate the correct name of the server
- create at least one user…
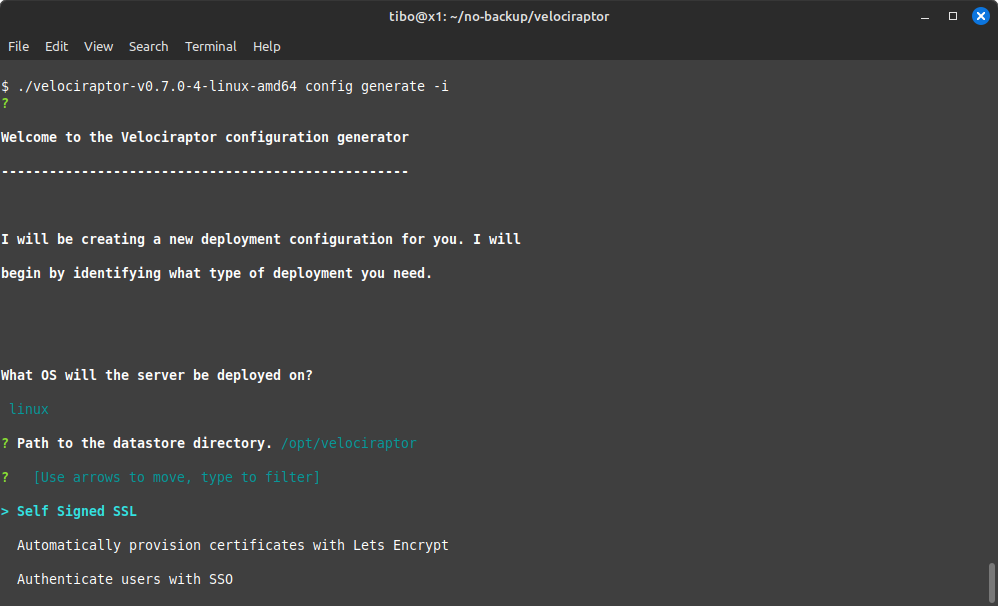
At the end of the process, 2 configuration files: one for the server and one for the clients.
Create and install a server package
Important note: For self signed certificates, by default the web GUI will be bound to the localhost only. So it will not be accessible from a different computer. You can change this in the configuration if you wish…
So now that the configuration file is ready, we can use the server config to create a server installation package:
./velociraptor-v0.7.0-4-linux-amd64 debian server -c server.config.yaml
This will create the package velociraptor_server_0.7.0.4_amd64.deb that we can upload to the server and install with
sudo dpkg -i velociraptor_server_0.7.0.4_amd64.deb
And you can check that the server is running correctly with
sudo service velociraptor_server status
Create and install client packages
The same process applies to create the client installation packages:
./velociraptor-v0.7.0-4-linux-amd64 debian client -c server.config.yaml
The client package velociraptor_client_0.7.0.4_amd64.deb can be installed with
sudo dpkg -i velociraptor_client_0.7.0.4_amd64.deb
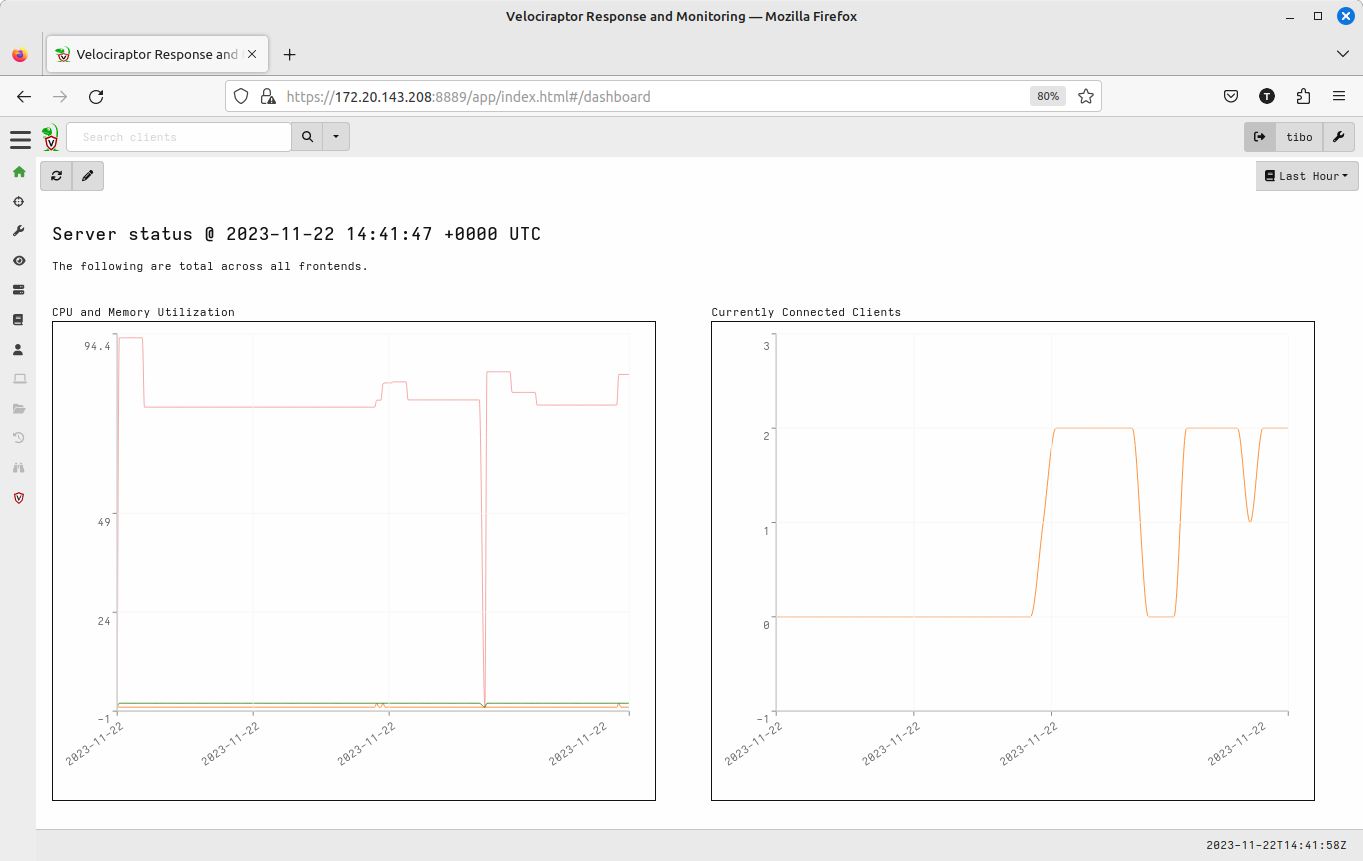
Testing
After a few seconds, velociraptor will be accessible on port 8889, and you will be able to start hunting on all your nodes…
Note: If you used “self-signed** certificates, your browser will show you a warning when you connect…
Going further
The next step for discovering velociraptor would be to explore the other available artifacts.
You can also check
This blog post is licensed under
CC BY-SA 4.0


