MARk : Use built-in detectors
Nov 20, 2020 by Thibault Debatty | 2842 views
Now that you have a running MARk server, with data flowing in, you can use the provided algorithms to build your detection chain.
For this blog post you first need to install MARk and create a data injector, as described in Getting started with MARk : create a PHP data injector
Once your MARk server is started, you should see a new directory called modules. This directory is mapped by docker-compose to the corresponding directory inside the MARk container. It contains the yaml files that describe the different detectors. For now it is empty.
Inside this modules directory, create a first file called counter.detection.yml with following content:
---
class_name:     be.cylab.mark.detection.Counter
label:          detection.count
trigger_label:  data
In this file:
- the extension
.detection.ymlindicates to MARk that this file contains the definition of a detector; class_nameis the algorithm that should be executed. Counter is one of the built-in algorithms;trigger_labelindicates when this algorithm should be executed;labelindicates the label for the produced evidence reports. It can be used by other detectors that will build on top of our counter.
Now, on the web interface, head back to the Status page and click the ‘Reload’ button.
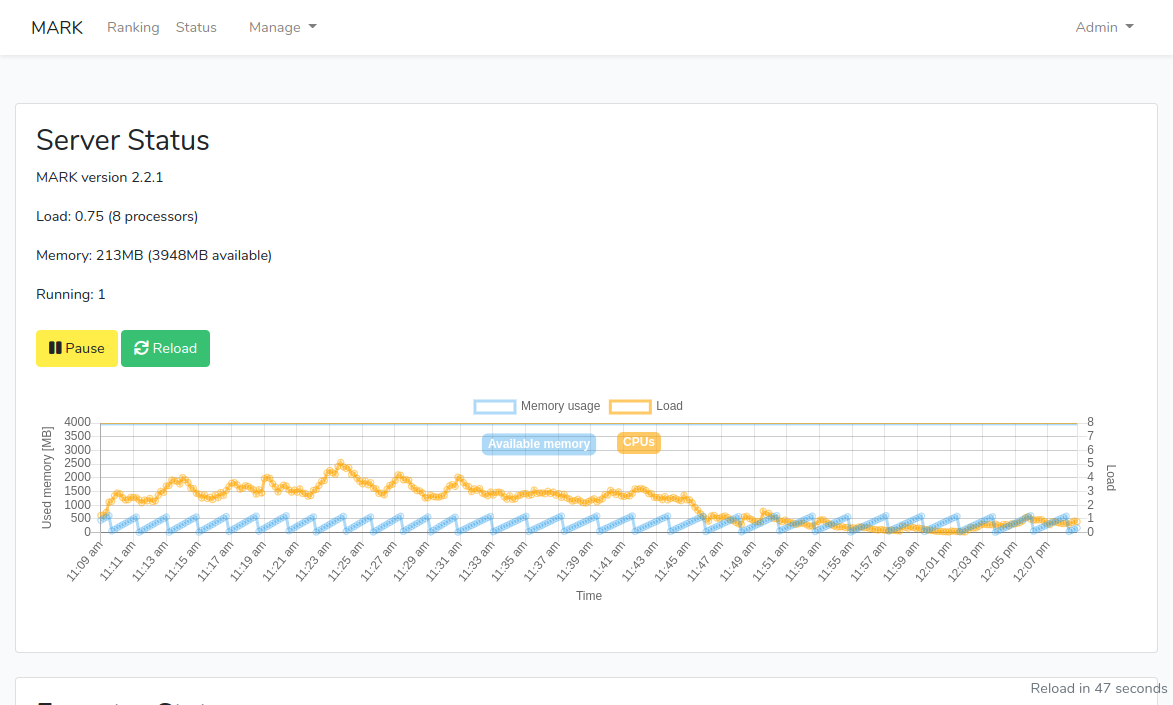
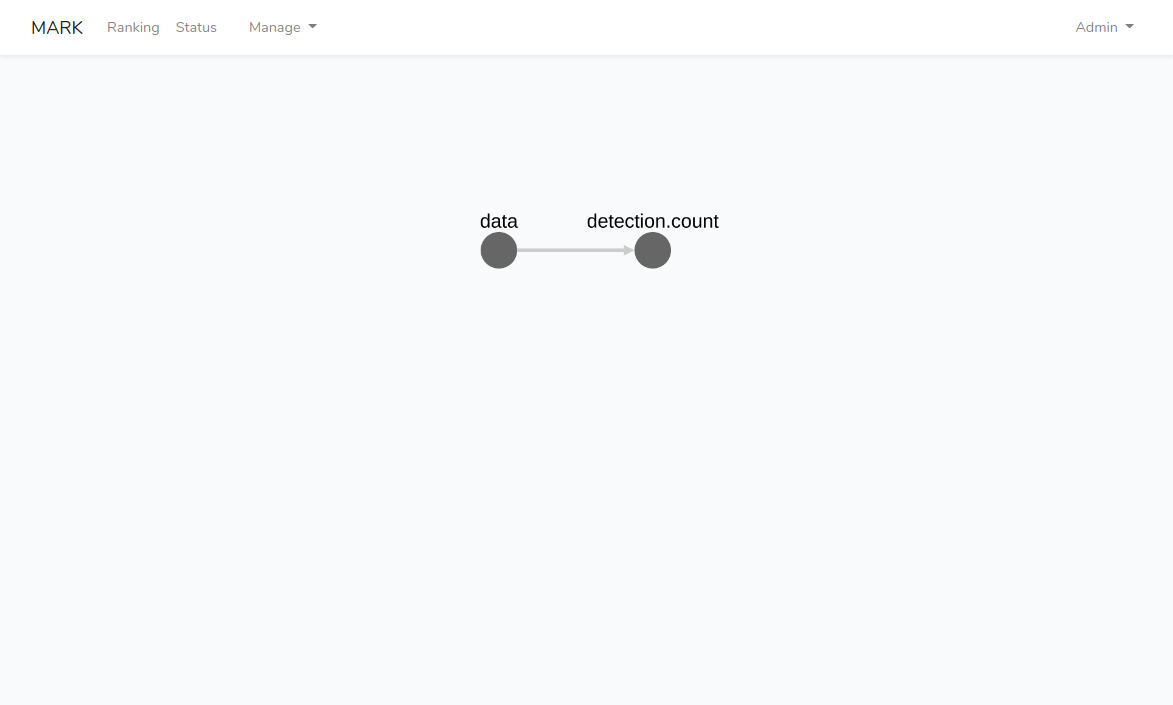
MARk will reload the modules directory, and execute the detection algorithm as requested. You can see your detector appear on the ‘Ranking’ page.
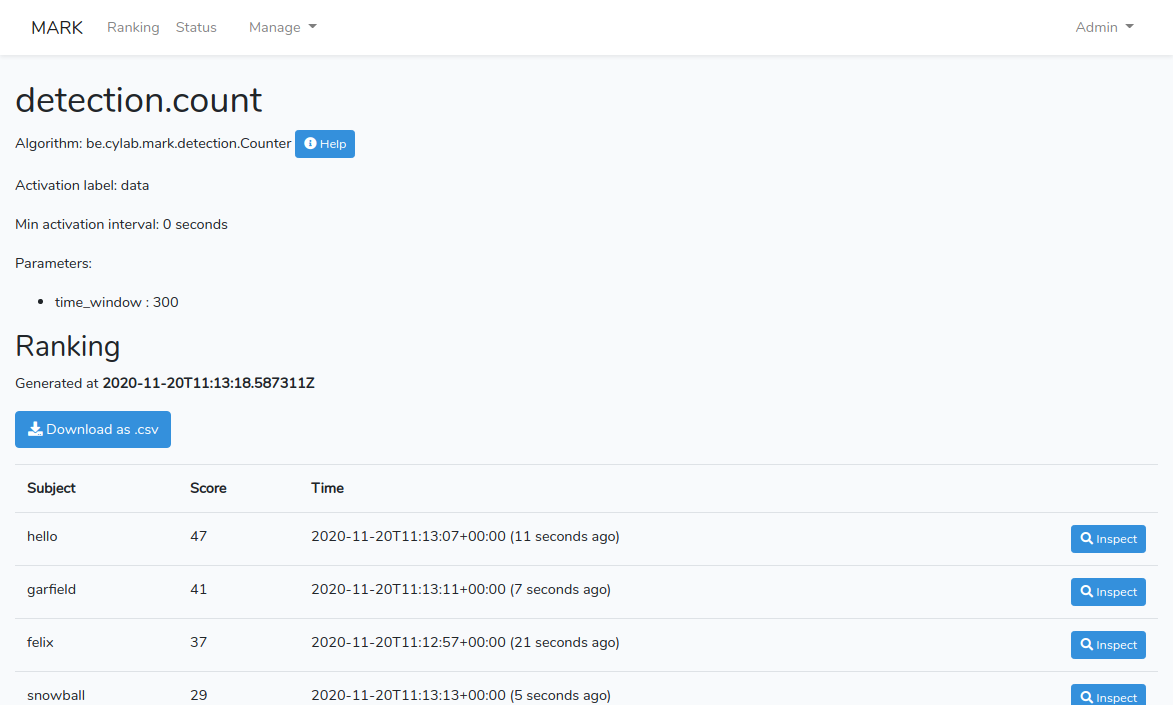
And if you click on the detection.count detector, it will display the ranking produced by this detector.
Most detectors also accept optional parameters, like time_window. For Counter.java, the default time_window is 3600 seconds (1h). Let’s add another detector, with a custom time_window of 300 seconds (5 minutes). Therefore we add a new detection configuration, called counter.5m.detection.yml :
class_name:     be.cylab.mark.detection.Counter
label:          detection.count.5m
trigger_label:  data
parameters: {
  time_window : 300
}
For this detector we use the same trigger_label, but we must indicate a different label for the produced scores.
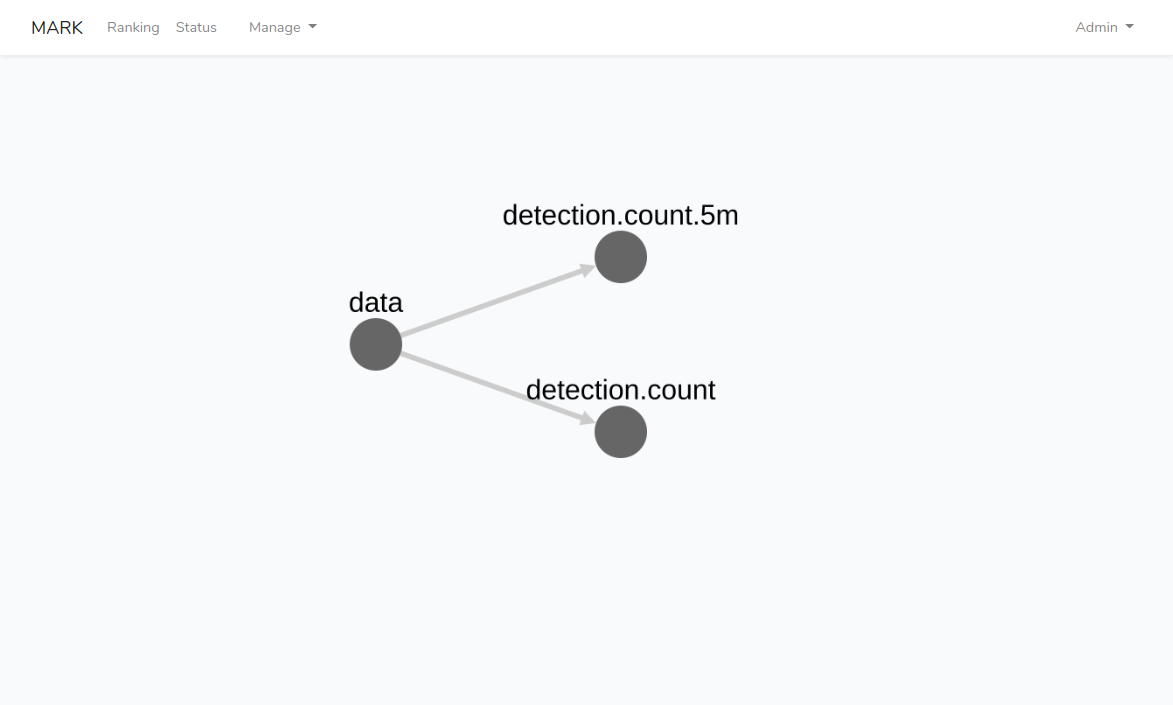
Once again, we click on ‘Reload’, and the new detector should appear.
And so on, by adding definition files, we can add more detectors. At the time of writing, there are 8 available algorithms:
- Average.java : compute the average of the scores produced by different detectors;
- Counter.java : count the number of data records received during a specified time window;
- Frequency.java : perform a frequency analysis of received data to detect fixed frequencies;
- Max.java : find the highest value produced by another detector during a specified time window;
- OWAverage.java : compute the Ordered-Weighted Average of the scores produced by different detectors;
- Threshold.java : produces an evidence only if another detector produced a score higher than the specified value;
- TimeAverage.java : compute the average score produced by another detector over the specified time window;
- WOWAggregation.java : compute the Weighted-Ordered-Weighted Average value of the scores produced by other detectors.
You can find the most up-to-date list of buil-in detectors and the documentation of each detector on the GitLab project itself: https://gitlab.cylab.be/cylab/mark/-/tree/master/server/src/main/java/be/cylab/mark/detection
This blog post is licensed under
CC BY-SA 4.0


