Whisper: Speech-to-Text AI
Apr 12, 2023 by Alexandre Croix | 8935 views
For a few months, many new AI tools are released every week (if not every day). This AI model trend began with models able to generate images from a text prompt: MidJourney, Stable Diffusion, and DALL-E for example.
A few months later (November 2022), a new kind of AI model appeared to the public: Large Language Models. These models are able to answer questions (sometimes complex ones) asked by a user on a chatbot interface. The most known LLM is ChatGPT developed by OpenAI (as DALL-E). But it is not the only LLM available. Google is working on Bard which is available in Beta in the USA. Meta (Facebook) presented its own LLM: LLaMa is really smaller than ChatGPT for equivalent performance.
These two kinds of AI models are the most known, but of course, there are a lot of other new tools existing that are really performant in their specific domain. There are Image detection and recognition algorithm, recommendation models (Netflix welcome page), and text-to-speech (TTS) models that convert written text to voice.
In this blog post, we present Whisper, a Speech-to-Text AI model. The purpose of this type of model is to convert spoken language into written text. A few years ago, this kind of technology was more or less working.
On YouTube, it is possible to generate automatic subtitles on a video but the result is sometimes not very accurate. Google Pixel phones have a nice Voice recorder providing a pretty accurate voice-to-text conversion.
Whisper is an Automatic Speech Recognition (RSA) developed by OpenAI (ChatGPT, DALL-E). Whisper is available for everyone in 2 ways. First, by using the OpenAI API. It is simple and not expensive (0.006$/min). The second way is to install Whisper on your own machine or server. Indeed, Whisper is open-source and available on GitHub. Unlike other AI models, the code and the weights are available for everyone. LLaMa for example has released the source code but not the weights of the trained models.
Installation
The installation is really straightforward. You must have installed python and pip.
On your terminal, use the following command to install Whisper:
ubuntu@my-computer:~ pip install -U openai-whisper
You have to install also ffmpeg:
ubuntu@my-computer:~ sudo apt update && sudo apt install ffmpeg
You are ready to use Whisper!
Usage
The basic usage of Whisper is as simple as the installation.
ubuntu@my-computer:~ whisper <audio_file> --model <model_size> --language <audio_language>
Here is a simple example with a Barack Obama speech file:
ubuntu@my-computer:~ whisper obama.mp3 --model medium --language en
Whisper will transcribe the file and you obtain something like that:
Additionally, the transcription will be stored in several file formats (txt, json, srt, vtt, tsv).
In our example, we use the medium model that requires around 5GB in VRAM. But there are other model sizes:
| Size | Parameters | English-only model | Multilingual model | Required VRAM | Relative speed |
|---|---|---|---|---|---|
| tiny | 39 M | tiny.en |
tiny |
~1 GB | ~32x |
| base | 74 M | base.en |
base |
~1 GB | ~16x |
| small | 244 M | small.en |
small |
~2 GB | ~6x |
| medium | 769 M | medium.en |
medium |
~5 GB | ~2x |
| large | 1550 M | N/A | large |
~10 GB | 1x |
The biggest the model is, the most accurate will be the result. But, the computation time will increase a lot. If your machine has no GPU, the transcription can be time-consuming! For small and quick transcriptions, one solution is to use Google Colab.
Whisper on Google Colab
Google Colab is a free (and paid) cloud-based platform that provides a Jupyter notebook environment to write and run code in Python. It allows users to write and execute Python code using a web browser, without the need for any special setup or installation on their local machine. Google Colab provides access to a variety of pre-installed Python libraries and frameworks.
Google Colab has a free version that gives access to GPUs and TPUs if these resources are available at this time. Your GPUs usage is also limited in time. The paid version gives better access to better hardware and more computation time.
To test Whisper on a relatively small audio file, the free version of Google Colab is enough.
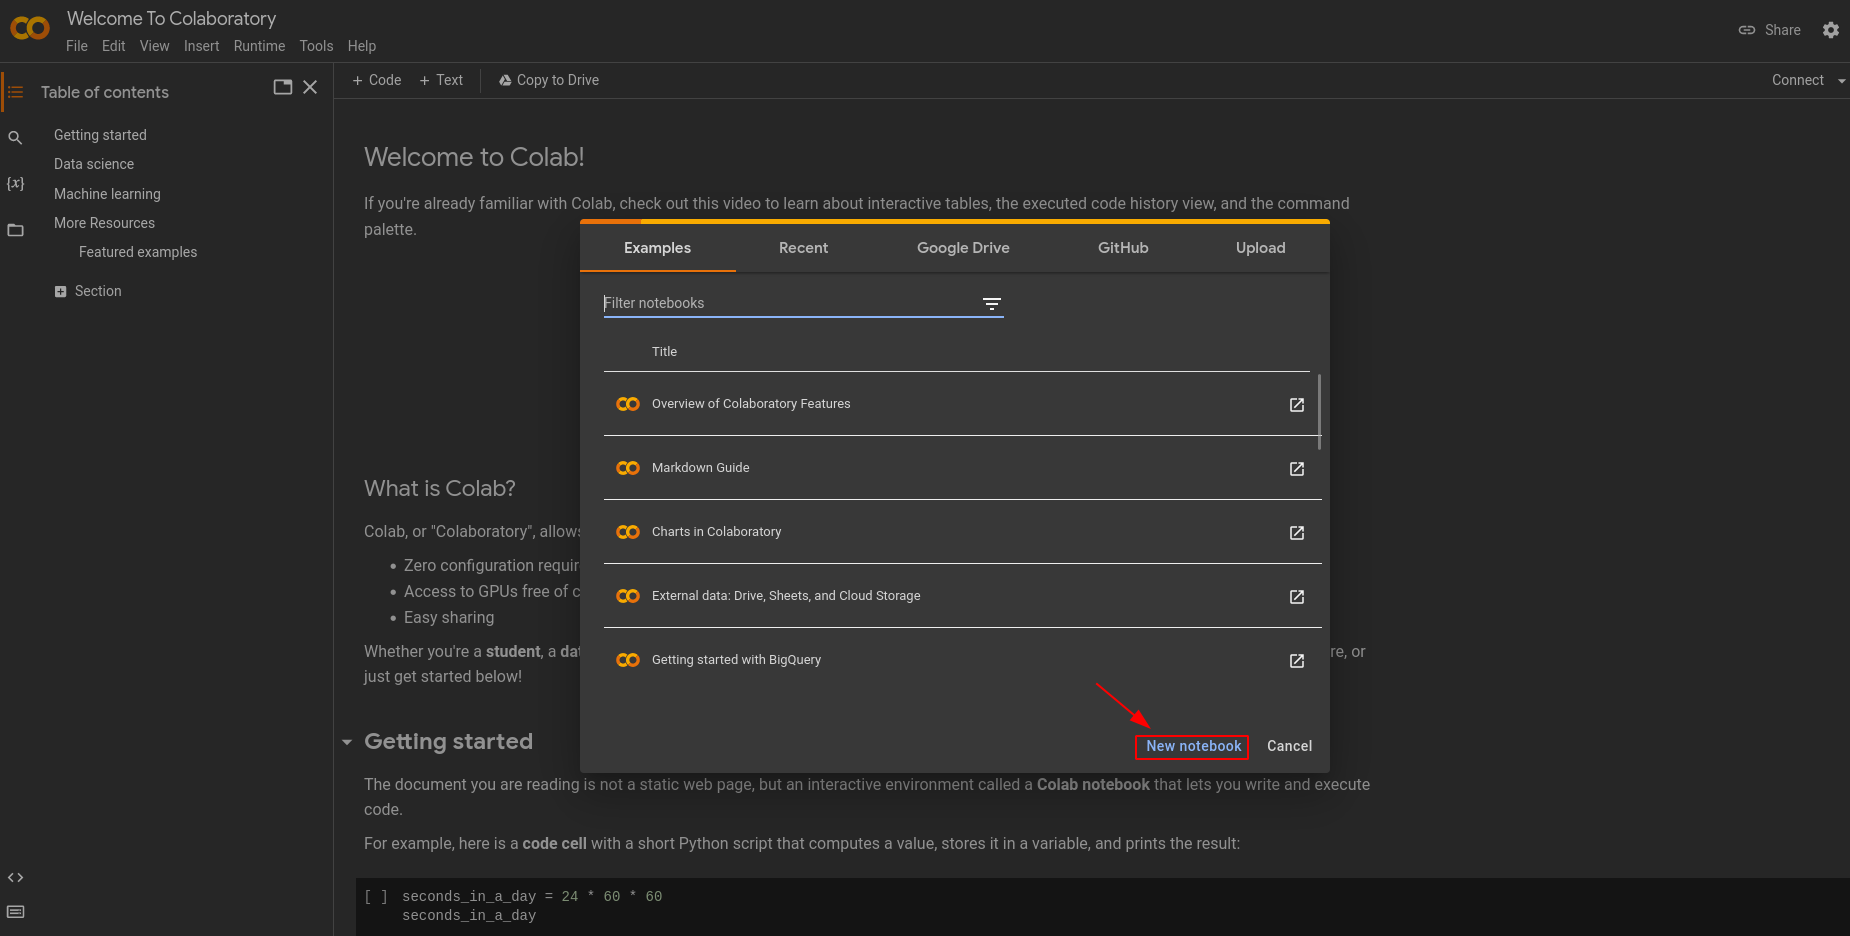
Go to https://colab.research.google.com/ and create a new Jupyter notebook.
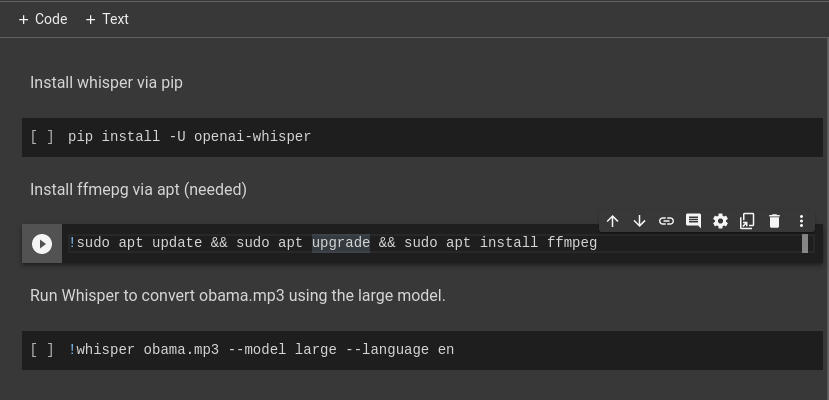
On your new notebook, create three code blocks. On the first one, you can put the command to install whisper. On the second, a command to install ffmpeg. Pay attention, to use bash command line on Jupyter notebook, you have to add a ! at the beginning of the line! To install ffmpeg* the command will be:
!sudo apt update && sudo apt install ffmepg
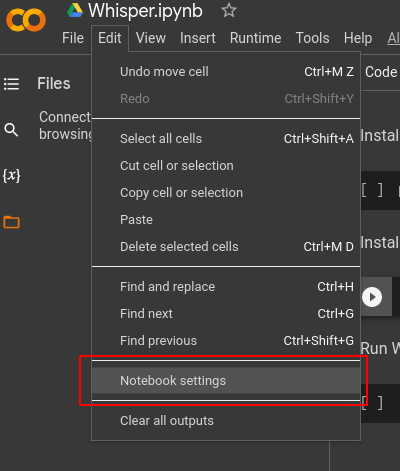
The last step before running your code, configure your notebook to use GPU. Go in Edit -> Notebook settings.
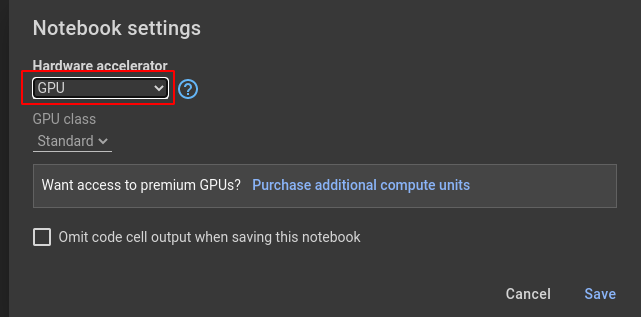
Then, select GPU and save the configuration.
Connect your notebook to the hardware: Connect button. Drag and drop the file you want to transcribe in the left panel
Run your code! That’s it!
A very basic example of Whisper notebook is available here if you want to try it.
Conclusion
This kind of AI model can be used by a lot of different people. Journalists can use it to transcribe their interviews really quickly. Subtitles for movies, TV shows,… can be generated automatically nearly instantaneously.
In any case, this kind of technology will continue to develop in the months and years to come.
This blog post is licensed under
CC BY-SA 4.0


