Continuous Deploy with GitLab, Docker and Portainer
Aug 27, 2025 by Thibault Debatty | 7511 views
https://cylab.be/blog/437/continuous-deploy-with-gitlab-docker-and-portainer
In a previous blog post I presented Portainer, a simple Docker stacks management interface. One of the nice features of Portainer is the possibility to create webhooks to automatically update existing stacks. In this post I’ll show how to combine this feature with GitLab pipelines to implement continuous deployment of Docker stacks.

The setup process requires 3 steps:
- build the Docker image
- create Docker stack and webhook in Portainer
- trigger the webhook
As a starting point, I assume your project already contains a working Dockerfile.
Build the Docker image
So, the first step is to modify your .gitlab-ci.yml to add a build job for your Docker image:
stages:
  - build
  - deploy

build:
  stage: build
  # this job requires docker-in-docker
  tags:
    - dind
  image: docker:24.0.5
  services:
    - docker:24.0.5-dind
  variables:
    # Specify to Docker where to create the certificates. Docker
    # creates them automatically on boot, and creates
    # `/certs/client` to share between the service and job
    # container, thanks to volume mount from config.toml
    DOCKER_TLS_CERTDIR: "/certs"

  before_script:
    - docker login -u $CI_REGISTRY_USER -p $CI_REGISTRY_PASSWORD $CI_REGISTRY
  script:
    - docker pull $CI_REGISTRY_IMAGE:latest || true
    - docker build --cache-from $CI_REGISTRY_IMAGE:latest --tag $CI_REGISTRY_IMAGE:$CI_COMMIT_SHA --tag $CI_REGISTRY_IMAGE:latest .
    - docker push $CI_REGISTRY_IMAGE:$CI_COMMIT_SHA
    - docker push $CI_REGISTRY_IMAGE:latest
https://docs.gitlab.com/ci/docker/using_docker_build/
Don’t forget to commit and push your modification to GitLab. After a few seconds, the image should appear under Deploy > Container registry.

Use the clipboard icon 📋 to copy the bull path of the Docker image. We ’ll use it at the next step.
Portainer stack and webhook
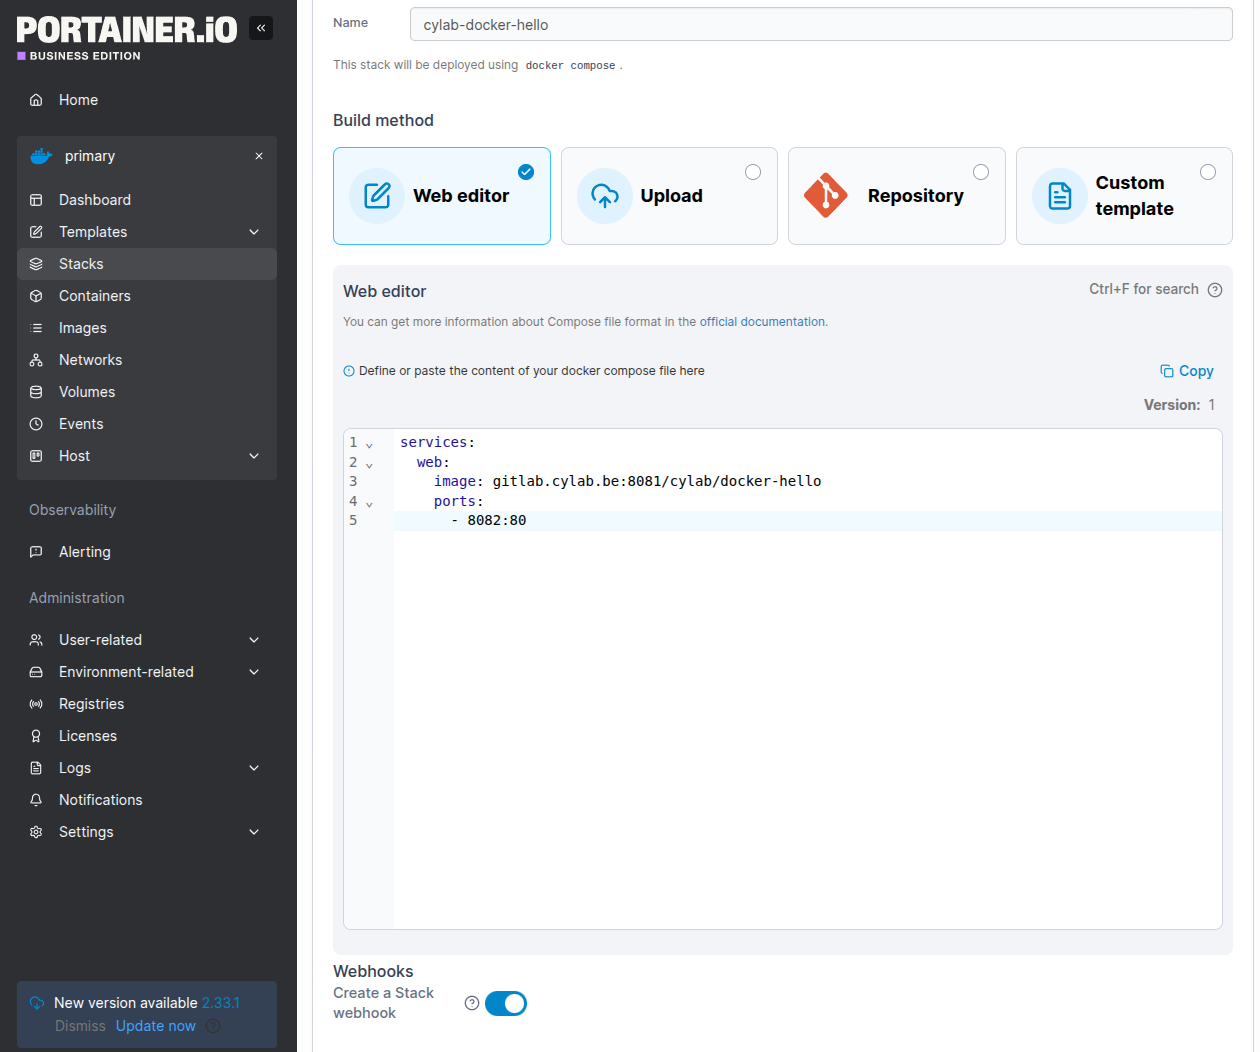
Now, on your Portainer instance, create a new stack for your application.
⚠ If you are working with a private GitLab project, you must first configure registry authentication
Here is a very simple example:
services:
  web:
    image: gitlab.cylab.be:8081/cylab/docker-hello
    ports:
      - 8082:80
Don’t forget to modify the image path to use your own image, and right under the edit pane, enable Create a Stack webhook.
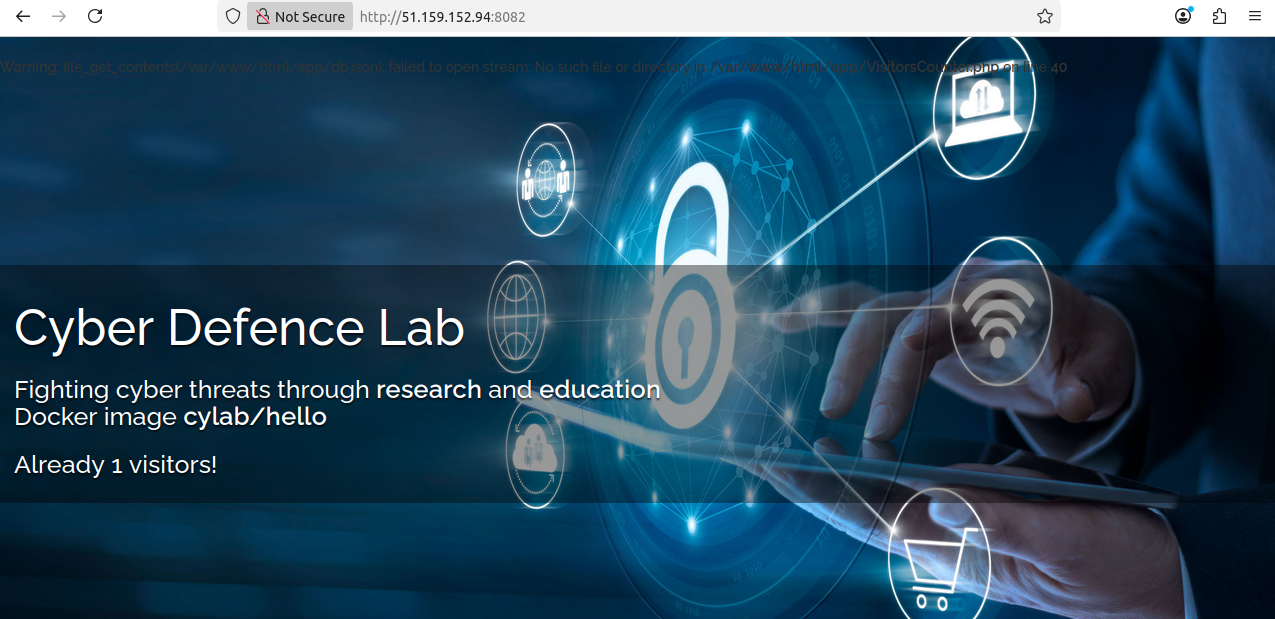
Click and Deploy the stack (at the bottom), wait a few seconds, and check that your stack was correctly deployed.
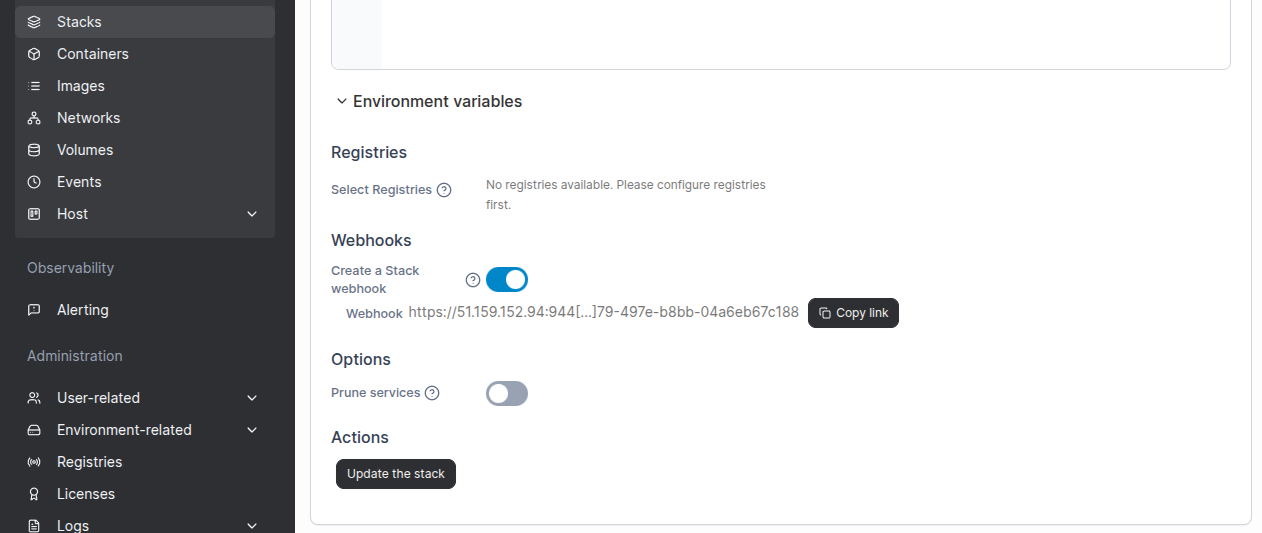
Now open again the stack editor, and this time the webhook URL will appear under the editor. Copy the link…
Trigger the webhook
Now open .gitlab-ci.yml once again, and add a job to trigger the webhook:
deploy:
  stage: deploy
  only:
    # only deploy when we push on the main branch
    - main
  image: alpine
  before_script:
    - apk add curl
  script:
    - curl -X POST https://51.159.152.94:944...04a6eb67c188
Don’t forget to modify the URL to match your deployment…
If needed, you should also modify the branch that must be used for deployment. For example, the main branch may be used to deploy to your production environment, while could use other branches to deploy to one or more test environments…
Commit and push your changes, and after a few seconds your new version will be deployed by Portainer…
Private GitLab project
If your work with a private repository, Portainer will need an access token to fetch the Docker images from the registry.
On the GitLab interface, open your project and open Settings > Access tokens. Then create a new token with (at least) the scope read_registry.
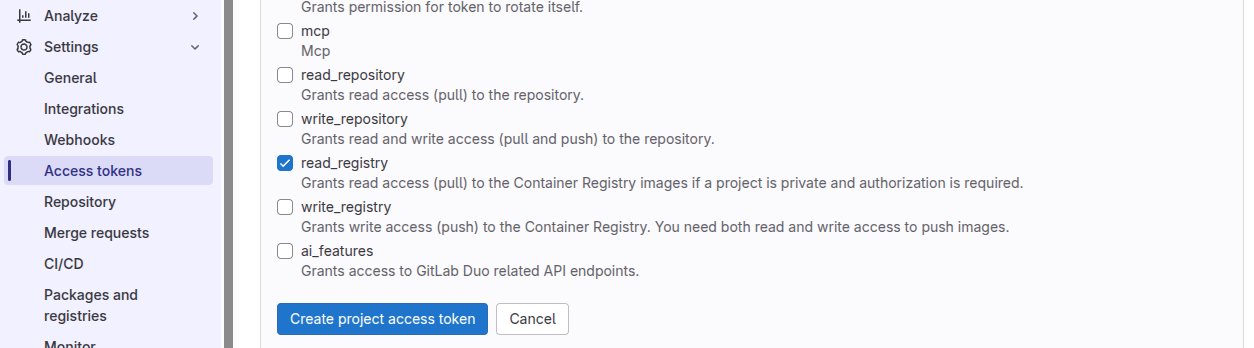
Once created, don’t forget to copy the value of the token, as it will only be displayed once!

Now, in Portainer, open the Registries menu and add a new registry:
- if (like use), you are using your own GitLab instance, you must select Custom registry
- in the
Usernamefield you can indicate any value (I usedportainer) - in the
Passwordfield you must paste the value of the access token
Save your configuration. This time your stack should deploy without issue…
⚠ In the current version, Portainer supports only a single access token per server. So if you plan to deploy Docker stacks from different projects, you should create a single access token at the group level, or even at the server level, so Portainer can read all private registries using a single access token.
Going further
In this post, we presented how to combine Portainer’s webhook feature with GitLab pipelines to implement continuous deployment of Docker stacks. We also addressed the case of working with private GitLab projects, where Portainer requires an access token to fetch Docker images from the registry.
In a production deployment, you should probably use environment variables to store the webhook URL.
Moreover, you could also use GitLab components to simplify your .gitlab-ci.yml file.
Finally, you can deploy a traefik container to provide https certificates
This blog post is licensed under
CC BY-SA 4.0


